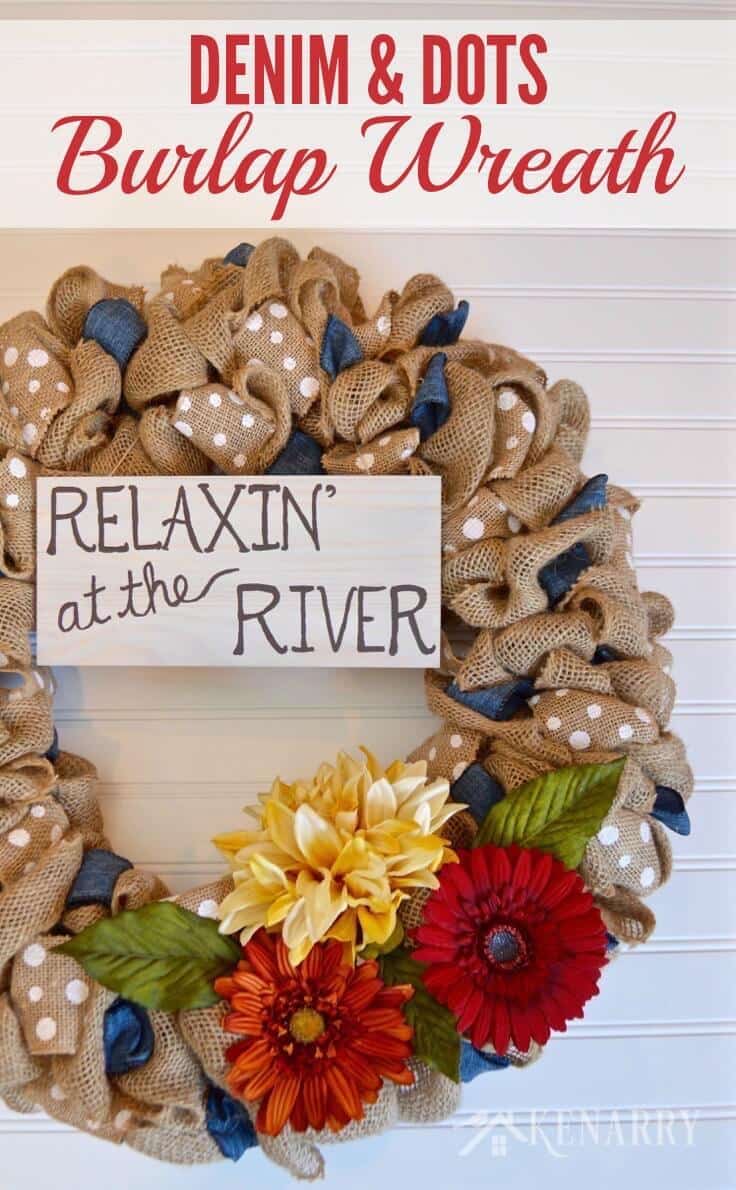
Burlap Wreath Tutorial: Denim and Dots Cottage Decor
THIS POST MAY CONTAIN AFFILIATE LINKS. PLEASE SEE OUR FULL DISCLOSURE POLICY FOR DETAILS.
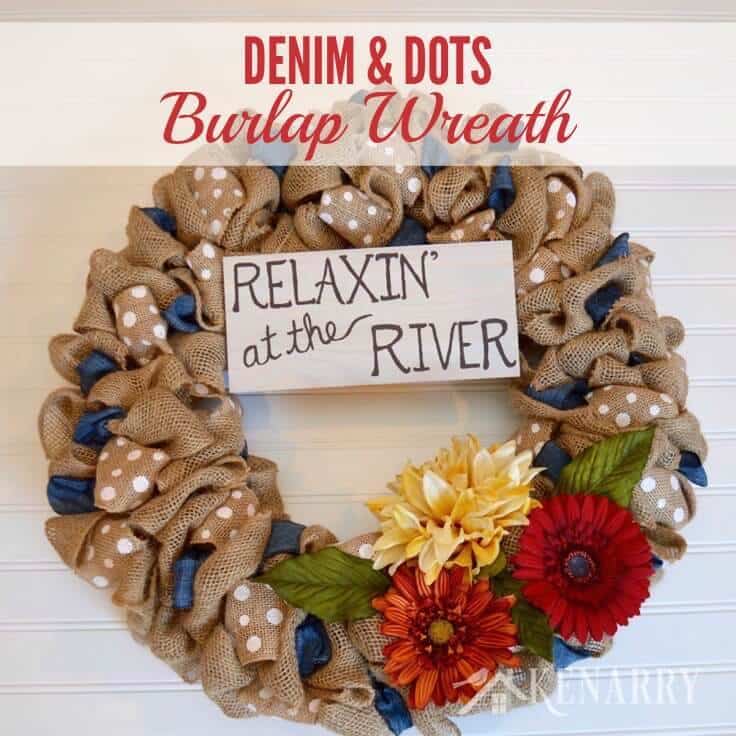
This burlap wreath tutorial is an easy craft you can do in a few hours. With two accent ribbons, the denim and dots wreath looks great in a home or cottage.
The blue denim ribbon gives this burlap wreath some rustic charm while the bright flowers and polka dots add a modern touch. You can quickly find everything you need at your favorite craft store, then follow this burlap wreath tutorial to have yourself a beautiful new wreath yet today!
Disclosure: This blog post contains affiliate links for products or services we think you’ll like. This means if you make a purchase from one of these links, we’ll make a small commission at no additional cost to you so we can keep the great ideas for the home coming your way. All opinions expressed are our own, derived from our personal experience.
I am a bit obsessed with burlap wreaths this year. They’re so pretty, but better yet they’re so easy to make. You can imagine what a sense of accomplishment you feel when you’re done with a craft project in just a few hours. Burlap is so trendy right now for crafts and home decor. It’s an especially fun craft to do for a girls’ night with friends.
Last Fall, I made a burlap wreath for our cottage with orange and blue denim accent ribbons during a fun afternoon with my mother and sister. The wreath I made has a giant welcome sign with a pumpkin in the center along with a large sunflower and some cornstalks attached to the side:

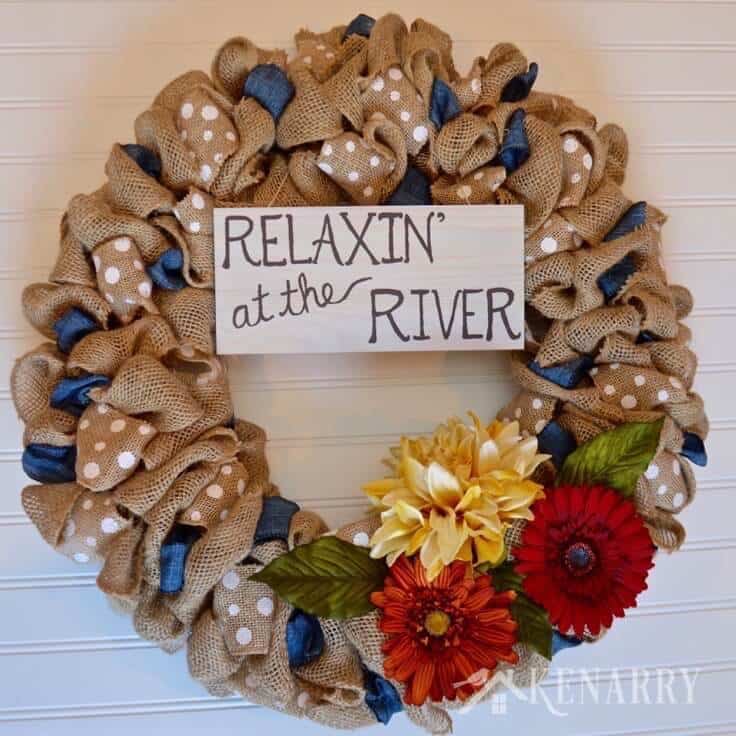
I left the burlap wreath on the wall at the cottage all winter, but once warmer weather came into view I knew it needed to be replaced with a lighter, brighter and more fun burlap wreath for summer. I wanted to keep it simple, not seasonal since the cottage is small and I don’t have room to store too many burlap wreaths (much to my dismay, since I LOVE making these wreaths). I liked the rustic appearance of the blue denim ribbon, but chose to pair it with a white polka dotted burlap ribbon this time. I also added colorful flowers and a sign that reminds me what the true purpose of having a cottage is — to relax!

Get our e-book The Ultimate Guide to Making a Burlap Wreath plus a special limited time offer for 25% off Kenarry burlap ribbon when you sign up below. It’s totally FREE!
Your privacy is important to us. We promise not to spam you or share your information. You can opt-out at any time. See our privacy policy for more information.
Once you’ve confirmed your e-mail address, we’ll send you the free digital eBook in addition to the coupon code. Plus you’ll have the opportunity to get our weekly Ideas In Your Inbox newsletter as well as access to our resource library stocked with free printables, product discounts and other content that is EXCLUSIVE for Idea Insiders only.
Burlap Wreath Tutorial
You might be surprised at how easy it is to make a burlap wreath. I can throw one together over the course of few hours while I’m watching a chick flick or my favorite TV shows. I shared a full burlap wreath tutorial on Kenarry last summer and encourage you to check out that post if you want the easy, but detailed step-by-step instructions. You may also enjoy the Red, White and Blue Burlap Wreath I made for patriotic holidays or the three ideas I shared for fall burlap wreaths last September. All you need to do is grab your supplies and start weaving – you’ll have a burlap wreath in no time!
What you need:
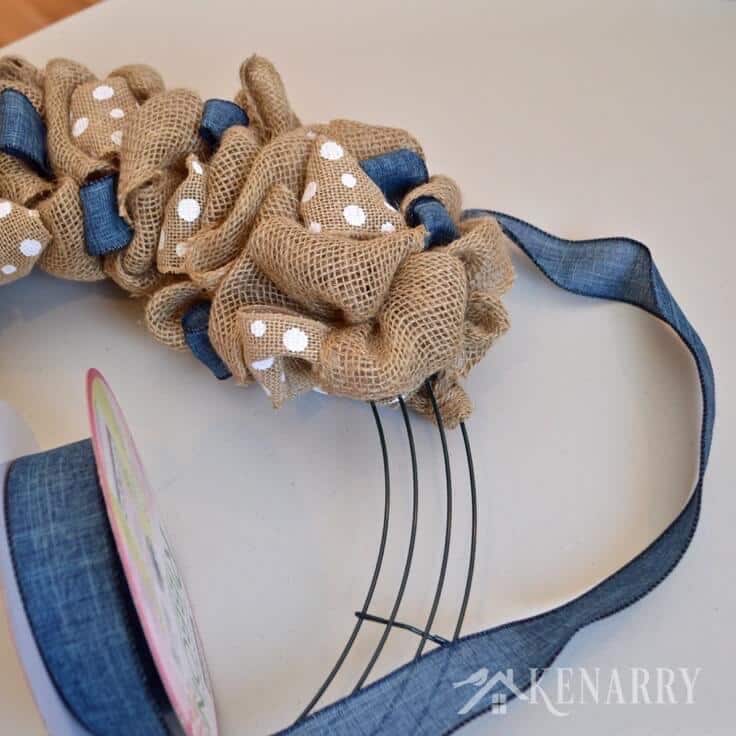
- 60 feet of 5″ wide burlap ribbon or garland (20 yards) — NOTE: If you’re making more than one wreath, you can also get a 4-pack of burlap ribbon rolls (40 yards or 120 feet) or a 6-pack of rolls (60 yards or 180 feet) at a discounted rate. Plus sign up to be a Kenarry Idea Insider and get 25% off your total purchase for a limited time.
- 16″ wire wreath (You could also use an 18 inch wire wreath, but I would add at least a few more yards of burlap if you want your wreath to have a fuller appearance like mine.)
- 1 – 18 foot spool of 2″ wide wired burlap ribbon with white polka dots (6 yards)
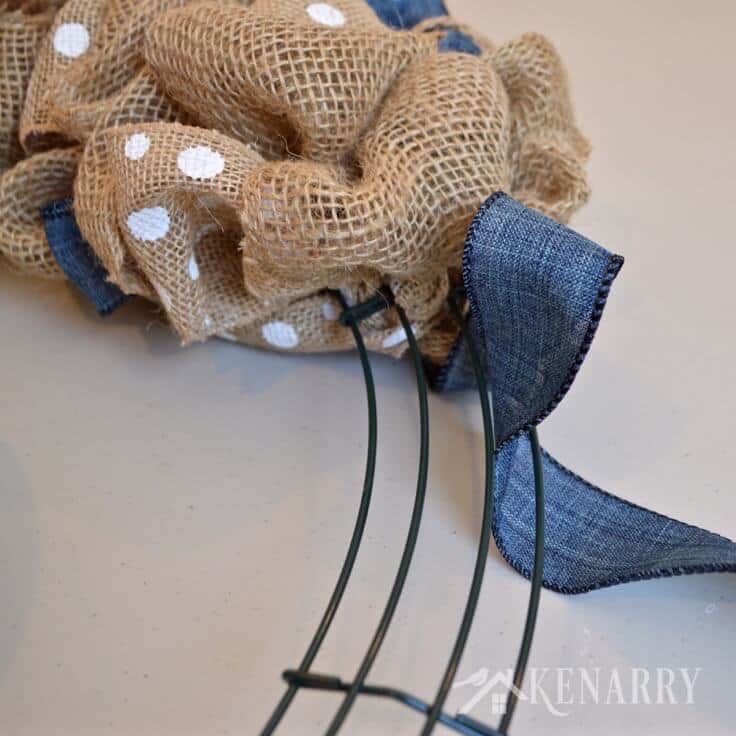
- 1 – 18 foot spool of 1″ wide denim wired accent ribbon (6 yards)
- Rectangular unfinished wood sign
- Paint brushes
- Black, white, red and yellow acrylic paints
- Twine
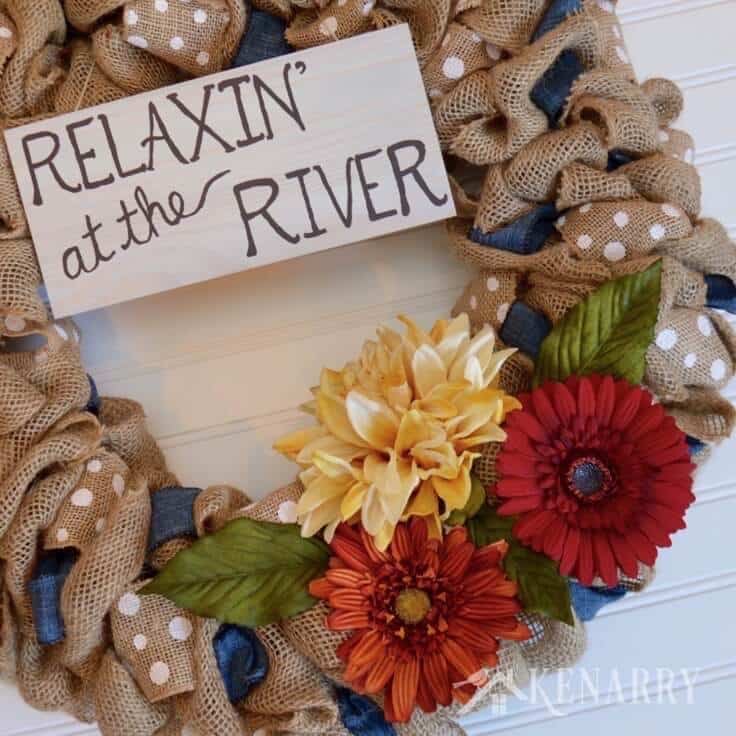
- 3 artificial flowers
- Wire cutters
- High temperature glue gun
- Glue sticks
Instructions:
1. Weave the ribbons through the wire wreath. Tie the burlap ribbon and the two accent ribbons to the wire wreath. Gently weave the ribbons in and out of the wreath frame from the backside until you’ve gone all the way around it. As you end or add spools, be sure to knot your ends on the wire wreath to keep them in place. See our full tutorial for how to make a burlap wreath if you’d like complete step-by-step photos of this process or watch our video tutorial:
2. Paint the sign. I found this unfinished wood sign at Hobby Lobby, but you could get the same effect from any unfinished rectangular wood sign. I thought about painting it solid white, but instead decided to give it more of a white washed or weathered appearance.
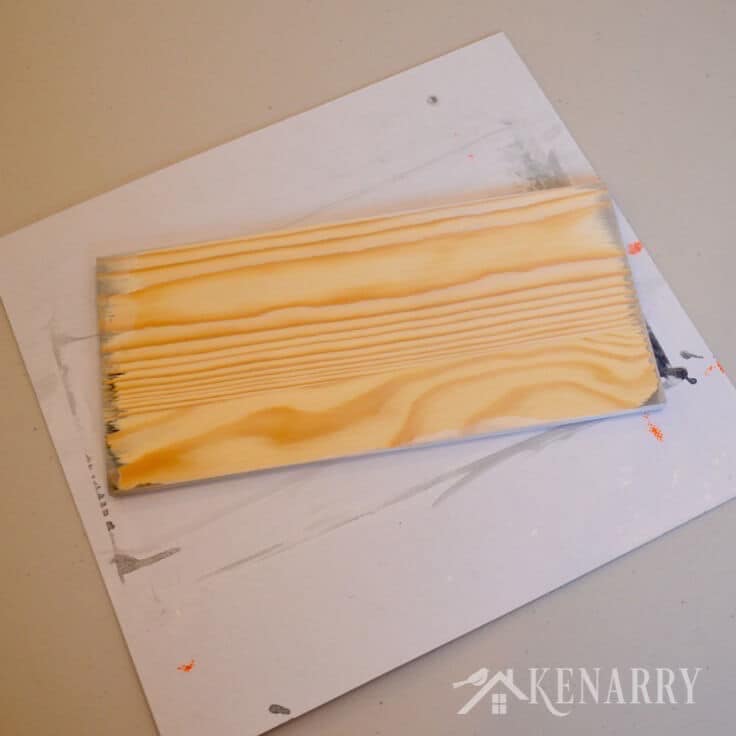
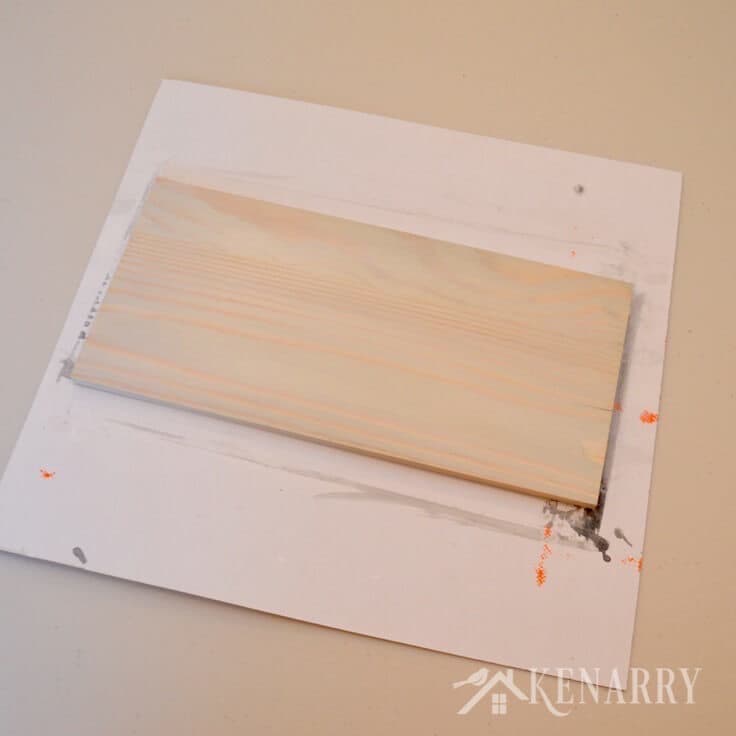
To start, I mixed white acrylic paint with water in a small bowl and then quickly brushed it across the board using a wide paint brush. This technique allows the woodgrain to show through. The white wash alone though only gave it a flat appearance. I wanted it to have a little more dimension so I added a tiny little bit of black acrylic paint to my water. I then quickly brushed the gray watered down paint around the edges of the wood sign, fanning it in toward the center. I used a paper towel to blend the shades of paint and repeated this process over and over until I got the weathered appearance I wanted.
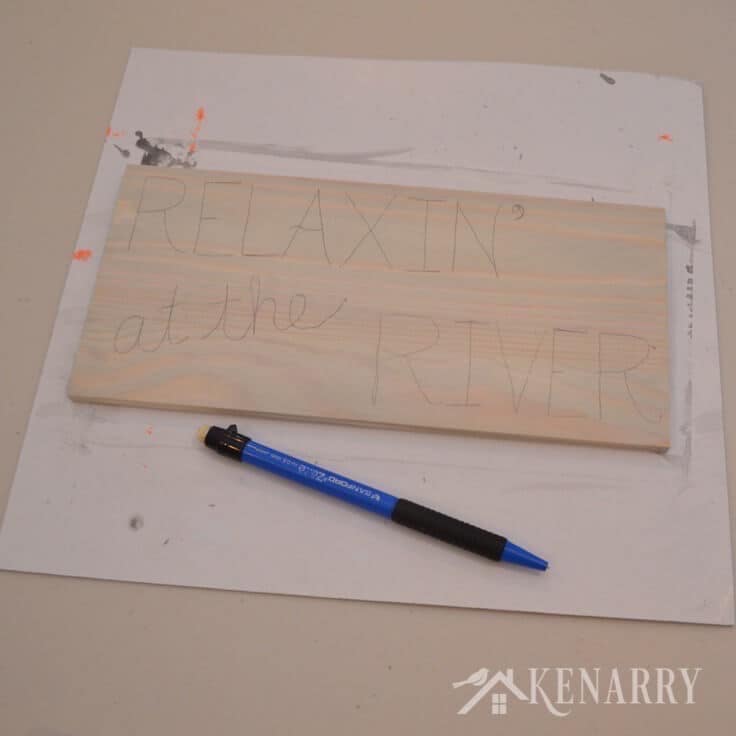
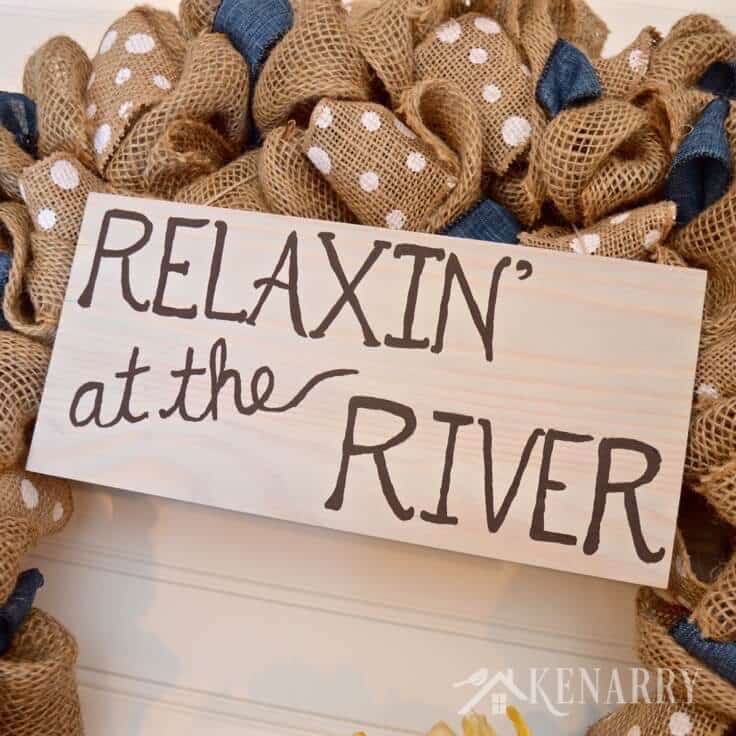
Use a pencil to lightly write your message on the sign. I chose “Relaxin’ at the River” because I was making this wreath for our cottage. If you wanted to make it for a different type of vacation home, here are few suggestions:
- Life is better at the lake
- Relax and Unwind
- Cottage Sweet Cottage
- There’s no place I’d rather be
- The sun, the sand, a drink in my hand
- The lake is my happy place
- Relax, you’re on cottage time
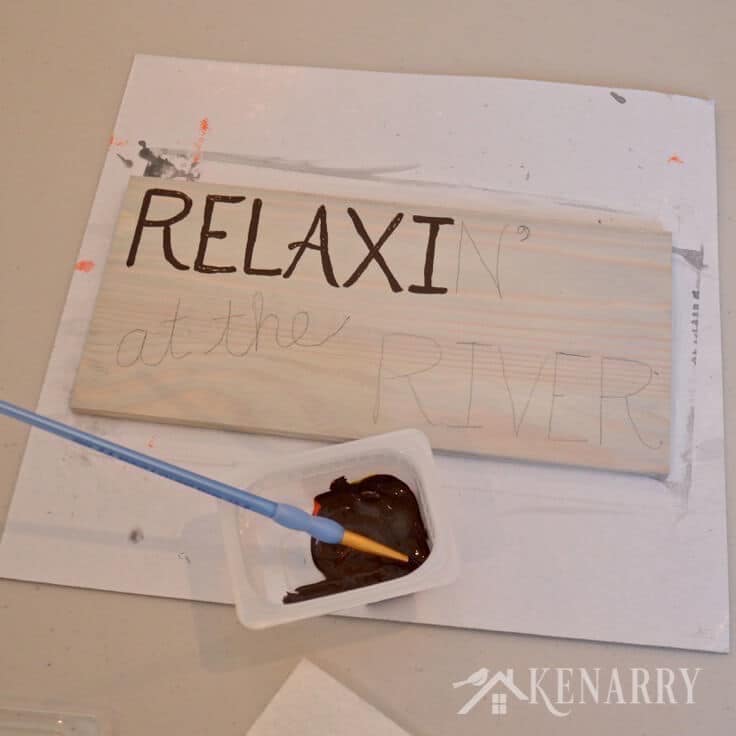
Once you’ve written your message in pencil, mix your paint to create the lettering for your sign. I created a dark brown using mostly red acrylic paint with a little yellow and a tiny bit of black paints mixed in until I created the chocolate-y brown I wanted. I then used a small thin paint brush to paint over the penciled letters.
When the sign is dry, use hot glue to attach two pieces of twine to the back side near the top. Once the hot glue is dry, use the twine to tie the sign to the top of the burlap wreath.
3. Add the artificial flower accents. I picked out three different artificial flowers at Hobby Lobby to accent this wreath. I wanted them to be bright, fun and summer-y. Once you’ve got your flowers, snip off the stems and leaves with wire cutters. Keep the leaves if they’re pretty, but throw away the stems. Using a hot glue gun, apply a good amount of glue to the back of the artificial flowers one at a time. Add the flowers, then the leaves, to the burlap wreath pressing a little of the burlap to the back of the flowers and leaves to hold them securely in place. Just be careful not to burn your fingers!

4. Hang and enjoy your burlap wreath. To hang the burlap wreath on a wall, you can hang the wire wreath frame directly on a long nail. Or you could add a loop of denim ribbon or heavy duty twine to the back of the burlap wreath and use that to hang the wreath on your wall. Either way, you now have a beautiful burlap wreath to hang in your home or cottage!
Love the ideas you see here on Ideas for the Home by Kenarry®? Subscribe today to get our weekly Ideas in Your Inbox newsletter plus other exclusive gifts and offers — all for FREE!
While you’re here, be sure to check out other craft ideas –
- Front Door Embroidery Hoop Wreath
- DIY Spring Flowers Wood Sign PLUS Video Tutorial
- Rustic Christmas Decor: 10 Burlap Ideas for Holiday Decor
You’ll also find more inspiration on our Craft Ideas Board on Pinterest.
If you liked this Denim and Dots Burlap Wreath tutorial, please share it with your friends or pin it for later:


Such a gorgeous wreath! I love everything about it, especially the flowers. I’m pinning it!
Navy Wifey Peters @ The Submarine Sunday Link Party
T’onna, I’m so glad you liked it – thank you very much for pinning it too!
I really enjoy reading your tutorials…. also I will say your projects are amazing. Thanks for sharing. I have one of those thick styrofoam wreath forms, whats a unique, amazing, techniquee/S to do on this form
Hi Judy,
Thank you so much for taking the time to let us know what you think of the projects you find on Ideas for the Home by Kenarry. You are so kind to say so! We have several project ideas using a styrofoam wreath form that you might enjoy — https://kenarry.com/?s=styrofoam+wreath Most involve wrapping the wreath form with rope, ribbon or fabric, but you should especially check out how to make a wreath with cupcake liners using a styrofoam wreath form.
Best wishes and happy crafting!
Carrie from Ideas for the Home by Kenarry
so lovely! the flowers really pop, such great colors to use! Great tute, easy to follow to make your own and then easy to personalize by using your own colors! Kristina’s will have to say gone to the beach 🙂 thanks for sharing with us at Snickerdoodle Sunday!
Thanks, Kristina and Millie! “Gone to the Beach” would be a PERFECT sign for this wreath. I’d add in a few shells too if I were you. 🙂
I love this wreath and have most of the supplies already!! I plan to make this for my daughter today. (And I’m sure you know this but 18 feet is 6 yards, not 9.
Oh my goodness, Lynn! Thank you SO MUCH for letting me know about the error/typo in our tutorial. I just fixed it. Hope you enjoyed making the wreath for your daughter today. I’d love to see how it turned out. Can you please share a photo on social media and tag us or something so we can see it?
When you are pulling the two colors and the burlap through the rings are you alternating the rings that you are pulling it through or are you just pulling it through the middle ring every time?
Great question, Phillis! I alternate the rings that I’m pulling it through each time.
I would love to see how your burlap wreath turns out. Please send us a photo when you’re done or tag us on Facebook or Instagram @kenarryideas if you post a pic online.
Happy crafting!
Best wishes,
Carrie
Did you use all three spaces between the circular wires or only two. It is very pretty.
Hi Phillis,
Yes, I use all three spaces between the circular wires and I alternate which one each time.
Best wishes,
Carrie