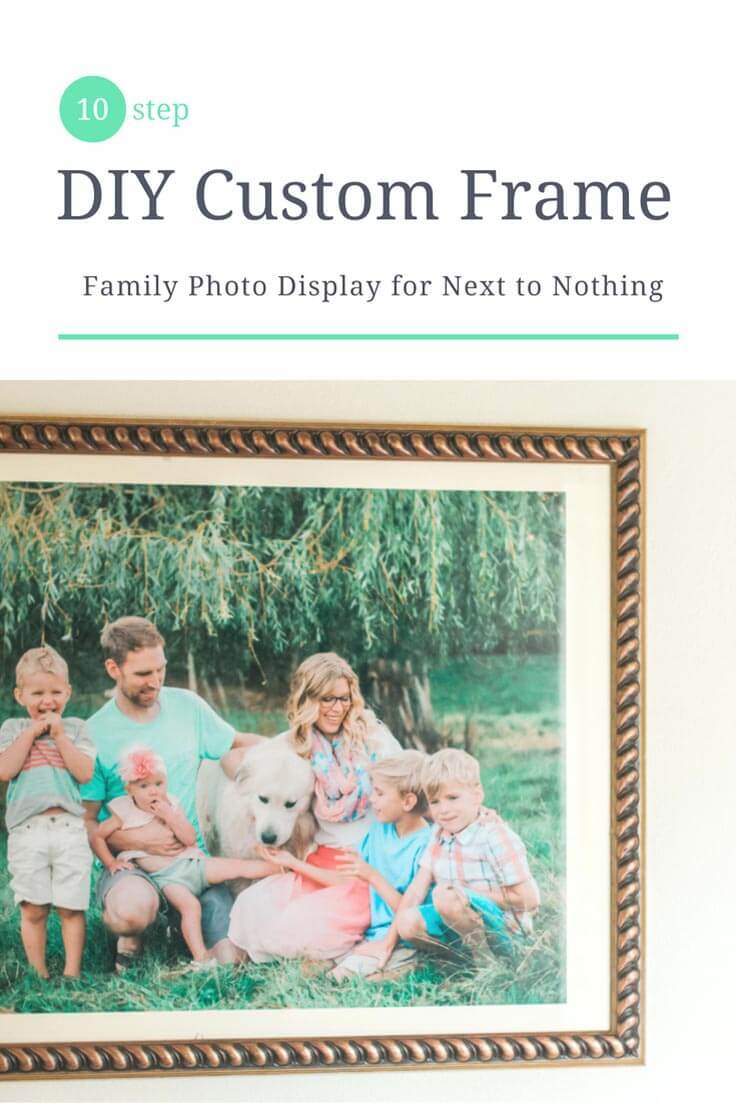
DIY Custom Family Photo Frame
THIS POST MAY CONTAIN AFFILIATE LINKS. PLEASE SEE OUR FULL DISCLOSURE POLICY FOR DETAILS.
Turn an inexpensive frame from a thrift store or garage sale into a beautiful way to display a family photo using this easy tutorial and a few simple tools.
I am Alycia from Our Homestead Where My Heart Is, I am so thrilled and humbled to be here as a part of the Kenarry Team this year! As a photographer, I tend to think about photos a lot. That includes ways to display them in my home. We like to update our family picture in the summer or fall every year. I thought that now would be the perfect time to get you thinking about actually printing those photos and showing them off.
Disclosure: This blog post contains affiliate links for products or services we think you’ll like. This means if you make a purchase from one of these links, Ideas for the Home by Kenarry® will make a small commission at no additional cost to you so we can keep the great ideas for the home coming your way. All opinions expressed are derived from personal experience.
10 Step Instructions For Your Own Custom Frame
I thought I would start off with a simple inexpensive project that has BIG impact. It just involves a photo frame and hardly any skill.
Step #1: Find a used frame that you love. Check garage sales, thrift stores, or even a buy-sell-trade site. I found this one at a garage sale several years ago. It has just been sitting in my closet collecting dust since then.
Speaking of dust… I did a little research. I found that backing paper is added in order to keep dust out of the frame. It also helps reduce fluctuations in humidity. I decided that I am not really worried about those things. Especially since this is a family picture I am most likely going to replace every year.
Step #2: If it has a backing paper, pull it off and throw it away. Don’t worry, if you still want backing paper to protect your photo I have a solution for that. So just keep on reading!
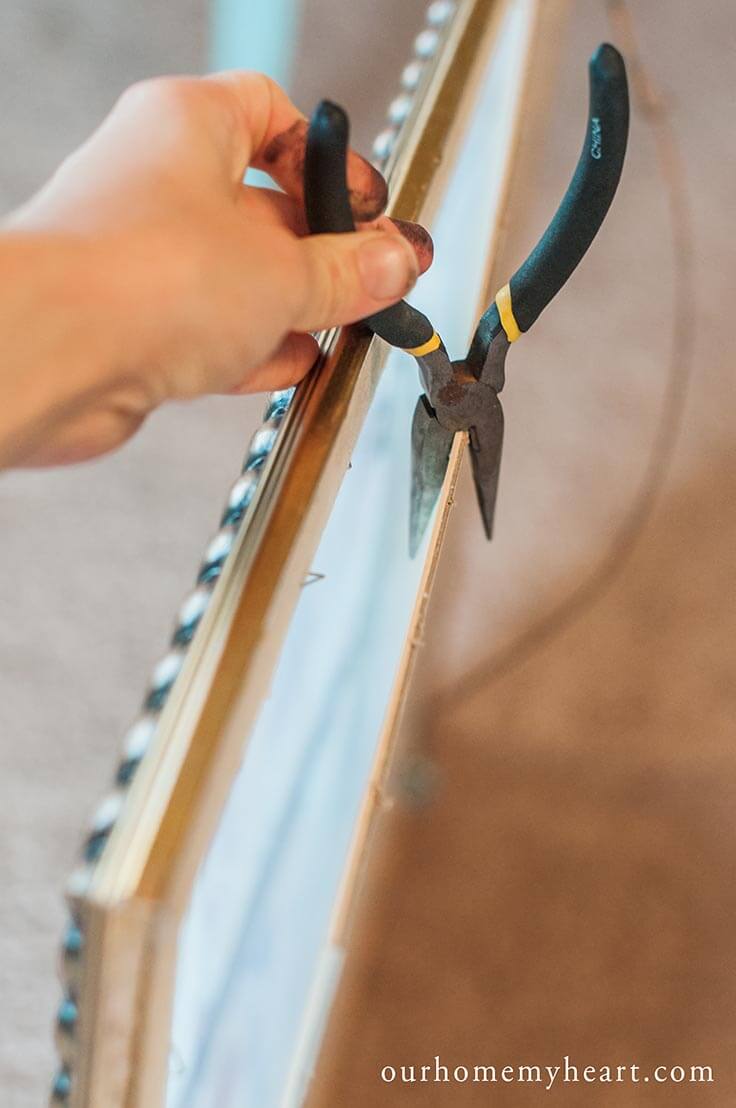
Step #3: Using needle nose pliers, bend each of the staples on the back of the frame up. Don’t worry if a few break or fall out. The remaining ones should be able to hold everything into place. Just another little tip. Try to remember not to stain something right before you are taking photos of your hands, or they might end up looking something like this. 😉
Step #4: Slide out the cardboard backing.
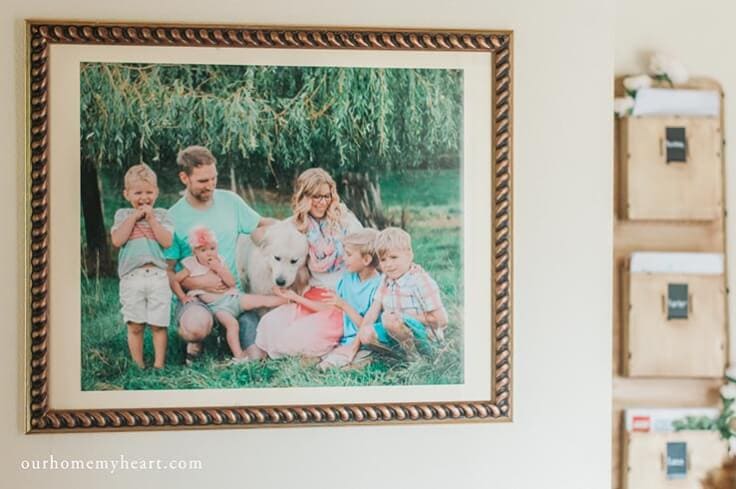
Step #5: Measure the frame opening and print off your favorite family photo in that size. I love this one of my family because it shows off each of my kid’s individual personalities. It also helps that you can kind of see everyone’s face.
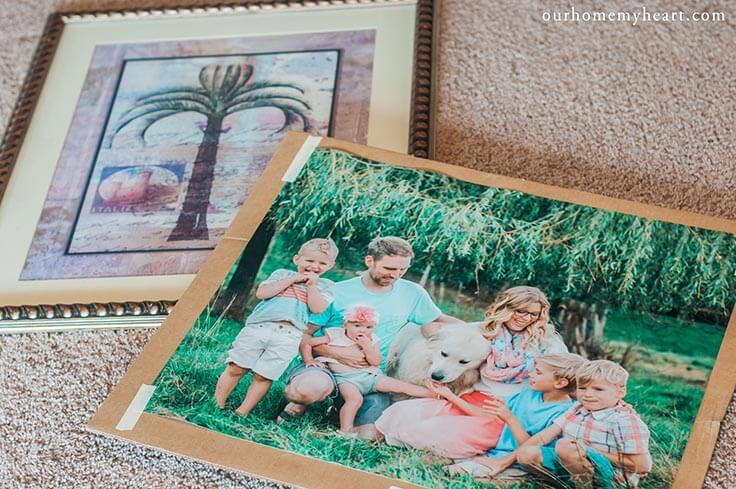
Step #6: Replace the ugly (I’m assuming it is) stock photo and replace it with one of your beautiful family. Mine didn’t fit perfectly so I ended up using some masking tape to attach it to the back of the custom matting.
Step # 7: Prepare to hang it on the wall. Look at the back of the frame to see if it has a sawtooth or wire hanger. Unfortunately in my case the hanging wire was situated in the wrong direction. I needed the frame to hang horizontal, not vertical.

Step #8: Using a phillips screwdriver I unscrewed it and just moved it to the top of the frame. In order to do that, I had to use a drill bit (a size smaller than the screw) to make a small hole in the frame. I made sure it was shallow so I didn’t drill all the way through. I was so proud of myself for figuring out how to do it, and reattaching the wire. First I tried hanging it on just one screw.
But then this is what happened. Like I said, I’m not really tool savvy. 😉
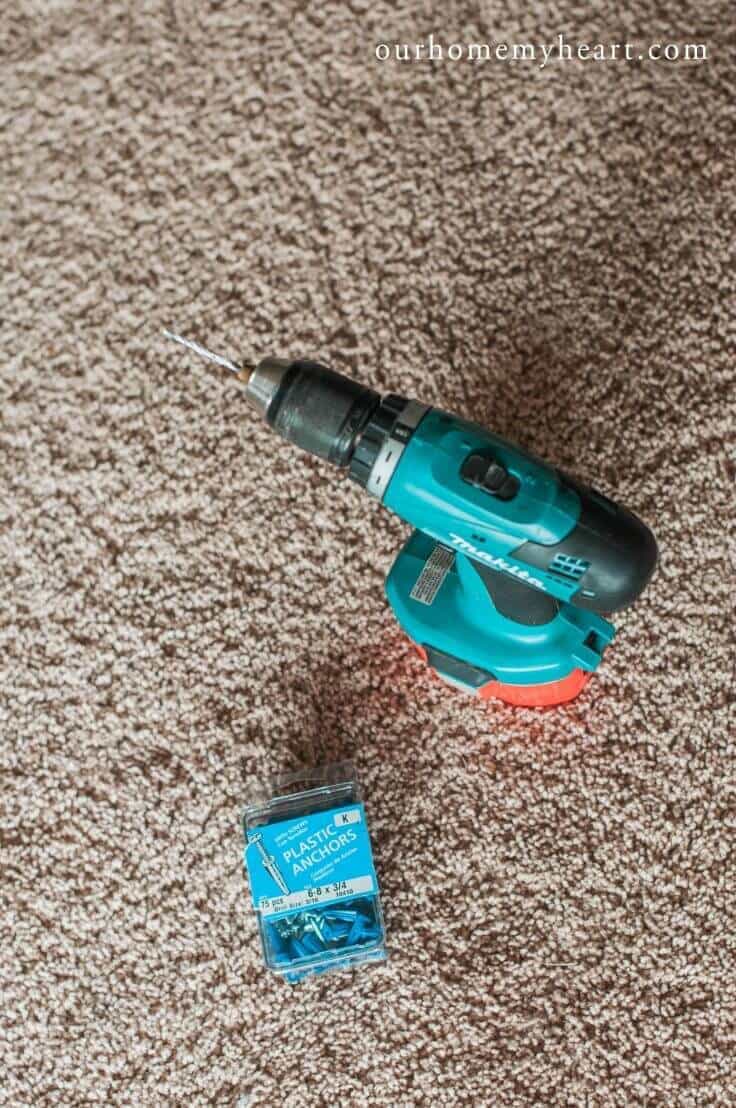
Step #9: Go to your local hardware store to buy 6-8 x 3/4 inch screws with plastic anchors. Also, make sure you have a power drill. Nothing too fancy is required. I am not handy with tools. Especially power tools. Not at all. My husband will attest to that. However, that being said, I now know how to use a drill. It might be harder than it looks for me… But that just goes to show that anything is possible, and anyone should be able to use a drill. 🙂
Step #10: Using a large drill bit (slightly smaller than the anchor) drill two level holes in your wall. Like I said I’m not very technical. I’m sure that if my engineer husband has done this it would have been more precise. So just do it whichever way works best for you and your personality. 😉
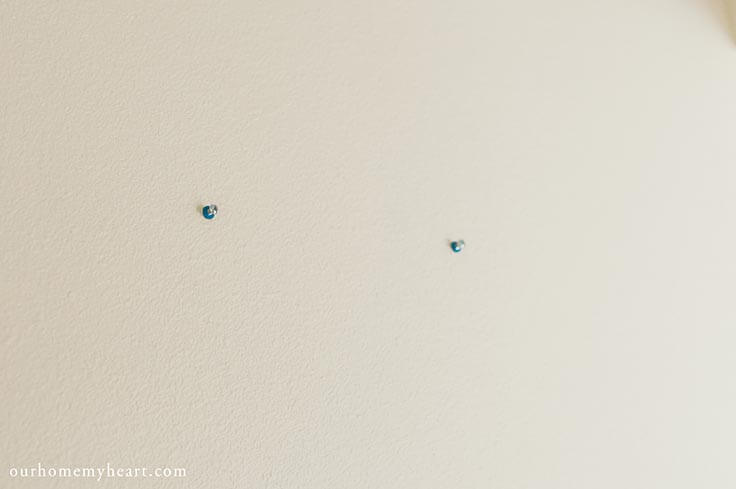
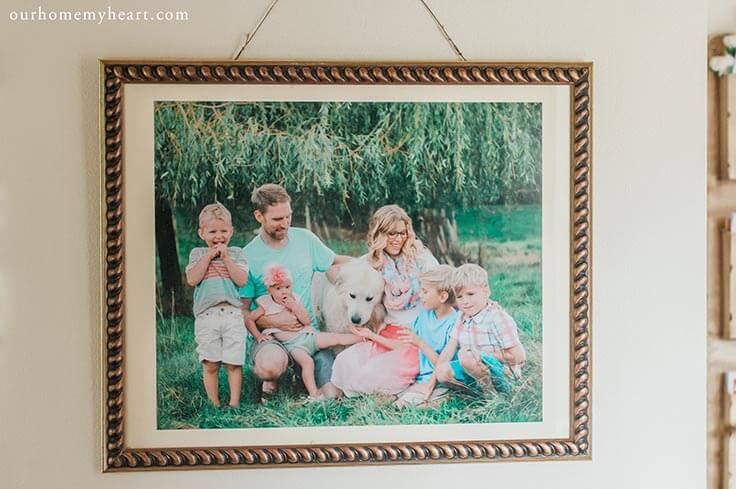
I ended up needing to replace the wire with a much longer one. So I did. Then I screwed it in on either side of the frame (drilling pilot holes first), not on top. Isn’t that so much better?
Final Step (optional): If it is something that is important to you, the backing paper could easily be replaced by stapling butcher paper onto the back of the frame. Simply take your picture off of the wall, add the butcher paper, then hang it back up on the prepared screws. Easy as pie!
What do you think? Is this a project you are willing to tackle? If I could do it you can too. It’s that simple!
Check out more of my home decor on my blog.


While you’re here, be sure to check out these other DIY projects from Ideas for the Home by Kenarry® –


One Comment