How To Hang A Gallery Wall Using A Gift Wrap Template
THIS POST MAY CONTAIN AFFILIATE LINKS. PLEASE SEE OUR FULL DISCLOSURE POLICY FOR DETAILS.
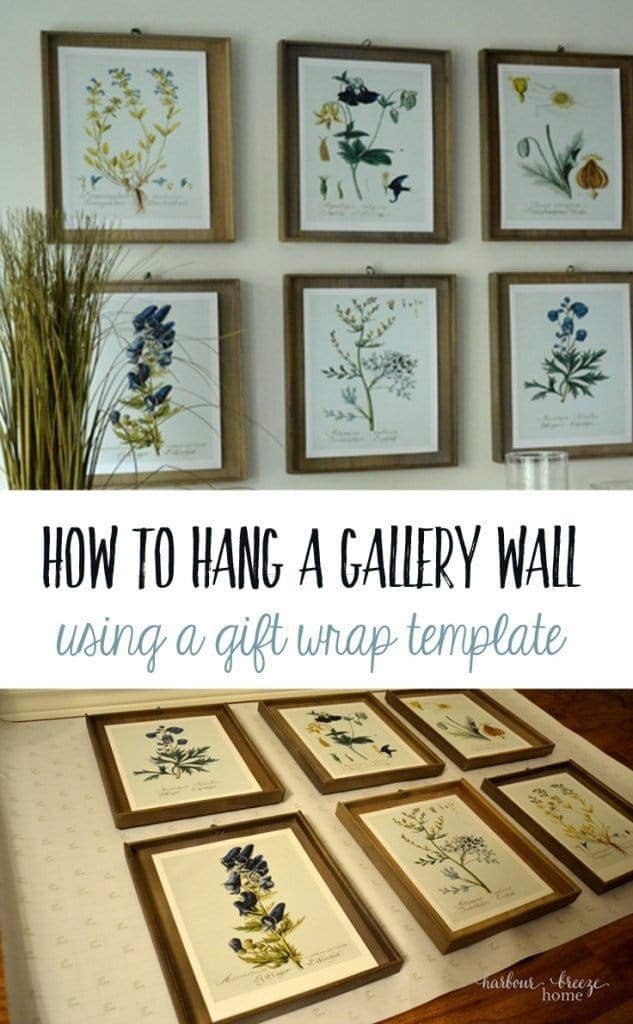
Learn how to make a perfect gallery wall and only have to nail ONCE! This simple to follow tutorial teaches how to hang a gallery wall using a gift wrap template.
The Gallery Wall Struggle
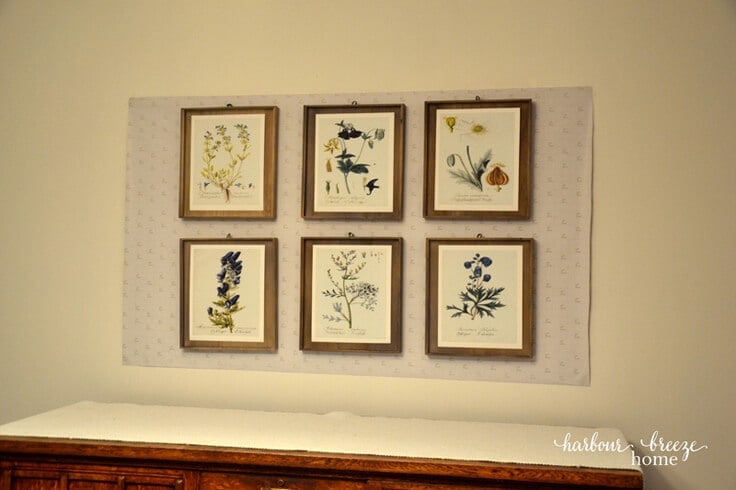
Hi everyone, I’m Rita Joy from Harbour Breeze Home, and I’m so glad to be back here at Kenarry today. Sometimes the last step in a project ends up being the biggest challenge, doesn’t it? Such was the case when I decided to hang a botanical print gallery wall in my One Room Challenge Dining Room design.
I finally had all the prints in frames, but then wondered how to get them hung on the wall properly. Since we had recently painted the walls a pretty Simply White color, I didn’t want to mess them up with a whole bunch of nail holes in the wrong places!
I wracked my brain to think of a simple solution using something I already had in the house (since it was 10 pm!). I didn’t have a roll of large kraft paper on hand, but I did have some Christmas wrap I bought last year on clearance.
When I took the plastic off and started to unroll it, I noticed it had grid markings on the back. That little feature made this method the easiest gallery wall hanging process I’ve ever tried.
How to Make a Gallery Wall Template Out of Wrapping Paper
If you’d like to try it too, here are the simple steps:
1.) Cut the Wrapping Paper
Cut a piece of paper that is approximately the size of the space you want to cover with a gallery wall. If the paper isn’t wide enough for the square footage you’re covering, tape 2 (or more) pieces together.
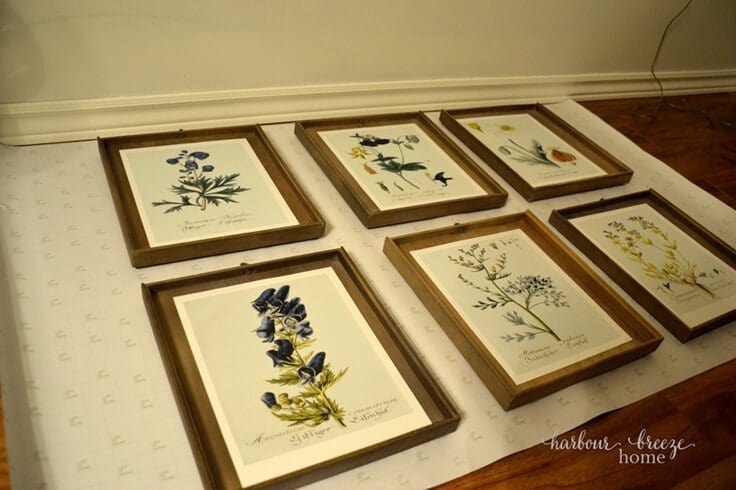
2.) Place the Frames on the Paper
Lay the paper on the floor and arrange your items the way you’d like them to appear on the wall. (Since I wanted the pictures to be in straight lines, the grid paper made this step so much easier!)
3.) Mark the Hanger Spots on the Paper
Once happy with the arrangement, mark where the hangers are of each picture frame. (You can even trace around the
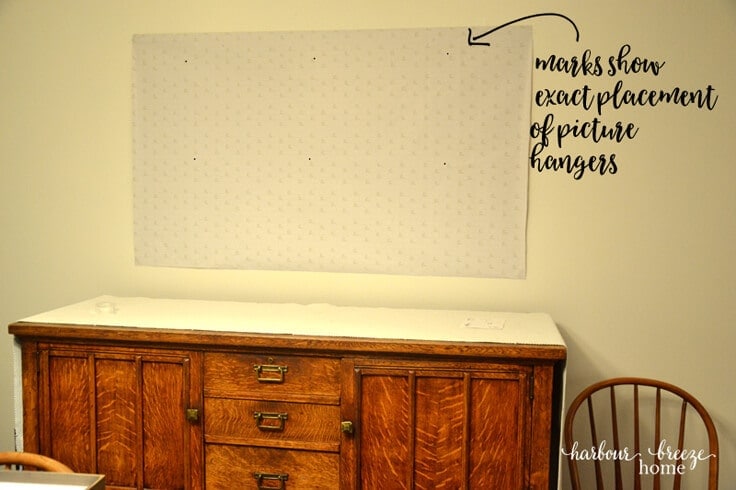
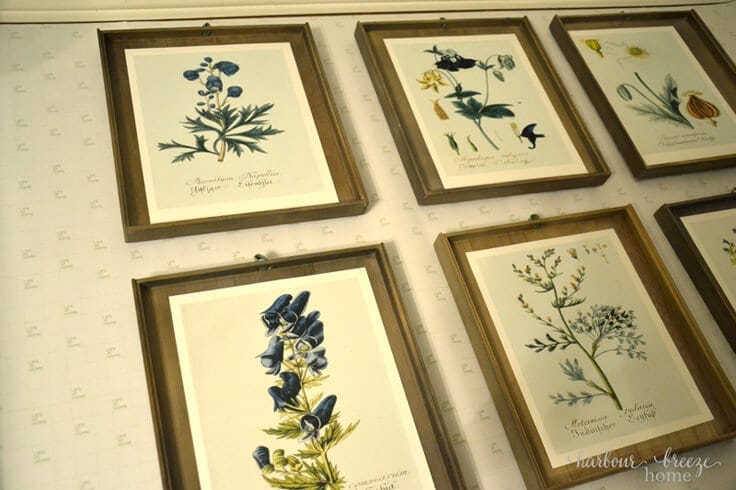
4.) Tape the Gift Wrap to the Wall
Tape the gift wrap on the wall where you’d like the gallery wall to hang.
5.) Hammer Nails on the Marks
Hammer picture hangers or nails on the marks.
6.) Take the Wrapping Paper Down
Once all the nails are in the wall, remove pictures (if you had them up
7.) Hang Pictures Back Up
Hang your pictures up, stand back, and enjoy the successful completion of your project!! You can check out Carrie’s living room makeover to see how she used the wallpaper template for her own family gallery wall.
PS. If you’re interested in the botanical prints I chose, you can grab the free printables of them here. Free printables are one of my favorite economical decor tricks. You can see other uses for them in these posts:

6 Ways to Use Free Printables in Your Home

Love the ideas you see here on Ideas for the Home by Kenarry®? Subscribe today to get our weekly Ideas in Your Inbox newsletter plus other exclusive gifts and offers — all for FREE!
More Home Decor Ideas
Here are some more home decor ideas from Ideas for the Home by Kenarry® –
- Wood Bead Garland Photo Holder
- DIY Fabric Covered Bulletin Board
- How to Make Easy Yarn Wall Hanging
- How To Make A Beautiful Pallet Wall Hanging Vase
Originally published November 2016. Updated November 2018.


One Comment