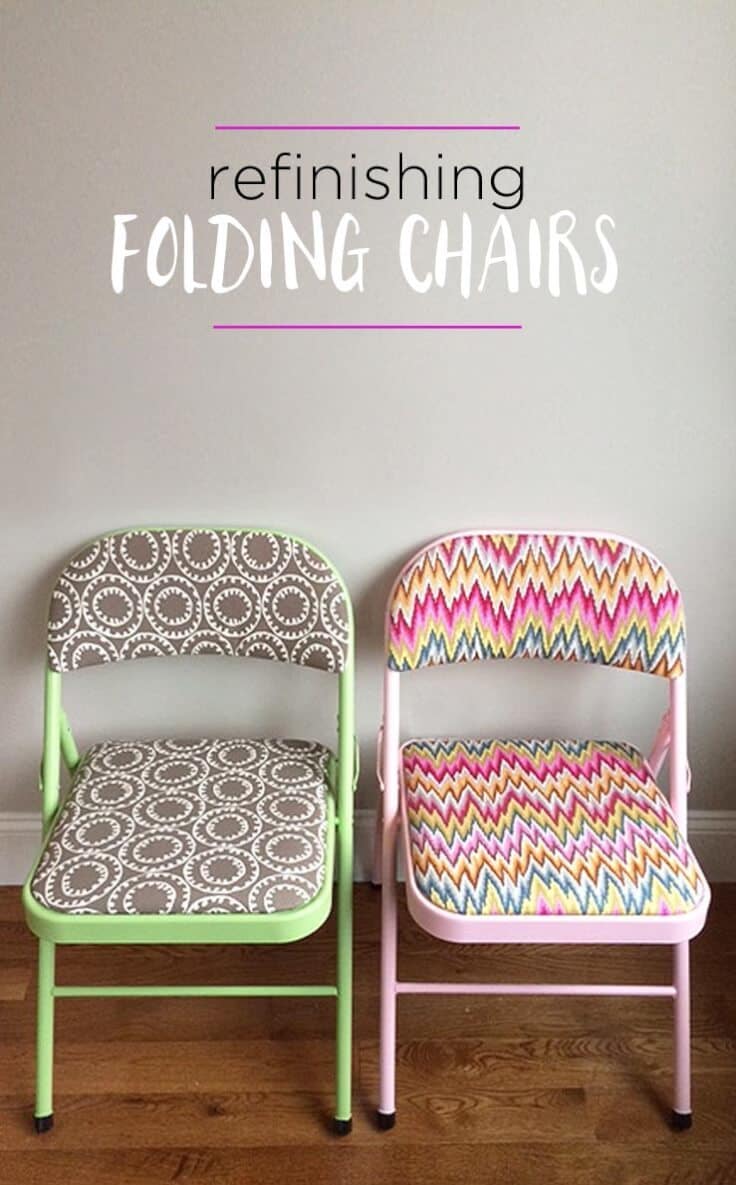
How To Refinish Folding Chairs
THIS POST MAY CONTAIN AFFILIATE LINKS. PLEASE SEE OUR FULL DISCLOSURE POLICY FOR DETAILS.
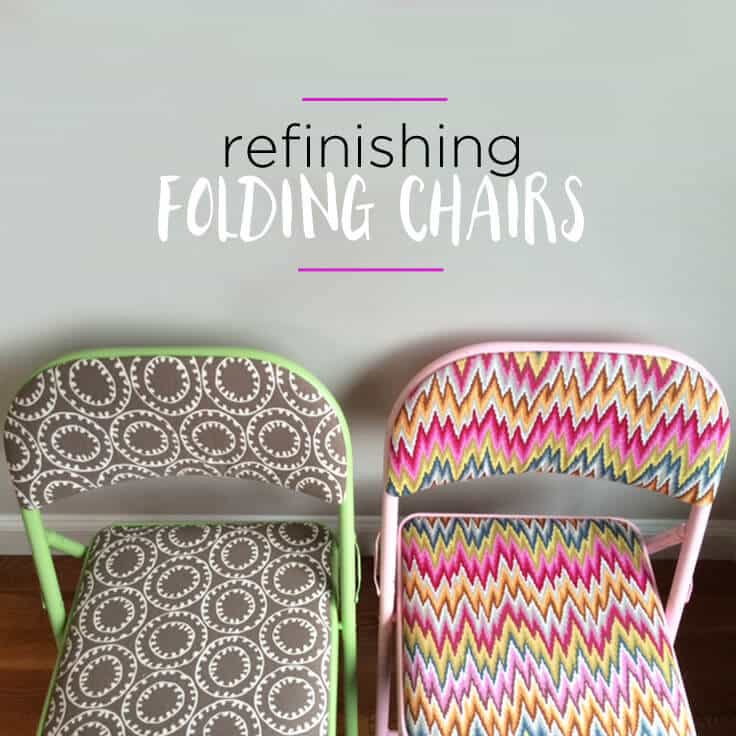
How do you decorate boring folding chairs? It’s easy with some fun fabric and paint! This is how to refinish folding chairs and make them look brand new.
Hi Kenarry readers! I’m Lori from Greco Design Company back today to share a DIY project that turns those boring, ugly folding chairs into fun pieces of furniture that you may not want to fold up and put away! Learn how to refinish folding chairs.
From Boring Chairs to Fun Seats!
Folding chairs have always been used on special occasions when you need some extra seating. They are usually black or beige and not all that pretty. This easy project will turn these useful – but unattractive chairs – into fun pieces of furniture and all it takes is some remnant fabric and spray paint!
How To Refinish Folding chairs the easy way
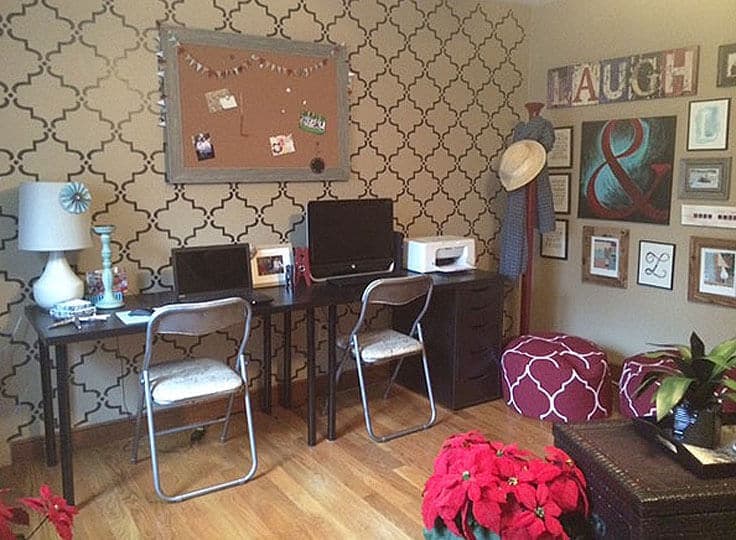
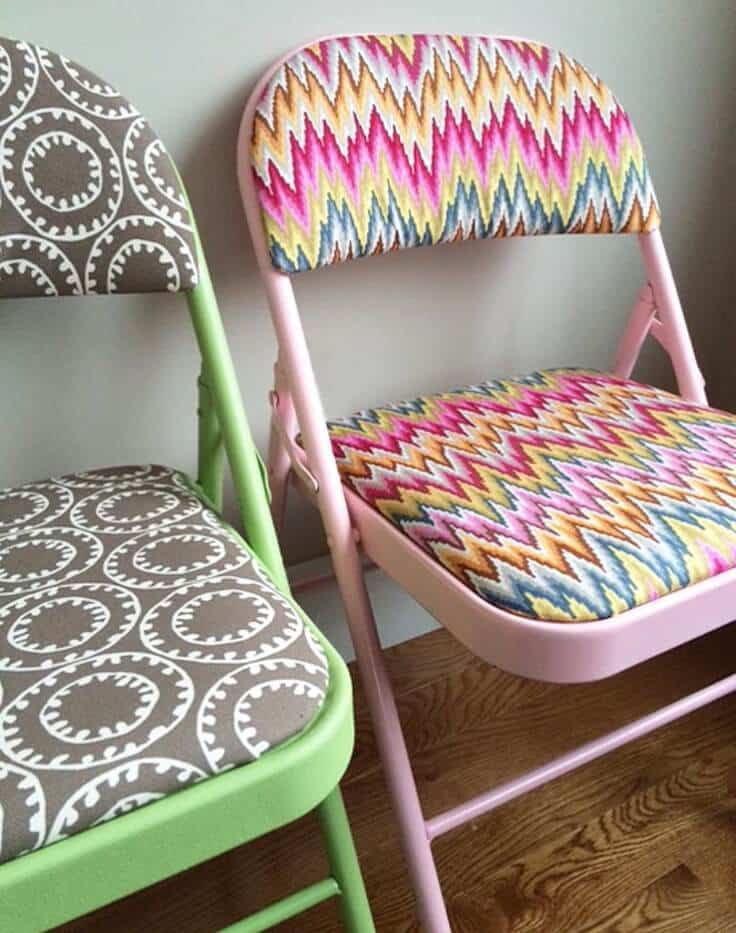
Last year I refinished 2 folding chairs when I redesigned this home office. We used these chairs as the permanent desk chairs and they look so pretty. Plus they’re cushioned so they’re comfortable too. l loved them so much that I decided to do a few more so I could have them as extra seating for my home. They’re perfect for a party but also look so cute in a girl’s room or play area for the kids.
The entire tutorial is in a printable card at the bottom of this post. First, I’ll share some tips and some pictures of my process.
Supplies You Need
- Cushioned folding chair (I used chairs with both back and seat cushions – and they were attached with standard screws)
- Spray paint (about one can per chair)
- Fabric (less than 1/2 yard for each chair)
- Staple gun (about $10 anywhere that sells basic tools)
- Screwdriver
Refinishing folding chairs steps
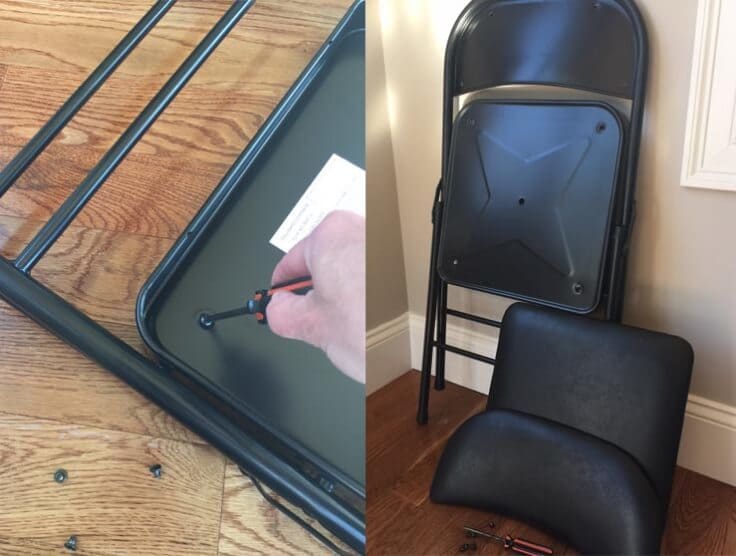
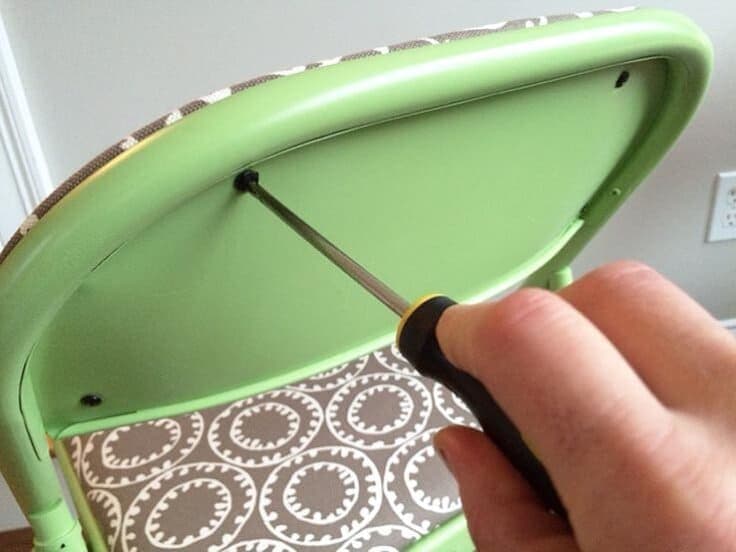
Keep Screws in a safe place
Start by removing the pads from the chair and set the screws aside. Keep the screws in a safe place, you’ll need them later.
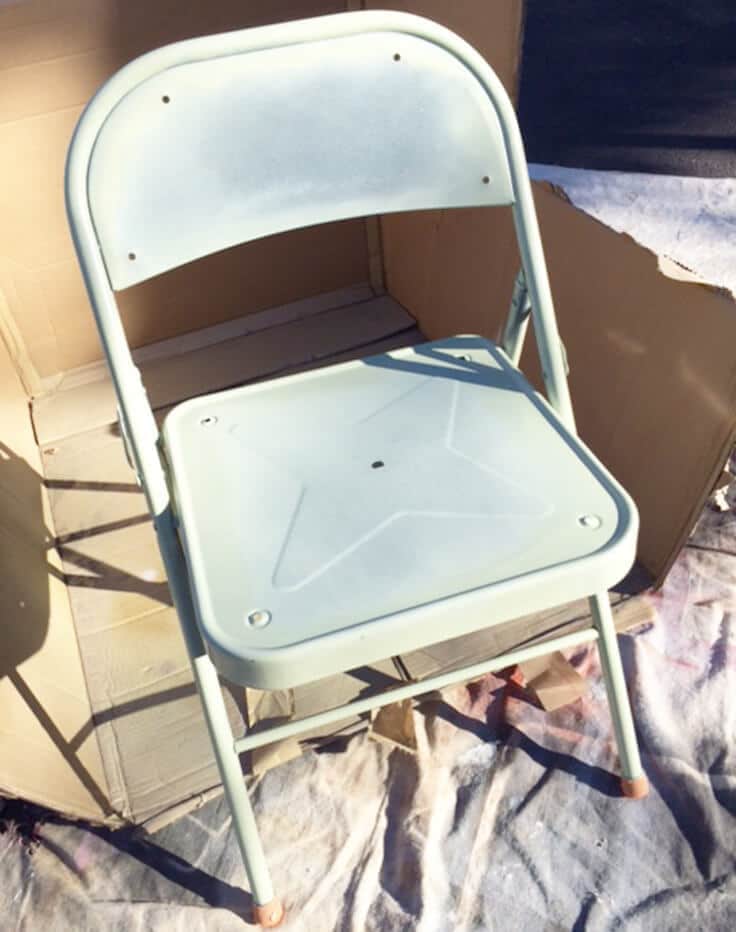
Add multiple coats of paint
Spray paint the chairs. I use Rustoleum products and they seem to hold up well. You might need 2 or 3 coats and make sure to get the chair at all angles. While the paint is drying, you can upholster your cushions.
How to Recover folding chairs
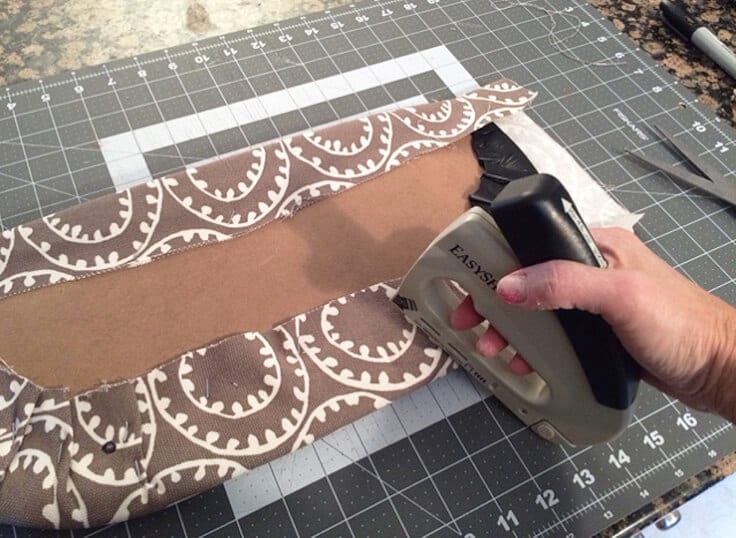
To cover the cushions, you’ll need to cut a piece of fabric to fit the cushion. I cut my fabric about 4 inches larger around all edges. Then lay the cushion upside down over the backside of the fabric and pull the edges of the fabric around to the back of the cushion and staple it down right over the existing fabric.
Make sure to keep it pulled tight. At the corners, fold the fabric over in small pleats so you don’t have big puckers. If you’re using a fabric with a pattern, keep flipping the cushion over as you go to make sure you’re keeping the pattern straight.
Reattach the cushions to the chairs
Trim any excess fabric and reattach the cushions. To attach the seat cushions, just attach the screws back in where they originally were. I made sure to leave the screw holes clear of any fabric.
Now you have pretty, party-ready chairs. Or in my case, any-time chairs! I made a few in different patterns and colors.
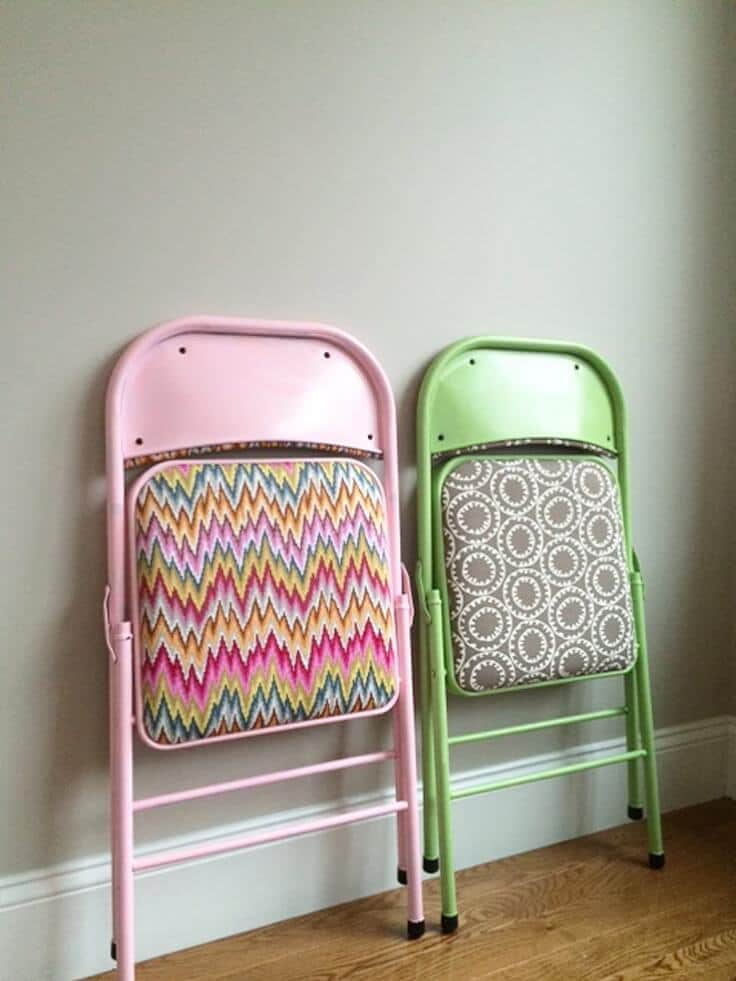
What a fun surprise these would be when you take them out for your next party.
But they’re so pretty that you won’t want to put them away!
How to decorate a folding chair
How do you decide what will look good together on the chair when you decorate it? I like to get ideas from Pinterest. I’ll browse pictures I like of outfits or beautifully decorated rooms.
Then, I will pull out the colors and patterns I like and that’s how I’ll paint the chairs.
Here are some more folding chair decorating ideas:
- Ombre – Paint the chairs darker on top and lighter as you go down to the bottom.
- Rainbow – Use as many colors as you can, but in the order of the rainbow.
- Monochrome – Pick out 1-2 colors and use only those to decorate your chairs.
- Monogram – Use an iron-on transfer to display your initials on the chair-back.
How To Refinish Folding Chairs
Equipment
- Spray paint
- Staple gun
- Screwdriver
Supplies
- 2 cushioned folding chairs
- 1 yard fabric
Instructions
- Start by removing the pads from the chair and set the screws aside. Keep the screws in a safe place, you’ll need them later.
- Spray paint the chairs. Add 2 coats if it needs.
- To cover the cushions, you’ll need to cut a piece of fabric to fit the cushion.
- Lay the cushion upside down over the backside of the fabric and pull the edges of the fabric around to the back of the cushion and staple it down right over the existing fabric.
- At the corners, fold the fabric over in small pleats so you don’t have big puckers.
- Trim any excess fabric and reattach the cushions. To attach the seat cushions, just attach the screws back in where they originally were.
I hope you enjoyed this DIY project and you may also like the following related posts:
Love the ideas you see here on Ideas for the Home by Kenarry®? Subscribe today to get our weekly Ideas in Your Inbox newsletter plus other exclusive gifts and offers — all for FREE!
What’s Next?
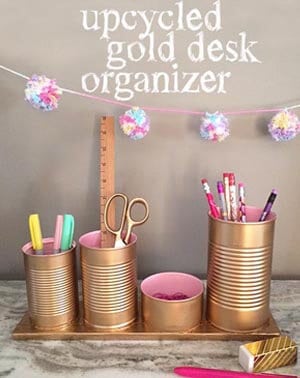
If you love upcycled crafts, try these imaginative ideas next.

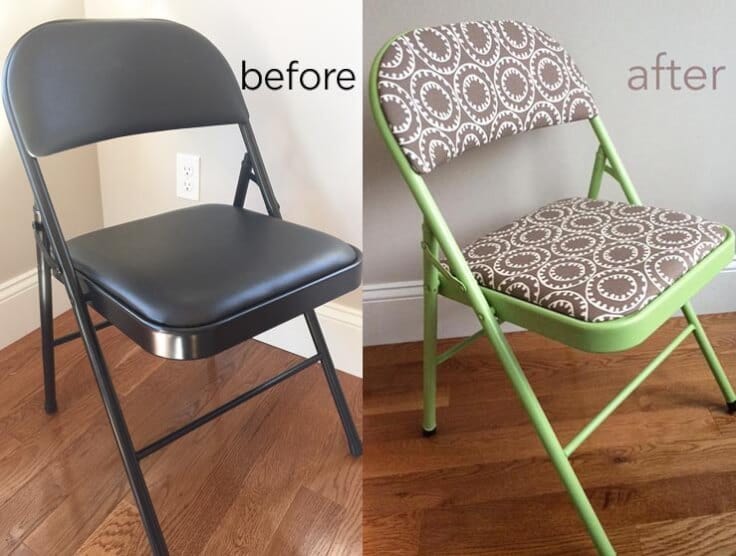
The chairs in your “before and after” picture (seventh photo down) are not even the same chairs! Maybe you meant to put a different “before” (or “after”) picture there? It’s misleading the way it is now, you may want to correct that.
I particularly love that pink chair, the paint choice for the metal part of the chair really pops with the fabric choice. Very nicely done!
Great catch, April! Lori has done several chair folding chair makeovers using this same method so she used the “before” photo from one of them and the after photo of her most recent makeover for this post. She and I can see how it was confusing though and swapped out the “after” photo to match the before in the side by side photo. Let us know what you think!
The finished chairs look lovely but they do not match the before chair. The frame and the legs of the before chair are very different from the after chair. What is up with that?
You have a fantastic eye for details, Cathy. Thanks for letting us know. Lori used a “before” photo from one of the other folding chair makeovers she did when she wrote this post. We’ve since changed out the side-by-side photo so the before and after show the same chair. Let us know if it looks better now.
It looks very nice.. Can u tell me which type of fabric u used for this…
I love the chairs! I have a bunch of folding chairs and have been planning to do a makeover on some of them. My problem is that the seat cushions are not screwed on, but rather attached with some sort of plastic things which are very hard to remove and I can’t find any to replace them with. Do you have any suggestions on that?
Hi Leigh Ann – I think I know what you’re referring to but not sure unless I can see a picture of the plastic things. All my chair cushions were attached by screws. If you’re able to send a photo that would be helpful. The other idea I had is if it’s only the seat cushion you’re looking to replace (no back cushion) you could add a cushion ON TOP of the existing one and even have it hang over the sides a bit too, making it more comfortable and hiding the existing, attached cushion. Good luck and send a photo if you can! Thanks.
Thanks for using our EasyShot stapler for this project. These chairs look amazing! #MadeWithArrow
Thank you for noticing, Arrow Fastener! We’re thrilled you stopped by to check out Lori’s folding chair project.
how can you put padding on a folding chair that doesn’t already have padding? Thank you….
Great question! Can you e-mail us at [email protected] with a few photos of the top and bottom of your folding chair? That might give us some ideas for how you could attach padding. You could also create or buy a detachable chair pad that ties to the back of the chair – like the kind you would use on wooden kitchen chair.
Best wishes,
Carrie
Ideas for the Home by Kenarry®
This is just the tutorial I was looking for, thanks. Did you remove the original fabric before you reupholstered the chair cushion and backrest? I am wondering how to get those prolific and heavy duty staples out.
Thanks – Diana
Great question, Diana! When Lori from Greco Design Company reupholstered the chair cushion and backrest, she just stapled the new fabric right over the existing fabric. She didn’t bother taking all the old heavy duty staples out first. Hope that helps!
Best wishes,
Carrie from Ideas for the Home by Kenarry®