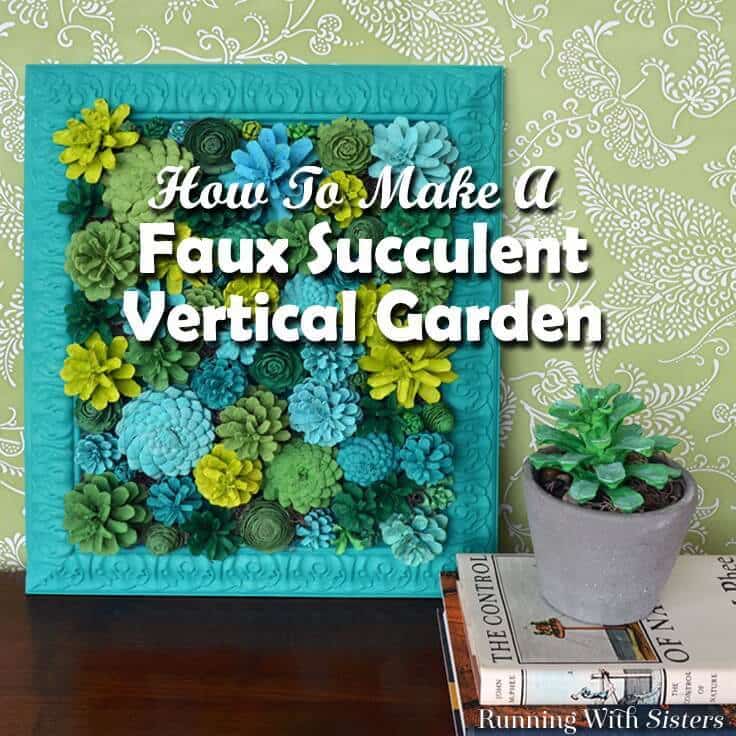
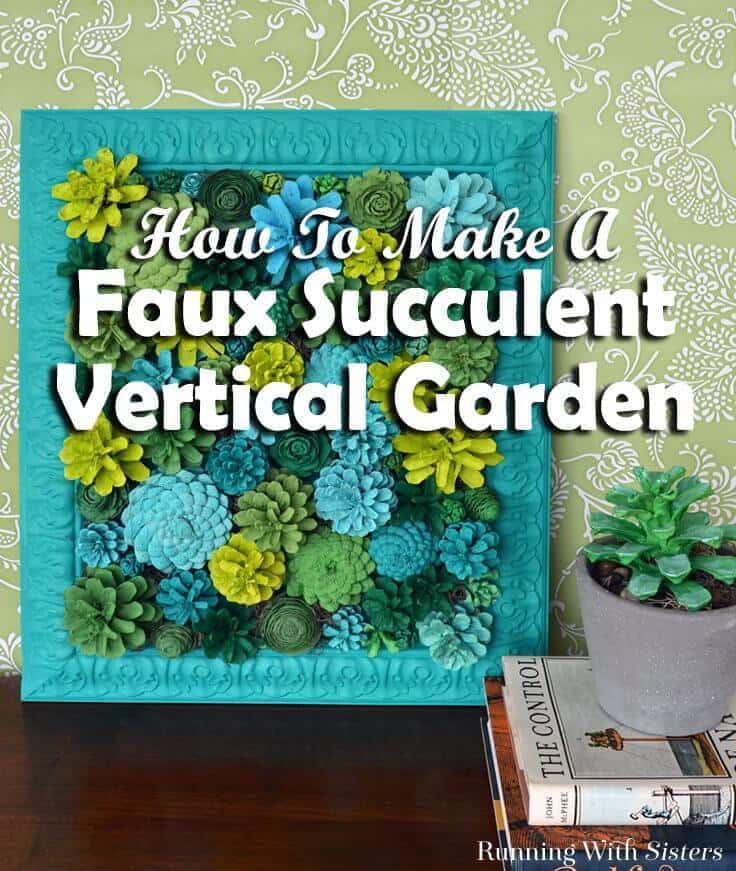
Faux Succulent Vertical Garden Made From Pine Cones
THIS POST MAY CONTAIN AFFILIATE LINKS. PLEASE SEE OUR FULL DISCLOSURE POLICY FOR DETAILS.
Make a faux succulent vertical garden by painting pinecones to look like succulents. We’ll share how to paint pinecones to look just like succulents – with a video tutorial too.
Hi Kenarry readers! We’re Jennifer and Kitty from RunningWithSisters.com. We are so excited to share this project with you – how to make a faux succulent vertical garden.
We love succulents! So we were looking at faux succulents at the craft store and thinking they were pretty spendy when it dawned on us that pine cones (which are practically free) look an awful lot like succulents. Would it be possible to paint pine cones to look like succulents? Turns out the answer is yes!
We decided to make a vertical garden in a frame, but the possibilities go on and on! Make a faux succulent teacup with painted pine cones. Fill up a little wire birdcage with painted pine cones. You could make a whole wreath! Whatever you decide to do, we hope you have as much fun as we did making this vertical garden!
How To Make A Faux Succulent Vertical Garden Out Of Pine Cones
Disclosure: This blog post contains affiliate links for products or services we think you’ll like. This means if you make a purchase from one of these links, Ideas for the Home by Kenarry® will make a small commission at no additional cost to you so we can keep the great ideas for the home coming your way. All opinions expressed are derived from personal experience.
Tools & Materials
- Frame (Ours is 14″ by 17″)
- Pine cones: large, medium, and small (About 65 total)
- Spanish moss
- Acrylic paint: Jade Green, Turquoise, Light Aqua, Medium Green, Forest Green, & Charteuse
- Hot glue gun and glue sticks
- Handsaw or long-handled rose bypass loppers
- Craft paintbrushes
Where To Get Pinecones
Where do you get pinecones if you live somewhere without pine trees? Thankfully you should be able to find bundles of pinecones at your local craft store. You can also find bags of them on Etsy.
Steps
Follow these simple steps and you’ll have your own succulent garden made out of painted pinecones.
1.) Collect Pinecones
Start by collecting pine cones. We found all kinds of pine cones in our neighborhood once we started looking. And since we knew we wanted pine cones that looked like succulents, it was easy to pick out which ones we wanted.
We looked for a few big pine cones, lots of medium-sized ones, and lots of little ones. If there aren’t a lot of pine cones in your neighborhood, you can always buy a bag or two at the craft store.
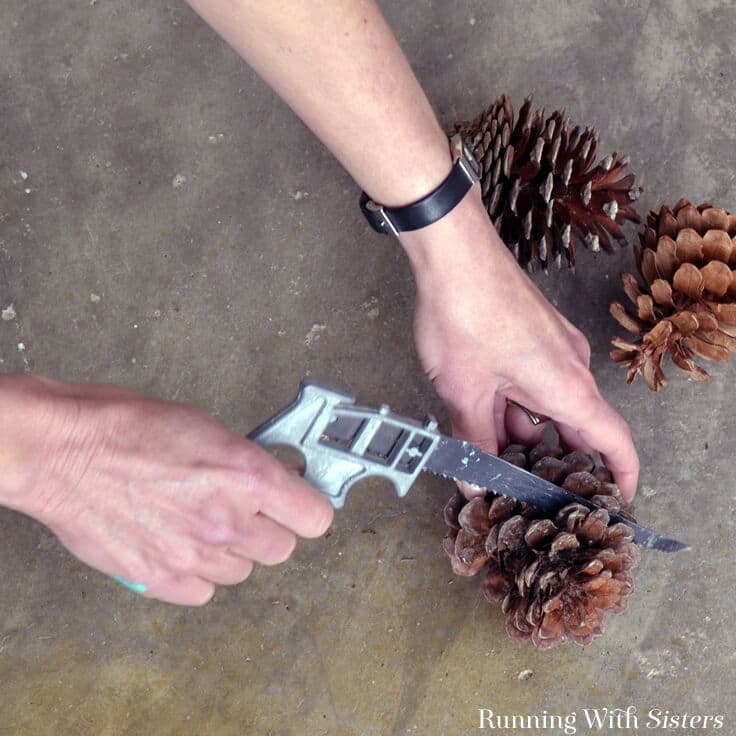
2.) Cut the Pinecones with a Bypass Lopper
Next we cut a few of the bigger pine cones in half so we’d have a top and a bottom. (The bottoms look just like succulents, too!) We experimented with ways to cut the pine cones. For the harder ones,
(By the way, if you are squeamish about bugs, let your pine cones sit a little while, maybe outside on the patio, so any bugs can make their escape.)
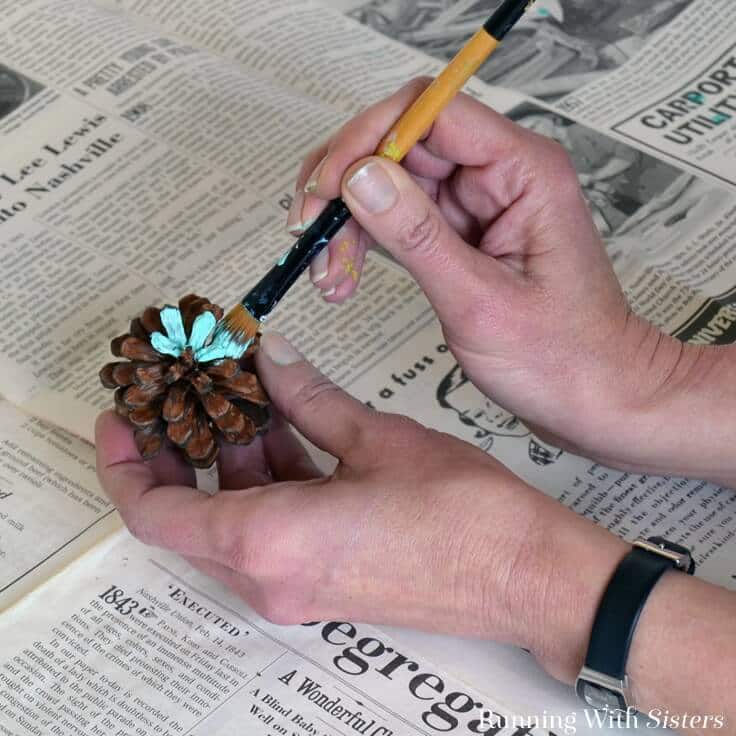
3.) Paint the Pinecones
Now for the transformation! Paint the pine cones in shades of light green, dark green, frosty blue, turquoise, and aqua. We pulled up photos of real succulents on Pinterest to get color ideas.
We didn’t dilute the craft paint at all—we just used it straight from the bottle. Let the pine cones dry completely. Then add touches of lighter colors to the tips of some of the darker pine cones.
(You might get some little seedlings stuck to your paintbrush from inside the pine cone scales. We just wiped them off the brush and kept going.)
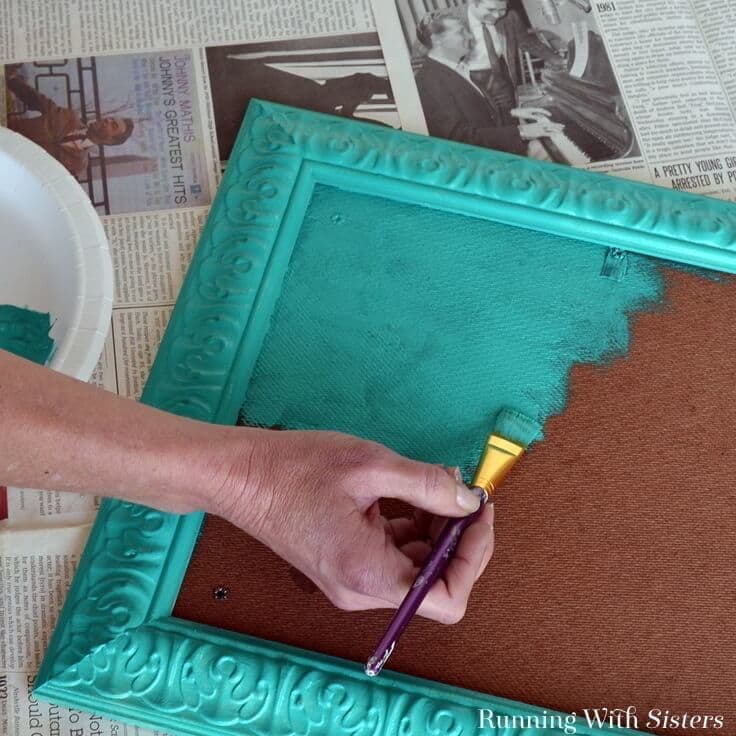
4.) Prepare an Old Picture Frame
Remove the glass from your frame if there is any. You can upcycle a frame from a thrift store or garage sale or buy a new one. We chose one that looked like a fancy vintage frame because we like the shabby chic look next to the “succulents.” Paint the frame with one of the succulent colors. We painted the backing board inside, too, just in case it shows through the pine cones.
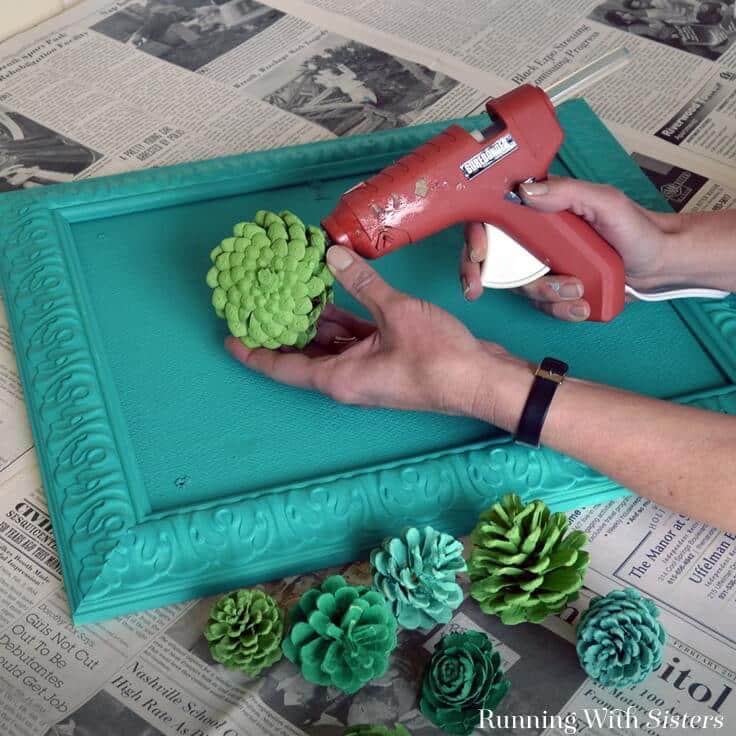
5.) Attach the Pinecones to the Frame Board
Hot glue the painted pine cones inside the frame starting with a big one. Tuck medium pine cones around the big one and glue them. Then fill in with smaller ones. Then add another large one. And keep going. We overlapped the edge of the frame so it would look like the “succulents” were growing right out of the frame. Tuck a little Spanish moss into any openings between the faux succulents.
How fun is that?! And the best part is, you can hang your vertical garden inside and it’ll stay green year-round. No watering required! Let us know how your pine cone succulents turn out. And if you have any questions or comments while you’re working on them, write in, and we’ll write back. We’d love to hear from you!
Happy Crafting,
Jennifer & Kitty
If you’d like to share this project, you can pin this photo:
Want to see more crafts from the O’Neil Sisters? You might like…
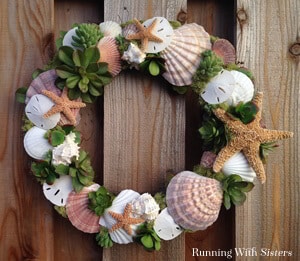
Seashells And Succulents Wreath
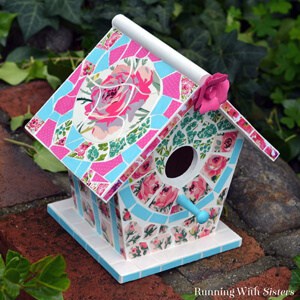
Easy Mosaic Birdhouse That Looks Like Broken China!
Love the ideas you see here on Ideas for the Home by Kenarry®? Subscribe today to get our weekly Ideas in Your Inbox newsletter plus other exclusive gifts and offers — all for FREE!
What’s Next?
While you’re here, be sure to check out other craft projects on Ideas for the Home by Kenarry® –
- Boho Chic Napkin Rings: Get Started Woodburning
- How To Make A Beautiful Pallet Wall Hanging Vase
- $10 Faux Succulent Beach Terrarium
Originally published May 2016. Updated May 2018.


Lovely! These really looks like succulents!
Don’t they? I can hardly believe they’re pine cones. So clever!
I love this and went immediately to Etsy to purchase some pine cones. I live in Pennsylvania in a downtown area of a city. Our pine cones are elongated and not attractive for this project. I immediately saw DOZENS of versions of this project for sale at inflated prices. Thing is, none are as cute as yours. I had to come back specifically to say that you should be proud of yourself! I am going to order some pine cones and make my own attempt. Thanks for the idea! 😀
Hi Mandy,
That’s so sweet of you to take the time to let us know and send a word of encouragement!
Best wishes,
Carrie, Jennifer and Kitty