How to Make A Beautiful Woodland Winter Front Door Wreath
THIS POST MAY CONTAIN AFFILIATE LINKS. PLEASE SEE OUR FULL DISCLOSURE POLICY FOR DETAILS.
Let me show you how to make a beautiful woodland winter front door wreath. The materials needed are simple and can be found at your local craft or home store.
This is a perfect project for someone looking for an easy, inexpensive, and attractive way to decorate their home this winter season.
Hello! Michelle back from Our Crafty Mom sharing a beautiful woodland winter wreath that is perfect to hang on your front door.

How to Make A Winter Front Door Wreath
Let me show you how quick and easy it is to make this darling winter wreath with a sweet winter snowy owl.
What you need:
Want more ideas like this? Subscribe today to get our weekly Ideas in Your Inbox newsletter plus other exclusive gifts and offers — all for FREE!
DIY Tools Needed:
Supplies Needed:
These are the ingredients you’ll need. All the exact amounts are in the printable card at the bottom of this post.

Winter Front Door Wreath Tips:
Add the faux Greenery
Whenever I make a wreath, I always start by adding the accent stems or greenery first. If your stems have a heavy wire, like the ones I show here, you don’t even need hot glue. Simply place the wire stem into the opening of the grapevine wreath.
You can also add floral wire if you feel the stems are not secure enough.
Separate The Snowy Stems
Once the accent stems are added, start attaching the larger snowy stems. I found these gorgeous winter stems on clearance last season after Christmas.
I always check the craft stores for florals that can work for winter decorating. Sometimes you can even find some pink or red that works for Valentine’s Day as well. It’s a great way to keep costs down.

Add a Pretty Bow
Once you have the winter stems added, it’s time to add a pretty bow. If you are not comfortable making your own bow, you can buy a pre-made one. We’ve also got a super-easy tutorial so you can learn how to make a wreath bow.

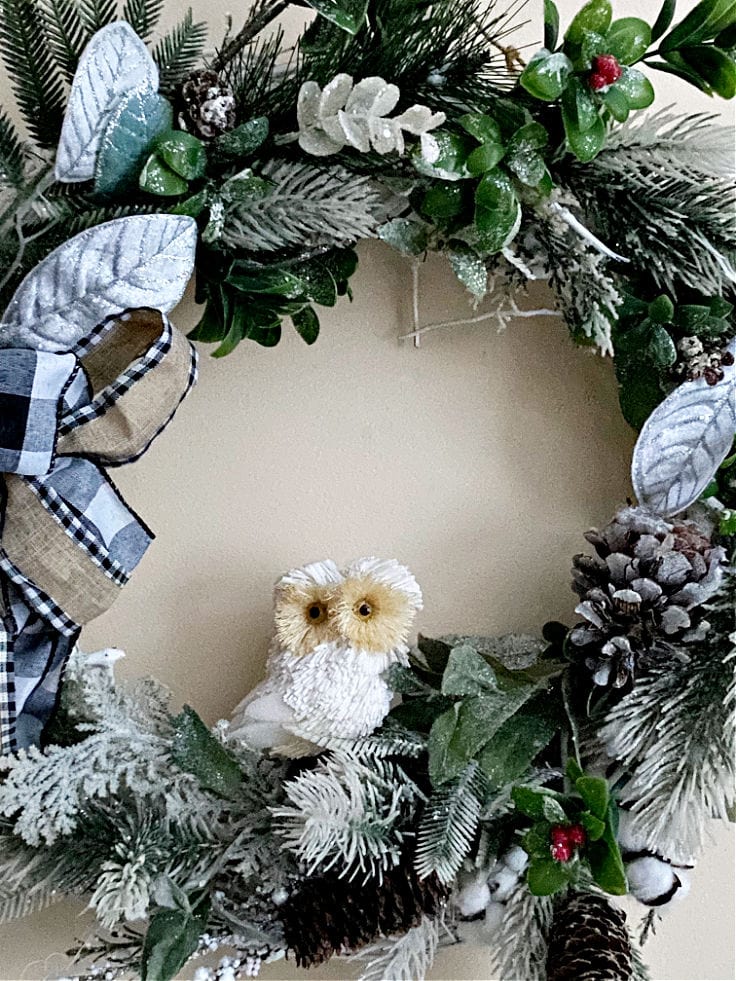
Secure The Woodland Owl
This sweet little owl is actually an ornament. He makes the perfect centerpiece for this winter wreath. Because of his larger size, it’s best to use wire to attach the little owl.

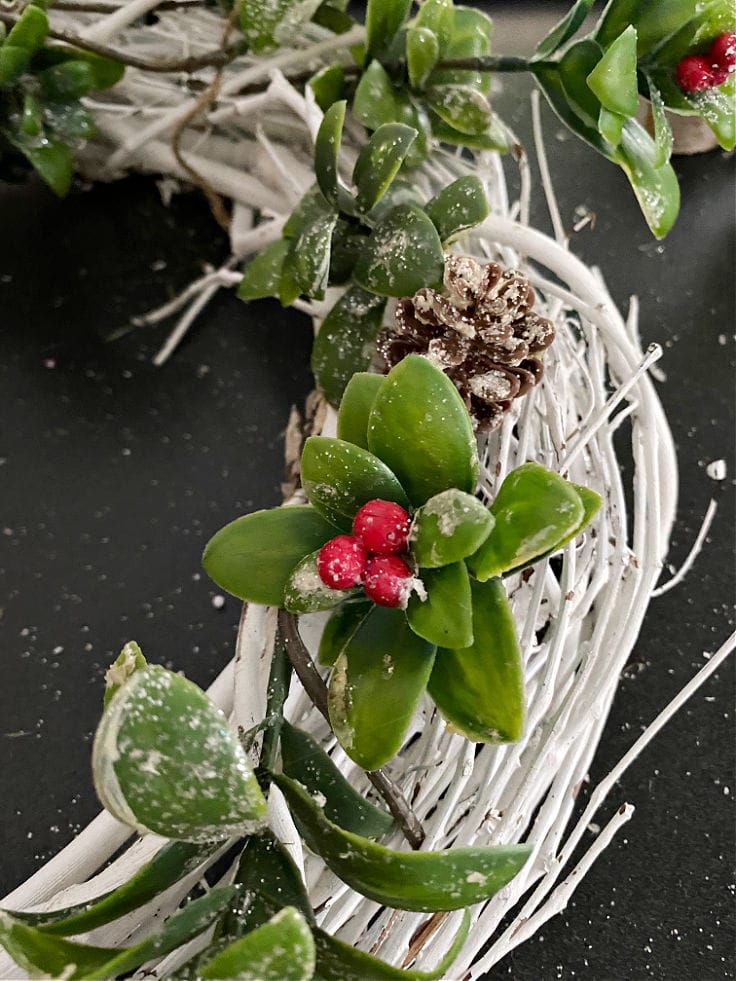
Add Fillers Like Leaves and Berries
To fill in any blank areas, I added fillers like sparkling leaves, pine cones, and berries. The main tip for wreath making is to have fun with it! Add as much detail as you like.
decorate with Your Winter Wreath
That’s all there is to it! Now you have a woodland winter wreath to hang on your front door. If you can’t find a white grapevine wreath, you can use a natural color, or spray paint one if you like. I do prefer the white wreath for winter.

Woodland Winter Wreath
Until Christmas is over, I hung this beauty on an antique window in my bedroom. It looks right at home with the cone trees on my bureau. The link for these trees is at the bottom of this post.


DIY Woodland Winter Wreath
Supplies
- 1 Grapevine Wreath
- 10 Winter Stems
- 2 yards Ribbon
- 1 yard Floral Wire
Instructions
- Start by adding the greenery to the grapevine wreath. Add floral wire if needed.
- Secure the larger statement winter stems to the wreath with hot glue.
- Create a bow and secure it with floral wire to the side of the wreath.
- Add accent leaves and stems.
- Secure the snowy owl to the bottom center of the wreath with floral wire.
- Hang your wreath!
Love the ideas you see here on Ideas for the Home by Kenarry®? Subscribe today to get our weekly Ideas in Your Inbox newsletter plus other exclusive gifts and offers — all for FREE!
What’s Next?
If you enjoyed this winter wreath, then you’ll enjoy these winter ideas too.
Transition to Winter Decor After Christmas


You may also enjoy these winter project ideas on Ideas for the Home by Kenarry® –