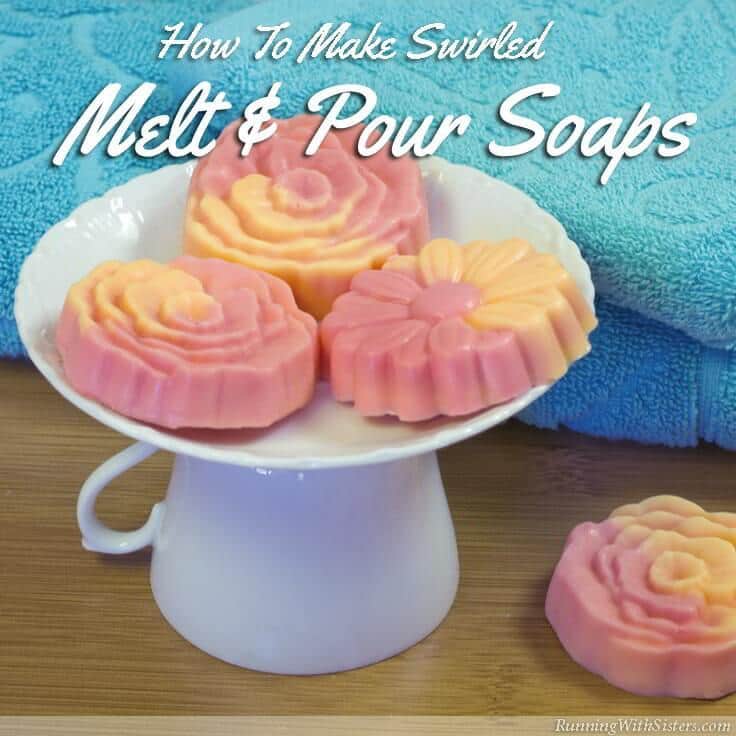
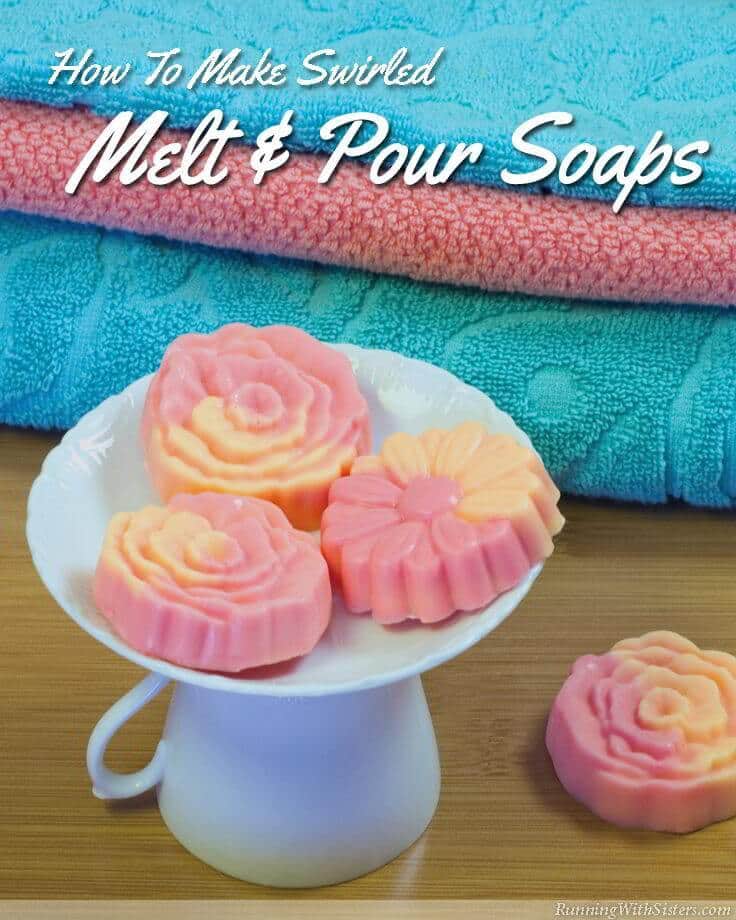
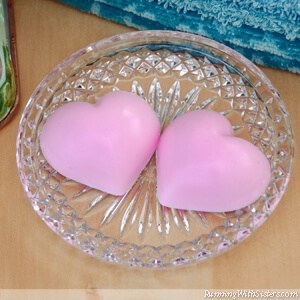
Orange Bergamot Guest Soaps: How To Make Swirled Melt and Pour Soaps
THIS POST MAY CONTAIN AFFILIATE LINKS. PLEASE SEE OUR FULL DISCLOSURE POLICY FOR DETAILS.
It’s easy to make melt and pour soaps! In this video and step by step tutorial, you’ll learn how to melt soap, add scent, and swirl colors into the mold.
Hi Kenarry readers! We’re Jennifer and Kitty from RunningWithSisters.com, and we have a craft to share that’s super fun and easy to make: Melt and Pour Soaps!
We love making soaps using melt and pour soap base. It’s easy to melt because you use the microwave! And it’s a cinch to tint and scent. Plus you can find all kinds of molds to make pretty shapes. And it has no harsh chemicals! But our favorite thing about making melt and pour soaps is how our studio smells from all the scented essential oils. It turns a craft day into a spa day!
Even if you’ve never made soaps before, you can definitely do this project. Just follow the step-by-step instructions below, or follow along with the video we included and make the soaps with us. You can see first-hand how to mix two colors together to get a pretty swirl. It’s such a neat effect!
How To Make Swirled Melt and Pour Soaps
Here’s the entire tutorial. We even have a video so you can make them along with us.
Soap Ingredients
- 8 Ounces shea butter white soap base
- Soap colorant: red, orange, and yellow
- Orange Bergamot essential oil
Tools and Materials
- Flower soap mold
- 2 Pyrex measuring cups
- 2 Chopsticks
- Knife
- Cutting board
- Microwave oven
- Spritzer bottle
- Rubbing alcohol
How to make melt and pour soaps
1. Pick out a soap mold. The first thing to do is to pick out your soap mold. (This part is fun!) If you decide to do the two-color swirl, pick a soap mold that is wider than it is deep so you’ll have room to pour in both colors at the same time. Soap molds are available at craft stores, and silicone baking molds and candy molds work well, too!
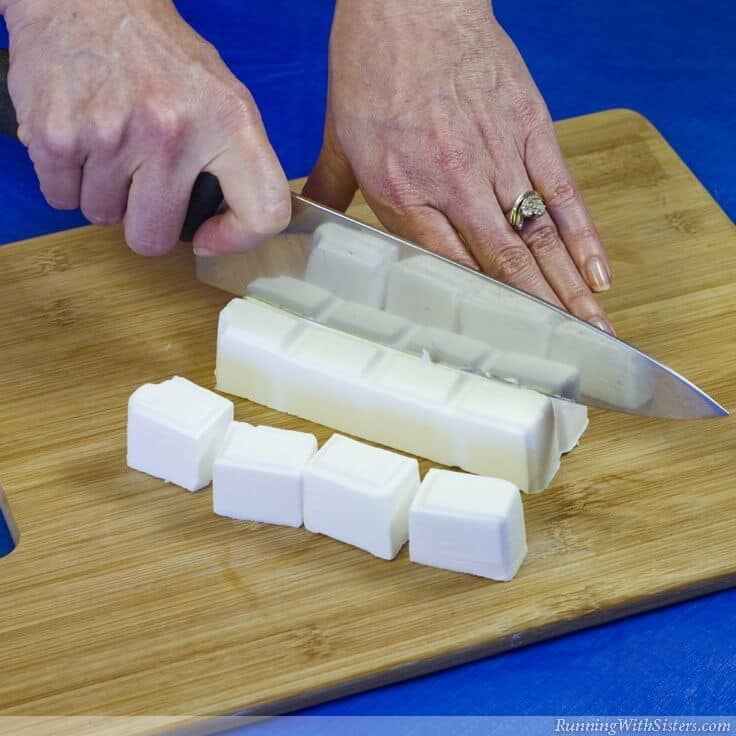
2. Cut the soap base into chunks. The soap base is usually scored into one-ounce squares so you don’t need to weigh it. Place four ounces (or four squares) into each of the Pyrex measuring cups.
3. Melt this soap base in the microwave. Melt the two cups of soap base one at a time in the microwave. It only takes about a minute, but start with 30 seconds on high, stir with a chopstick, heat for another 15 seconds, stir, and continue until all the soap is melted.
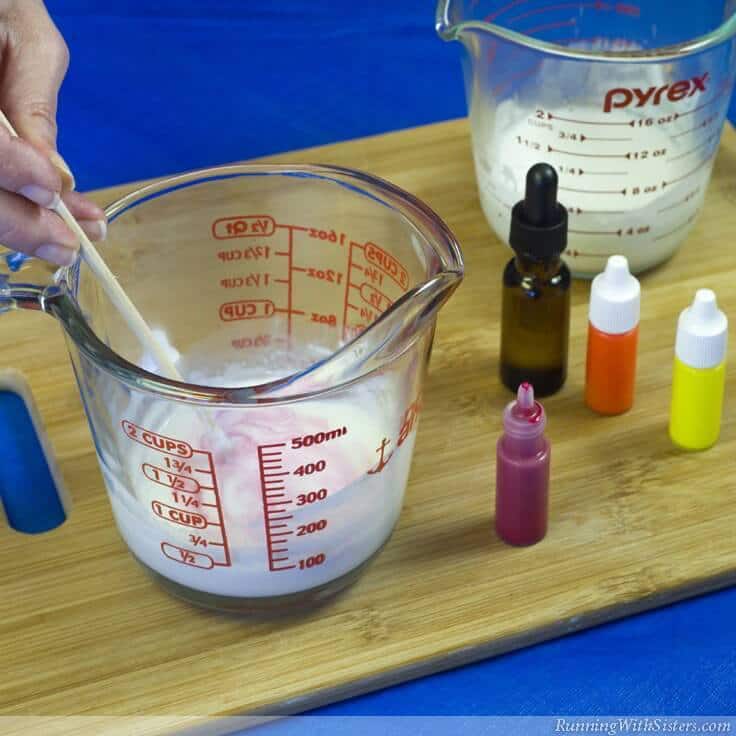
4. Add color and scent. Add 5 drops of the Orange Bergamot essential oil to each cup. Then add soap colorant to the soap base to make it a pretty rose color. If the soap is starting to cool and gets a skin on top, reheat it in the microwave for 15 or 30 seconds.
Rose and Peachy-Orange Color Recipe
To make the rose color, use:
- 8 drops of red
- 4 drops of orange
- 2 drops of yellow. Stir with a chopstick to blend.
For the peachy-orange color, use:
- 8 drops of orange
- 4 drops of yellow soap colorant. Stir.
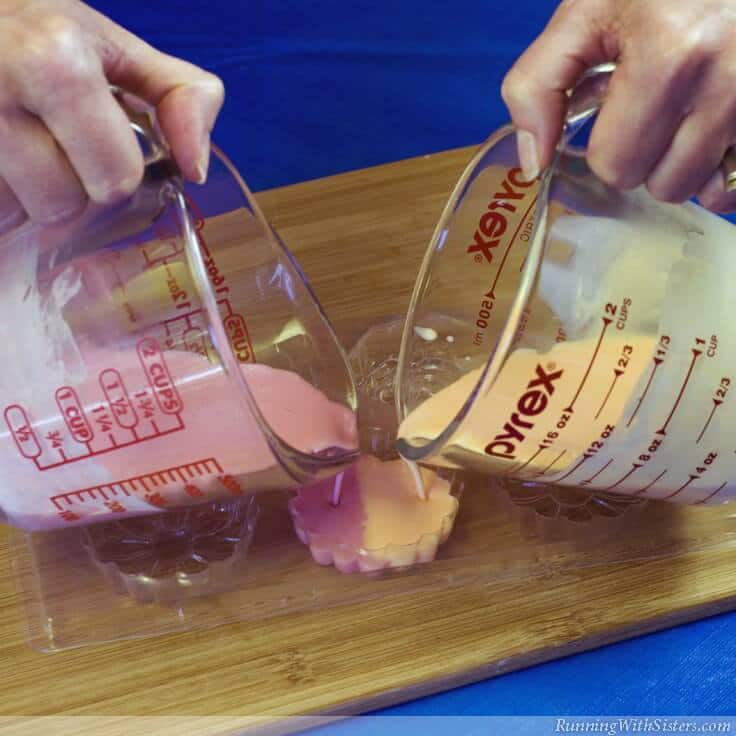
5. Pour into soap molds. Slowly pour both colors into one of the molds at the same time. Set down your Pyrex cups and use a chopstick to gently swirl the colors. If bubbles appear on the surface, spritz with rubbing alcohol. It magically pops the bubbles!
Here’s a video we made of the whole project. Watch to see how we poured and swirled the colors!
Repeat to fill each mold. Reheat the soap colors if they are starting to cool in the measuring cups. Let the mold sit on a level surface to cool for about 45 minutes.
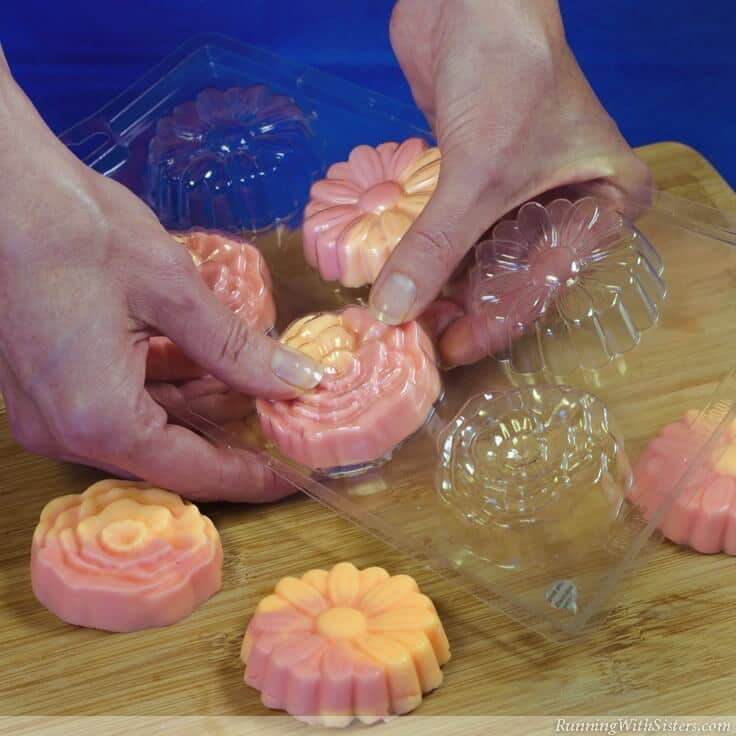
6. Unmold the soaps. Once the soap has set, turn the mold over and gently unmold the soaps. If any of the soaps are sticking, place the mold in the freezer for a minute or two and try again. They should slide right out.
We made our soap dish by turning an espresso cup upside down and gluing the saucer on top using E6000. Isn’t that a cute way to elevate your soaps?!
If you’d like to share this idea, you can pin this photo:
We love soap making and we bet you will too once you try it! Have you already been making your own soaps? Do you have any tips and tricks to share with us? We’d love to hear about your spa crafts! Just leave us a note in the comments below.
Happy Crafting,
Jennifer & Kitty
Want to see more of our projects? Here are a few soap tutorials from our blog:
More DIY Gift Ideas
DIY soaps make some of the best gift ideas. They are perfect for holidays, birthdays, and teacher appreciation or even hostess gifts. Here are some DIY gift ideas you can try next.
- Handmade Soap Chains
- Lemonade Scented Sugar Scrub
- Homemade Lip Sugar Scrub
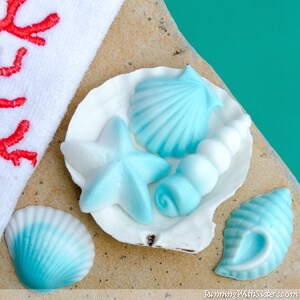
- How To Make Beautiful Seashell Goat’s Milk Soap
Originally published September 2015. Updated September 2018.
I love these soaps! Thanks for sharing!
Glad you liked them Pam! They’re really fun to make.