Scrapbook Paper Winter Wreath Craft
THIS POST MAY CONTAIN AFFILIATE LINKS. PLEASE SEE OUR FULL DISCLOSURE POLICY FOR DETAILS.
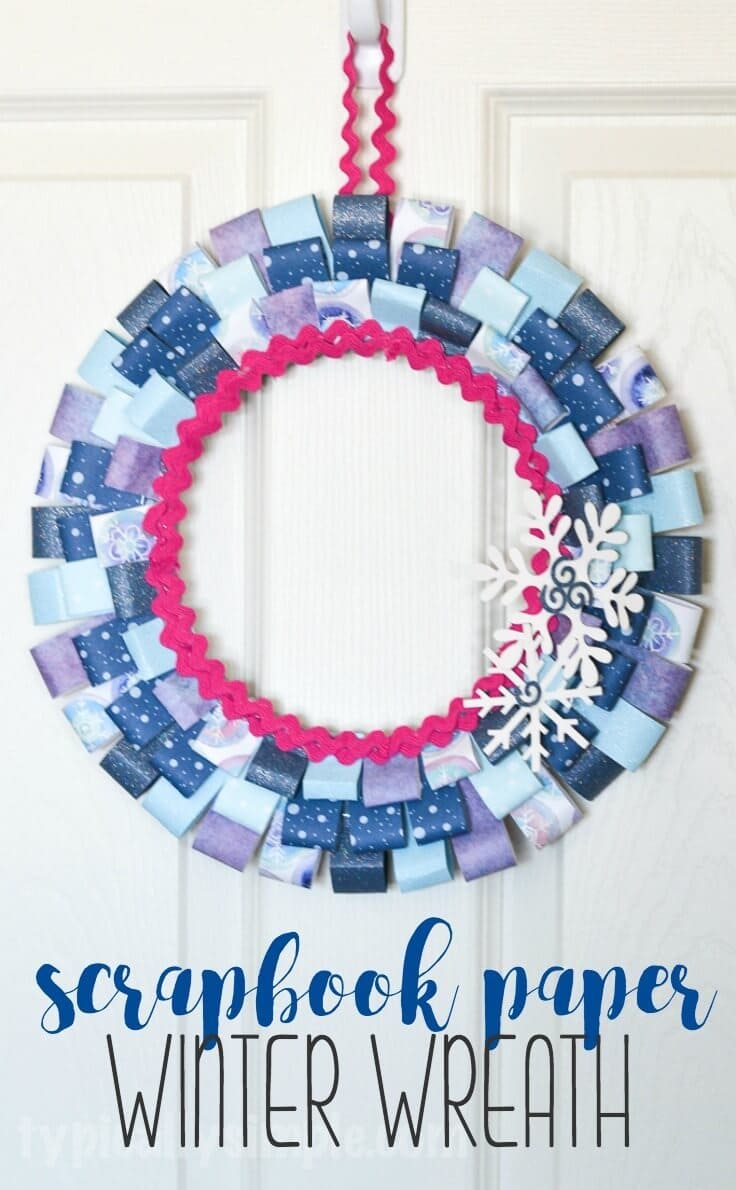
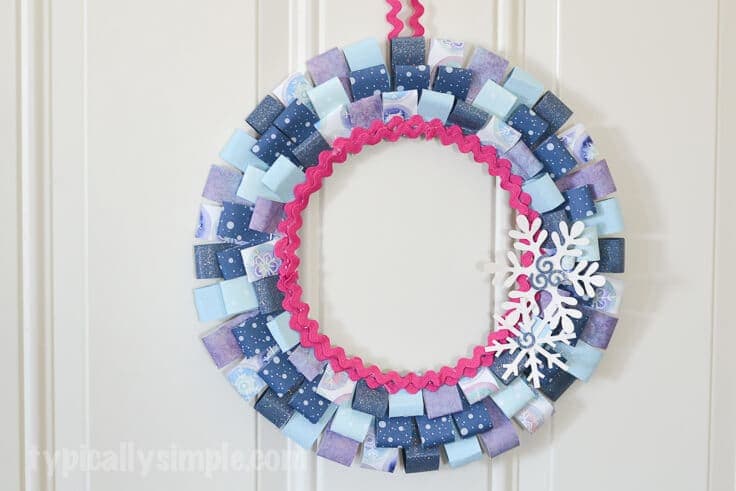
With just a few basic craft supplies and some paper from your scrapbooking stash, make this scrapbook paper winter wreath to decorate your home!
Hi there, Kenarry readers! It’s Kelly from Typically Simple and I’m back with a simple craft project that is perfect to make on a cold, winter day. Or if you are one of the lucky ones that lives in warmer climates…this project is a fun way to bring a little snow into your home!
Now that Christmas is over and I’m packing up all of the decorations, I never know what to decorate with for the next few weeks until I pull out my Valentine’s Day stuff. So I thought it would be fun to make a snow-themed wreath to hang on the door in our kitchen.
Many (many) years ago, when I had a lot more time on my hands, I was an avid scrapbooker. Well these days, I’m lucky to even get my photos printed; but I still have tons of scrapbooking supplies in my craft room…especially paper! I decided it was time to start going through my stash and using up some of the fun, printed papers on craft projects, like this scrapbook paper winter wreath!

Get our e-book The Ultimate Guide to Making a Burlap Wreath plus a special limited time offer for 25% off Kenarry burlap ribbon when you subscribe to be an Idea Insider. It’s totally FREE!
Your privacy is important to us. We promise not to spam you or share your information. You can opt-out at any time. See our privacy policy for more information.
Disclosure: This blog post contains affiliate links for products or services we think you’ll like. This means if you make a purchase from one of these links, Ideas for the Home by Kenarry® will make a small commission at no additional cost to you so we can keep the great ideas for the home coming your way. All opinions expressed are derived from personal experience.
How to Make a Scrapbook Paper Winter Wreath
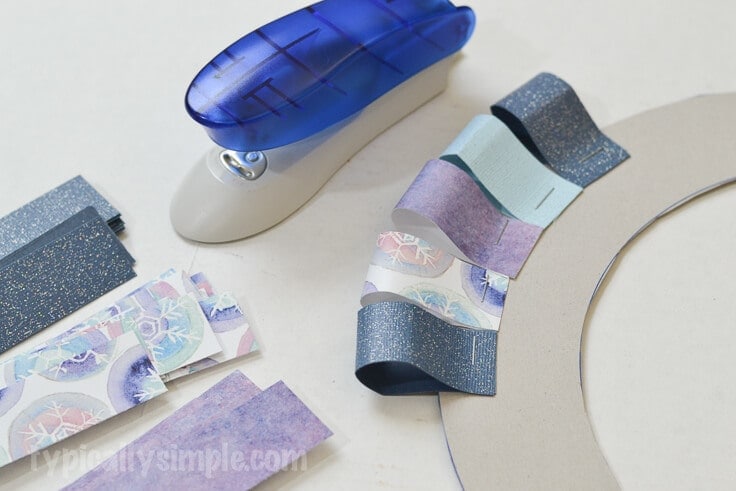
Supplies
- 4-5 sheets of scrapbook paper
- chipboard or cardboard
- scissors
- paper trimmer
- stapler & extra staples
- ric rac or ribbon
- embellishments (optional)
- hot glue gun

Directions
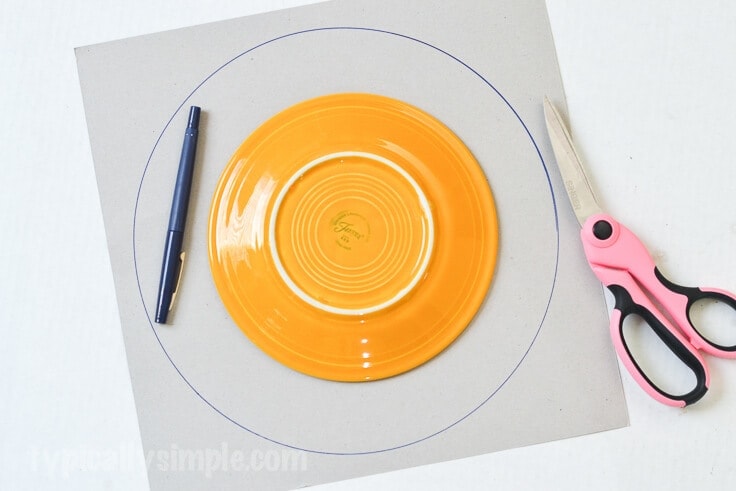
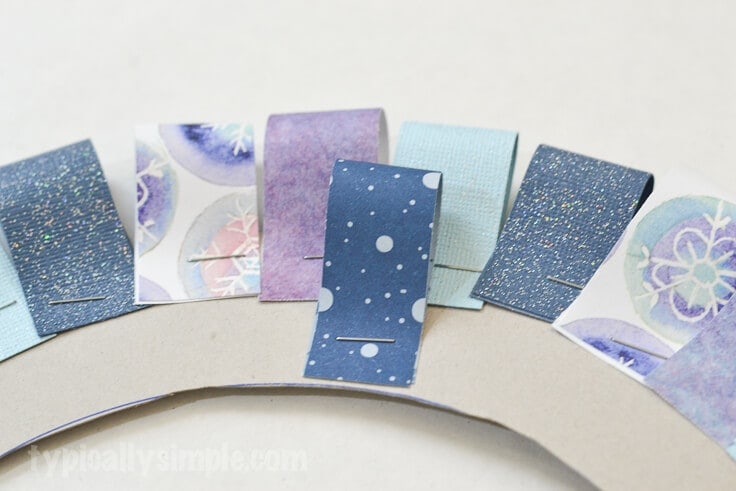
Start by drawing a circle on the chipboard, then an inner circle to make the wreath base and cut out. I like to trace a dinner and a salad plate to make drawing the circles a little easier.
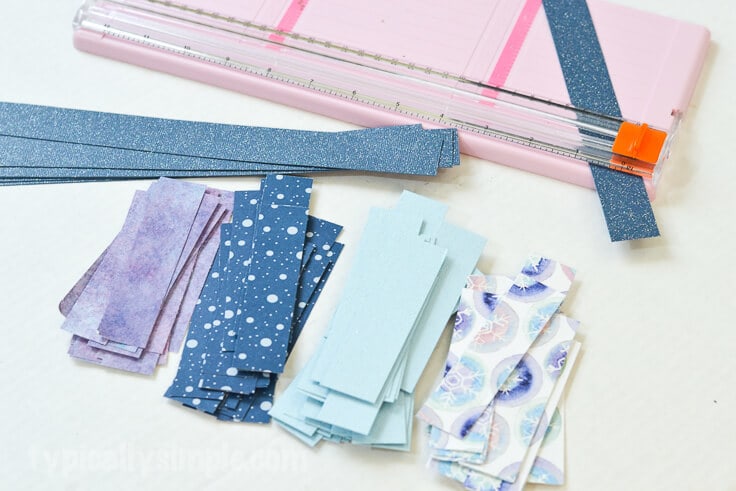
Next start trimming your scrapbook paper into 1×4 inch strips. I ended up needing about 85 strips to make a wreath that was 12 inches in diameter. You may need a little more or less depending on how larger or small you make your wreath.
After deciding on the pattern order of your papers, loop one strip of paper in half (making sure not to crease it in the middle) and staple it to the wreath base. Continue this process all the way around the wreath to make the first row of paper loops. I did find the thinner, printed scrapbook paper worked a lot better for this project. The heavier card stock tended to crease a little too much.
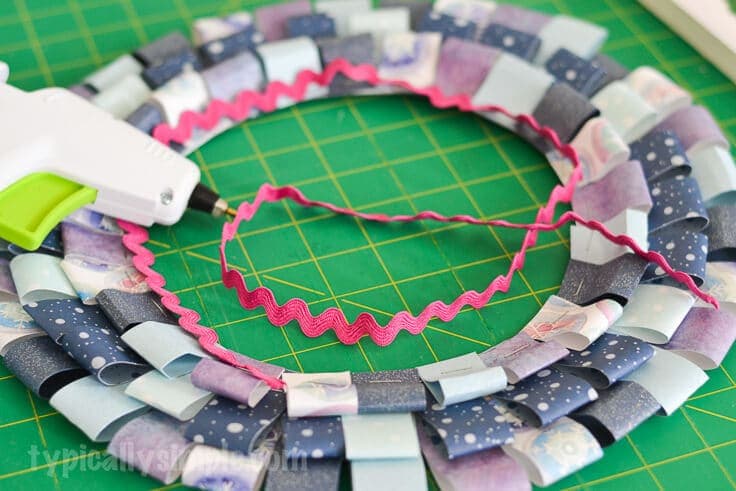
Now you will want to start your second row of loops. I decided to use a different pattern altogether for this row, but the best thing about this project is that you can make it look however you want! Starting between two pieces of the first row, staple a loop and work all the way around again.
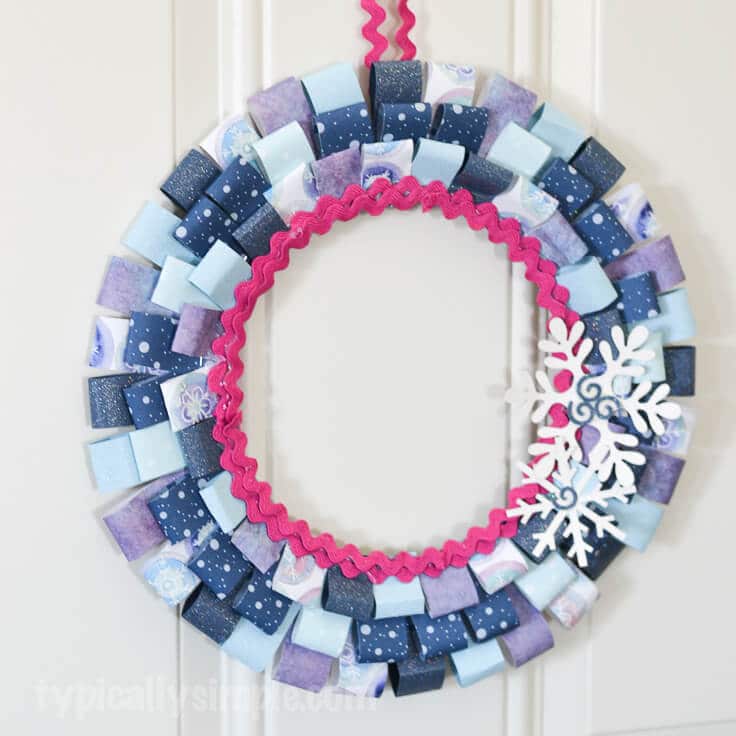
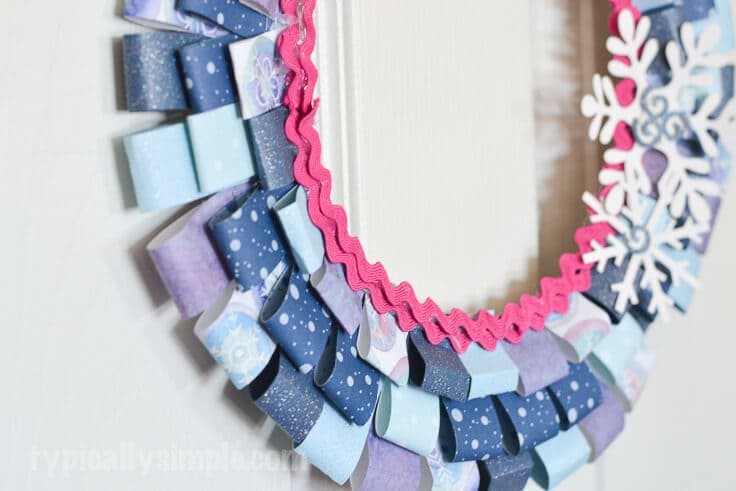
And finally, make a third row using the same looping, stapling process as the first two rows. After I was all done attaching the papers, I decided I wanted to finish the wreath off a little bit, especially to cover up the staples of the final row. So I hot glued some ric rac around the inside of the wreath. You could also use ribbon or felt.
And I also decided to embellish the wreath a little more with some paper snowflakes. You could also add a little banner across the middle or even a bow at the top. There are lots of options for giving this wreath some of your own style!
All in all, this scrapbook paper winter wreath took about an hour to work on from start to finish. It would make such a fun craft project for a Pinterest party or girls’ craft night. With all the beautiful scrapbook paper available at the craft stores, you can make a wreath that matches your decor or any holiday or season! Also, check out how to make a faux mosaic with some of your left over scrapbook paper.
Looking for more simple project ideas? Be sure to check out these fun wreaths and door hangings!
Love the ideas you see here on Ideas for the Home by Kenarry®? Subscribe today to get our weekly Ideas in Your Inbox newsletter plus other exclusive gifts and offers — all for FREE!
While you’re here, be sure to check out other craft projects on Ideas for the Home by Kenarry® –

We always look for paper projects and this is such a great one! It’s also a great way to use leftover scrapbook paper. Thank you for sharing!
Brigitte, so glad you like the project. It’s a great way to use all of those fun leftover papers. Enjoy!