Winter Yarn Wreath: An Easy Craft Idea
THIS POST MAY CONTAIN AFFILIATE LINKS. PLEASE SEE OUR FULL DISCLOSURE POLICY FOR DETAILS.
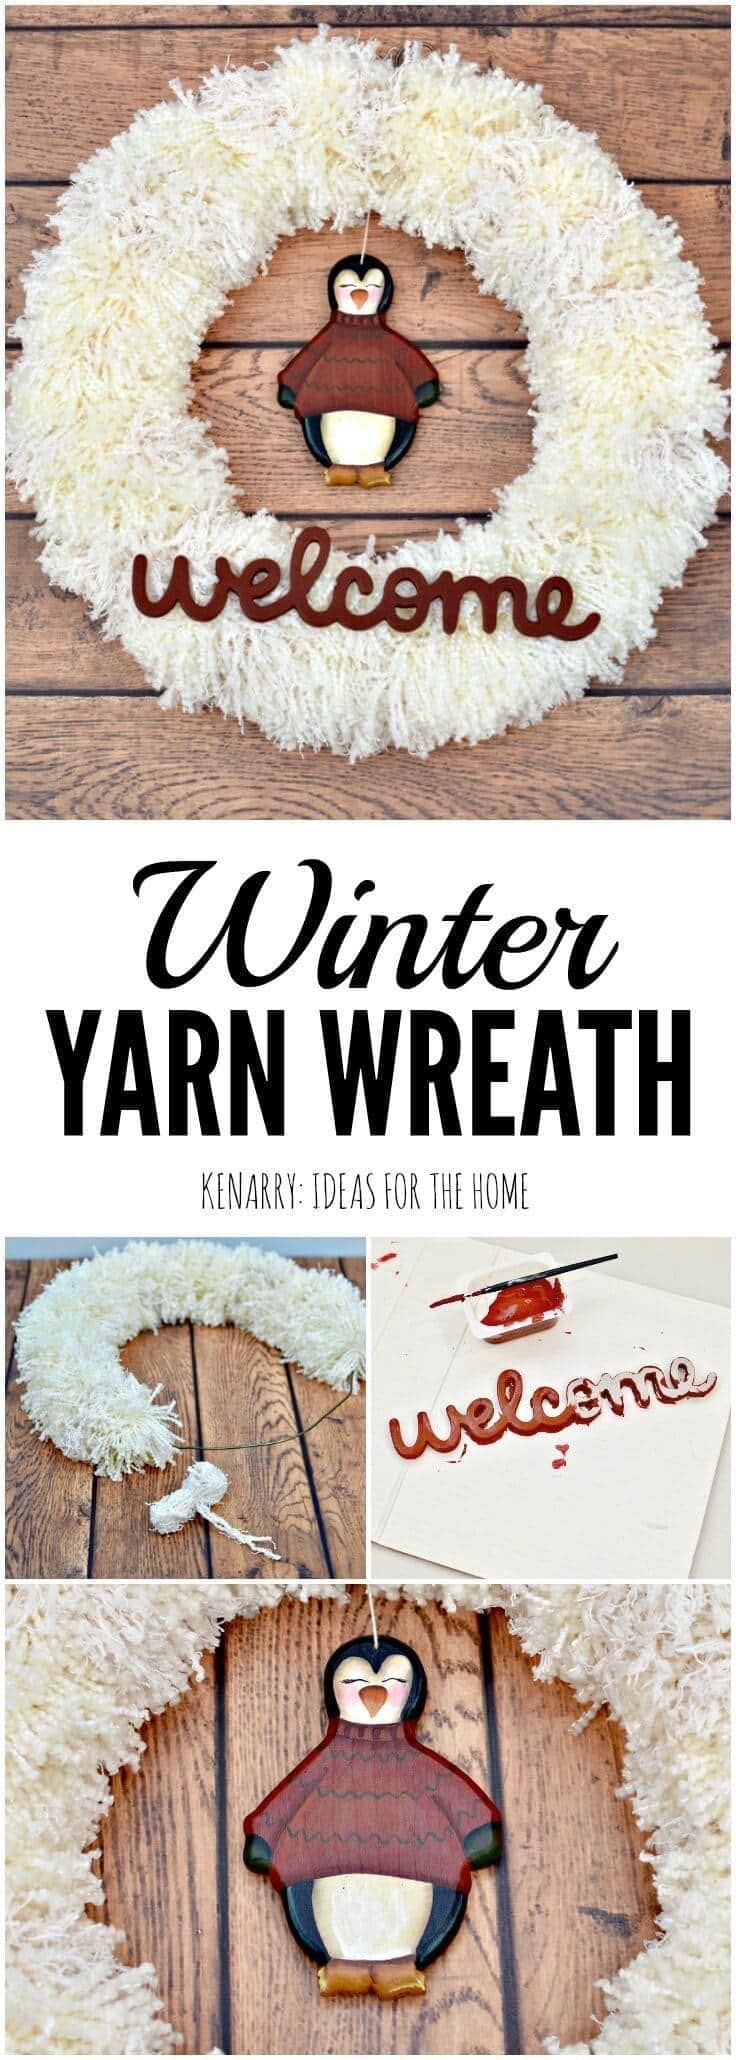
An easy Winter Yarn Wreath will add warmth and texture to your home decor this season. It’s a beautiful craft to make for Christmas or to display all winter long.
Looking for a new wreath idea for your home this winter? Today I’ll show you how to make an easy winter yarn wreath to display for Christmas or the entire winter season.

It’s no secret that I love penguins. They are my most favorite animal. During the holidays, I have them on our mantel, on our Christmas tree and throughout our home. I like to leave a few penguins up after Christmas is over and needed a new winter wreath to hang by our front door in January and February. I thought a fuzzy wreath made of yarn would be perfect to create for the winter months – and of course, it needed to have a penguin hanging on it!


Get our e-book The Ultimate Guide to Making a Burlap Wreath plus a special limited time offer for 25% off Kenarry burlap ribbon when you subscribe to be an Idea Insider. It’s totally FREE!
Your privacy is important to us. We promise not to spam you or share your information. You can opt-out at any time. See our privacy policy for more information.
How to Make a Winter Yarn Wreath
Disclosure: This blog post contains affiliate links for products or services we think you’ll like. This means if you make a purchase from one of these links, Ideas for the Home by Kenarry® will make a small commission at no additional cost to you so we can keep the great ideas for the home coming your way. All opinions expressed are derived from personal experience.
A Winter Yarn Wreath is an easy craft to make. You’ll love how fuzzy and cozy it is as DIY home decor for Christmas or winter.
What You Need:
- Wire coat hanger
- Natural, ivory or cream colored yarn (I used 6 oz weight of the Bernat Baby Coordinates in “natural” that I had leftover from a project. They don’t seem to make that exact color anymore, so you could try it in “white” instead.)
- Super bulky cream colored yarn (I used 3 oz weight of coconut colored yarn from Coats and Clark, which I bought on clearance many years ago. I can’t find it online, but this Red Heart Scrubby Yarn looks really similar.)
- 4″ piece of cardboard
- “Welcome” chipboard sign
- Red craft paint
- Black craft paint
- White twine or string
- Mini hot glue gun
- Mini hot glue sticks
- Penguin ornament (or anything else you want to hang from the center of your Winter Yarn Wreath!)
Instructions:
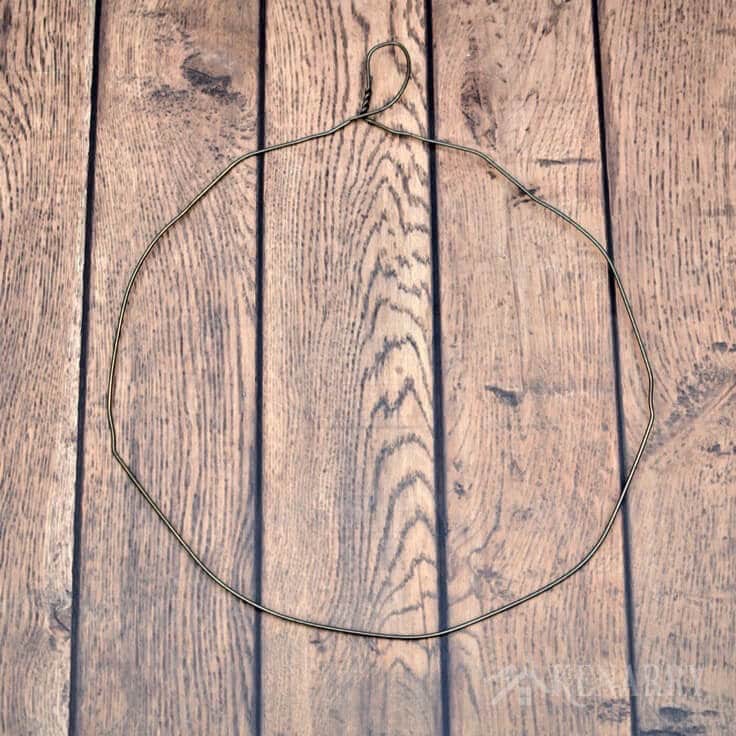
Step 1: Prepare the Base for the Winter Yarn Wreath
Using your hands, bend a wire coat hanger into the shape of a large circle. Don’t worry about getting it perfect. You’ll be covering the entire wire frame with yarn shortly. You can also turn the hook part at the top of the hanger into a loop to use for displaying the Winter Yarn Wreath on your wall.
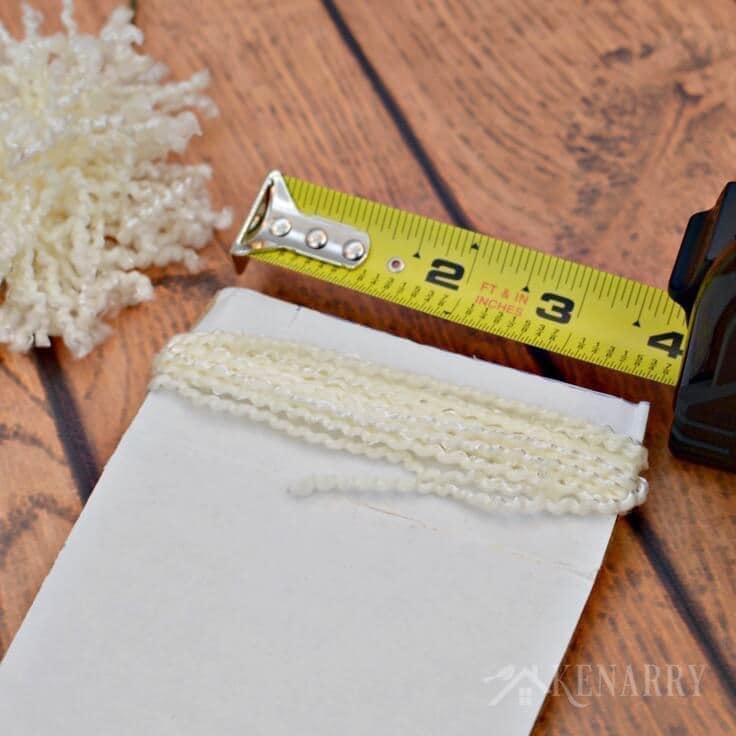
Step 2: Create Yarn Tassels
Cut a piece of cardboard so it’s about 4 inches wide. Wrap your yarn around the cardboard 20 times.
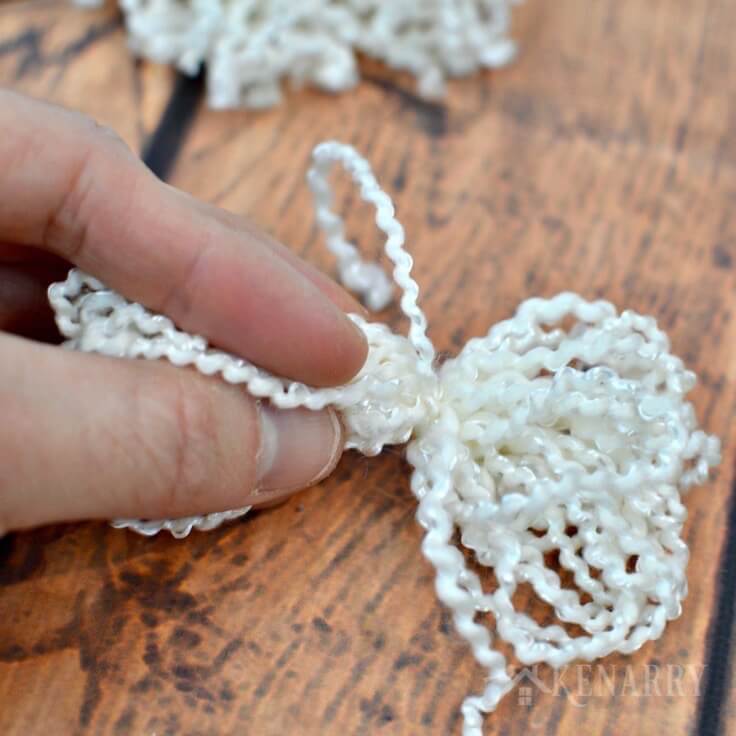
Carefully slide the yarn off the cardboard and tie it firmly around the middle with an 8-9″ piece of yarn.
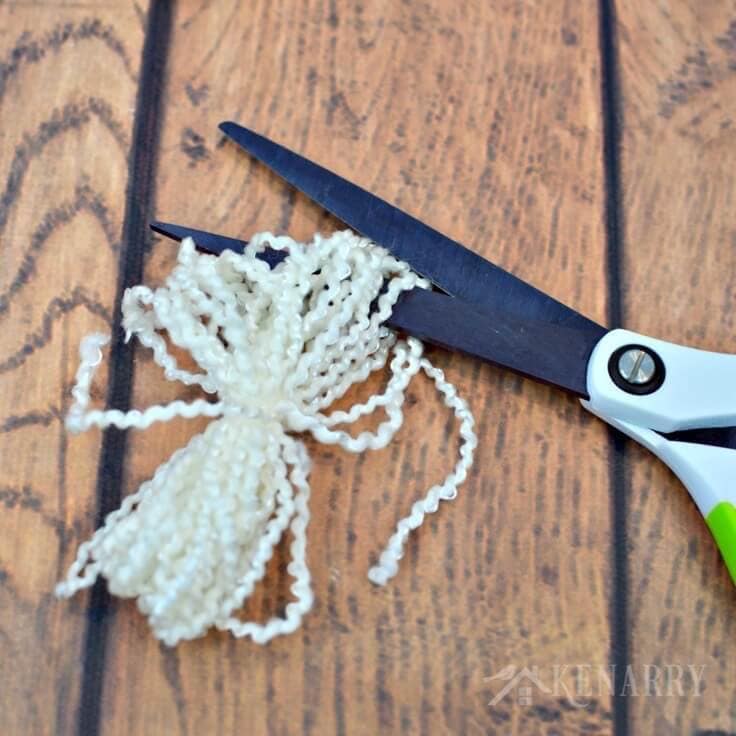
Slide one end of your scissors through the loops and cut to create tassels. Do this on both sides.
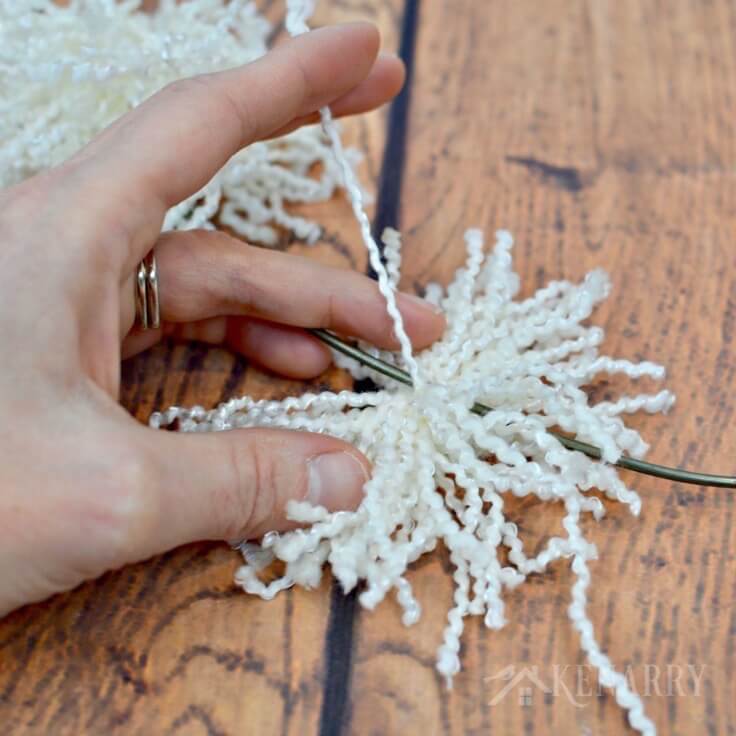
Step 3: Tie the Tassel to the Wire Frame
Use the 8-9″ piece of yarn that you tied around the center of the tassel to tie the tassel to the wire hanger frame. Double knot it to hold the tassel firmly to the wreath frame. Then trim the ends of that piece of yarn so it blends with the rest of the yarn in the tassel.
Step 4: Make and Attach Additional Tassels
Repeat steps 2 and 3 over and over again to fill the wire frame. You’ll see in the photos I used two different types of cream colored yarn to vary the texture of my Winter Yarn Wreath.
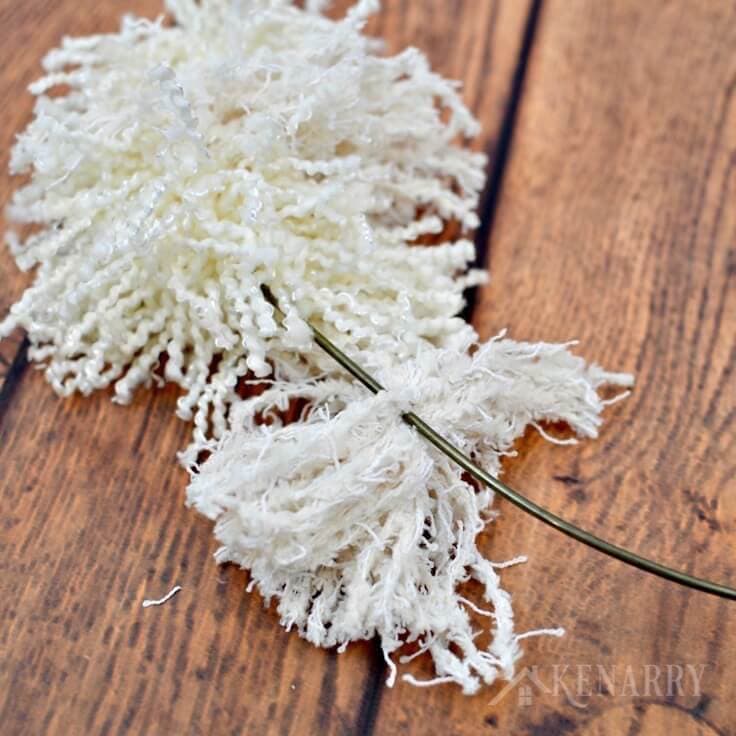
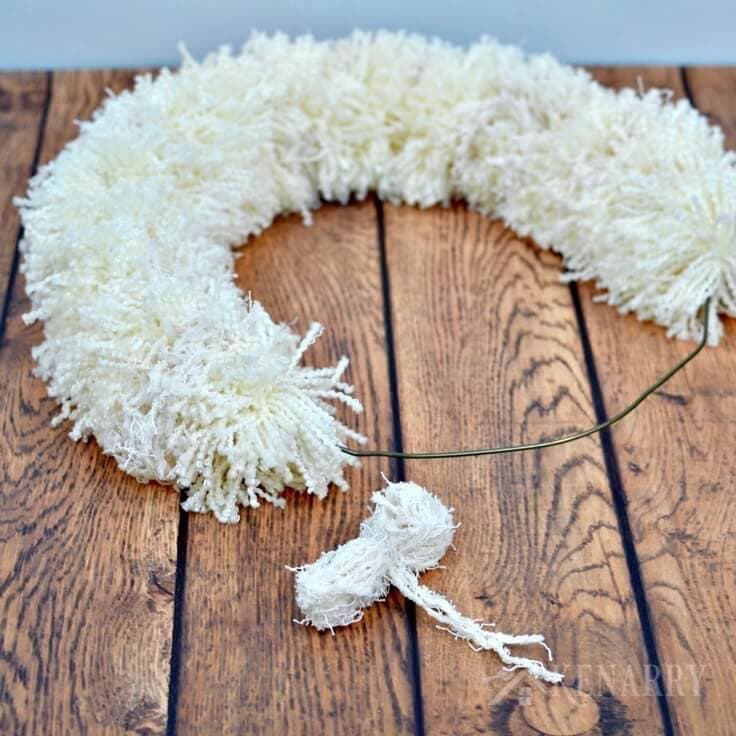
As you add each new tassel to the wire frame, slide all of the tassels together to give the Winter Yarn Wreath a fuller appearance. Keep adding tassels until the wire hanger is completely covered.
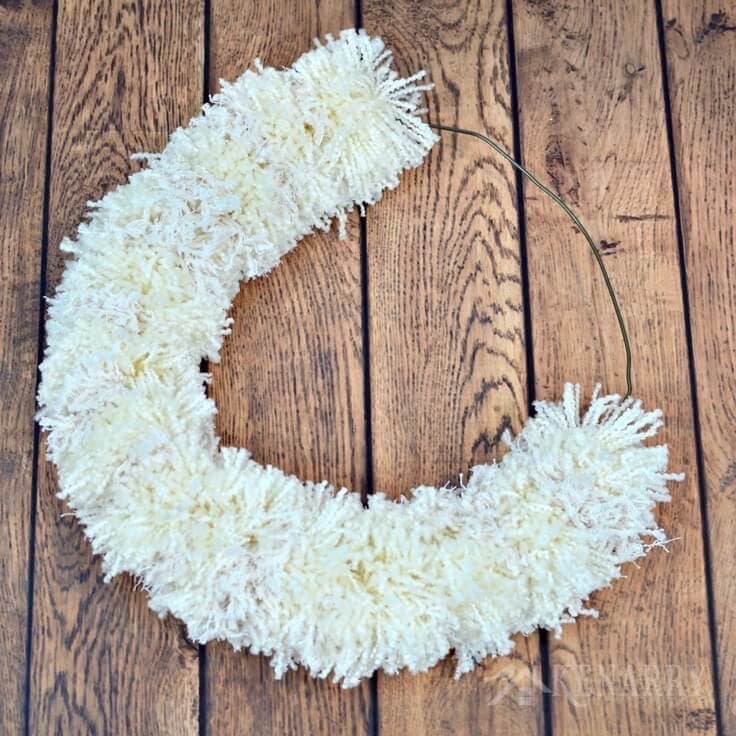
I actually found it easiest to mass produce the tassels in batches while I was watching TV rather than to create and attach one tassel at a time. I’d start by creating 20-30 tassels. Next I’d cut the loops on all the tassels in the batch. Then I would tie the entire batch of tassels to the wire frame. After that, I’d go back to the beginning and create another batch of 20-30 tassels. It can feel time consuming, but it was really easy to do while watching a good movie or television show. I love that kind of mindless crafting sometimes, don’t you?
Step 5: Create a Small Sign
I wanted to hang this Winter Yarn Wreath inside my front door so I found a chipboard “Welcome” sign at a local craft store. Next I mixed bright red and a little bit of black craft paint to create a rustic red color. The rustic red coordinates with our Winter Mantel Decor that’s just across the room.

I had to put several coats of rustic red paint on the “welcome” sign before it was completely covered. With all the nooks and crannies in the scroll-y type font, I kept missing small spots. The chipboard also absorbs a lot of the paint so it took a few coats just to get the color even.

Next, I used a mini hot glue gun to attach white string or baker’s twine to the back of the chipboard welcome sign. You’ll notice I put a small knot in the string. I wanted to give the string a little more bulk or substance so the glue would have more to hold on to.

Once the hot glue was dry, I used the string to attach the “welcome” sign to the bottom of the Winter Yarn Wreath. The string blends in with all the yarn so you don’t even see it.

Step 6: Add Any Other Embellishments
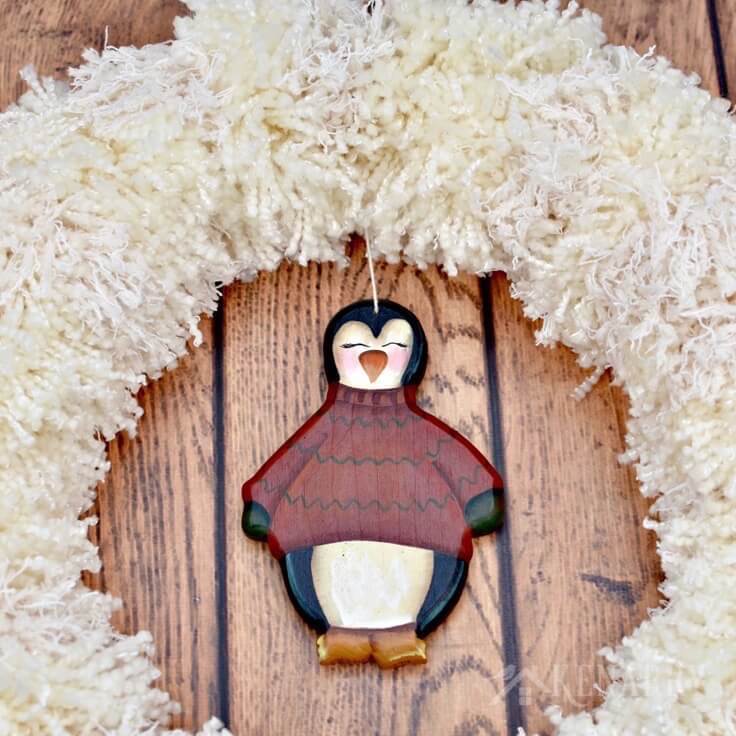
The holidays and winter months are known as “penguin season” at my house. So it was only fitting that I attached a penguin to hang in the center of the Winter Yarn Wreath. I’ve had this cute painted penguin ornament for years and just stole him out of my Christmas tree decorations when I was making this Winter Yarn Wreath. In fact, you can even see this penguin ornament in one of the pictures on our post about 8 Ideas for Child-Friendly Christmas Tree Decorating. It was a perfect ornament to have on the tree when the boys were babies since it’s made of wood and unbreakable.
Step 7: Hang Your Winter Yarn Wreath
You’re all done! Once you’ve embellished your Winter Yarn Wreath as much as you’d like, you’re ready to hang it on your wall. Remember how I turned the wire hanger hook into a little loop in the first step? Well, I ended up bending it upside down so that it hid behind the yarn better. Now you don’t even see it.

Once the holidays are over, I’ll hang the Winter Yarn Wreath above the coat rack near our front door after I take down our Scrap Fabric Wreath made with old Christmas pajama pants. Where will you hang your Winter Yarn Wreath? Snap a picture and tag us @kenarryideas when you post it on Instagram so we can see how yours turned out!
While you’re here be sure to check out other winter ideas on Ideas for the Home by Kenarry® –
If you enjoyed this Winter Yarn Wreath, please share it with your friends or pin it for later:


Fabulous, just love it and the way you covered the wire with tassels not pom poms, so much easier! thanks for sharing on craft schooling Sunday!
I really liked how the tassels gave the wreath a more “fuzzy” look that pom poms would have! Thanks for swinging by today.
What a cute welcome! Thanks for sharing your idea with us at Over the Moon Link Up.
Thanks for visiting us, Sue! We’re so glad you stopped by!
So simple but very sweet!
Thanks, Michele!
So cute! I didn’t realize you made pom poms! Easy! Thanks for sharing at Dishing It & Digging It! Looking forward to seeing more of your creativity!
Thanks, Lori! These are actually a little more like tassels than full pom poms. I think you could do the same thing with pom poms, but it would give it a slightly different look.
Who wouldn’t feel welcome when they see such a cute wreath. Thanks for sharing at Funtastic Friday.
Thanks, Kimm! That’s what we were going for!
Your winter yarn wreath is great! I love the penguin, too! This was the Most Clicked post from our last Snickerdoodle Party. All of the co-hosts will be featuring it at tomorrow’s party. Thanks for sharing with us!
Oh WOW! I am incredibly honored, Beverly. It’s so exciting that it was the most clicked idea at your awesome party. Thank you so much for letting me know.
love these perfect past time craft for winter when there is a lot that can not be done
Thanks, Angie! It’s definitely a fun craft to occupy a long winter’s day.
What a clever way to make a wreath!!! I need to save this for this coming year…or make a Valentines Day Wreath =) Mmmm. Haha. Love your post. #TurnItUpTuesdays
This would be very pretty as a Valentine’s Day wreath, Selena! I actually thought about hanging a heart from the center instead of the penguin.
What a fun Winter wreath! I just love yarn wreaths. Found you at the Funky Polkadot Giraffe link up.
Alexandra of EyeLoveKnots
Me too, Alexandra! Don’t they look so warm and cozy for winter time. So glad you found us!
Oh Tina! You totally made my day. I’m thrilled you liked our Winter Yarn Wreath and chose to feature it this week. Thank you! Thank you!