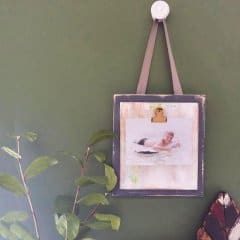
DIY Wood Clip Frame
These DIY Wood Clip Frames are a great alternative to standard – and often expensive – picture frames. Plus they’re super easy to make!
Servings 2 frames
Cost $15
Equipment
- Hand saw
- Wood glue
- Tack nails
- Loctite Super Glue Liquid
- Minwax water-based polyurethane
- Electric sander
Ingredients
- 1 common board 1-inch thick cut 10 inches by 11 inches
- 1 plywood 1/4-inch plywood cut 8.5 inches by 9.5 inches
- 2 mini bulldog clips
Instructions
- First, cut your pieces of wood to the size you want. Since I wanted mine to hold 5″ x 7″ photos, I cut my common board wood to be 10″ x 11″ and my plywood to be 8-1/2″ x 9-1/2.”
- Next, I used my electric sander to sand the boards and give the edges a rounded, more worn look.
- Paint or stain your wood pieces. I used 2 coats of acrylic paint on each. The larger board was painted Behr Antique Tin and the plywood was painted Behr White. Since I wanted an aged look, I added some additional, random paint colors to the top board.
- Once the paint dried, sand the pieces again to distress the wood.
- Attach the plywood to the wood backing. Use wood glue on the back of the plywood and add a nail to each corner.
- Let the glue dry. Paint a coat of polyeuthraine on the entire piece and let dry.
- Add your clips to the frames.
- Hang up the frames!