How to Make a Bird Feeder from a 2-Liter Plastic Bottle
Recycle, repurpose, or reusea 2-liter plastic bottles to make these one-of-a-kind (and kid friendly) DIYBird Feeders from a 2-Liter Plastic Bottle.
Servings 1 bird feeder
Cost $2
Equipment
- 1 Pair of scissors
- 1 Permanent Marker
- 3 paint brushes
- 1 drill & drill bit
- 1 glue gun
- 1 Funnel
- 1 Empty 2-Liter Bottle
Ingredients
- dish soap
- outdoor paints
- glue sticks
- rope or twine
- bamboo skewer
- bird seed
Instructions
Step One: Clean and Gather
- Before you begin making your bird feeder, you'll want to remove the label from your 2-liter bottle. You'll also need to wash the bottle with dish soap and warm water. Then rinse and allow to completely dry before proceeding.
Step Two: Cut the Bottle
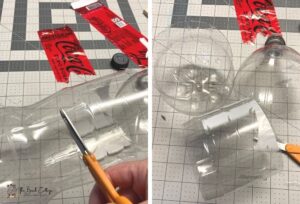
- Once your bottle is clean and dry, you will cut it into two pieces. To do so, carefully poke a pointed end of your scissors into the side of the bottle about 2/3 of the way up from the bottom. Cut around the perimeter of the bottle, cutting it literally in half. My top piece measured about 5" in height.
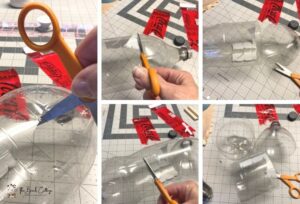
- Then depending on how tall you want your feeder to be, cut off about 3" along the top edge of the bottom piece of the bottle. This will allow for the top to slide over the bottom a little easier. My bottom piece measured about 4" in height.
- Next you will mark and cut the feeding hole in the bottom section of the bottle. Take the bottle cap and hold it on the side of the bottle. Trace around the cap. Insert the tip of the scissors in the center of the drawn circle. Cut out the circle.
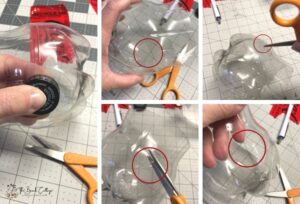
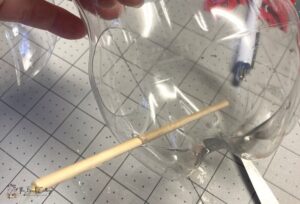
- You'll also cut a hole for the perch (bamboo skewer). Again, use the tip of the scissors to puncture a small hole that's just big enough to insert the skewer into.
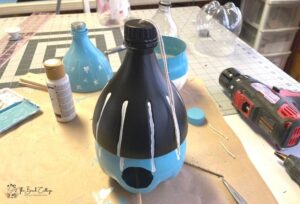
Step Three: Paint the Bottle
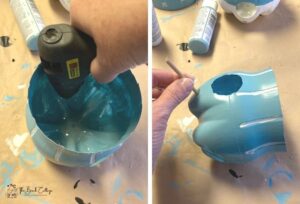
- Using outdoor paint that is designed for use with plastic will help ensure your project stands up to the weather. With the paint colors of your choice, paint a thin layer of paint on the outside of both pieces of the bottle and the bottle cap.
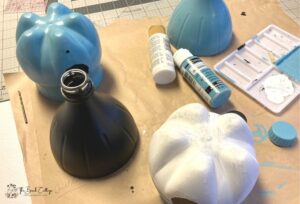
- Allow the paint to dry completely and apply a second coat. Repeat as necessary to completely cover. You only need to paint the outside of the bottle pieces and the outside of the bottle cap.
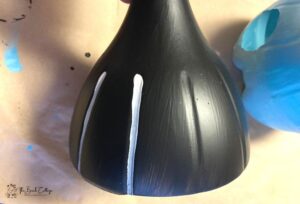
- Then you can decorate the bird feeder by painting on flowers, lady bugs, geometrical shapes, polka dots, stripes, and more! (This is the perfect time to involve the kiddos!)
Step Four: Assemble the Bird Feeder
- Insert the perch into the small hole. Secure in place from the inside with hot glue.
- Run a bead of hot glue along the perimeter of the top edge of the bottom piece. Then insert the bottom piece into the top, carefully and quickly lining the pieces up and pressing the pieces together where they are glued.
- Drill a hole in the center of the bottle cap. You want the hole to be big enough to slide through two strands of twine.

- Once the hole is drilled, fold the twine in half and insert the loop from the inside of the cap. Tie a knot in the twine ends and secure with hot glue.

- You're now ready to fill the bird feeder. Using a funnel, add seed to the bird feeder from the spout. Secure the lid and hang your bird feeder!