How to Make a Deco Mesh Wreath
THIS POST MAY CONTAIN AFFILIATE LINKS. PLEASE SEE OUR FULL DISCLOSURE POLICY FOR DETAILS.
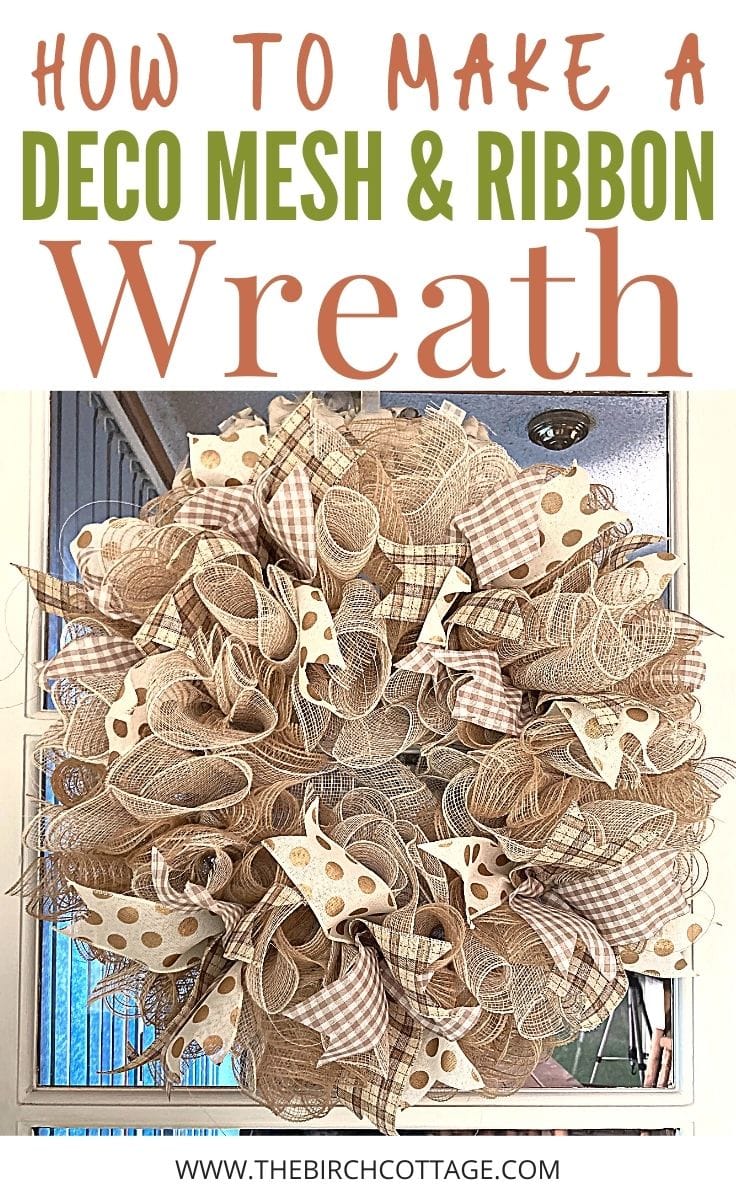
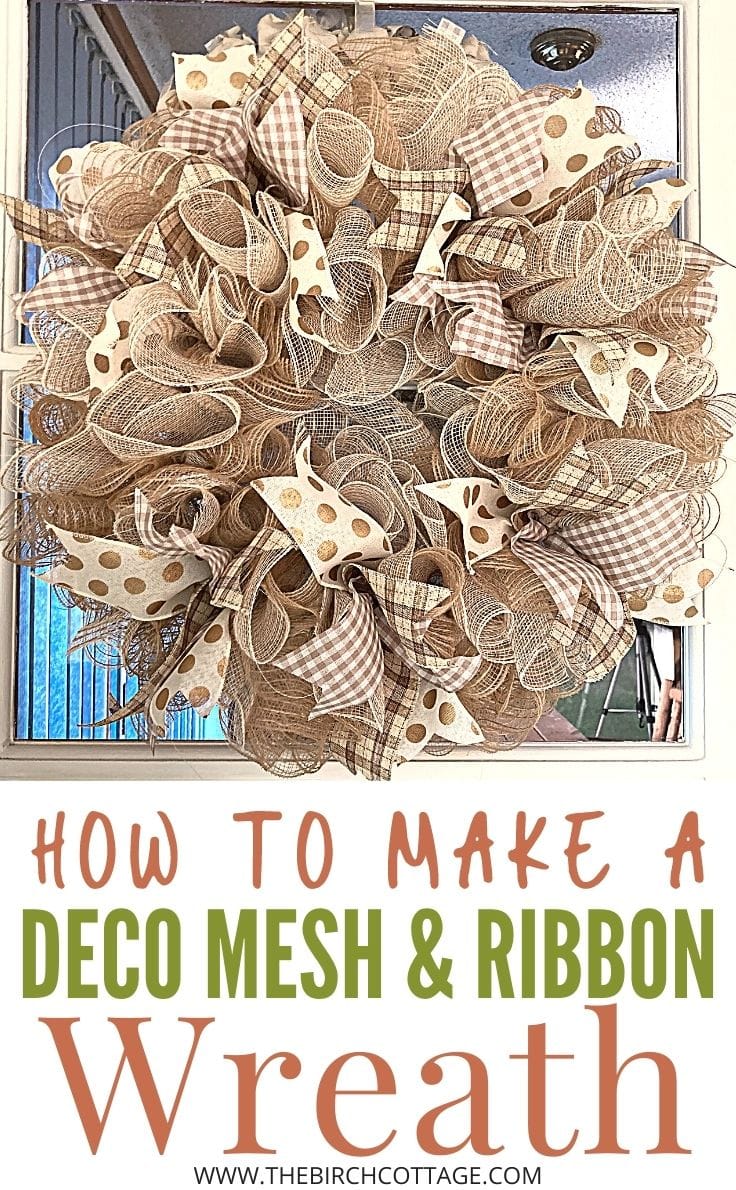
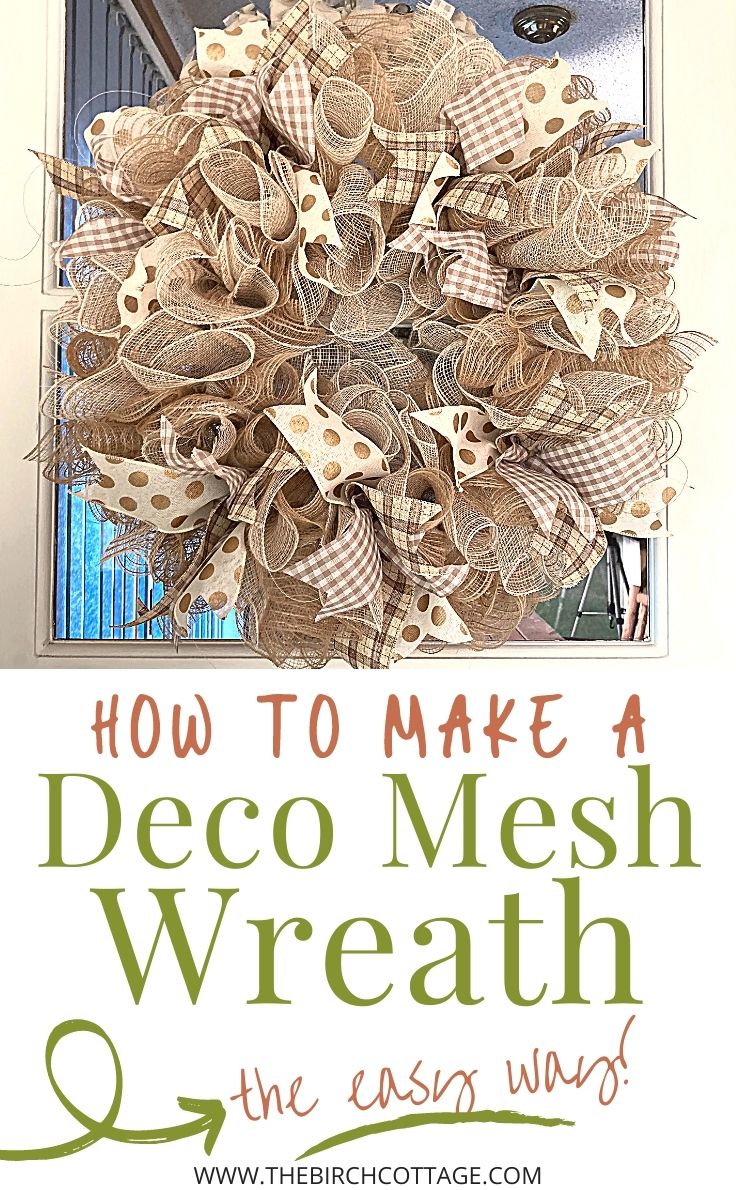
Deco Mesh Wreaths are easy and fun to make! Learn how to make an easy Deco Mesh Wreath using 10″ mesh and 3 spools of ribbon.
Hello, Kenarry readers! I’m Pam from The Birch Cottage, and I’m back again this month sharing with you How to Make a Deco Mesh Wreath. This craft project is easy, fun, and somewhat addictive!
Why is this project addictive? Well, once you make one wreath and see how truly easy it is to make and see all the many color options there are, you’ll want to make more! You can make Deco Mesh Wreaths for any season, holiday, to display your favorite sports team colors and more!
How to Make a Deco Mesh Wreath
Today I’d like to show you just how easy it is to make a deco mesh wreath. I have plenty of pictures and a video to help guide you through the process. For the purpose of this specific wreath tutorial, we’re going to use two rolls of deco mesh and 3 coordinating/contrasting rolls of 2-1/2″ ribbon.
You can actually use one color of mesh ribbon, two colors, or more. And as fas as the accent ribbon, again, I’m using three, but you can use all the same ribbon, two different, or three. Like I said, the options and possibilities are just about endless!
What you need:
Want more ideas like this? Subscribe today to get our weekly Ideas in Your Inbox newsletter plus other exclusive gifts and offers — all for FREE!
Craft Tools Needed:
Supplies Needed:
These are the ingredients you’ll need. All the exact amounts are in the printable card at the bottom of this post.
- 10″ Wide Deco Mesh Ribbon
- 2-1/2″ Wide Wire Edge Ribbon
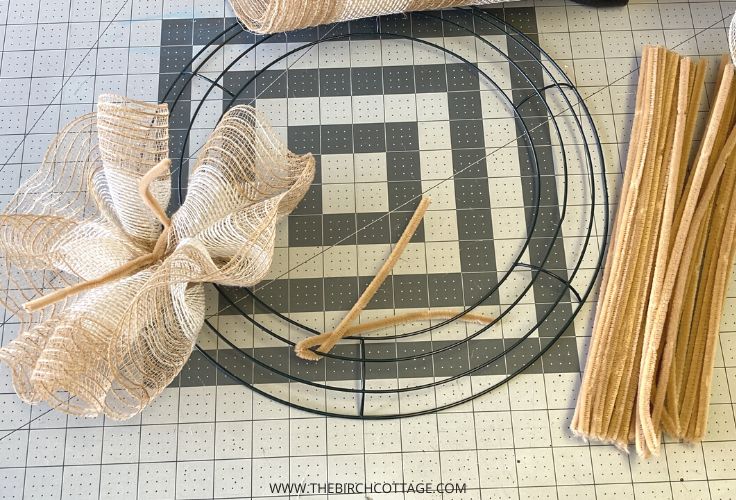
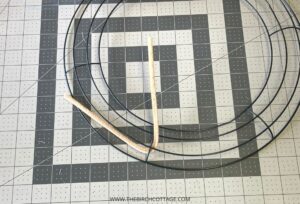
- 14″ wire wreath (bought mine from Dollar Tree!)
- Chenille Wire or Pipe Cleaners
- small zip ties
Deco Mesh Wreath Video Tutorial
If you learn best by watching, then you’re in luck! I created a video tutorial on How to Make a Deco Mesh Wreath. You can watch it below or visit my YouTube channel.
Deco Mesh Wreath Tips:
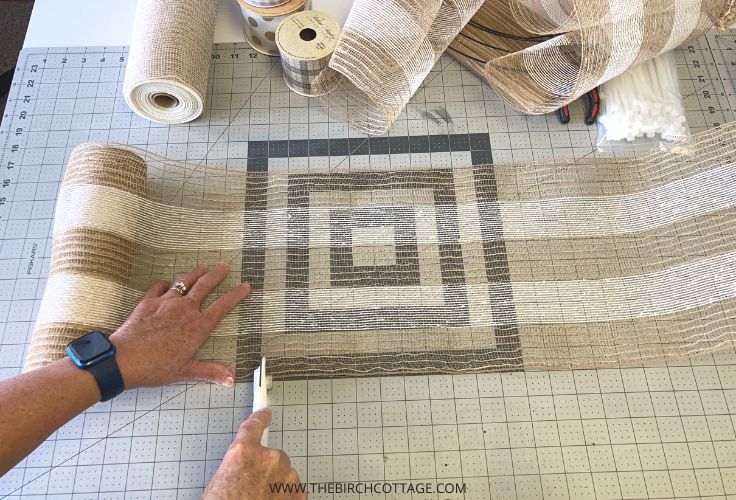
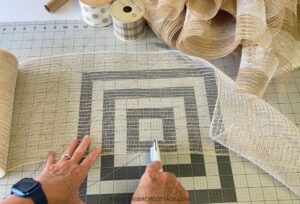
Cut Deco Mesh
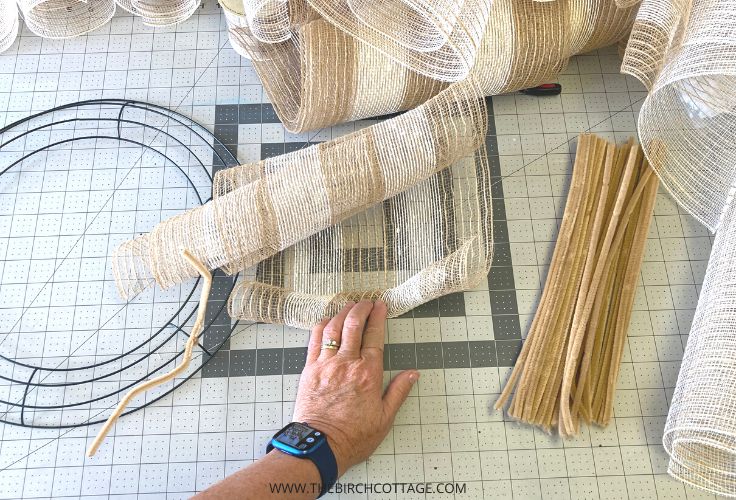
You are going to use all of the deco mesh ribbon from two rolls. So, go ahead and cut your deco mesh into 30″ strips. You can make the strips shorter or longer, if you wish. But 30″ is a pretty good length for a 14″ wire wreath.
If you are using a smaller wreath, you may want to cut your mesh a little shorter. If you’re using a larger wreath, you may need to purchase an additional roll of deco mesh. Just keep that in mind!
Cut Ribbon
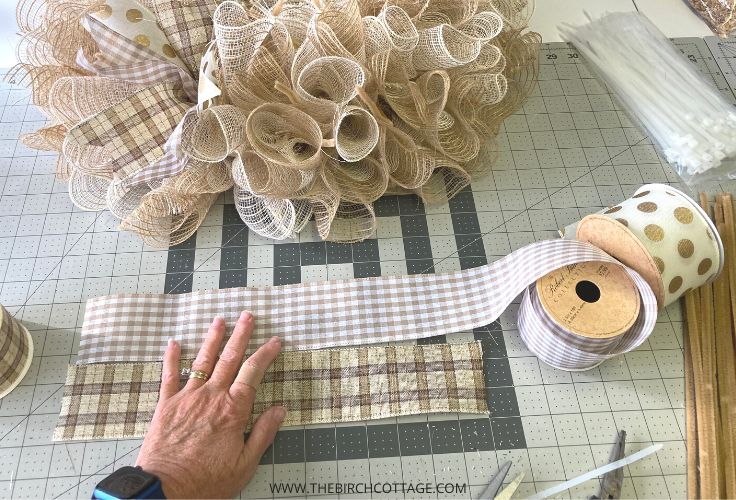
For my Deco Mesh wreath, I used 7 ribbon sections. Each section or ribbon cluster (not sure what to call them) contains three 14″ pieces of ribbon. So, I cut 7 strips of ribbon #1, 7 strips of ribbon #2, and 7 strips of ribbon #3 for a total of 21 strips of 2-1/2″ ribbon.
It’s helpful to go ahead and have your mesh and ribbon already cut to size. You’ll also want to cut or trim the corners of each ribbon. I like to cut a little “V” in the ends of each ribbon. You gather your three strips of ribbon together, fold in half lengthwise, and trim from the fold towards the edge about an inch or so down from the end of the ribbon. Repeat for the opposite ends.
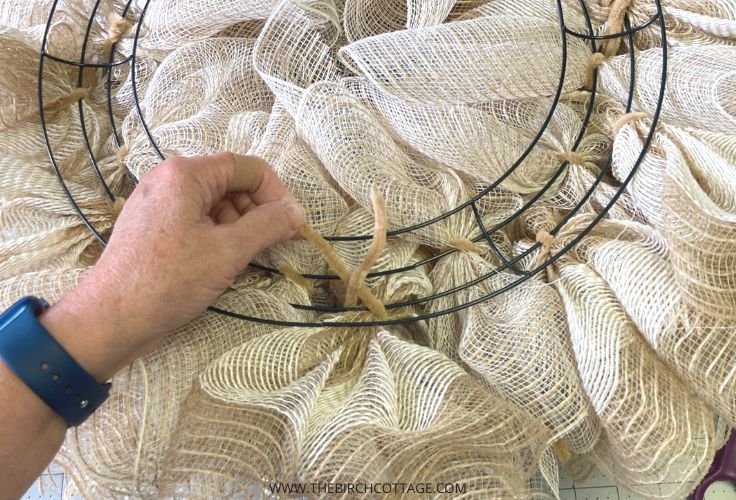
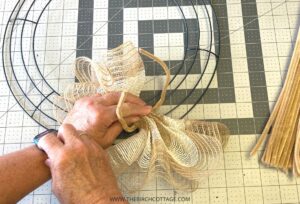
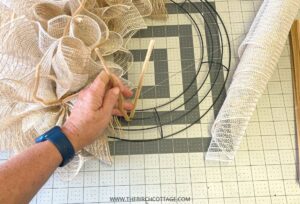
Attach Chenille to the Wire Wreath
You can either go ahead and attach for pieces of chenille wire (or pipe cleaner) to each section of the wire wreath, or attach the wire as you go. Honestly, I found it easier to attach the chenille as I went along because the chenille wires tended to get in the way.
Just remember to attach the next piece of chenille before you start gathering up the mesh to attach. I kept finding myself having to attach the chenille with one hand because I just didn’t get the process down right. But trust me, it’s easier if you put the chenille wire in place (alternate between rows 2 and 3) and then gather up your mesh. That way you’re all ready to attach the deco mesh to the wreath frame.

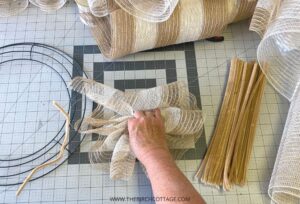
Gather Mesh
It is a little bit awkward at first, but once you get the hang of it, you’ll fly through gathering the strips of mesh. For the best results, roll one of the short ends up once or twice, as pictured below.
Then gather up the mesh with your fingers. Kind of like walking across the mesh with your finger tips and pulling the mesh towards your thumb.

Then hold the mesh in place with your thumb and fingers.
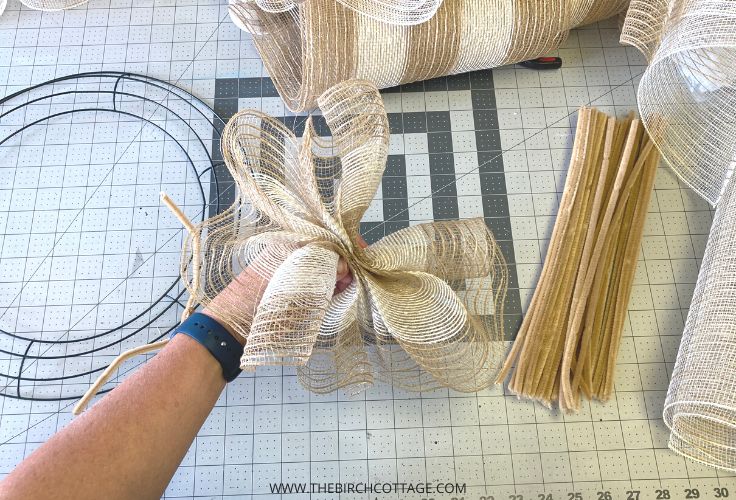
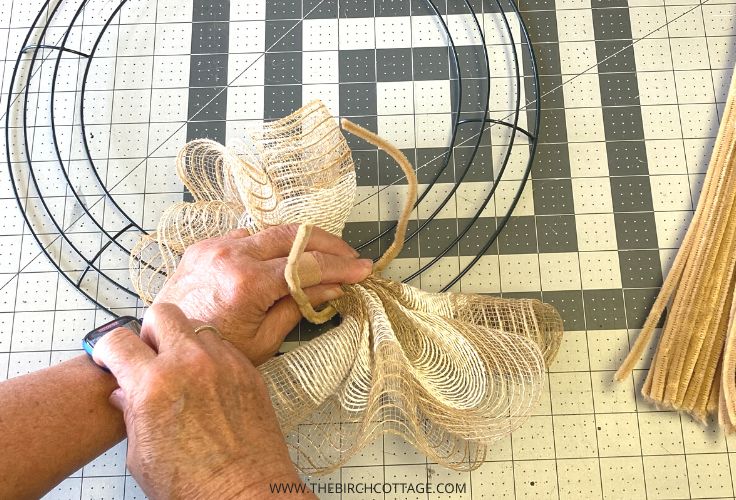
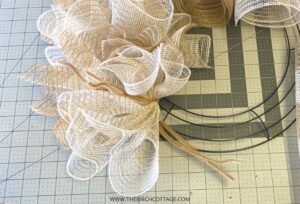
Without letting go of the mesh, place it on top of the chenille wire. Then twist the chenille once or twice to secure the mesh in place on the wire wreath.
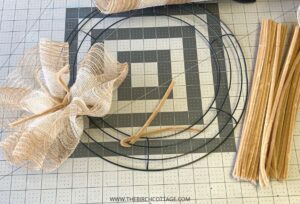
Wait to Trim the Chenille Wire
It is tempting to trim the chenille wire right after you attach the Deco Mesh to the wire frame, but don’t! You’ll want to wait until the very end of your Deco Mesh Wreath project to trim those ends.

You’ll use those long ends to attach the ribbon to your wreath. Once you have all the ribbon attached, then you’ll be ready to trim the ends. Just be sure to secure them really well first!
Attach Ribbon
Remember, it’s helpful to have your ribbon already cut to 14″ length and dovetail the ends before you begin. It really does help the process go faster.
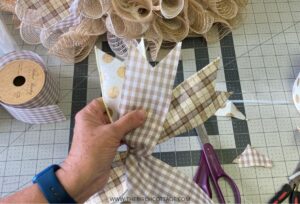
To attach the ribbon, we’re first gonna make little ribbon trio clusters (I don’t know what to call them). But, we’ll simply lay each piece of ribbon out in a criss cross fashion.

Then you’ll secure the three pieces of ribbon together with a small zip tie.
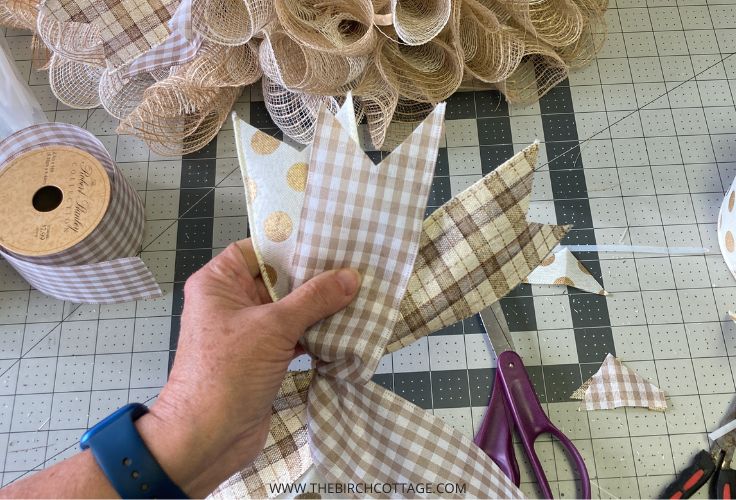
Go ahead and trim off the excess tail from the zip tie on the back side of the ribbon. (The side you will place against the mesh.)

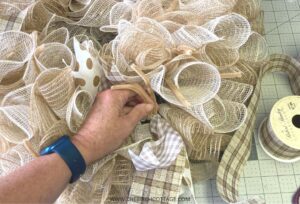
Next you’ll place the zip tied ribbon on top of a piece of chenille that you used to attach the mesh ribbon to the wreath with.
Twist the chenille wire a couple of times to secure the ribbon.

Then I like to take the long ends of the chenille wire and push them through to the back side of the wreath. I’ll then twist the wire a couple of times and trim the ends.
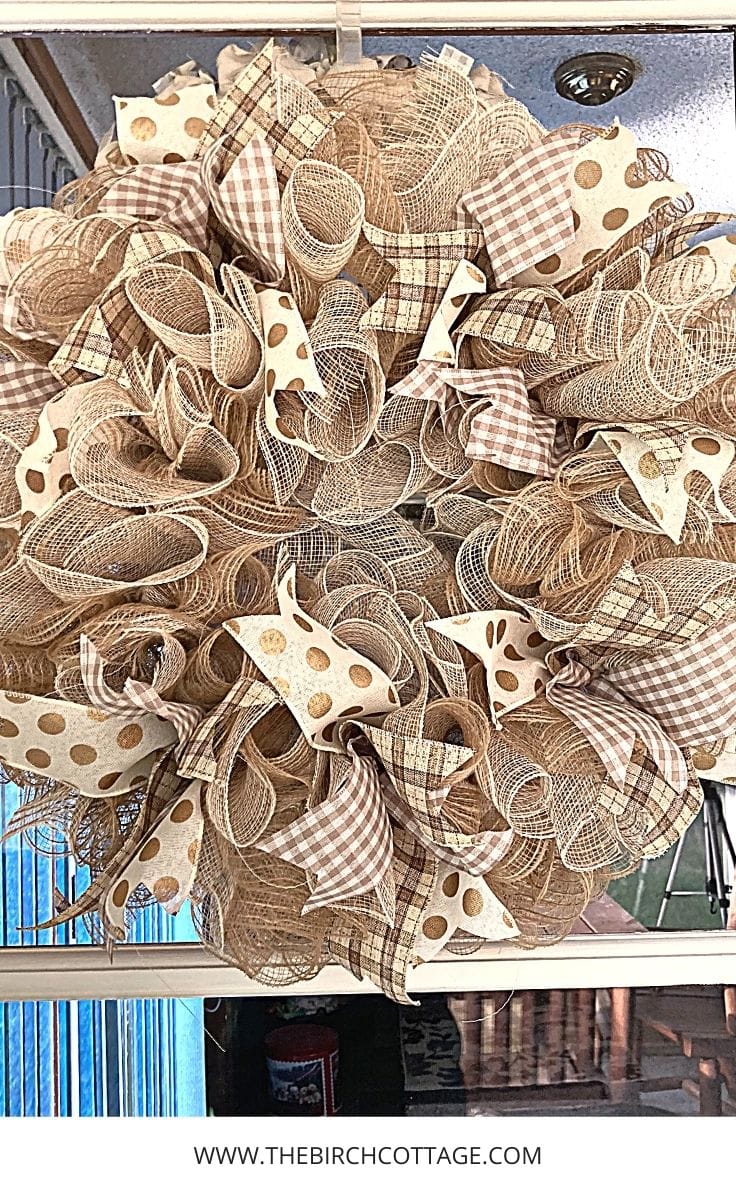
Here’s what the back of the wreath looks like when I’m all done.

Deco Mesh Wreath
Equipment
- cutting mat
Supplies
- 2 10” Deco Mesh Rolls referred to as Color A and Color B
- 1 14” Metal Wreath Frame
- 3 2 ½” wide rolls of ribbon 7 yards each
- chenille stems
- zip ties
Instructions
- Cut deco mesh into 30” strips. I’m using a 14” wire frame with 6 sections. I’ll use 4 30” strips of mesh in each section for a total of 24 30” strips. Or 12 30” strips of Color A and 12 30” strips of Color B.

- Affix one pipe cleaner or chenille stem where the vertical bar attaches to the second from the outside crosswire. My wire wreath has four rows of wire that encircle the wreath. The outermost wire is row 1, next is row 2, next is row 3, and the innermost wire is row 4.We will start by inserting a piece of chenille wire around a row 2 wire from the wreath frame.
- Take one piece of 30” mesh from Color A and roll one of the short ends slightly, then gather the remaining mesh with your hand towards the end you just rolled. When you reach the other end, roll it slightly before gathering.
- Hold the gathered mesh in the middle and place over chenille stem and twist chenille to attach deco to the wreath.
- Attach a piece of chenille stem to row 3 between the two vertical bars.
- Roll up a piece of Color B deco mesh and attach to the wreath form.
- Attach a piece of chenille stem to row 2 between the two vertical bars. Roll up a piece of Color A deco mesh and attach to the wreath form.
- Attach a piece of chenille stem to row 3 between the two vertical bars. Roll up a piece of Color B deco mesh and attach to the wreath form.
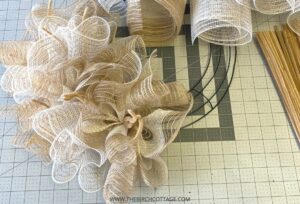
- Repeat with alternating Color A and Color B. You will attach 4 clusters of mesh to each section of the wire wreath. Again alternating between the 2nd and 3rd rows of wire.
- Once you have all the mesh attached to the wire frame with the chenille wire, it should look like this.
- Use three coordinating 2-1/2” wide spools of ribbon. Cut ribbon 14” long.
- Dove tail the ends by folding the ends together and cutting a little triangle out of the ends. You will need seven sets of ribbon (for a total of 21 ribbons cut to 14”).
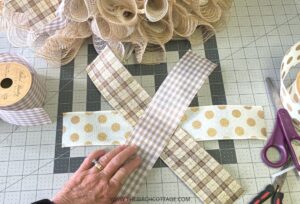
- Lay out three pieces of ribbon so they lay diagonally on top of each other.
- Gather in the middle and secure with a zip tie.
- Attach to one section of the wreath using the chenille wire. So, lay the ribbon on top of one of the sections of mesh, right in the middle of the chenille wire. Twist the wire a couple of times to secure the ribbon in place. I then like to pull the wires through to the back side of the wreath, twist a couple more times and then trim off the ends. Bend the ends towards the front of the wreath.
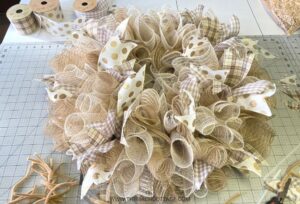
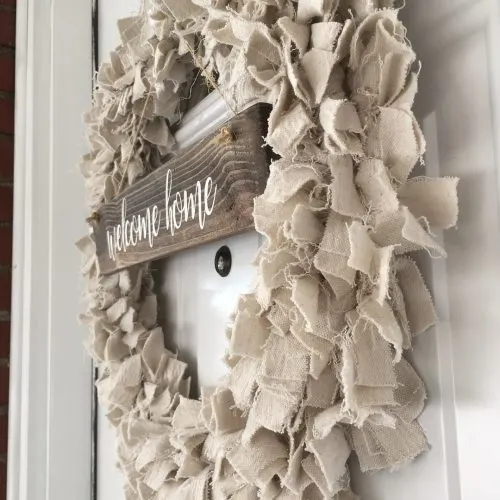
- You can further embellish your deco mesh wreath by adding a large bow, beads, or even a sign. You will also want to trim off the excess ends of the chenille wires. I like to twist them 5 or 6 ties before trimming off. Then I just fold or bend the ends down towards the back of the wreath.
- Your wreath is now complete!


Love the ideas you see here on Ideas for the Home by Kenarry®? Subscribe today to get our weekly Ideas in Your Inbox newsletter plus other exclusive gifts and offers — all for FREE!
What’s Next?
If you enjoyed learning how to make a Deco Mesh Wreath, you might also like these creative ideas from The Birch Cottage:
How to Embroider on a Clothesline Rope Basket


You may also enjoy these wreath craft ideas on Ideas for the Home by Kenarry® –
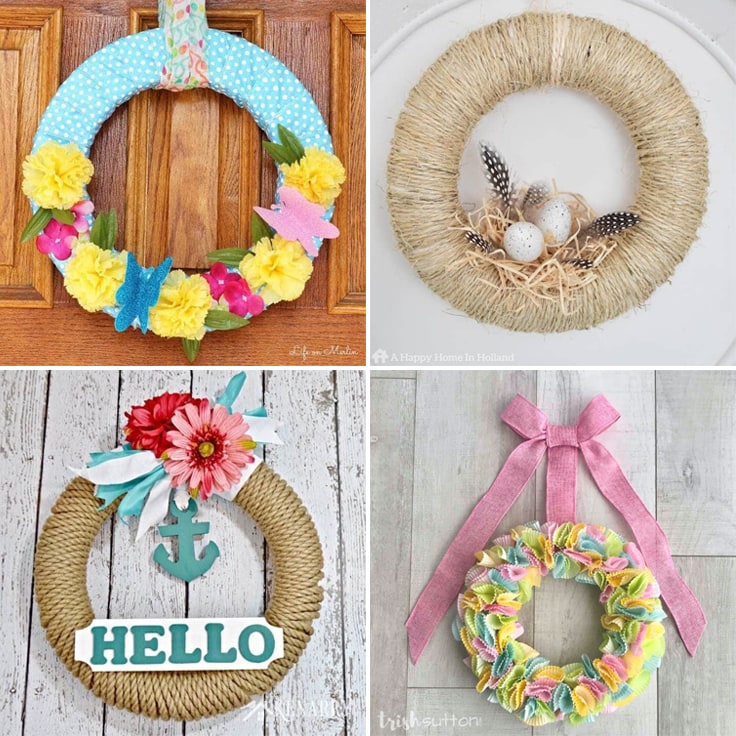
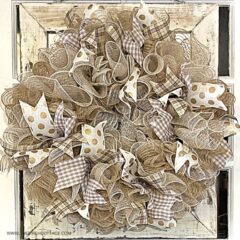
Love this pretty wreath for Fall! Feels organic and fancy at the same time!