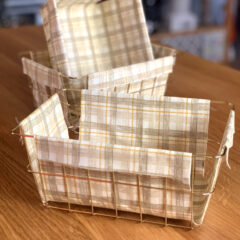
No-Sew Fabric Lined Storage Baskets
It's so easy to make these no-sew fabric lined storage baskets.
Cost: $3
Equipment
- Fabric tape measure
- Rotary cutter and mat OR scissors
- Pencil and scrap paper
- Iron
Supplies
- 2 pieces Fabric fat quarters or scrap fabric
- 1 Wire basket
- 1 roll Peel and stick fabric tape
- 8 Sticky back velcro buttons
Instructions
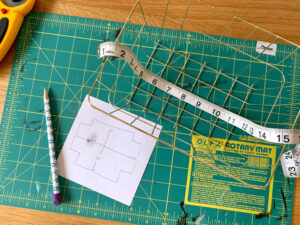
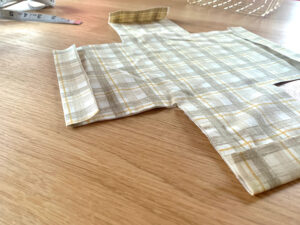
- Measure the baskets and draw a pattern.Draw a quick pattern on a piece of scrap fabric. Start by measuring your wire baskets to create a pattern. You’ll need the length and with of the bottom, plus the sides. Add an inch to each measurement so the top edge can fold over. For each cutout corner square, measure the height of the basket, plus the extra inch. Your pattern will resemble a plus sign.
- Iron the fabric.If your fabric is wrinkled or has some creases, iron the fabric so it’s nice and flat to start.
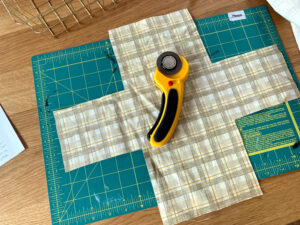
- Cut out basket liner pieces.Use the fabric tape measure and rotary cutter to cut out each basket liner piece. You’ll need 2 pieces for each basket.
- Assemble the basket liners.Line up 2 pieces of fabric with the right sides facing out. Cut pieces of tape to fit the edges, then peel and stick them to one side of the fabric. Then remove the paper backing and fold the other piece of fabric to line up. Repeat until all edges are sealed.
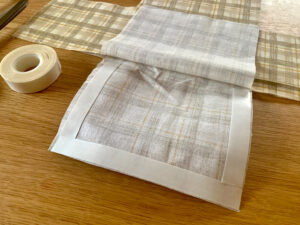
- Crease the outside edges.One at a time, fold over the edges to create a 1-inch lip and iron to crease. This will be where you attach the velcro to fold over the edge of the basket.
- Attach the velcro buttons.Peel off the backing and stick a velcro button onto the main fabric, then remove the coordinating velcro piece and line it up on the folded lip. If you have a few uneven edges, trim them straight.
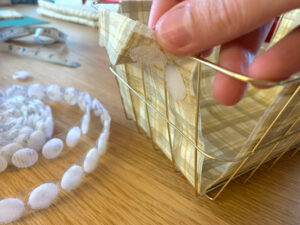
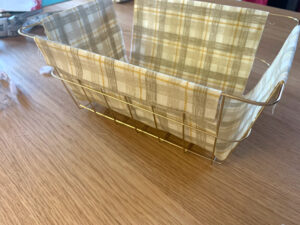
- Assemble the fabric lined storage baskets.Drop a fabric liner into each basket. Fold the lip over the edges and use the velcro button to attach each lip to the wire.
Did you follow these steps?Tag us on Instagram at @kenarryideas or leave us a comment rating below.
https://www.kenarry.com/fabric-lined-storage-baskets/
Copyright © Ideas for the Home by Kenarry, LLC