Glue Sponge: Make Crafts And Art Projects Easier For Kids
THIS POST MAY CONTAIN AFFILIATE LINKS. PLEASE SEE OUR FULL DISCLOSURE POLICY FOR DETAILS.
Are you tired of your toddler or child wasting glue or creating a huge mess when you make crafts? A glue sponge is the solution for tidier art projects.
When you’re making crafts with toddlers and small children, using glue can really be a challenge. Learn how to make a glue sponge to make crafting with kids easier.
How To Make gluing easier for kids
A while back, my cousin Kate who’s an art teacher for children recommended I create a glue sponge to use for art projects with my son. Kate explained “pouring glue is two-fold challenging. Opening and closing the glue bottles is hard, as is knowing how much to use.”
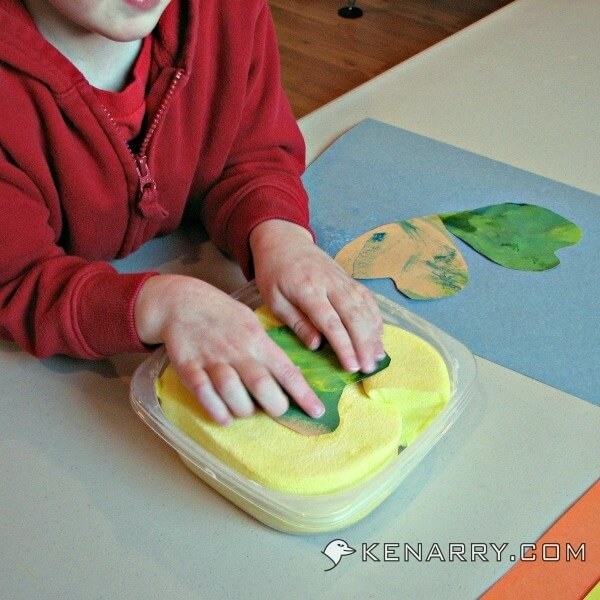
Though experimentation can be good for learning, it often leads to a big mess and a lot of wasted glue. Kate uses a glue sponge in her classroom so her students can easily add glue to objects for their projects and crafts. The glue sponge is especially helpful when they’re trying to glue small pieces of paper. Kate finds the glue sponge is useful for her students until at least third grade.
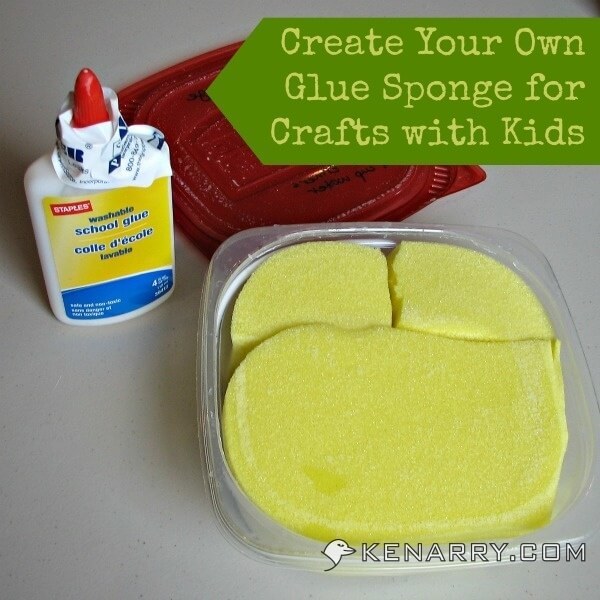
What you need:
Disclosure: This blog post contains affiliate links for products or services we think you’ll like. This means if you make a purchase from one of these links, Ideas for the Home by Kenarry® will make a small commission at no additional cost to you so we can keep the great ideas for the home coming your way. All opinions expressed are derived from personal experience.
- 1 cup of white Elmer’s glue or school glue
- 1/4 cup of water
- A large, thick sponge
- A large sealable container
Note: Kate says “ideally the goal is to have the sponge be the same size as the container. So you want your container to be the same height as your sponge or really close. Then you can cut your sponge down to the length and width of the container. The height of the sponge matching the height of the container is the tricky part, but it works best if they match, so you can drag your large shapes across.”
Instructions:
- Put your sponge in the container. Cut it to fit if necessary.
- Pour a cup of glue on the sponge.
- Add 1/4 cup of water or less.
- Keep the container covered when the glue sponge is not in use.
Tips for Making Your Glue Sponge
- When the top of the sponge no longer feels sticky enough, carefully flip the sponge over.
- When flipping the sponge no longer seems to bring fresh glue to the top, add a little more glue and water to the sponge.
- If you have trouble finding a large enough sponge for the size of your container, try cutting down the giant sponges meant for washing your car. I found ours at a dollar store, but you can also find them in the automotive department at most stores.
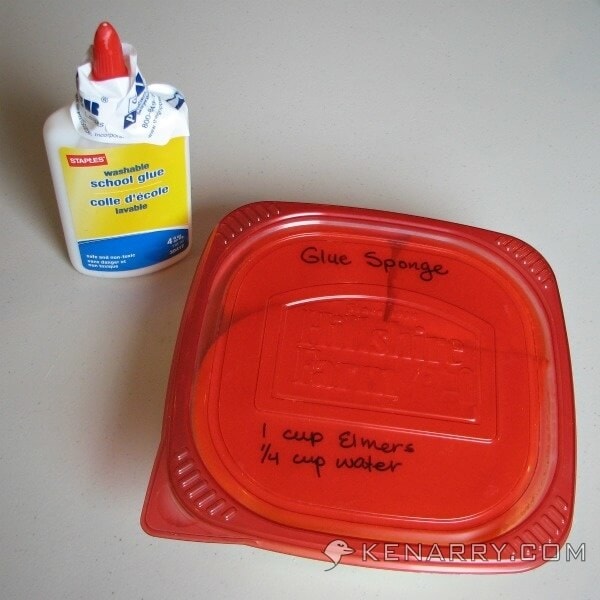
- I wrote the ratio of glue to water on the lid of my container, so I can easily remember when it’s time to add more glue or create a new glue sponge.
How Long Will a glue sponge last?
Kate says the glue sponge lasts a while as long as it doesn’t get stuck to the bottom of the container. The ones she uses in her art classroom get a lot of use, but she probably only adds glue quarterly. She replaces them annually at the beginning of the school year.
We’ve been using the glue sponge for our art projects since my son was two years old. He’s almost four now. It works amazingly well with very little mess. I highly recommend it.
Do you have any tricks like this that make crafts or art projects easier for your child? Please comment below and share.
Love the ideas you see here on Ideas for the Home by Kenarry®? Subscribe today to get our weekly Ideas in Your Inbox newsletter plus other exclusive gifts and offers — all for FREE!
What’s Next?
While you’re here, be sure to check out other kid ideas on Ideas for the Home by Kenarry® –
- Monster Cookie Bars: Easy Dessert Recipe for Kids
- Easter Bunny Bag Puppet: Easy Kids Craft
- Washi Tape Bookmarks: A Simple Craft for Kids
Originally published March 2014. Updated March 2019.


Thanks for stopping by, Mary! It really makes gluing with a toddler so much easier.
I wish I new about this when my kids were younger. Probably would’ve prevented a lot of gluey messes.
It really does help with the glue messes, Erlene! Thanks for stopping by!
I love this idea! Arts n’ crafts can get so messy, even as a grown-up. This is a great way to help keep everything nice. I love that you thought of something like this.
Love and Luck,
Laurali Star
http://www.thesecretsurprisinista.com
Thanks, Laurali! I can’t really take credit for this great idea, though. My cousin, Kate is the wise one who suggested it and I’m so glad she did.
Um hello, where has this been all my life! This is THE most brilliants idea EVER! Getting sponges this weekend for my boy! I hated when I was little and I didn’t have good control over the glue and my papers would get all crinkled b/c I used too much glue. 🙁 NO MORE! Pinning!
Thanks, Heather! We’re so glad you love the idea. It definitely makes gluing with little ones so much easier. Thanks for pinning too!
I keep clicking on your links from linky parties! I love this idea–it takes all the mess out of gluing. I’ll have to try this!
I always feel the same way about your links, Carrie. 🙂 Thanks for stopping by.
brilliant idea!! pinned 🙂
Thanks, ladies!
This is such a great idea! I bet it’s a lot easier to get the glue evenly distributed, too! I’ll definitely be trying this out!
Great! I definitely think it gets the glue distributed more evenly, especially on larger pieces that you’re trying to glue. Your papers don’t get over saturated.
What a great idea. I could of used this tip when my kid were younger.
I would love for you to share this at my T.G.I.F. Linky Party 🙂 Have a great Memorial weekend!
Thanks, Wendy! You have a great weekend too!