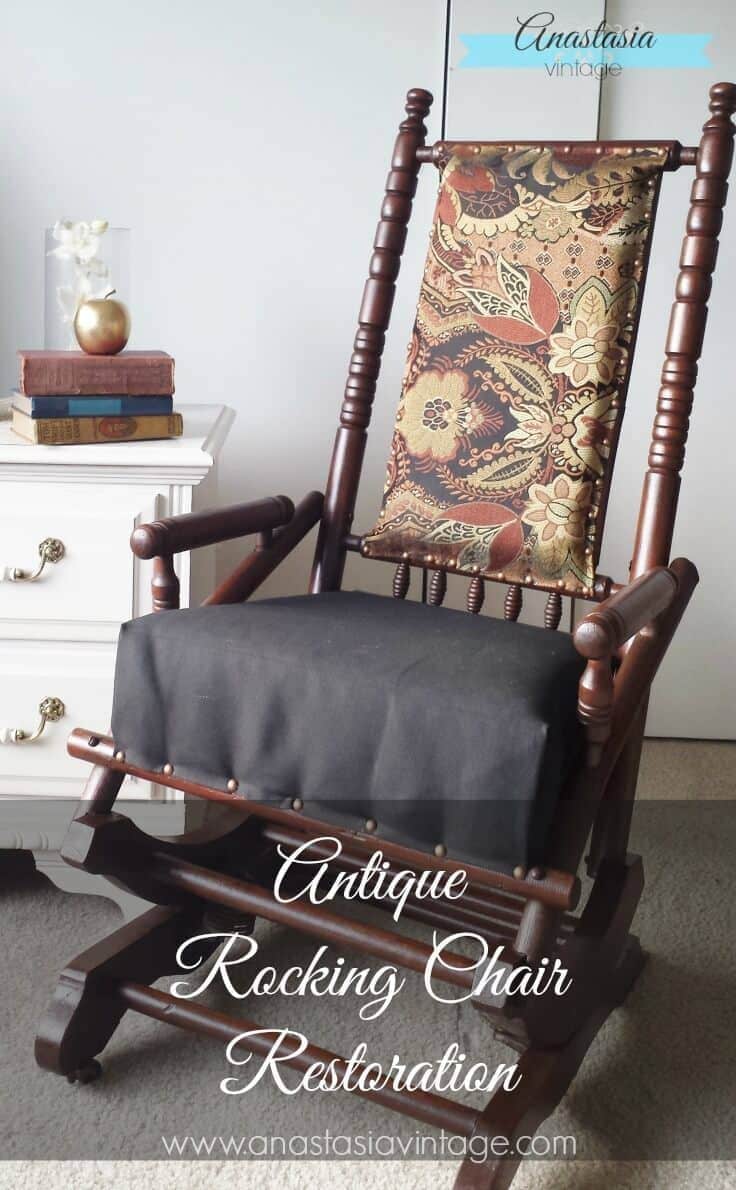
Antique Rocking Chair Restoration: Broken to Beautiful
THIS POST MAY CONTAIN AFFILIATE LINKS. PLEASE SEE OUR FULL DISCLOSURE POLICY FOR DETAILS.
You’ll love how this broken and worn antique rocking chair was restored with a new finish and contemporary upholstery. It’s a must-see transformation!
Hello Kenarry readers! I’m so happy to be joining you here today to share a recent antique rocking chair restoration project that I just love! I’m Stacy, and I blog over at Anastasia Vintage, where my husband and I share furniture makeovers, vintage-inspired crafts, and ideas for adding vintage style to your space.
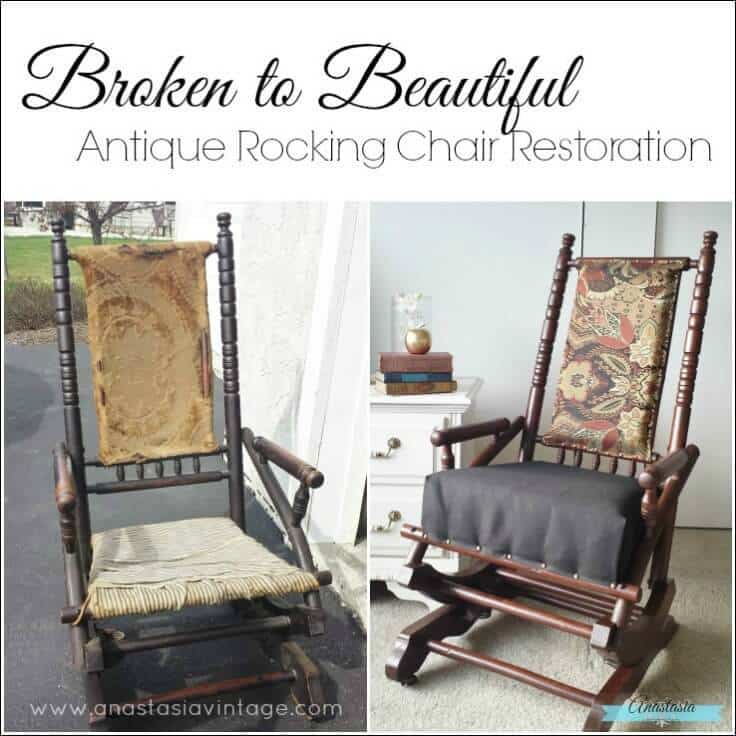
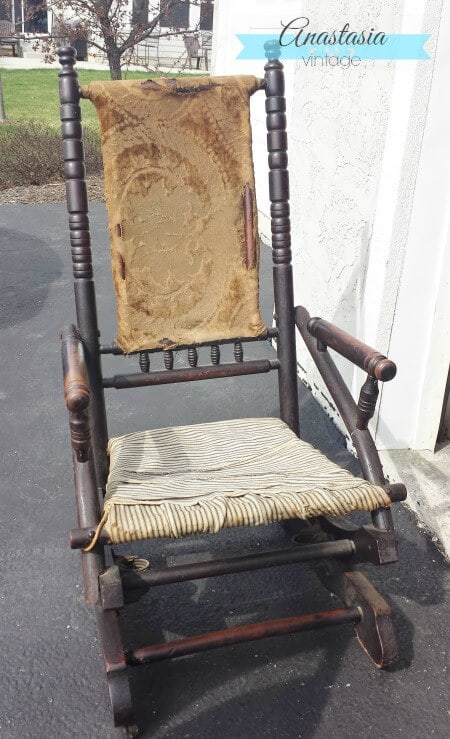
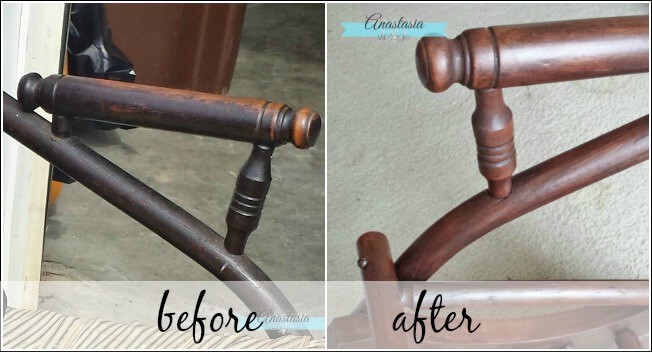
One of our local clients purchased this antique platform rocking chair a few months ago. As you can see, to say it was in rough shape is a bit of an understatement. It was essentially falling apart, and she was on the verge of selling or giving it away.
Even with its rough appearance, when she asked if I saw any potential in it, I gave her a very enthusiastic YES! I’m sure she and I were the only two people on earth who thought it could be something really special with a bit of work. And by “a bit of work,” I mean a complete overhaul!
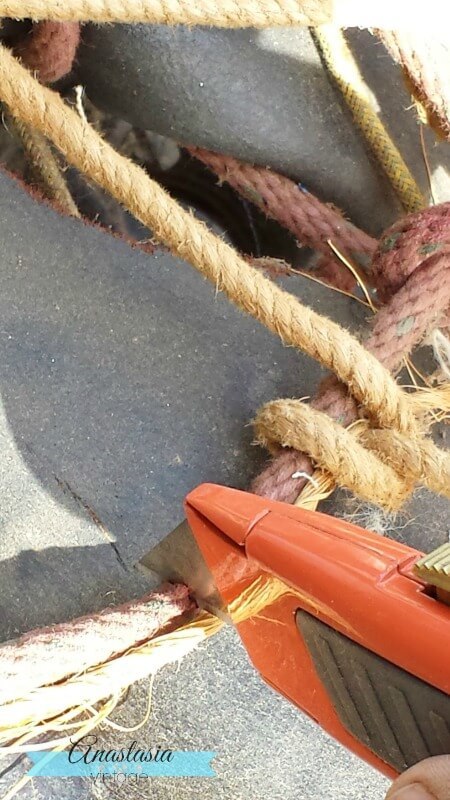
I’m always amazed by what I uncover when I start peeling back the layers of an old piece. Under the seat fabric, this chair featured a very impressive web of at least four different types of cables. My client and I both got a good laugh – Spiderman would have been very proud of this handiwork, I’m sure.

It took quite a lot of elbow grease, a box cutter, and some heavy-duty garden shears…but eventually I got them off!
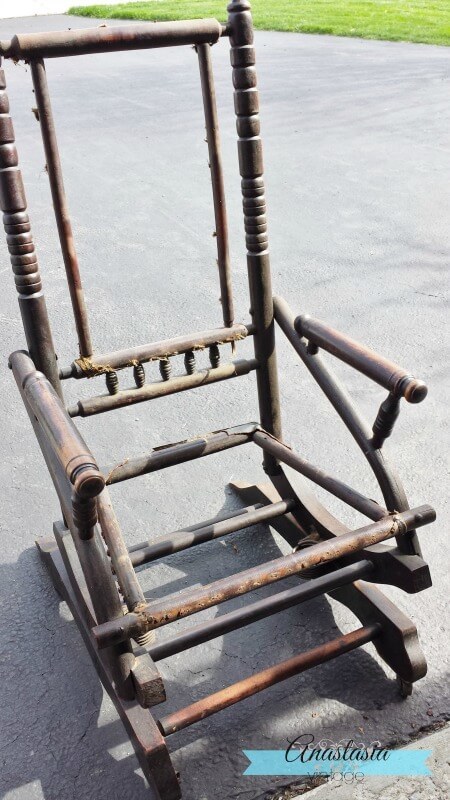
After stripping the old finish from the wood, I restained the entire frame in a lovely warm shade of gel stain – you can find the tutorial I used here.
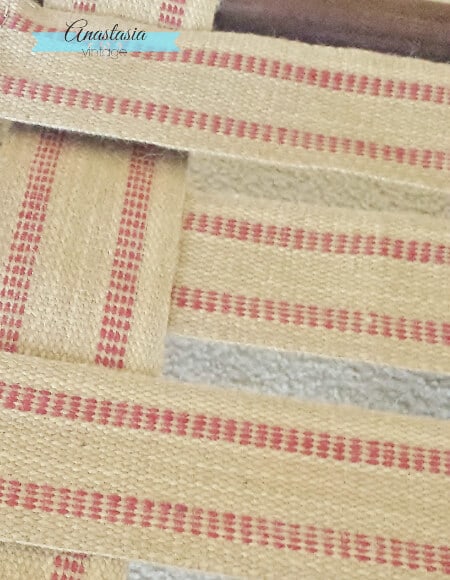
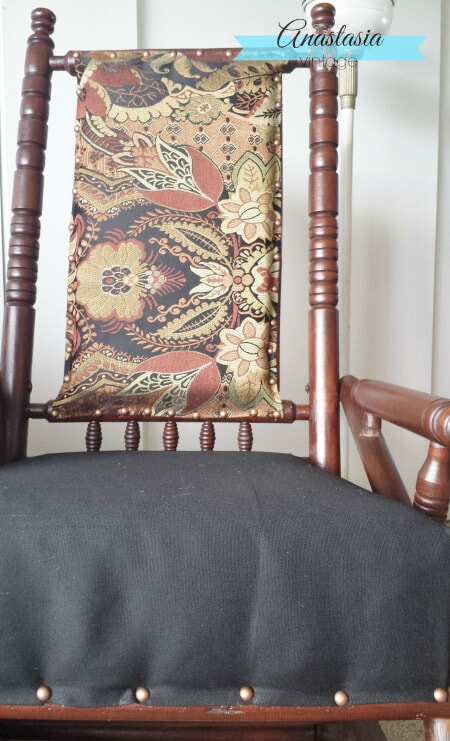
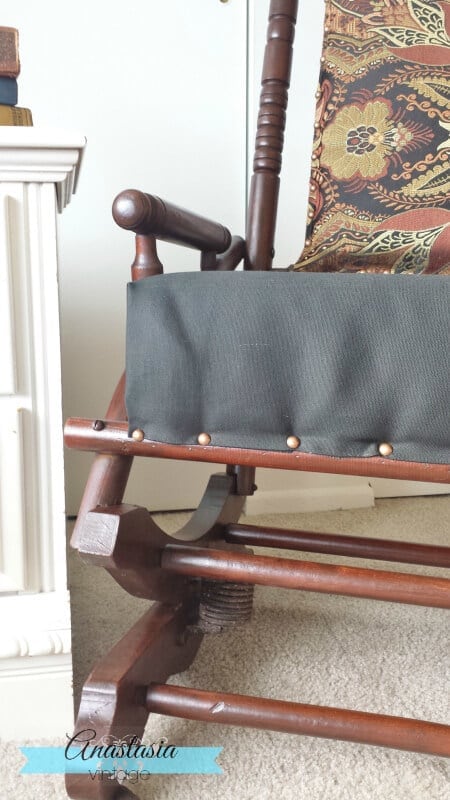
Next, it was time to tackle rebuilding the seat and back of the chair. To replace the network of ropes and cables, I used upholstery webbing to construct a foundation for the seat.
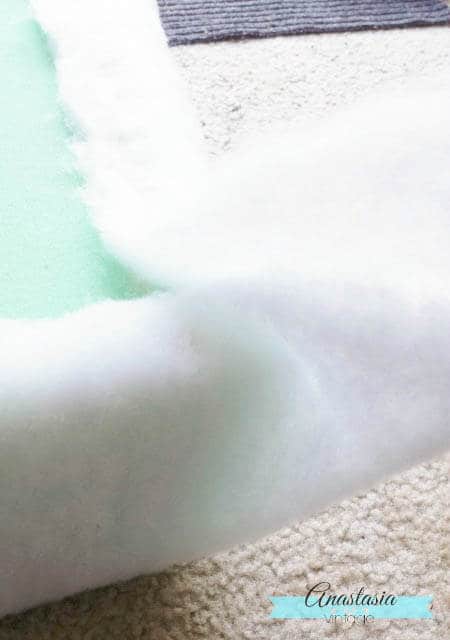
One of the biggest issues my client had with the old seat was that it was much too low. To fix this, I built a higher seat, as well as a cushioned back for the chair, with some high-density foam and batting.
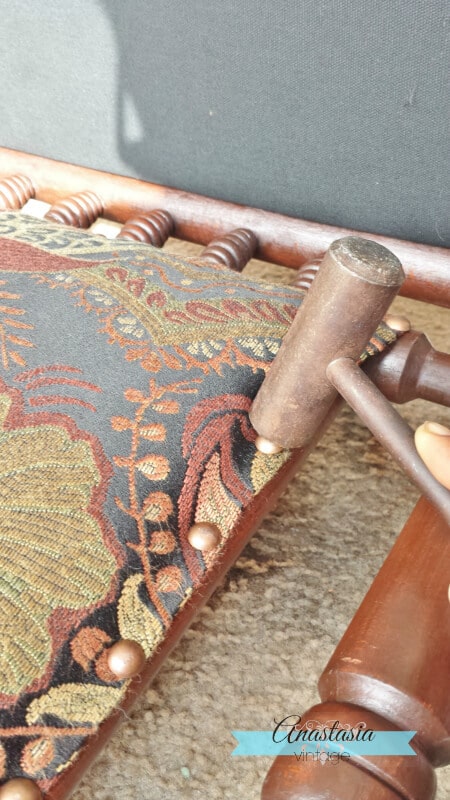
My client loved the idea of using complementary fabrics for the seat and back, and chose to pair a gorgeous, earthy tapestry with a clean, black woven cotton. I secured the upholstery to the chair frame with bronze-colored upholstery tacks.
It was a true labor of love, but I could not have been more pleased with the outcome!
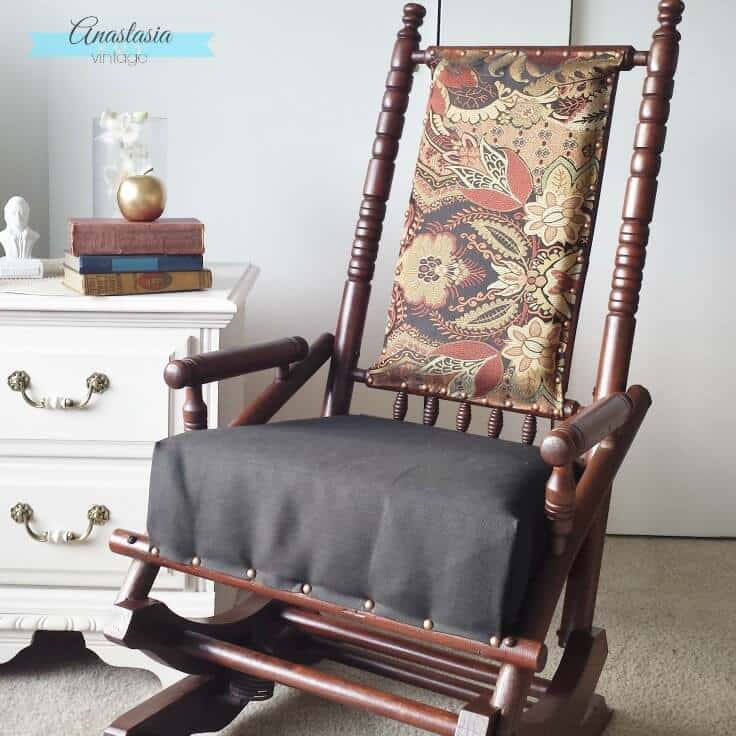
The color of the stain, the fabric, and the upholstery tacks all work so well together!
When we delivered it to our client, she could hardly believe it was the same chair she’d purchased all those weeks ago. After taking photos to send to her friends, she packed it up and took it to her lake house the very next day.
It makes my heart so happy to see another vintage gem saved from the landfill!
If you enjoyed this project, you might also like:
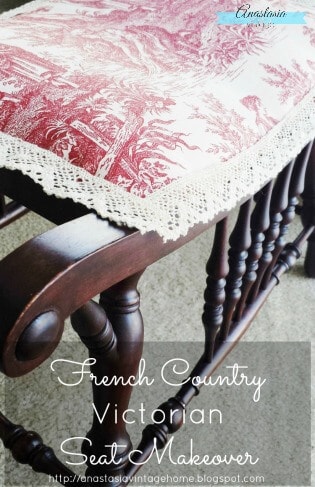
French Country Victorian Seat Makeover
See you again next month with more vintage ideas for your home!
Love the ideas you see here on Ideas for the Home by Kenarry®? Subscribe today to get our FREE DIY & Craft Planning Calendar, plus our weekly Ideas in Your Inbox newsletter filled with creative tips and exclusive offers!
What’s Next?
While you’re here, be sure to check out other home decor ideas on Ideas for the Home by Kenarry® –
I have a pair of old rockers similar to the one above{theCoaster Southern Plantation Porch rocker}. A runner is broken on one of them and I haven`t found one the same size {32 in. L, 2in.W, 7/8 in. H} Do you sell them and if not can you direct me to someone who does. The size would not have to be exact. Thanks
Hi Raiford,
That’s a great question! Unfortunately we do not sell runners for rocking chairs. I wonder if you could find a local wood worker to custom make one for you? Good luck with your project!
Best wishes,
Carrie
Ideas for the Home by Kenarry®
I have just attained a VERY similar rocker….and just like yours it has round dowels to outline the seat…I have to ditch the wire webbing.
How did you get the burlap webbing to stay? Staple gun? tacks?
thanks for this share…I was googling how to fix an aged platform rocker!
carol
ps…my arms…which look like dowels glued into the body are wobbly…how would you fix that?
Hi Carolyn,
Thank you for reaching out to us. Unfortunately, Stacy who used to write for Anastasia Vintage is no longer on our Kenarry Creative Team and her contact info has changed so I have no way to reach out to her with your questions. I believe you could use either a staple gun or tacks to hold the burlap webbing in place. For the wobbly dowel arms, you may be able to secure them in place and make them less wobbly by applying a little wood glue where they connect with the rest of the rocker. Good luck with your project!
Best wishes,
Carrie