How To Make Bead and Tassel Napkin Rings
THIS POST MAY CONTAIN AFFILIATE LINKS. PLEASE SEE OUR FULL DISCLOSURE POLICY FOR DETAILS.
Learn to make DIY Bead And Tassel Napkin Rings. We’ll show you every step including how to make handmade tassels made from embroidery floss!
Hi Kenarry readers! It’s Jennifer and Kitty, the O’Neil Sisters from RunningWithSisters.com. We have a super fun and easy project for you: Bead and Tassel Napkin Rings! The secret to these DIY napkin rings is the memory wire, a coiled wire that stays coiled in its original shape even if you pull it apart. (It’s a lot like a Slinky!) We’ll show you how to use the memory wire to make a beaded napkin ring. Then we’ll add two handmade tassels. Why? Because tassels are wonderful!

We’ve included a video showing all the tools and materials you’ll need for this project. We’ll show you how to count and cut the memory wire, how to add the beads, and how to finish the ends. Then we’ll show you how to make tassels from scratch using embroidery floss, a little piece of wire, and a bead cap. Follow along with us as we make one of the Bead and Tassel Napkin Rings. Then use the steps below to make your own. You won’t believe how easy they are to make!
How To Make Bead and Tassel Napkin Rings
Disclosure: This blog post contains affiliate links for products or services we think you’ll like. This means if you make a purchase from one of these links, Ideas for the Home by Kenarry® will make a small commission at no additional cost to you so we can keep the great ideas for the home coming your way. All opinions expressed are derived from personal experience.
Materials & Tools To Make One Of The Bead And Tassel Napkin Rings
- Glass beads, variety of sizes, copper
- Memory wire, 2″ diameter, gold color
- Embroidery floss, teal
- Bead cap or cord end, copper
- 26-gauge jewelry wire, brass
- Cardstock, 2″x3″
- Scissors
- Round-nose pliers
- Wire cutters (heavy duty)
Steps To Make One Of The Bead And Tassel Napkin Rings
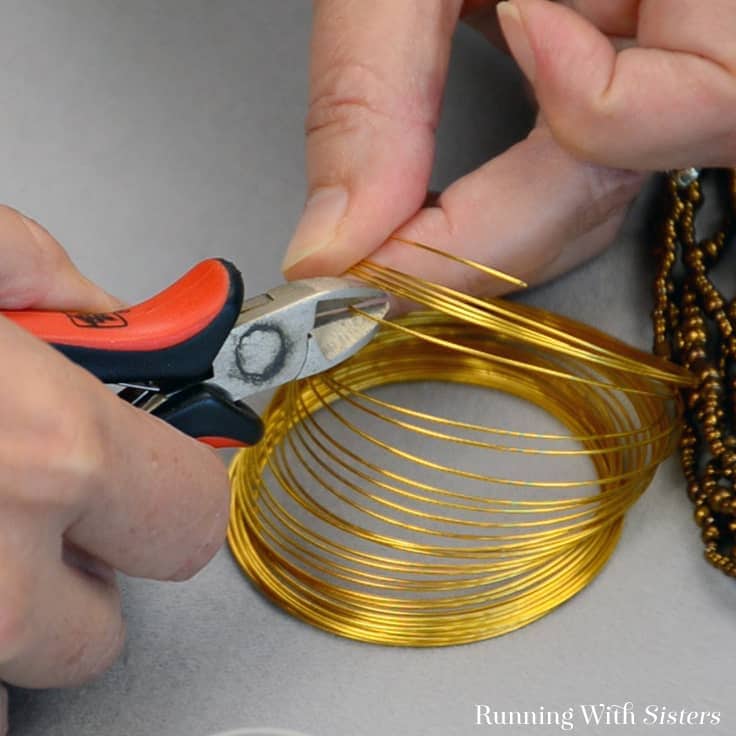
1. Measure and cut the memory wire. Count five coils of memory wire, then go around an extra inch, so the ends overlap by one inch. Cut the memory wire with the heavy-duty wire cutters. Don’t use your good wire cutters for this – memory wire is tough stuff and could put a nick in your good cutters!
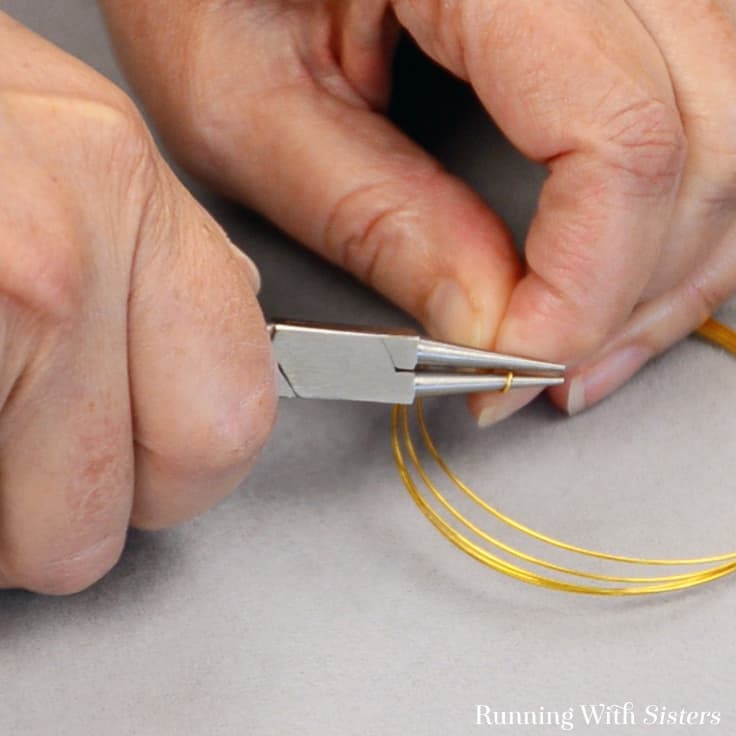
2. Twist a loop at one end of the wire. Use the round-nose pliers to twist a loop in one end of the memory wire. The memory wire is hard, so you’ll need to use some muscle to turn the pliers and make the loop. It helps to reposition the pliers while you bend the wire into a loop bit by bit.
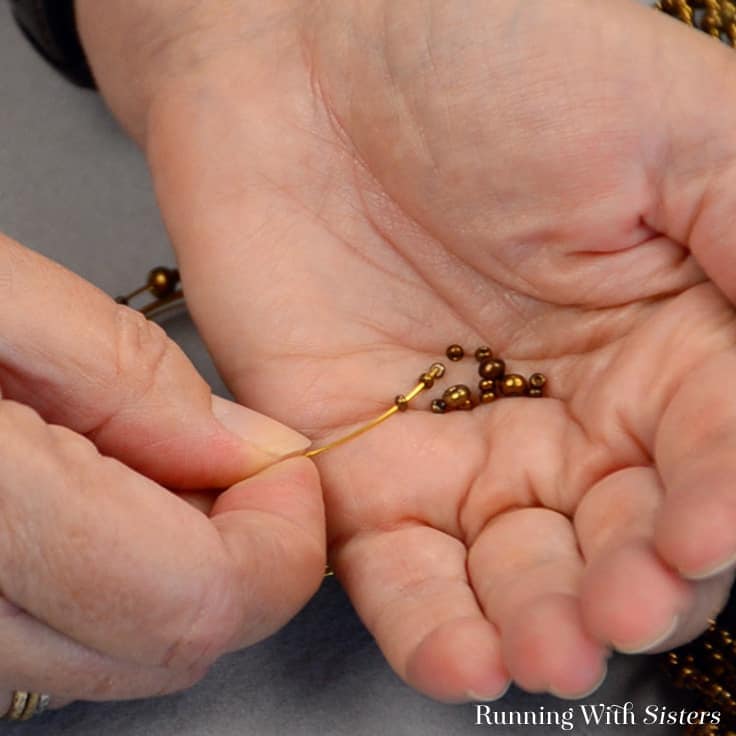
3. Bead the wire. Flip the coils over. Slide the beads onto the open end of the wire until all five coils are beaded, but leaving about 1/2″ for the final loop.
4. Close the wire off with another loop. Next, use the round-nose pliers to roll a loop in this end of the memory wire. If you end up with a gap between your loop and the last bead, keep twisting your loop until you reach the beads. Then use the heavy-duty wire cutters to trim off the excess wire.
5. Make the tassels. To make the first tassel, cut four pieces of embroidery floss 36 inches long each. Gently pull the floss apart into pairs of threads. (Our embroidery floss was made up of six threads twisted together, so we had three pairs of threads per length of floss.) Try to pull the threads apart slowly so they don’t tangle into a mess!
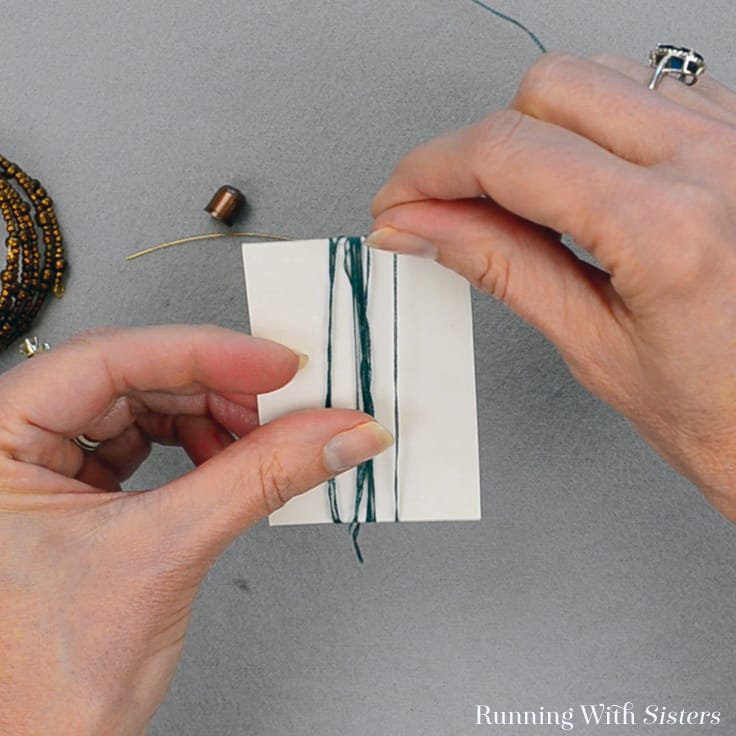
6. Wrap the threads around the cardstock. Wrap one pair of threads the long way around the piece of cardstock, going around as many times as the thread will go. Then add the next pair of threads. Continue until all the threads are wrapped around the cardstock.
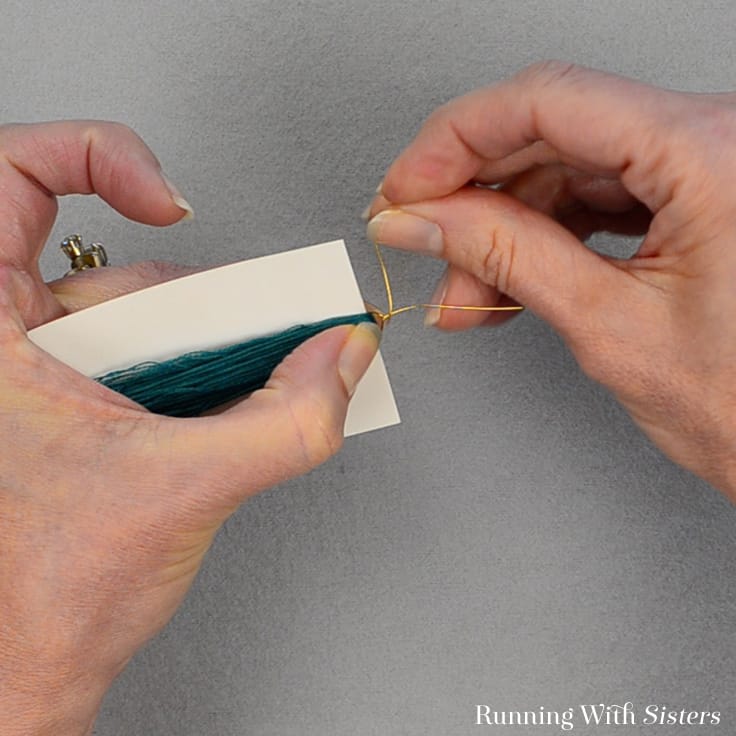
7. Add jewelry wire to the tassel. Cut a piece of 26-gauge jewelry wire about 3 inches long. Bend it into a hairpin with your fingers. Slide the hairpin under the wrapped threads. Pull the hairpin up to the top edge of the cardstock and pinch the wires together. Keeping one end of the wire straight, wrap the second wire around the first wire two times. Trim the end with the wire cutters.
8. Put the bead cap on the tassel. Remove the cardstock and set it aside so you can use it to make other tassels. Slide the wire up through the hole in the bead cap and pull the bead cap down over the top of the tassel.
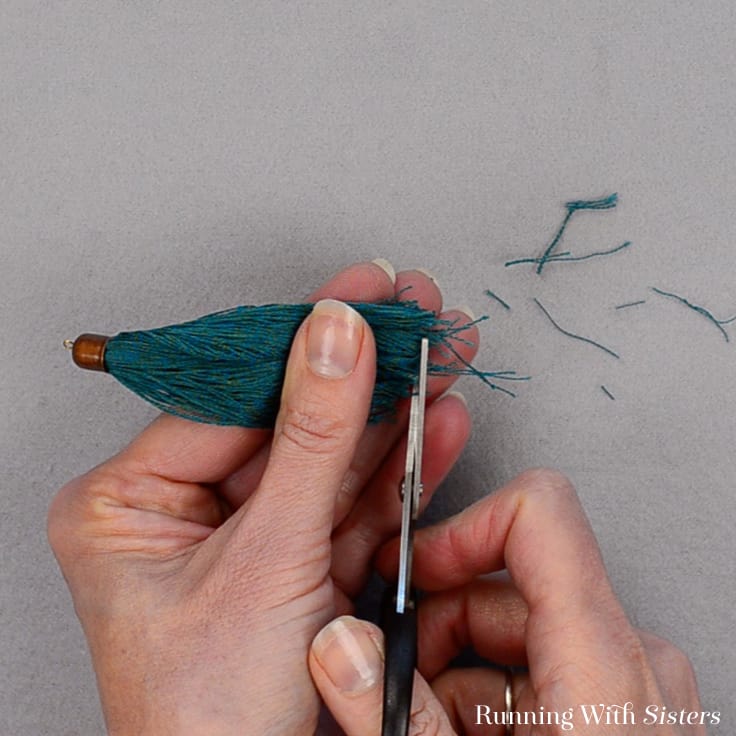
10. Evenly trim the bottom of the tassel. Cut the bottom loop of the tassel. Then trim the bottom edges. (It’s like a tassel hair cut!)

11. Make a loop at the top of the tassel. To do this, grasp the wire at the top of the tassel where it comes out of the bead cap using the round-nose pliers. Bend the wire 90 degrees. Reposition the pliers so they are at the top of the bend. Wrap the wire over the top jaw of the pliers. Slide the bottom jaw into the partial loop and finish pulling the wire around. Wrap the tail of the wire around the neck twice. Trim the end of the wire.
12. Attach the tassel to the napkin ring. Open the loop in the napkin ring slightly using the round-nose pliers. (We recommend opening the loop to the side like you’d open a gate so you don’t lose the round shape of the loop.) Slide on the tassel and close the loop. Make a second tassel for the other end of the napkin ring and add it the same way.
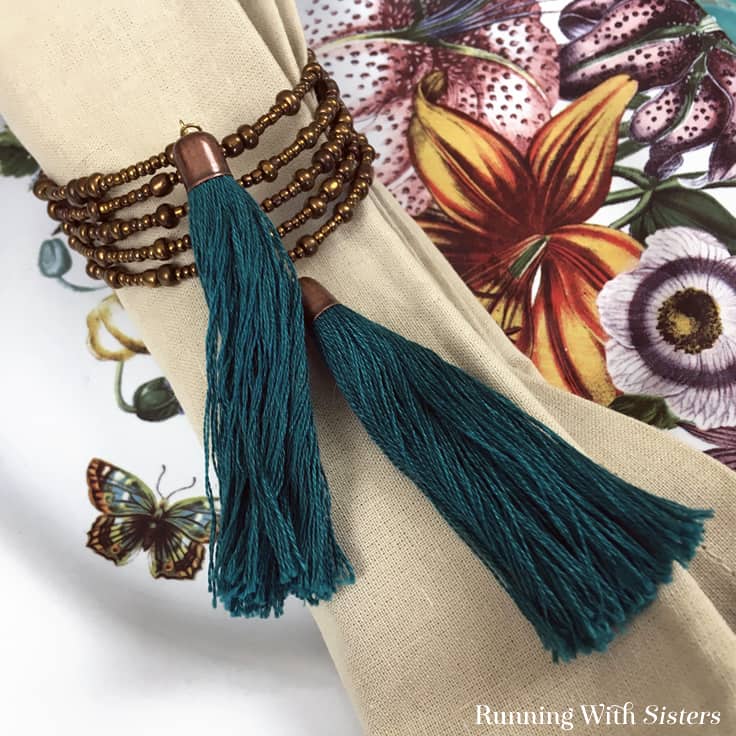
We made a set of four of these Bead And Tassel Napkin Rings, but they go together so fast you might want a set for 8 or 12! We think they’d add a dash of trendy flair to a traditional Thanksgiving Dinner table. What do you think? Leave us a comment and let us know. We’d love to hear from you! And, if you’re looking for more easy tablescape projects, check out these DIY Wood Place Card Holders.
Happy Crafting,
Jennifer & Kitty
Here are some more fun home accent projects by the O’Neil Sisters:

Sew A Pretty Tablecloth With Built-In Runner
What’s Next?
While you’re here, be sure to check out other craft projects on Ideas for the Home by Kenarry® –
One Comment