Board and Batten Shutters: An Easy DIY Tutorial
THIS POST MAY CONTAIN AFFILIATE LINKS. PLEASE SEE OUR FULL DISCLOSURE POLICY FOR DETAILS.
Continued…
4. Apply construction adhesive and lay up horizontal boards. Next take your construction adhesive and apply it to the vertical boards where your cross members will go.
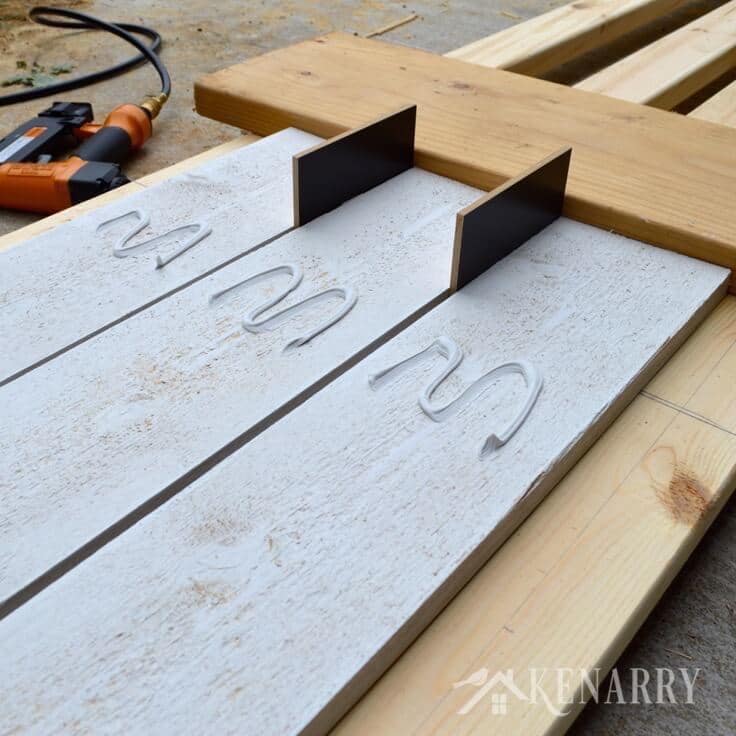
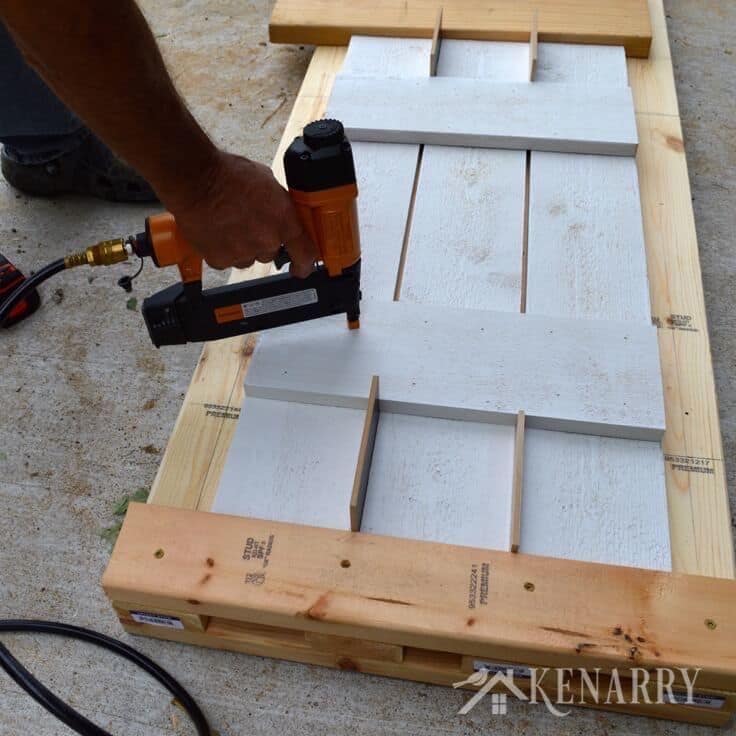
Now it’s time to place the horizontal boards. Here is where your spacers come in. Make sure you slide the boards down tight to the spacers and keep the vertical boards tight and square to the jig. Once the cross members are in place and square, tack them with a pneumatic nail gun.
Make sure you don’t shoot the nail out of the back side of the board! By using a finish nail you should only have a small mark left that will be covered by the final paint job.
I recommend stacking all the shutters on a flat surface and applying weight to the top of the stack. Let them sit overnight for the construction adhesive to fully cure.
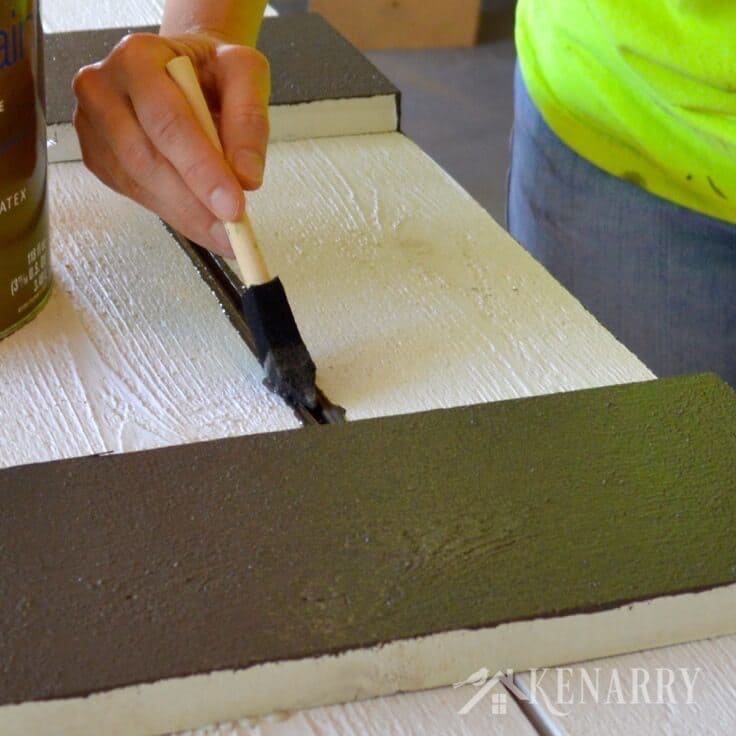
5. Complete the finish paint coat. Now that the construction is finished it’s time to give them the final paint job. We painted a few manually and also sprayed a few. If you have a sprayer, that’s the easy way to go, but it’s not needed. Depending on your quantity of shutters, it may be more hassle than it’s worth to use a sprayer.
The trickiest part to manual painting was getting into the gaps. We ended up using a sponge brush to get down in the seam. In retrospect, I should have probably rolled the board edges prior to assembly.
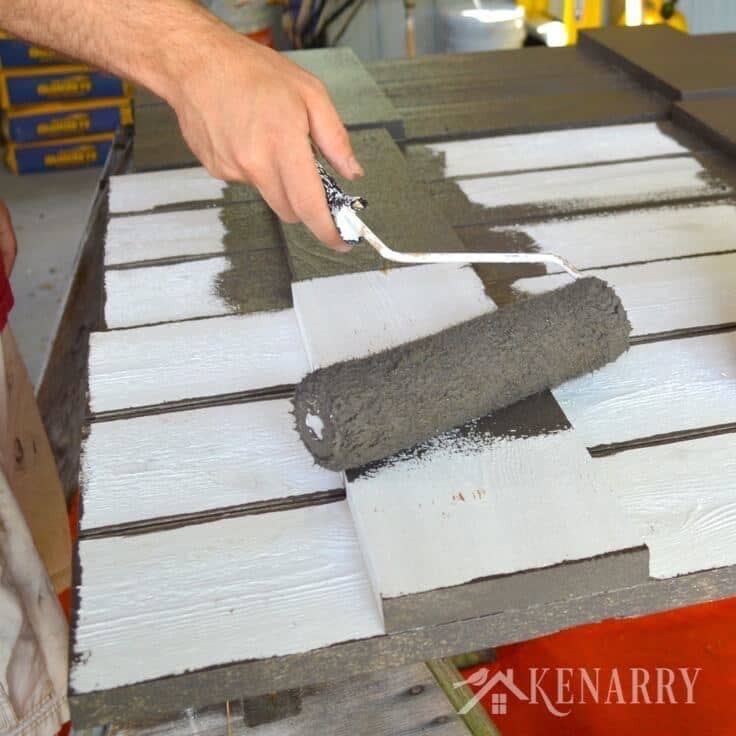
Once the gaps were painted, we rolled the flat surfaces. We applied 2 coats to the front and rear of the shutters.
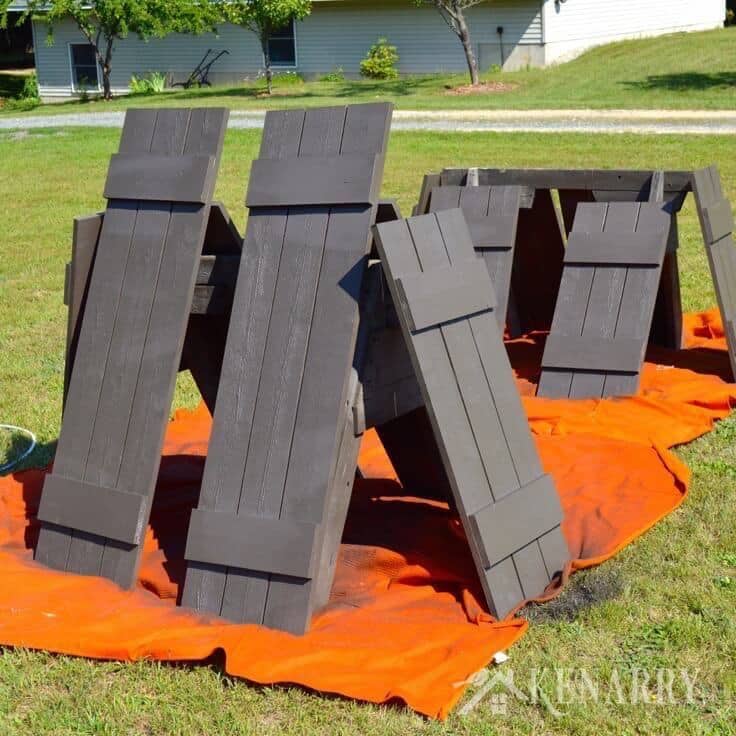
Below are the finished shutters drying in the sun. Notice that we created several different sizes for different windows, all using the same jig.
Such a simple update and it make such a big difference! These are great.
I agree, Stacey! They make a huge difference in the outward appearance of the place. Thanks for coming by to check out the tutorial!
Carrie,
Your new shutters look so nice! It really added some charm to your cottage and pole barn! I am getting ready to start hosting a new link party with Refresh Living starting this coming Tuesday @ 7pm CST. We would love to have you join us!
Thank you!
Cat
Thanks, Cat – both for your kind words, and the invitation to your new party!
I love these! These shutters really make a big difference, and how perfect that you were able to make them yourself! Thanks for linking up with us at Motivational Monday!
Thank you, Melanie! We are just thrilled with how they dress up the place. Thanks for coming by from Motivational Monday!
Love how they make such a difference and you make them look so simple to do. Thank you for sharing at Share It One More Time. Cathy
Thanks, Cathy! They’re surprisingly simple, but do make a dramatic difference. We appreciate that you came by to check them out.
I love shutters – houses always look better with shutters! Thanks for sharing with #SmallVictoriesSundayLinkup 5/31/15
Thanks, Heather! We love shutters too – especially rustic, simple ones. Thanks for visiting from your link party.
What a great makeover! You are smart to choose the color. Black is a kind of neutral color so that it looks fit with the windows. How much money do you spend to make it?
Hi Katie! Thanks for the comment. The color is actually called “Manix Bronze”, we chose it to match the dark two-tone metal siding. The cost per set of shutters for us was around $65, but that will vary depending on the size of the shutter. I hope that helps!
Kent
Is the inside of your metal sided building not finished? I have a similar post-beam building with the metal siding that I want to attach shutters to. The inside is dry-walled though so all I have are photos of when we were building to guide me to where studs would be. Any tips on how to find the studs on the outside of the metal siding?
Thanks.
Your shutters are adorable!
Hi Meg,
The inside of the pole barn is not finished. Our construction has some horizontal stud’s running behind the metal siding, so I simply measured up from the edge of the glass in the window on the inside of the barn to the nearest horizontal stud, then made sure I anchored the shutter there. In your case, I’d recommend using a stud finder on the inside of the building to see if you have a similar structure supporting your metal siding then translate that measurement to the outside so that the screws hit the horizontal studs. This isn’t my barn, but here is an example of the horizontal studs found in a lot of pole construction: http://wagnerbuiltconstruction.com/wp-content/uploads/2015/11/20151112_1356261.jpg
Thanks for reading and good luck with your project!
Kent
Love this idea!….hope to have my husband do these for our house!!!
Thanks Joan! We’re glad you found our tutorial and hope it helps inspire you and your husband as you make your own. We’d love to see pictures when you’re done.
Is that a Flat, Satin, Egg Shell, etc… paint? We have a flat/matte brown and wondering if we need something with a little bit of a shin to it. Yours looked like it had some what of a shin but may have been just the light/pic.
Hi Millard, great question! I just looked ours up — the paint we used was an exterior acrylic latex paint with a flat finish. The flat/matte brown you have should work great if you want it to look similar to ours. Good luck with your project. We’d love to see photos when you’re done – post them on instagram and tag us @kenarryideas.
Best wishes, Carrie
The only thing missing for me is the dimension to locate the cross members. I’m sure you need them to be the same on each shutter. Does it depend on the size of the window?
Hello! And thanks for taking the time to look at my tutorial.
The cross member location is mainly a matter of personal preference and may vary depending on the size of the shutter. To do mine I laid out the pieces on the ground and set the proportions based on what looked right to me (and more importantly what looked right to Carrie!). To make the standardization easy I cut my spacer shims to the length I determined looked right so they served a dual purpose, getting the gapping right between the long vertical boards and setting the distance to the cross members from each end. So in short, pick something that looks good to you and go with it! Good luck on your project!
Kent
LOL!
The boss is always right?
Thanks for your input. Guessing have never been a option with my projects. I’m just a perfectionist that way! Some call it obsessive compulsive disorder! I call it necessary. I hope mine turn out as well as yours
I have a little OCD also, so i can definitely relate! I hope the project turned out to your liking.
Kent
I love your shutters and am planning to make these for our lake cabin. I am making my materials list and would like your advice on the attachment hardware (screws). Our cabin is cypress wood exterior, basically in the shape of a long old fashioned shingle overlapping. How do I find a stud to attach the shutter to and what type and length if screw?
Thank you,
Linda Hendrix
Hi Linda,
Thank you for reaching out to us! I absolutely love the look of cypress, I’m sure your cabin looks great! I used an electronic stud finder to locate the studs on my project. If you don’t want to spend the money on that you can buy a magnetic stud finder relatively cheap which will locate the nails used to attach the siding to the studs. With a bit of work you should be able to establish the stud location. As for the length of screw, that will depend on the weight of the shutter and the type of fastener you use. I would recommend checking with the screw manufacturer you intend to use.
Best of luck on your project!
Kent
Thank you! I have a magnetic stud finder.
Regards,
How have these held up? Do they need repainted frequently?
Great question, Tammy! We’ve had them up for three years now and they’re holding up really well. We have not repainted them yet and they don’t appear to need it anytime soon. We just had to do some minor touch up painting when we nicked up the front one when we added the new front porch last summer. Otherwise, they look great still!
Best wishes,
Carrie
I really like the rustic and unfinished look with just the primer on. Is it okay to just leave it at that, or would you need to first treat the wood before putting on the primer? Our house is a darker blue and I think the white would look really great up against it. Do you think something like that would actually look good once up?
Hi Ashlee,
Great questions! If you want to keep the shutters white, we’d recommend using white exterior paint after the primer. If you’re going for more a “white washed” look, instead of painting, you could use a clear exterior wood lacquer or sealant to seal the wood after you prime or white wash it. You definitely want to seal it or the wood will rot over time as it ages and comes into contact with various weather conditions.
White rustic shutters on a dark blue house would look great! We’d love to see photos after you complete your project. If you share them on Facebook or Instagram, can you please tag us @kenarryideas so we can see?
Good luck with your project!
Best wishes,
Kent and Carrie
Ideas for the Home by Kenarry
Yes, thank you so much for the information! That is very helpful, although a project like this seems very overwhelming to me, having no carpentry experience :). That being said, it still looks like something that is doable, especially when looking at prices for premade wooden shutters at the store! Yikes! I’ll be sure to tag you if it ever happens :), and I’ve just followed y’all on Instagram. Sometimes you just need a little inspiration and encouragement!
Absolutely! Just try it with one first and see how it goes. One tip: if you don’t have a saw or are nervous to cut the boards yourself – Home Depot will cut them for you right at the store, just bring your dimensions with you. I think Lowe’s might offer this service as well. Then you’d just bring home your pieces and assemble them.
Good luck with your project!
Best wishes,
Carrie and Kent
We will be making shutters that will be 16×55. How far from the top and bottom should the horizontal boards be?
Hi Kris,
Great question! It’s really totally up to you and what your preference is. We would recommend placing the horizontal boards on top and moving them around until you like the “look” before attaching them. Then measure so you can replicate it on the other shutters. Also be sure that your measurement idd sex the same on the top and bottom so they’re all consistent.
Good luck with your DIY project!
Best wishes,
Carrie
Ideas for the Home by Kenarry
They look great. We’re fixing to do this. But I think we’ll paint the boards before we assemble them, may be much simplier. 👍
Hi Evelyn!
That is a fantastic suggestion – thank you for sharing it! When you end up putting together board and batten shutters, please let us know. We’d love to hear how it all went!
Best wishes,
Lisa at Ideas for the Home by Kenarry Customer Care