Do-It-Yourself Christmas Door Hanger
THIS POST MAY CONTAIN AFFILIATE LINKS. PLEASE SEE OUR FULL DISCLOSURE POLICY FOR DETAILS.
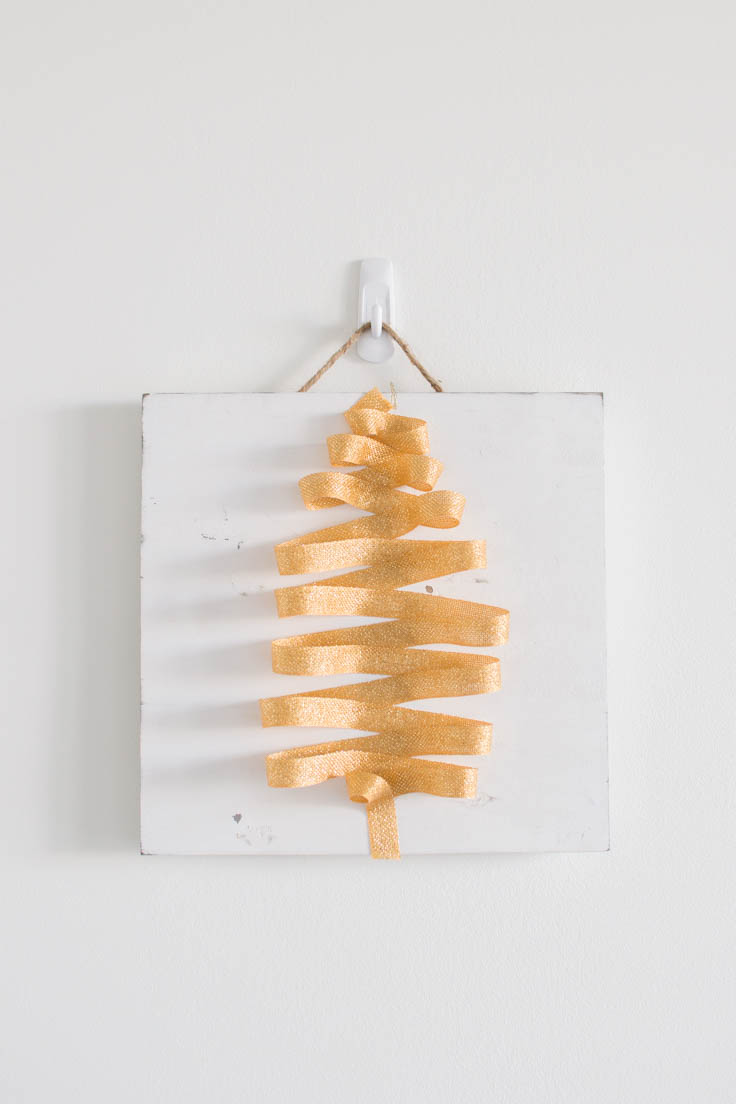
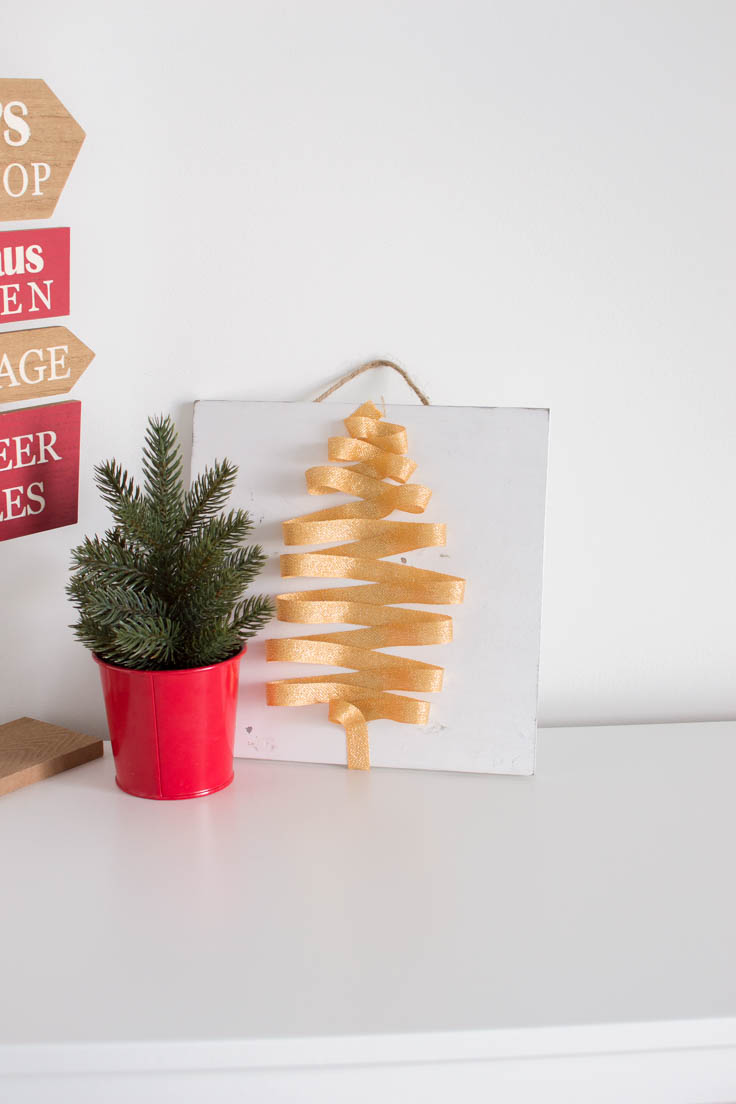
This DIY Christmas Door Hanger only requires four supplies to put together – making it the perfect holiday project even for the beginner crafter! Its simplicity is elegant, making it the perfect addition to any room in your home.
Welcome back, crafty friends! Lisa here from Sugar Agenda, a food and party blog, and I’m thrilled to be back here to share with you my latest DIY!

Are you getting excited for the holiday season? It must be getting crazy busy on your end. If you’ve been wanting to add more thematic decorative touches to your home, but can’t seem to find the time you’re in luck! I put together a quick and easy DIY Christmas Door Hanger that even the beginner crafter can whip-up!
How to Make a christmas door hanger
This Christmas Door Hanger requires very minimal supplies and is simple to put together. Its farmhouse vibes will add a touch of elegance to your holiday home decor.
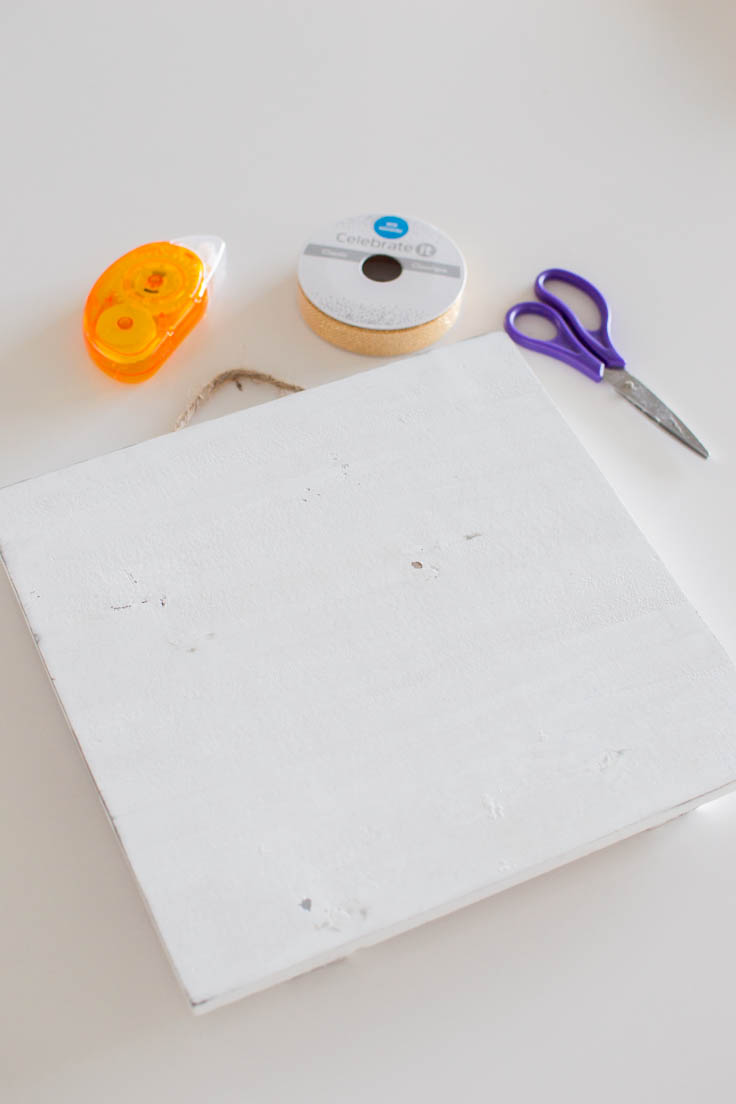
What you need:
Want more ideas like this? Subscribe today to get our weekly Ideas in Your Inbox newsletter plus other exclusive gifts and offers — all for FREE!
Craft Tools:
Supplies:
DIY Christmas Door Hanger Tips:
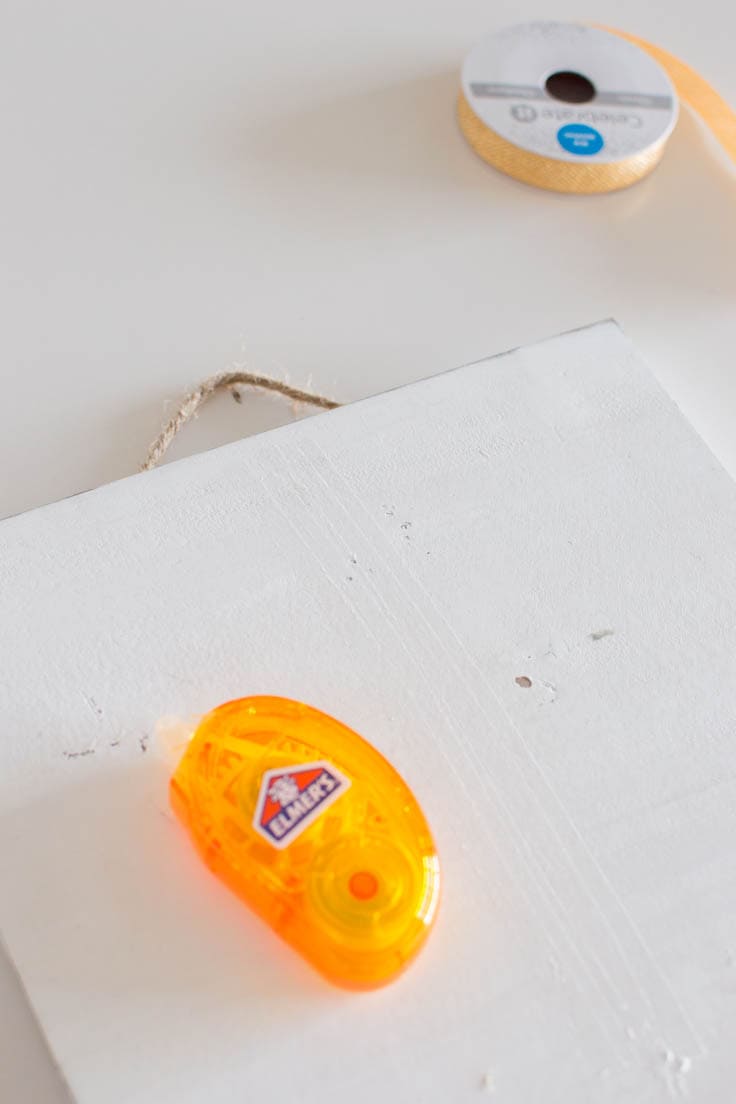
Crafter’s Tape is your best option
When it comes to the adhesive portion of this project, I highly recommend using crafter’s tape. It’s less messy to use and very precise when you need to make long straight lines (much like how you have to do it for this project).
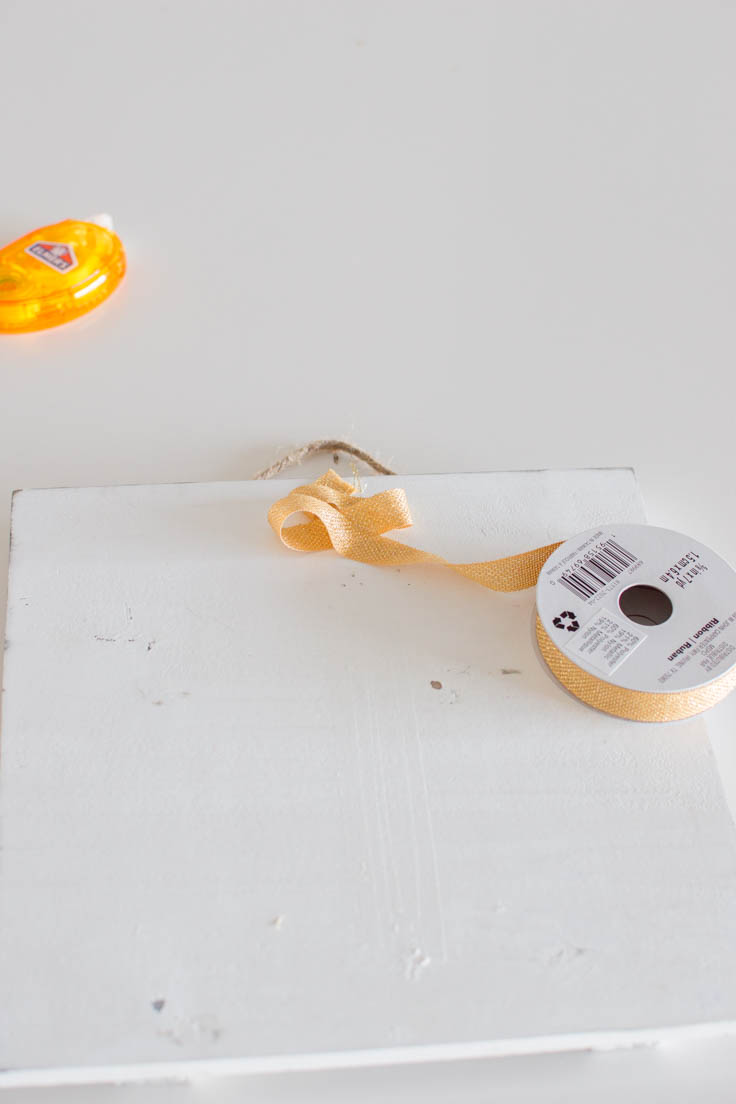
Don’t Forget to work in a loop
When you’re going back and forth to create the look of the ribbon Christmas tree, be sure that you’re looping it around to create a whimsical look. It really adds that special holiday touch to your DIY!
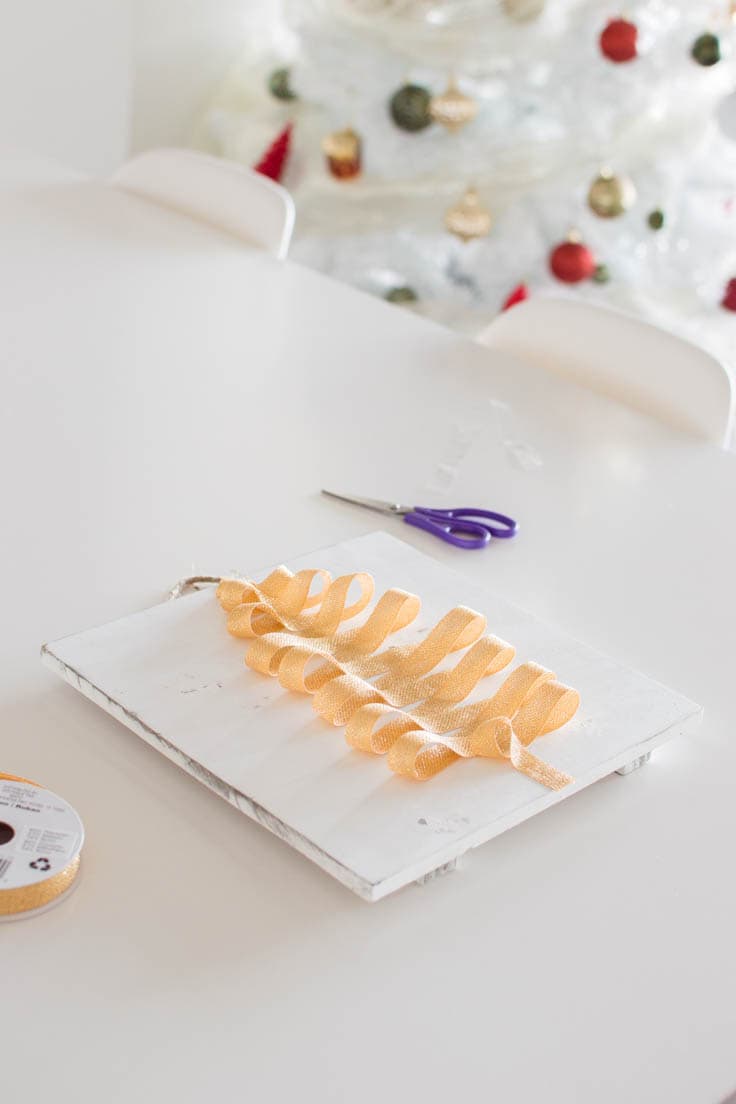
You Can Use Any Color Ribbon You Like
I opted for a gold ribbon but you can use any color you’d like! The sky’s the limit with the possibilities! I found that the gold looked really great against the white wash of my blank wooden hanger. However, if you go for a natural wood, I think red or a forest green would look fantastic.
Use this design on other projects
Now that you know how to make a ribbon Christmas tree design, this skill would transfer beautifully on other holiday projects. Try it for when you wrap your presents this year! It would really add that unique touch to your gifts!
use wider ribbon if using a larger door hanger
I decided to use a door hanger that 10in x 10in in-size. If you opt for a larger door hanger, be sure to go for a wider ribbon (my ribbon was 1/2 an inch in-size), so that your Christmas Door Hanger looks as proportional as possible.
wired Ribbon Also Works
You can also use wired ribbon – it would really give your door hanger some life and keep its shape nicely.
Christmas Door Hanger
Equipment
- Craft Scissors
Supplies
- 10 x10in blank wooden door hanger
- Crafter’s tape
- 1/2 inch-wide gold ribbon
Instructions
- Begin by adding crafter’s tape down the center of the door hanger. You will want it to be about 1 1/2 inches in size.
- Start at the top of the wooden door hanger (ie.: the tip of the tree), and work your way down by criss crossing the ribbon, making sure to press in the center so that it adheres to the strip of crafter’s tape. As you work your way down, be sure to loop at each end.
- As you get to the bottom of the tree, be sure to make each layer wider and wider.
- Once you are one inch away from the bottom of the door hanger, pull your ribbon down straight and press into the center, right on the crafter’s tape, to make the “trunk” of the tree.
Love the ideas you see here on Ideas for the Home by Kenarry®? Subscribe today to get our FREE DIY & Craft Planning Calendar, plus our weekly Ideas in Your Inbox newsletter filled with creative tips and exclusive offers!

What’s Next?
If you enjoyed this Christmas Door Hanger DIY, then you’ll enjoy these holiday ideas, too.
Chocolate Peppermint Cupcakes for the Holidays

Biscoff Cupcakes for the Holidays

DIY Toilet Paper Snowman Craft

You may also enjoy these holiday ideas on Ideas for the Home by Kenarry® –