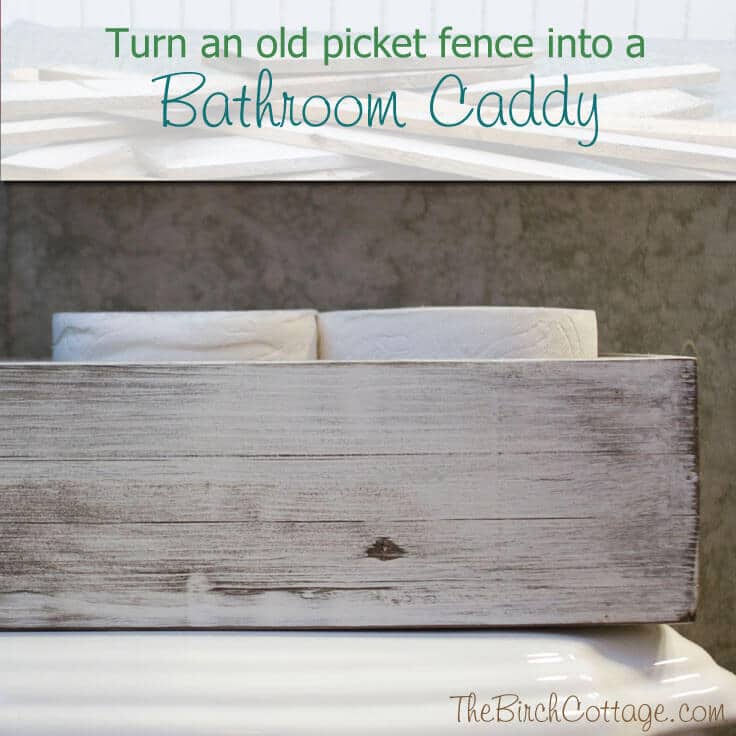
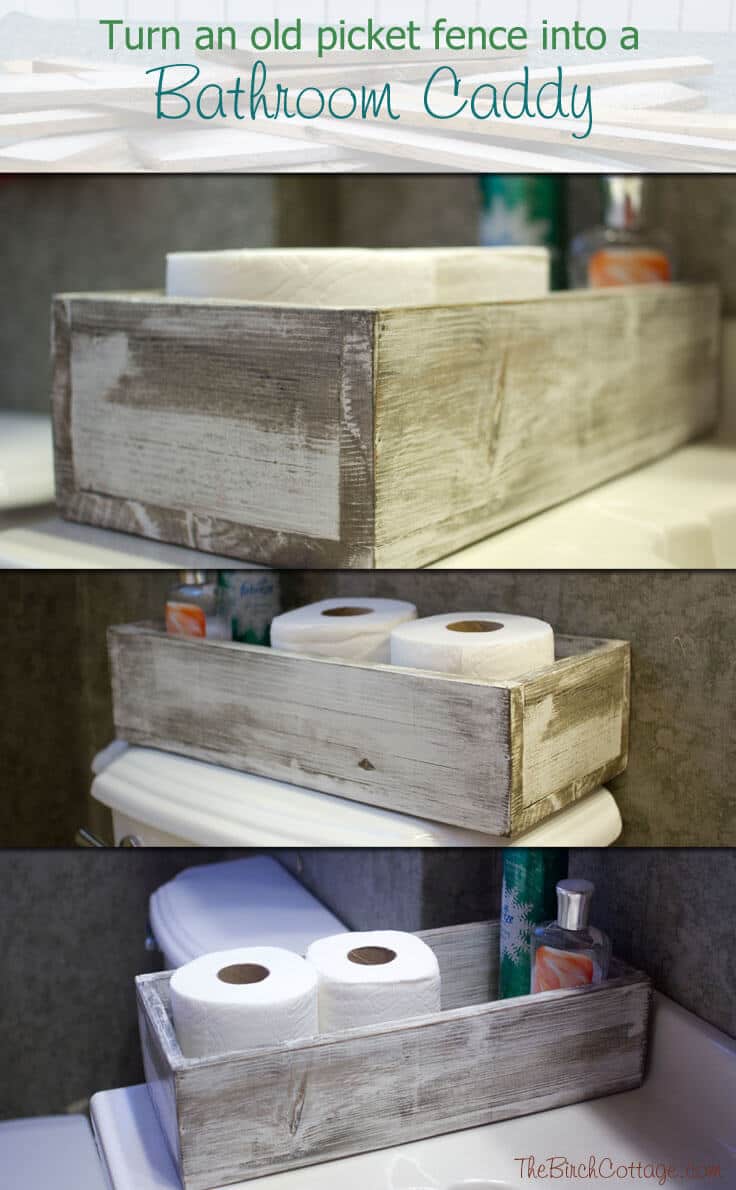
DIY Bathroom Caddy
THIS POST MAY CONTAIN AFFILIATE LINKS. PLEASE SEE OUR FULL DISCLOSURE POLICY FOR DETAILS.
Follow this DIY tutorial to learn how to make a bathroom caddy using an old picket fence, stain and chalk paint. It’s an easy project to help organize the bathroom.
Hello, Ideas for the Home by Kenarry® readers! I’m Pam from The Birch Cottage and I’m back again to share another DIY project with you. This month I’d like to share my DIY Bathroom Caddy with you. It’s really crazy around my house right now as Lenny and I have just begun a wonderful series of projects called “home remodeling.” Dust everywhere! But, I didn’t let a little thing like home remodeling interfere with this project.
This was an easy project that I’m proud to report I completed without any assistance from “the master of power tools.” Although he did ask me a couple of times if I wanted his help. He just cringes when he sees me using power tools. I, on the other hand, love using the power tools. I feel somewhat empowered. (That’s supposed to be funny.) Well, back to the DIY Bathroom Caddy project. This caddy is made from repurposed fence pickets.
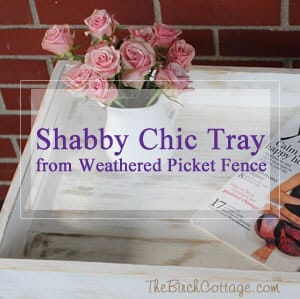
We bought an entire pallet of picket fence at an auction a couple of months ago and I’ve been having a great time coming up with new ways to re-purpose the picket fence. My first project was a Shabby Chic Wood Tray – that, by the way, I’m just in love with.
I have several other projects planned and I’ll be sharing those on my blog as well. For the bathroom caddy, the first thing I did before I started cutting any wood, was to measure the back of our commode, which is going to be our bathroom caddy’s new home. I got the length and width measurements and then made my cuts. I’m using two pieces of pickets for the bottom of the caddy, so that the bottom is two pickets wide. I’m using one width for each of the four sides.
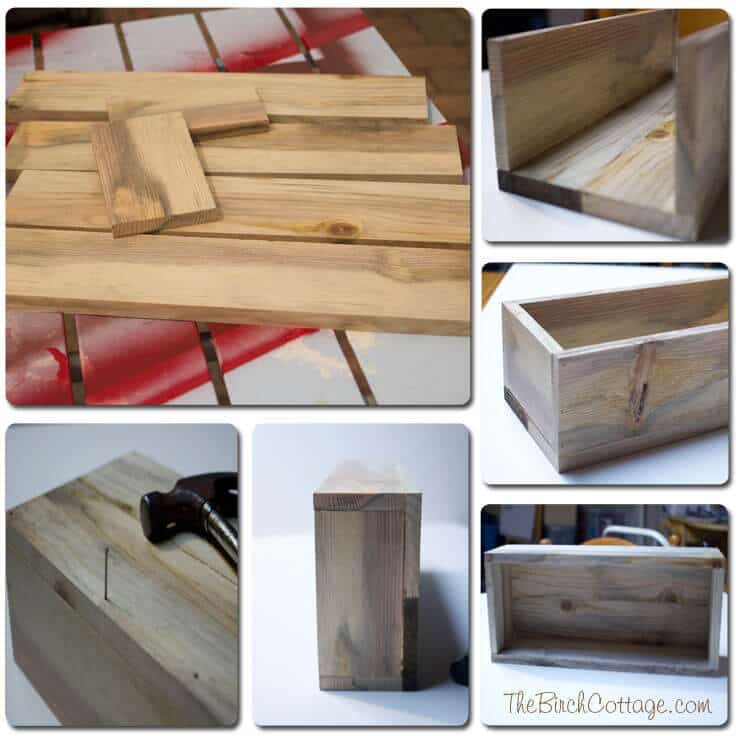
For my bathroom caddy, I cut two pieces of picket fence at 15″ long and two pieces at 6″ long. Once I had the pieces cut, I sanded all of the pieces so I could remove any dust, debris or mold.
Then I applied a bead of wood glue along side of each of the 15″ pieces and glued those two pieces together. I then applied a bead of glue to the top of the bottom and the bottom of each of the long side pieces and glued those pieces together. The wood glue I used dried really fast, so be sure you have your pieces lined up perfectly.
Once I had the two long pieces glued to the bottom pieces, I applied a bead of glue down each side of the shorter pieces and the ends of the long pieces and glued the ends in place. I made sure everything was lined up just so and then gave it a few minutes to dry. I attached small finishing nails along the edges to attach all the pieces.

Once I had all my pieces glued and nailed together, I was ready to do a little bit of sanding just to smooth out any rough spots. After sanding, I wiped down my caddy with a damp cloth to remove any dust. I made sure the caddy was good and dry and then began to apply my stain. I used a cotton rag to apply the stain to the wood, working with the grain.
I let the stain dry for a couple of hours, and whipped up a batch of chalk paint while I waited for it to dry. I have a great chalk paint recipe on my blog or you can purchase chalk paint from your favorite home improvement store, paint supplier or online.
After the stain was dry, I applied one coat of chalk paint, waited a very short time for the chalk paint to dry (because it dries really quickly), and then sanded the chalk paint to expose the stain below. I was going for an old rustic look, so after just one coat of chalk paint, I had just the look I wanted.
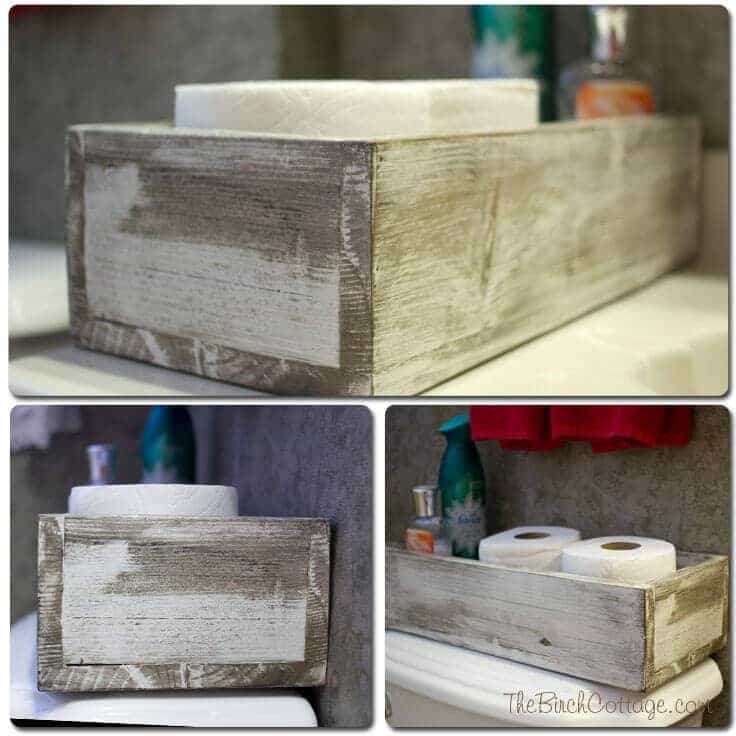
I haven’t decided yet if, or more accurately what kind, of handles I’m going to affix to my new Bathroom Caddy. Since Lenny and I are in the process of turning “Nanny’s house” into our home, I’m waiting to affix the hardware once we decide on the hardware for the rest of the bathroom. Until then, I’m just going to admire my bathroom caddy.
Add Labels
Optionally, you can now add new labels or leave them as they are. Clutter Keeper has some printable Bathroom Labels you can download and print!
If you liked this DIY project from The Birch Cottage, you might like one of these popular posts as well:
What’s Next?
While you’re here, be sure to check out other DIY projects on Ideas for the Home by Kenarry® –
One Comment