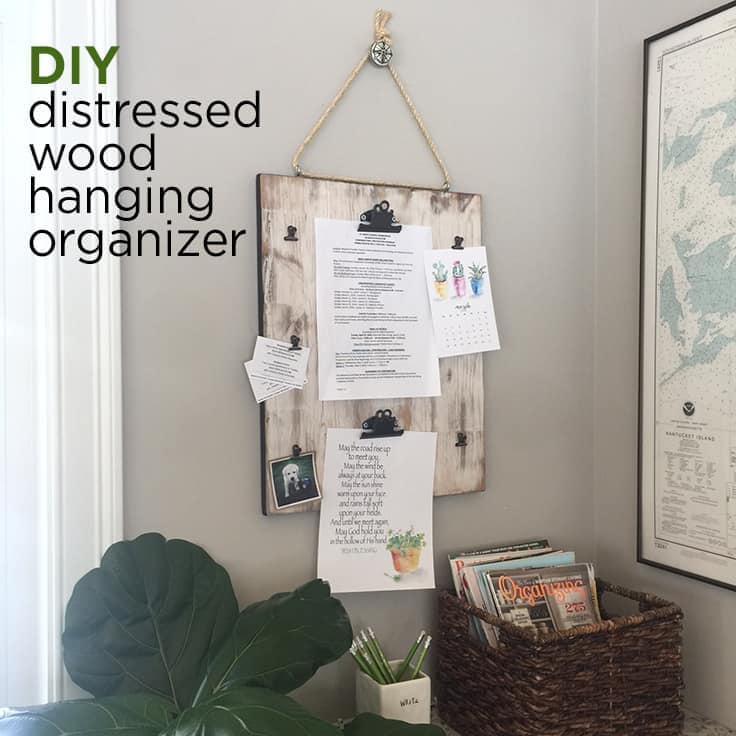
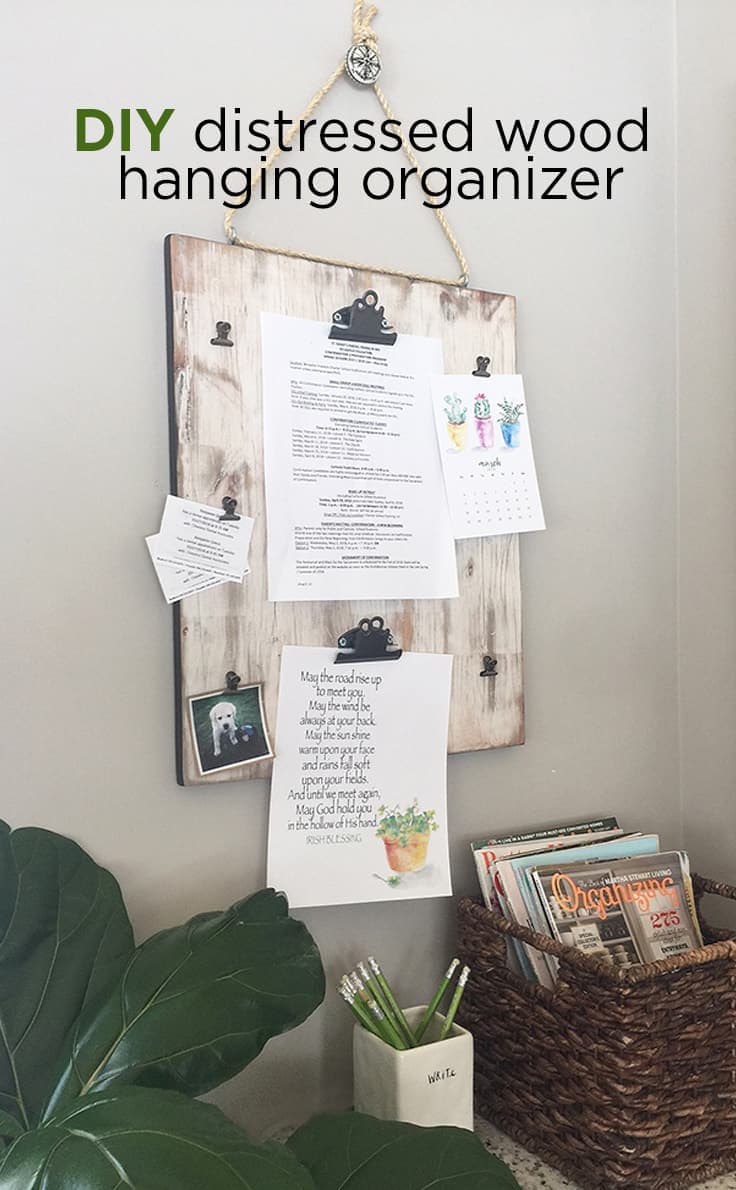
DIY Distressed Wood Hanging Organizer
THIS POST MAY CONTAIN AFFILIATE LINKS. PLEASE SEE OUR FULL DISCLOSURE POLICY FOR DETAILS.
This fun distressed wood hanging organizer is a cool, unique and useful piece that you can make to help organize your important papers and make them look pretty.
Hi Kenarry Readers! It’s Lori from Greco Design Company. I created this wood organizer for a client who needed a place to keep her family’s schedules, school notes and daily reminders. But she wanted something that was stylish and didn’t look like it belonged in an office.
Disclosure: This blog post contains affiliate links for products or services we think you’ll like. This means if you make a purchase from one of these links, Ideas for the Home by Kenarry® will make a small commission at no additional cost to you so we can keep the great ideas for the home coming your way. All opinions expressed are derived from personal experience.
I love distressing wood to make my wood signs so I thought a piece of distressed wood would be the perfect backdrop for an organization area. Making this piece was fairly easy and very forgiving. And you can tailor it to fit your space and color palette.
How to Make a DIY Distressed Wood Hanging Organizer
Here are the instructions to create your own distressed wood hanging organizer:
Materials:
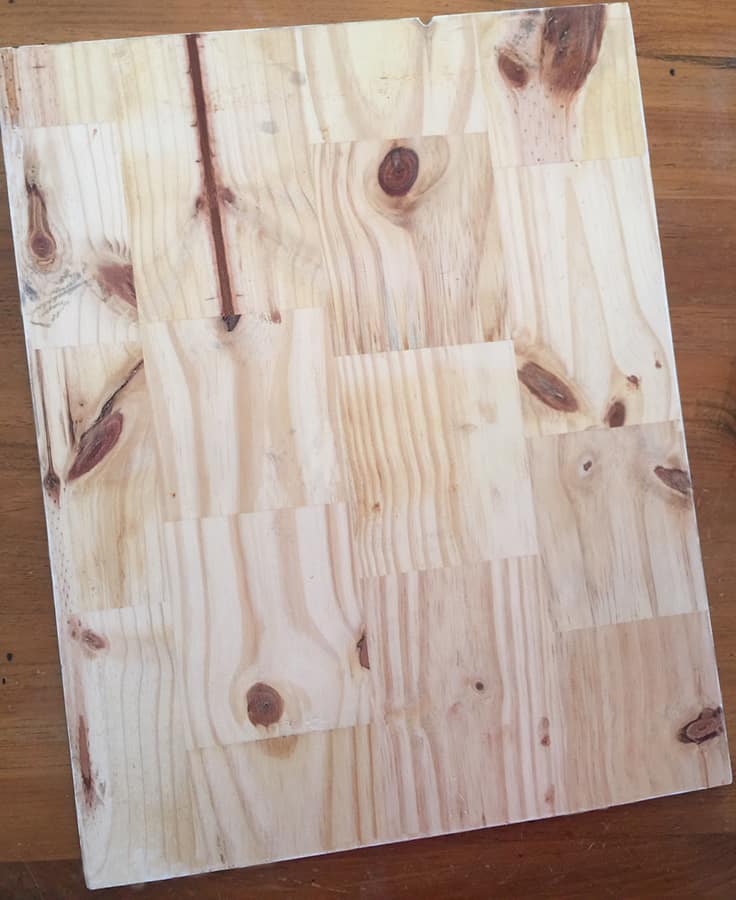
- a piece of wood, cut to the size you need. I used common board and my final size is 16″ x 22″.
- paint – I used white & black acrylics, plus gray stain. I chose this combination of paints and stain because my goal was to match the finish on chairs in this room, but you can use any colors you’d like.
- an electric sander or sandpaper
- a fork (you’ll see…)
- metal clips. I found these small clips at Michael’s. I also used 2 larger ones I had leftover from a previous project. These small metal clips and large clipboard clips on Amazon would work too.
- hanging hardware and twine (optional)
Instructions
How To Distress The Wood
To start, you’ll need to paint 2 coats of your background color onto the wood. I like to add a few additional strokes of an additional paint color to make the wood look a little more aged.
Let the paint dry fully and you’ll need to sand all the edges so they are rounded and worn. Also I like to sand the front so the paint looks aged too. I find an electric sander works best for this step. You can sand the piece by hand, but it will just take longer.
Next, I added a coat of the stain. This step is optional but I find adding a coat of stain – either tinted gray or wood toned color – helps the areas where there is bare wood to have a richer look. I used a gray stain to match the chairs in my client’s room but I love, love how this colors looks with the white and black paints.
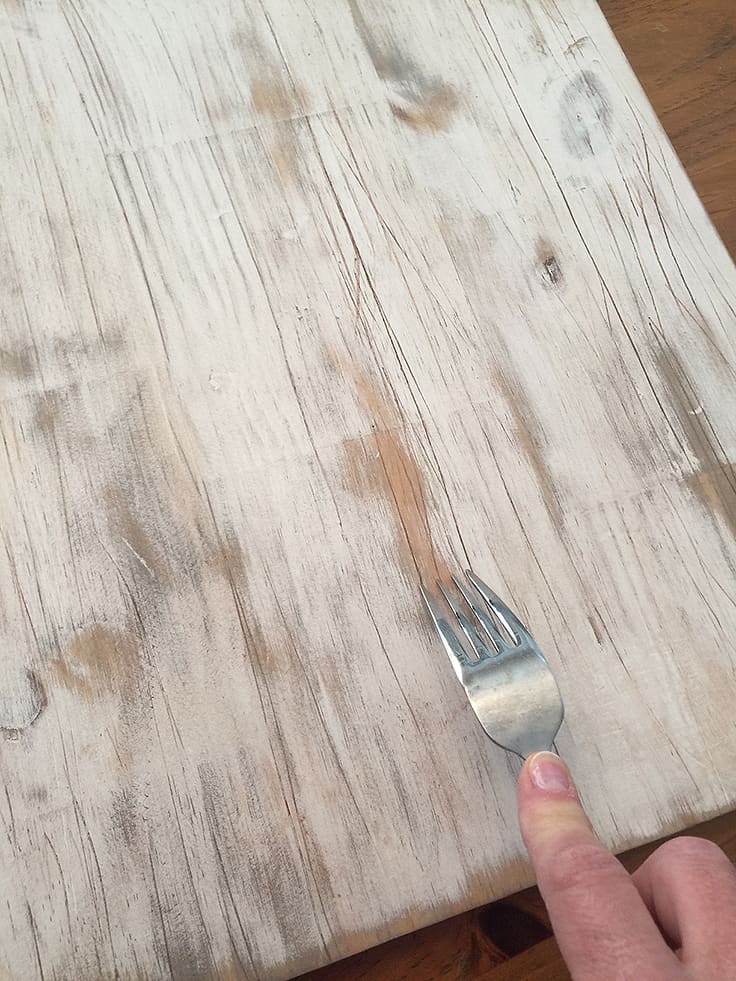
After the stain was dry, I used a fork and dragged the prongs down the wood to add some dimension and ridges. I was trying to match the linear grain look of my clients’ chairs but again, I loved how this technique turned out.
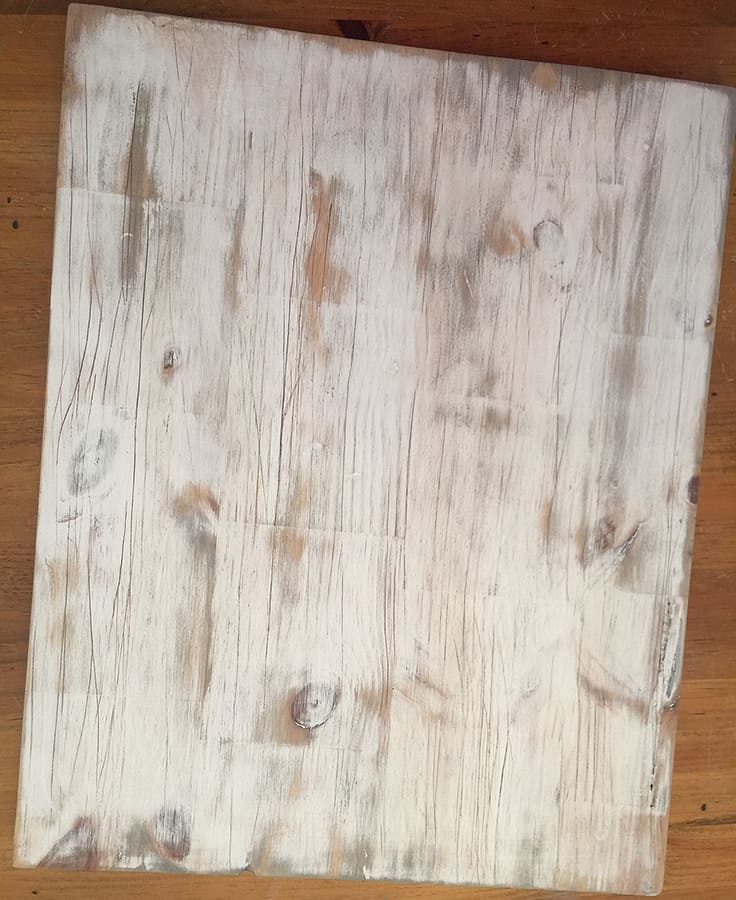
Here’s how my wood piece looked after all that painting, sanding and texture.
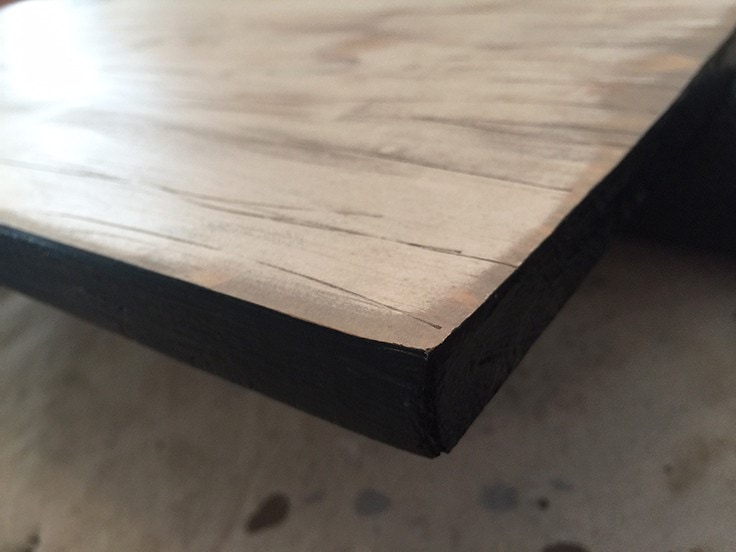
How to Give the DIY Organizer a Finished Edge
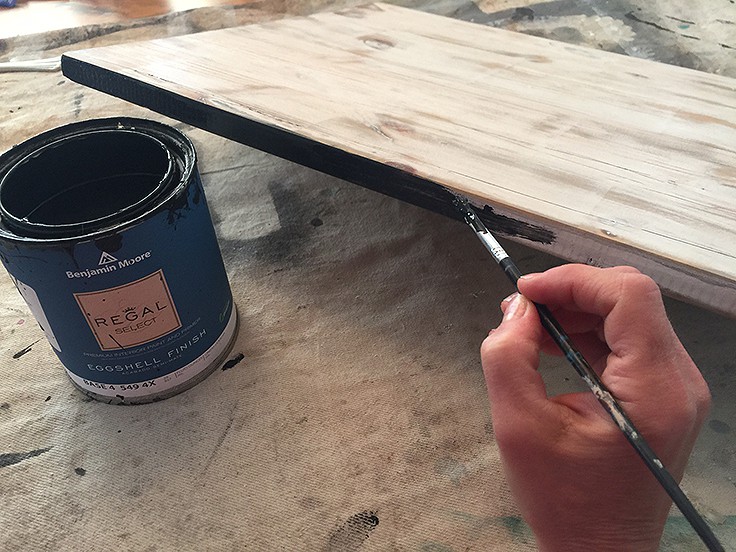
I didn’t want to add a frame to this piece but I thought it needed some sort of finishing to the edges. So I decided to paint the sides black. This is a simple way to add little more dimension to any wood sign.
I had previously hung a gallery wall with lots of black frames in the same room where this organizer will be hanging. So this subtle black touch will help relate to those frames.
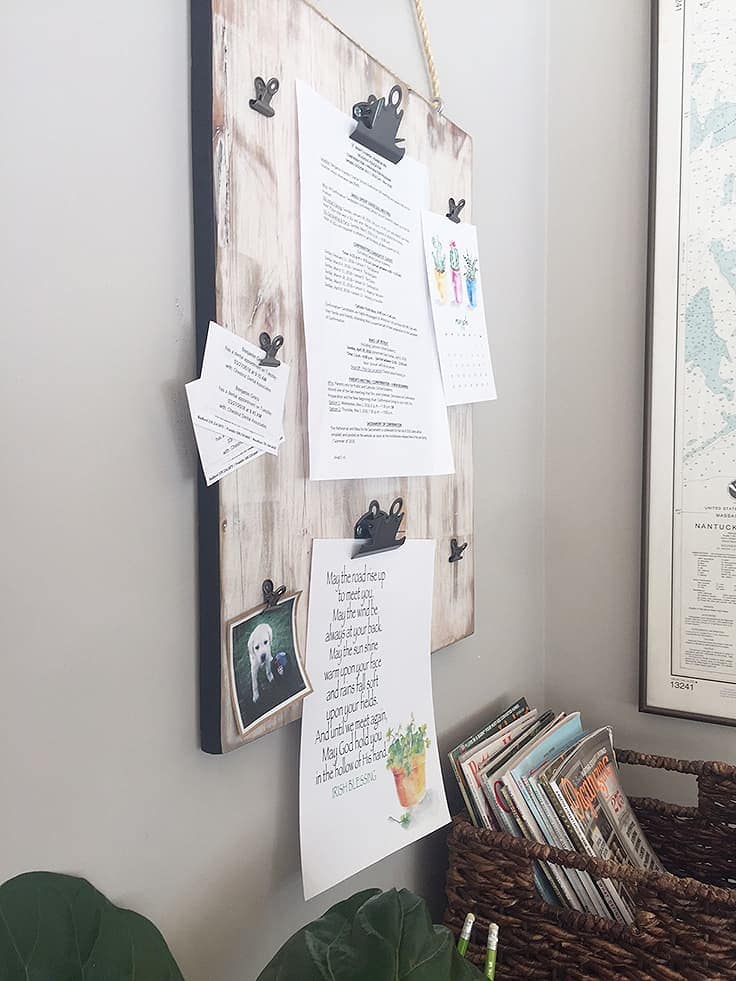
Add Metal Clips to the DIY Hanging Organizer
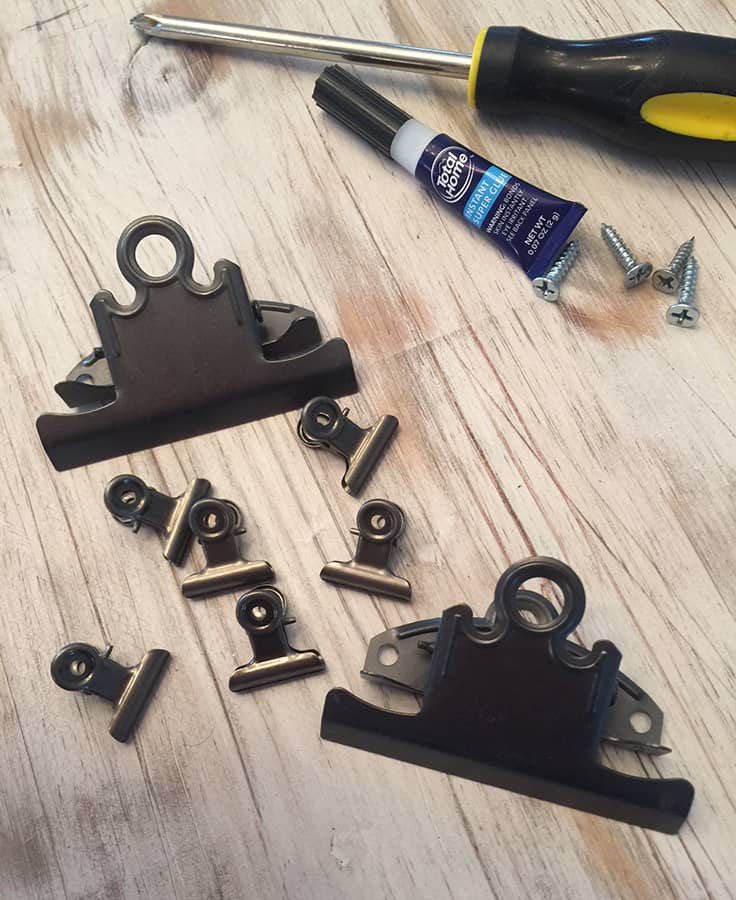
After the edges were dry I added the metal clips. I spaced them out so different sized papers could be hung on them, knowing that most papers will extend off the wood piece.
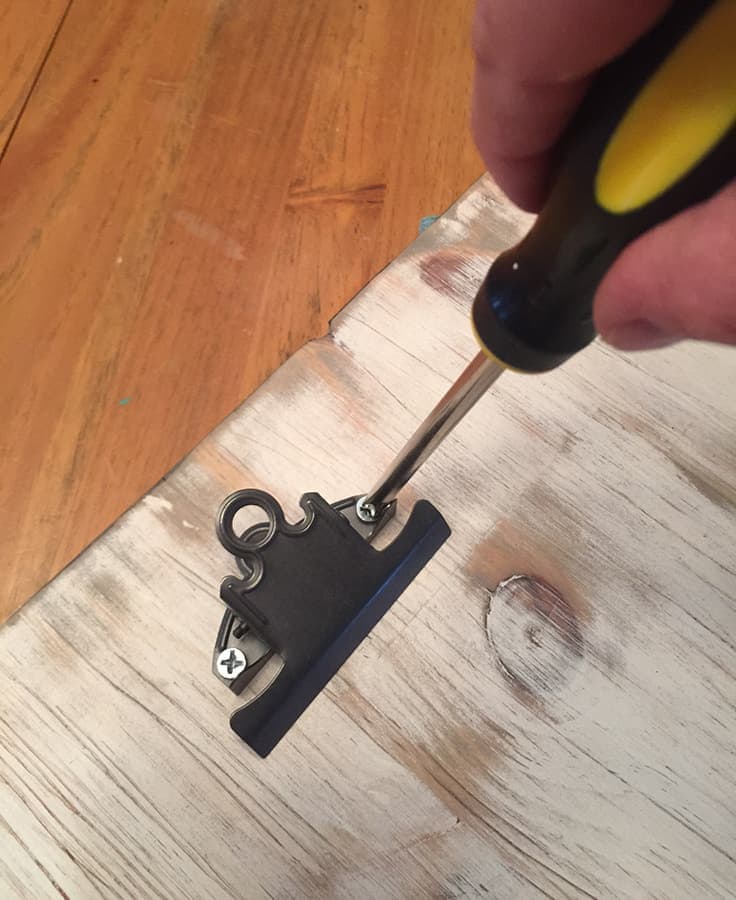
For the larger clips, I used screws and super glue but I attached the smaller ones with just super glue.
How to Hang the DIY Distressed Wood Organizer
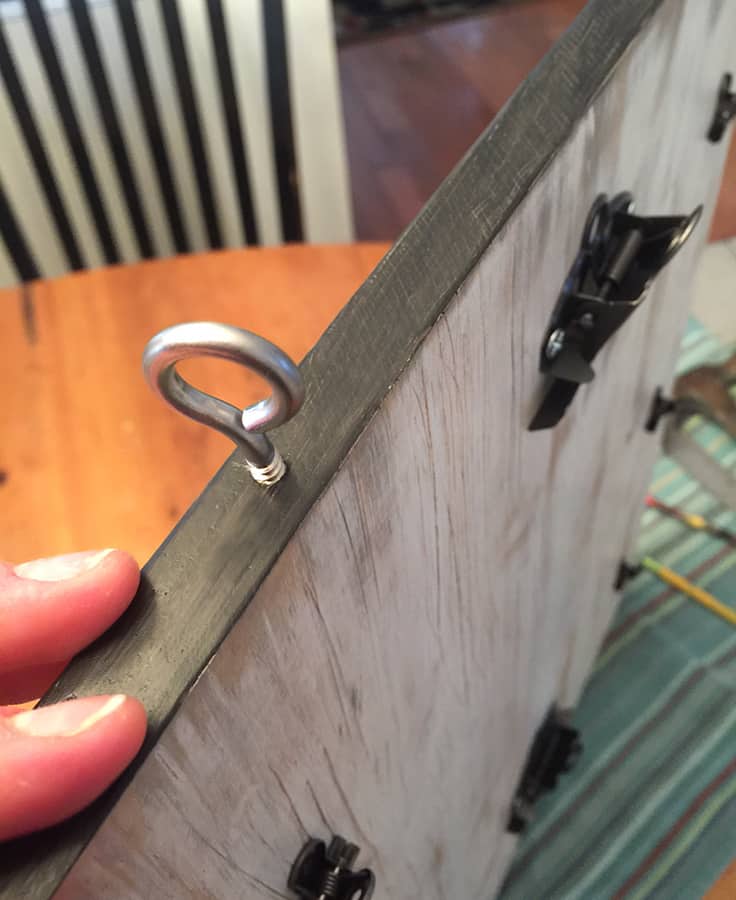
Let the glue dry completely then it’s time to add the hanging hardware. I wanted something a little more unique for this piece, so I used 2 eye hooks and some twine. I screwed the eye hooks into the top edge of the wood, spaced out evenly.
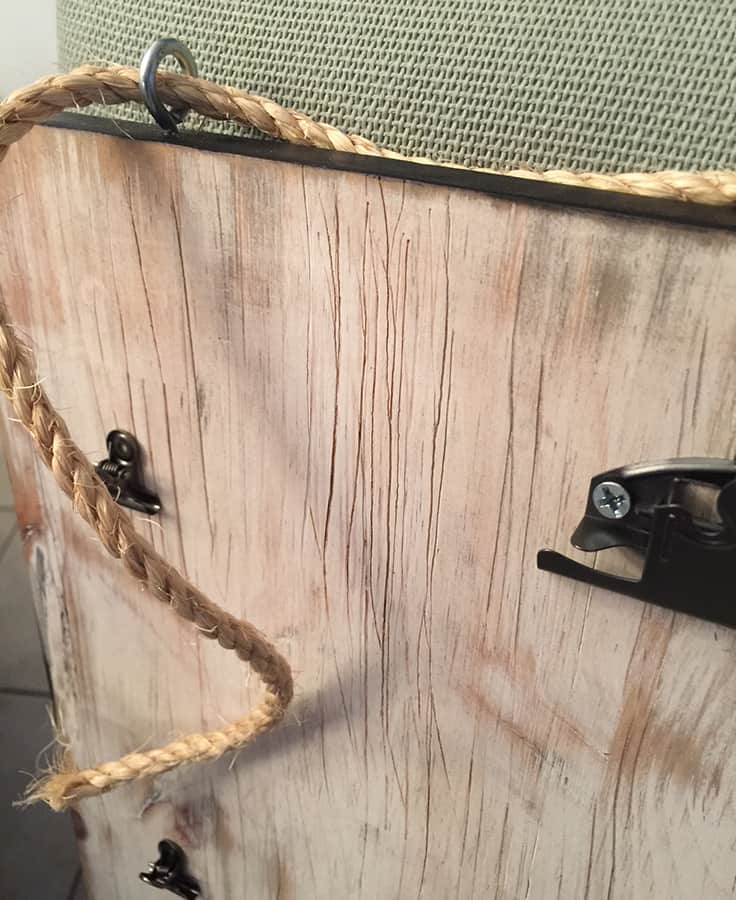
Then I thread a .5″ piece of twine through them and tied a simple knot at the top.
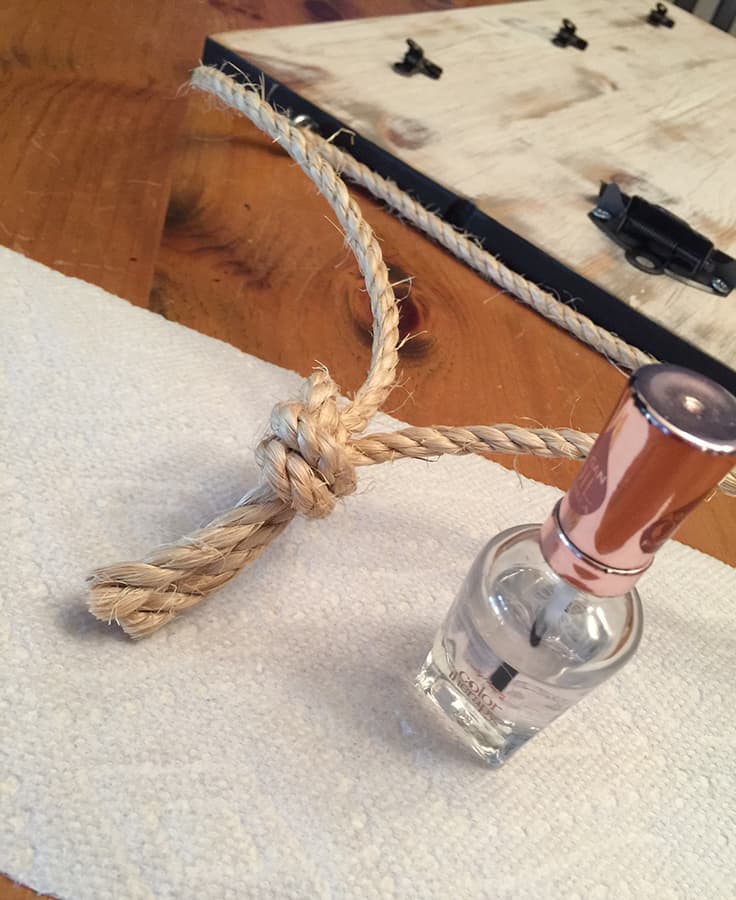
To keep the twine from fraying, I added some clear nail polish to the ends.
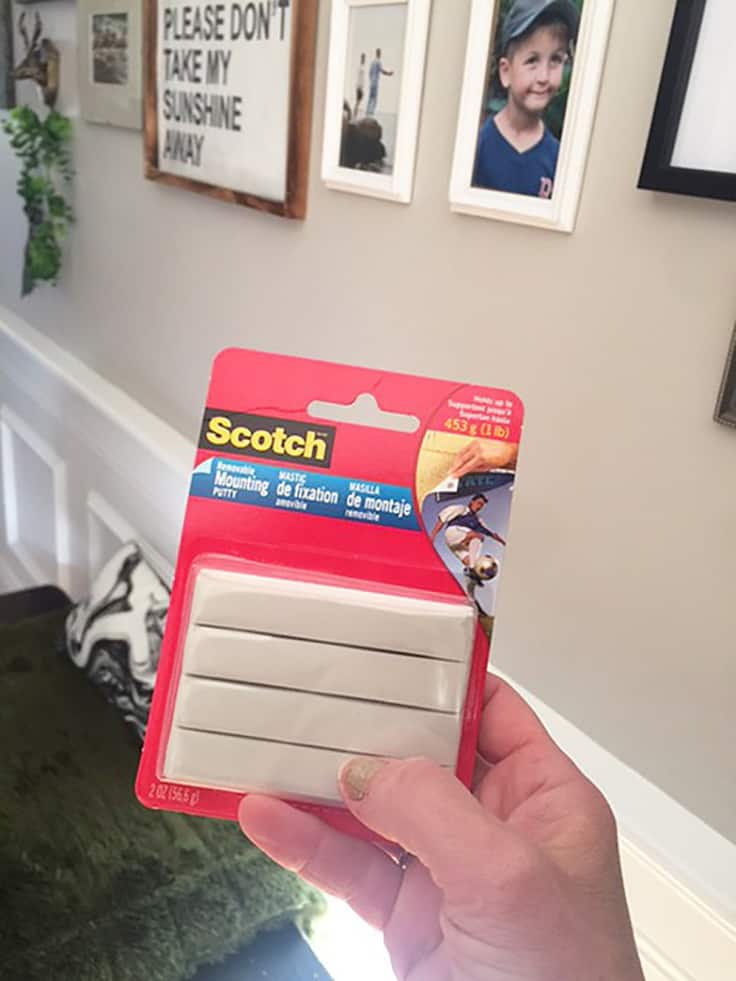
I’ll need a hook to hang this along with some Scotch Mounting Putty. The putty will prevent the wood organizer from sliding around and it won’t damage the walls.
The Finished DIY Distressed Hanging Wood Organizer
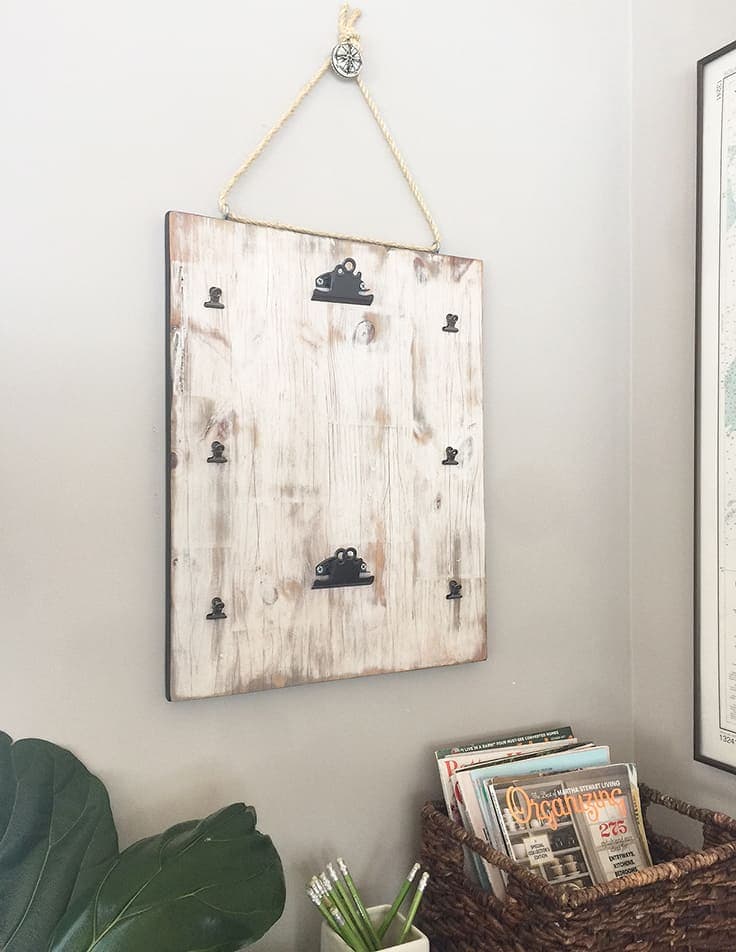
It looks so pretty without all those papers…
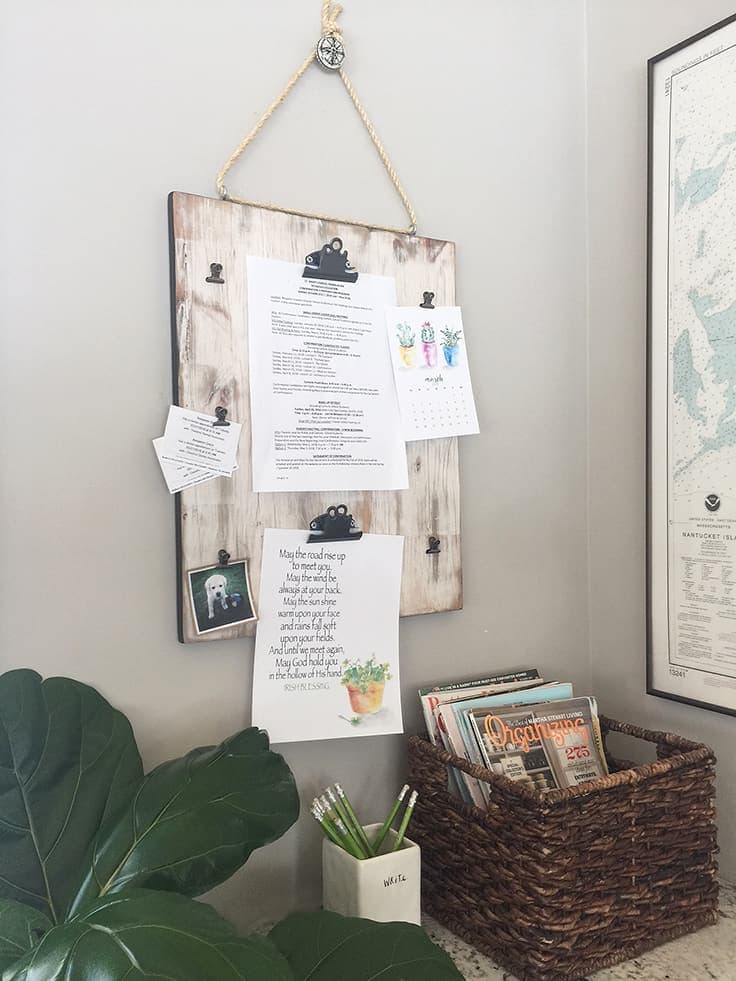
But it’s still pretty cute.
Now my client has a pretty and one-of-a-kind, distressed wood organizer. It’s the perfect solution for all those schedules, school notes and reminders. Plus she can hang it in an area for all to see.
Love the ideas you see here on Ideas for the Home by Kenarry®? Subscribe today to get our FREE DIY & Craft Planning Calendar, plus our weekly Ideas in Your Inbox newsletter filled with creative tips and exclusive offers!
If you liked this post, check out these additional posts about uses for distressed wood:

DIY Distressed Wood Shelf with Ikea Brackets
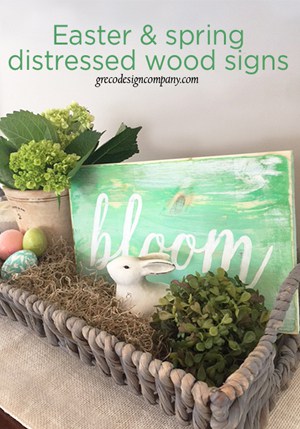
Easter & Spring Distressed Wood Signs
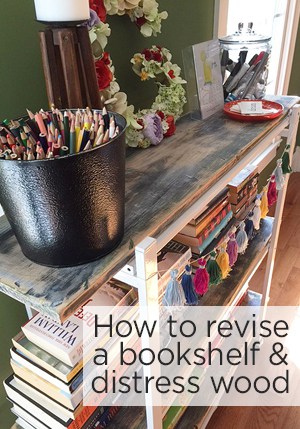
How to Revise a Bookshelf & Distress Wood
You may also enjoy these other home decor ideas on Ideas for the Home by Kenarry® –