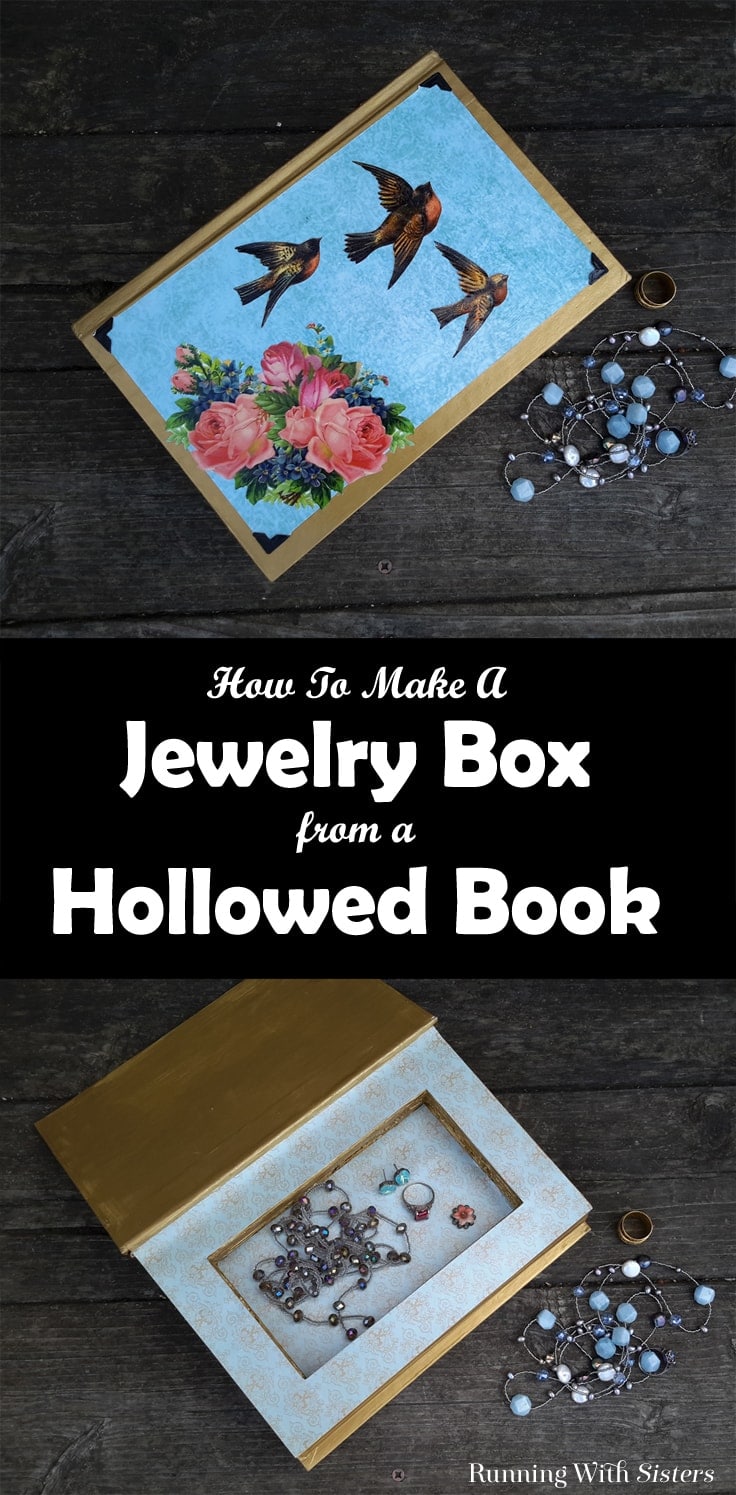
DIY Jewelry Box: Turn A Book Into A Jewelry Box
THIS POST MAY CONTAIN AFFILIATE LINKS. PLEASE SEE OUR FULL DISCLOSURE POLICY FOR DETAILS.
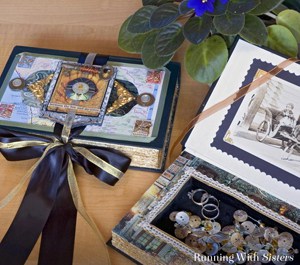
Upcycle a thrift store book into a DIY Jewelry Box. In this video tutorial, we’ll show you how to hollow out a book to create a box.
Hi Kenarry Readers! We’re Jennifer and Kitty from RunningWithSisters.com, and we’re back to share a cool upcycle project with you –– a DIY Jewelry Box made from an old book!
When we were kids, we loved the idea of hollowing out a book to hide secret treasures. So when we spotted old books at the thrift store, we thought it’d be fun to hollow one out to make a jewelry box! We picked a hardback about 1½” thick so it would be deep enough to hold our bracelets and rings. Then we hollowed out the inside and decorated the cover. We can’t wait to show you how we did it!
The trickiest part of this project is cutting the niche into the book. But we’ll take you through it step by step. We’ve even made a video showing everything you need to know –– from cutting the book pages to painting the edges and embellishing the lid. And if you have any questions about the DIY Jewelry Box, just leave us a comment below and we’ll reply. We’d love to help!
How To Make A DIY Jewelry Box
Disclosure: This blog post contains affiliate links for products or services we think you’ll like. This means if you make a purchase from one of these links, Ideas for the Home by Kenarry® will make a small commission at no additional cost to you so we can keep the great ideas for the home coming your way. All opinions expressed are derived from personal experience.
Materials & Tools
- Hardback book, at least 1½” thick
- Mod Podge Gloss
Acrylic craft paint (We used Plaid Folk Art Brushed Metal in Brushed Gold #5121. This Folk Art craft paint on Amazon is similar.) - Craft paintbrush
- Craft knife (like an X-Acto)
- 2 pieces of decorative scrapbook paper
- Vintage clip art (printed on a LASER printer)
- 4 Photo corners
- 4 Wooden beads, 1″ diameter
- E6000 glue
- Scissors
- Ruler
- Pencil
DIY Jewelry Box Tutorial
1. Create a niche inside the book. To do this, first paint the outside pages of the book with Mod Podge. This will effectively glue the pages together.
2. Next, mark the section inside that you want to cut into a niche using the ruler and pencil. We marked a rectangular opening for our niche on the first page of the book about 1″ from each side.
3. Using a sharp craft knife and ruler, carefully cut through the first ten or so pages of the book.
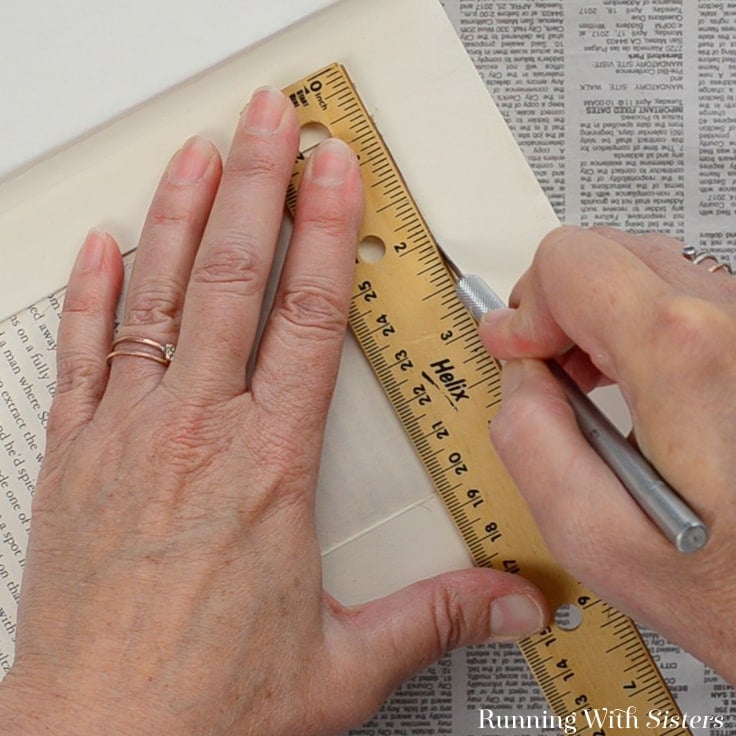
You can make repeated cuts and don’t need to press hard to cut through all the pages at once. Please be careful! Continue to cut the pages along the pencil guidelines, removing ten or so pages at a time until you have a niche almost as deep as the book.
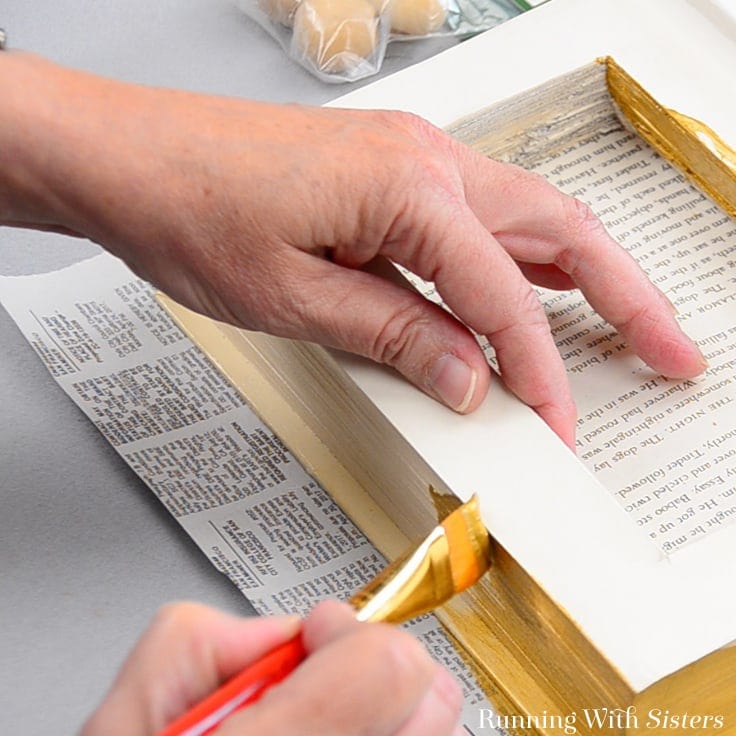
4. Paint the inside of the niche with Mod Podge, including the page edges and the bottom. Let dry.
5. To decorate the diy book jewelry box, paint the outside edges of the pages, the cover, and inside the niche with gold paint.
6. Cut a piece of scrapbook paper to fit the inside the niche and the first page. To do this, mark the size of the niche opening on the paper. Cut the opening out with the craft knife. Glue the paper into the bottom of the niche using the Mod Podge. Glue the rest of the paper to the inside front page.
7. Decorate the cover using the scrapbook paper and clip art. We cut a rectangle of scrapbook paper slightly smaller than the lid. We glued photo corners on each corner using Mod Podge. Then we coated the back of the page with Mod Podge and glued it to the cover.
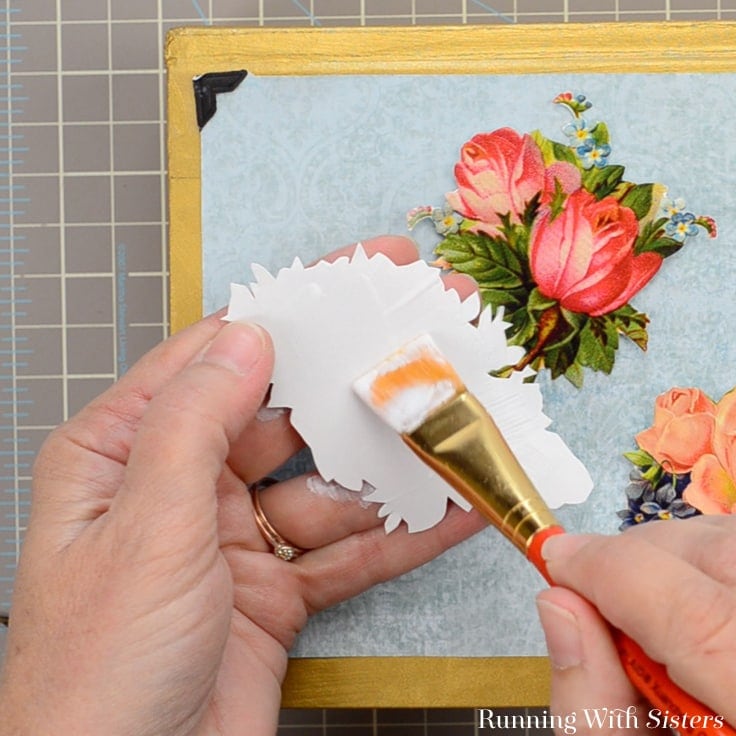
8. Next, cut out the clip art pieces and decoupage them onto the scrapbook paper on the lid. We like to coat the back of each piece with Mod Podge and press it down. Then paint a coat of Mod Podge over the top. Finally, coat the entire decorated lid with a layer of Mod Podge.
9. Paint the wooden beads gold and let dry. Use the E6000 to glue the beads to the bottom of the book box to act as bun feet. Ta-da! Know you know how to make a jewelry box made from a vintage book!

Have you ever hollowed out a book to create a hiding place for treasures? We want to hear about it! What did you hide?! Leave us a comment below! You should also check out this great review from Kylie at The Take on Adventure. She gave this project a try and turned it into a beautiful sentimental gift for a favorite teacher. You should also check out our Easy Jewelry Box with a Cute Label while you’re here.
Happy Crafting,
Jennifer & Kitty
Love the ideas you see here on Ideas for the Home by Kenarry®? Subscribe today to get our FREE DIY & Craft Planning Calendar, plus our weekly Ideas in Your Inbox newsletter filled with creative tips and exclusive offers!
What’s Next?
While you’re here, be sure to check out these other craft projects on Ideas for the Home by Kenarry® –
Awesome Idea, will try it.