DIY Personalized Keychain Using Polymer Clay
THIS POST MAY CONTAIN AFFILIATE LINKS. PLEASE SEE OUR FULL DISCLOSURE POLICY FOR DETAILS.
This DIY personalized keychain is very easy to make and the ideal gift for any celebration. Here’s our step-by-step guide!
Hello, everyone! Lisa here and I am thrilled to share my latest craft: a DIY Personalized Keychain that uses polymer clay.
After you make this, you can make a clay picture frame too! Both make perfect DIY gifts.

With my husband’s birthday coming up, I wanted to give him something with meaning. This Personalized Keychain is budget-friendly and because it’s a DIY, you can custom-make it exactly to your gift-receiver’s liking!
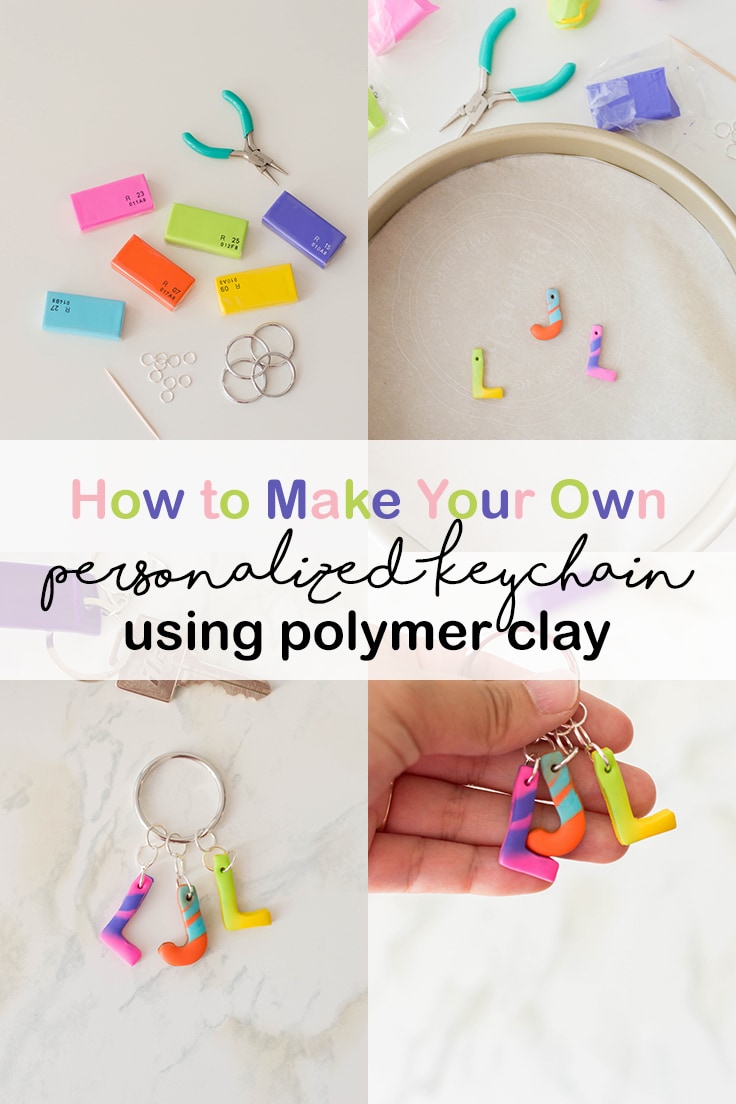
How to Make Your Own DIY personalized keychains
This DIY is my first venture into polymer clay and you know what? I am totally in love! I am eager to use polymer clay again and this personalized keychain is a really easy project to start off with.
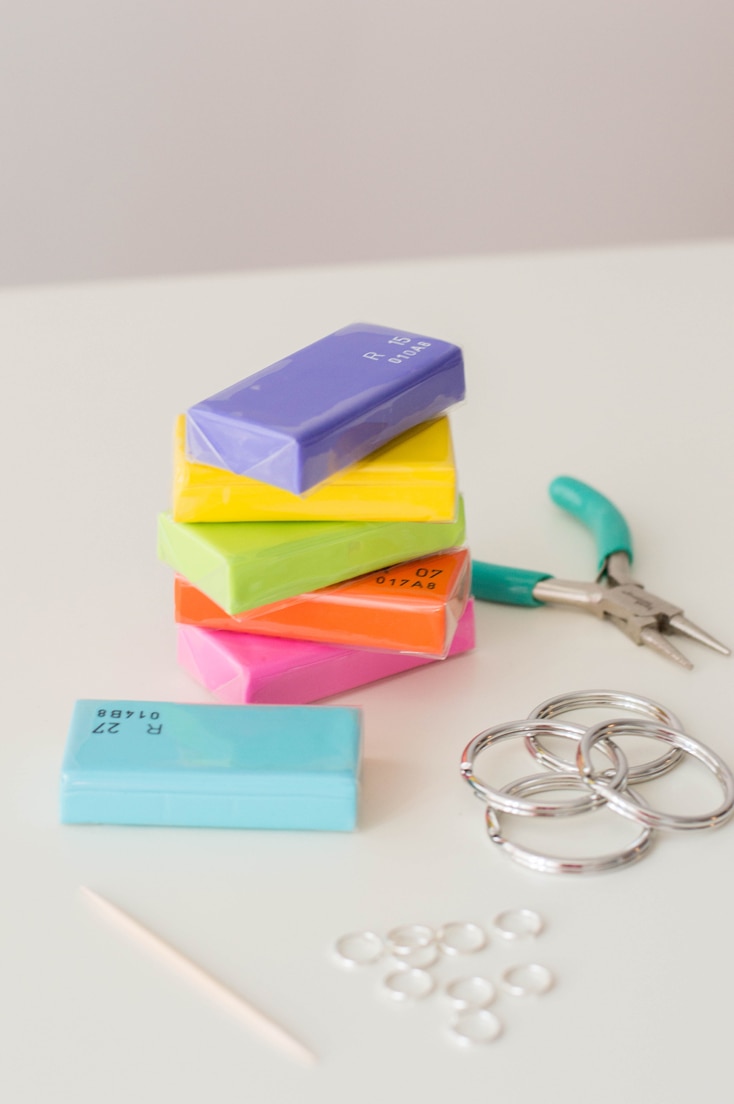
What you need:
Want more ideas like this? Subscribe today to get our weekly Ideas in Your Inbox newsletter plus other exclusive gifts and offers — all for FREE!
Craft/DIY Tools Needed:
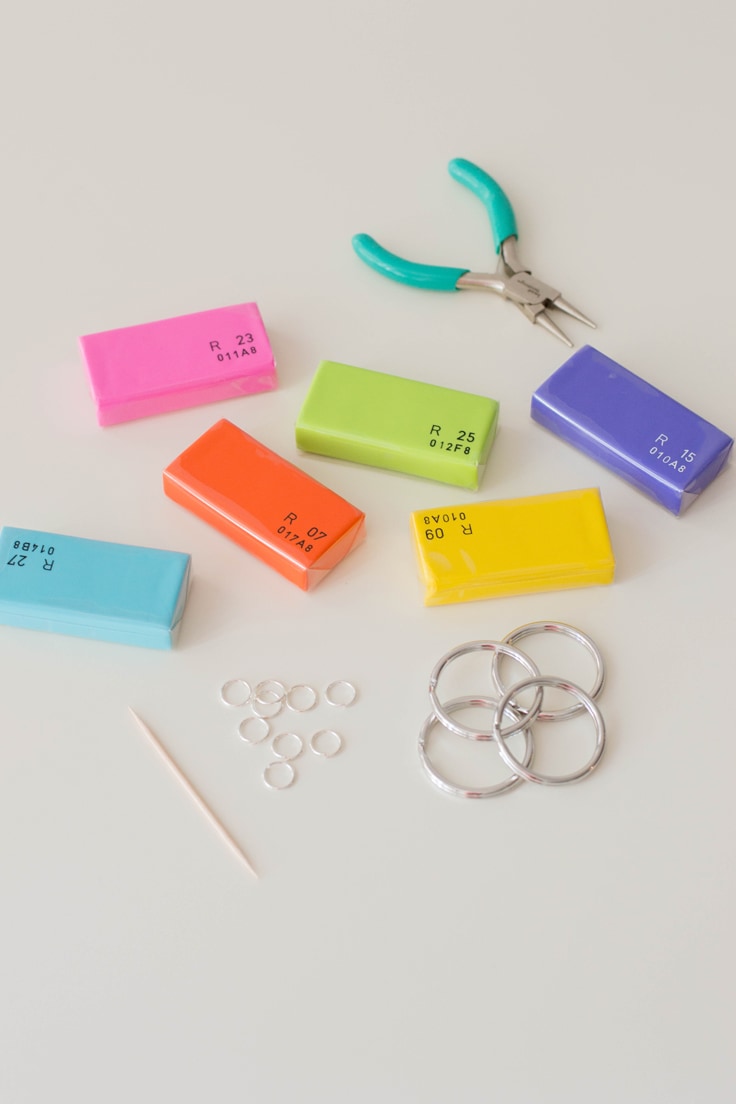
Supplies Needed:
- Polymer clay (colors of your choice) – we used two different colors for one letter
- Jump rings (you’ll need 3 per letter)
- Keyrings
- Small letter cookie cutters
Instructions:
1.break up the clay
Take 1 ounce of each color of your clay (you will want to use two for one letter) and divide them into small chunks.
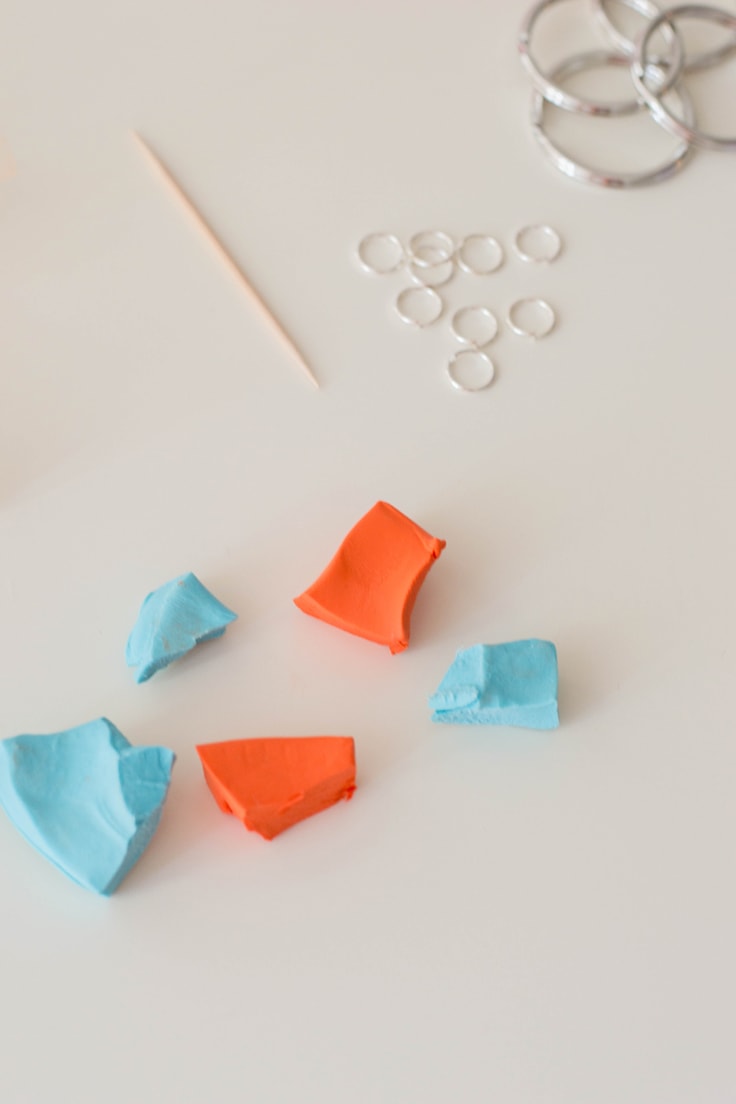
2. press the colors together
Press the clay colors together and begin kneading to create a “marbled” look.

3. roll out the clay and press the letter
Using a rolling pin, roll out the marbled clay until it’s about 1/4 of an inch thick.
Use a cookie cutter to cut out the letter of your choice.
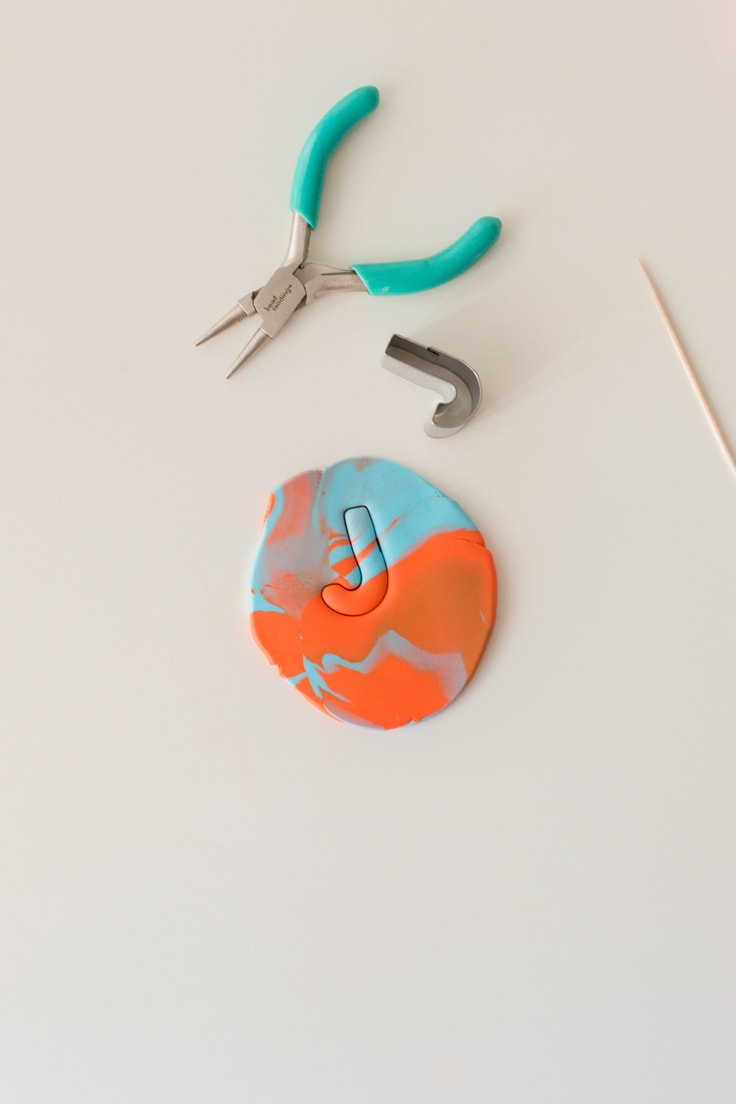
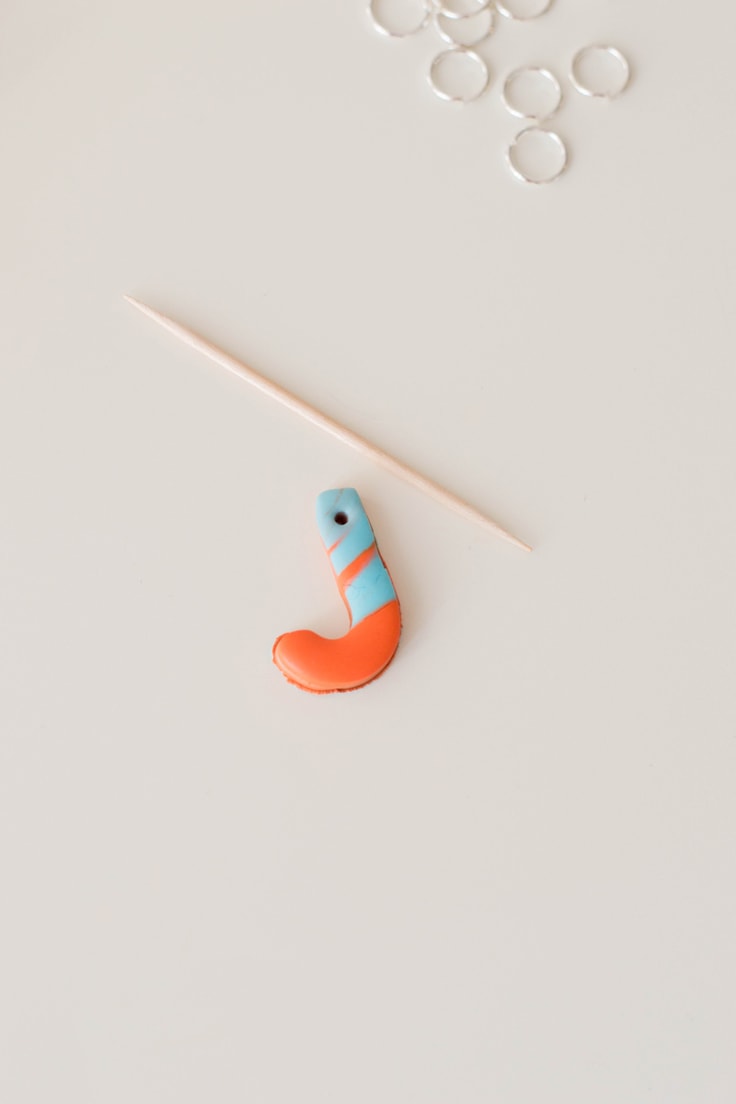
4. Create a hole on top
Using a toothpick, shape out a hole towards the top of the letter. This is where you will attach the ring for the keychain.
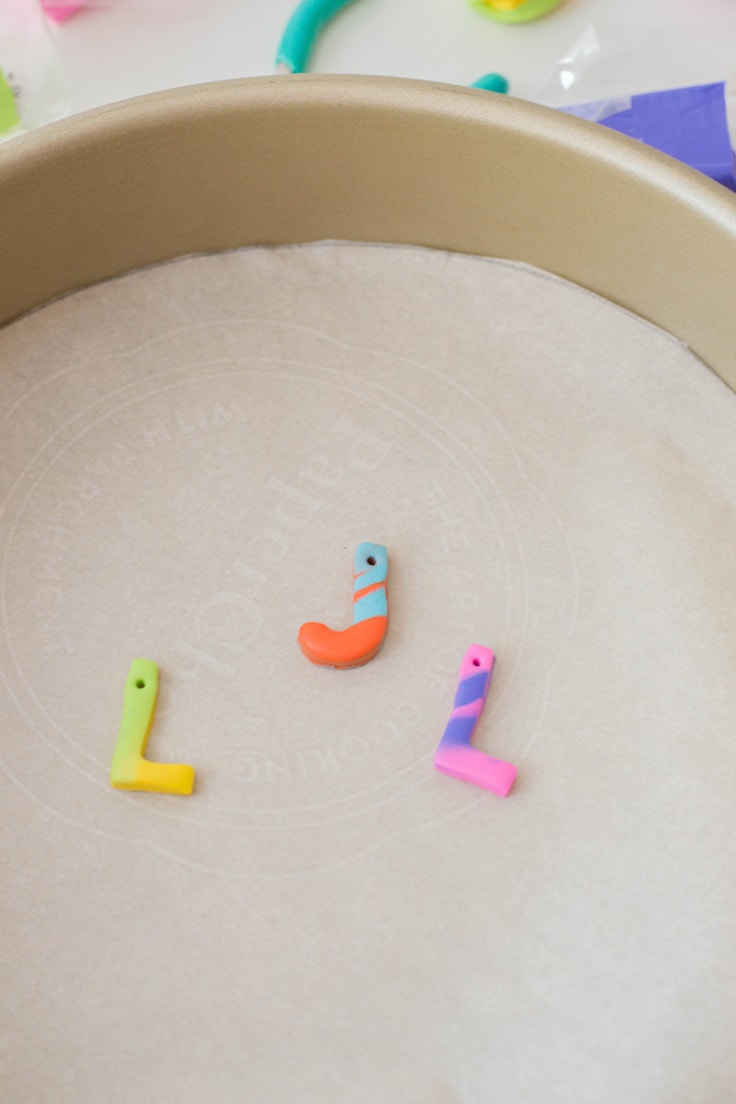
5. bake until set
Place clay letters on a lined baking pan and bake in an oven preheated to 375 degrees F for 15-20 minutes. Allow the clay to cool before moving forward with the next steps.
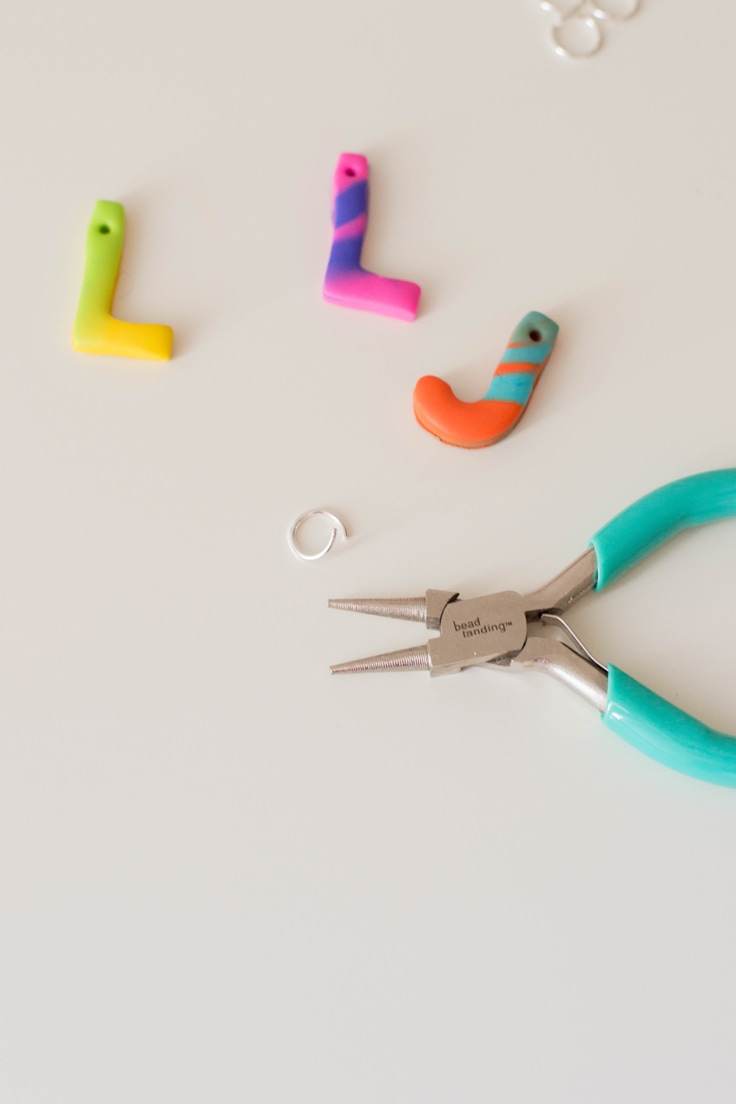
6. assemble jump rings
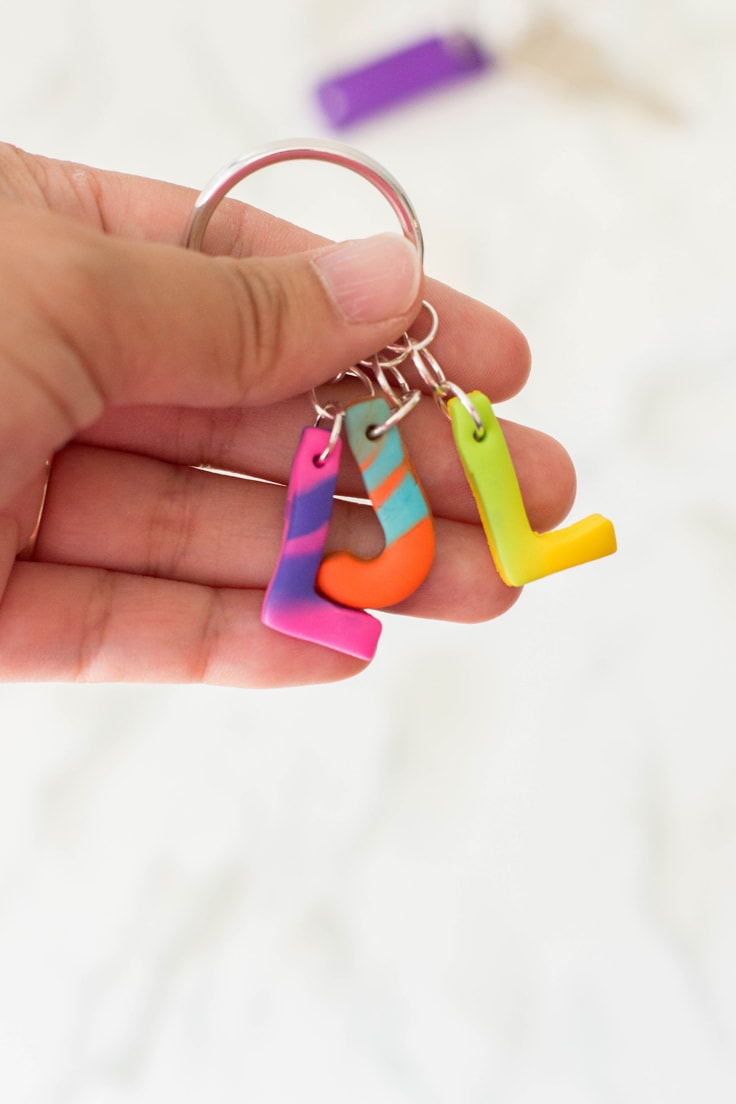
Using the precision pliers, open a jump ring and insert it through the hole of the clay letter. Add two more jump rings to create a chain.
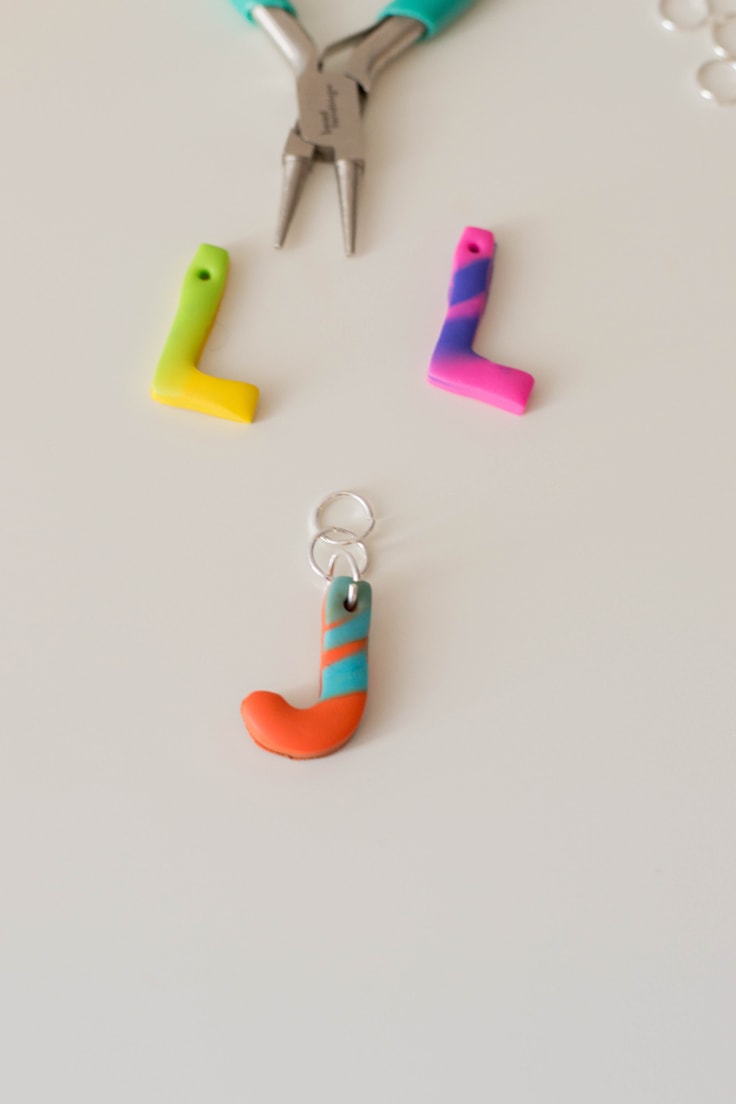
7. add the keyring
Loop the letter pendant through the keyring and voila! It really is that easy!
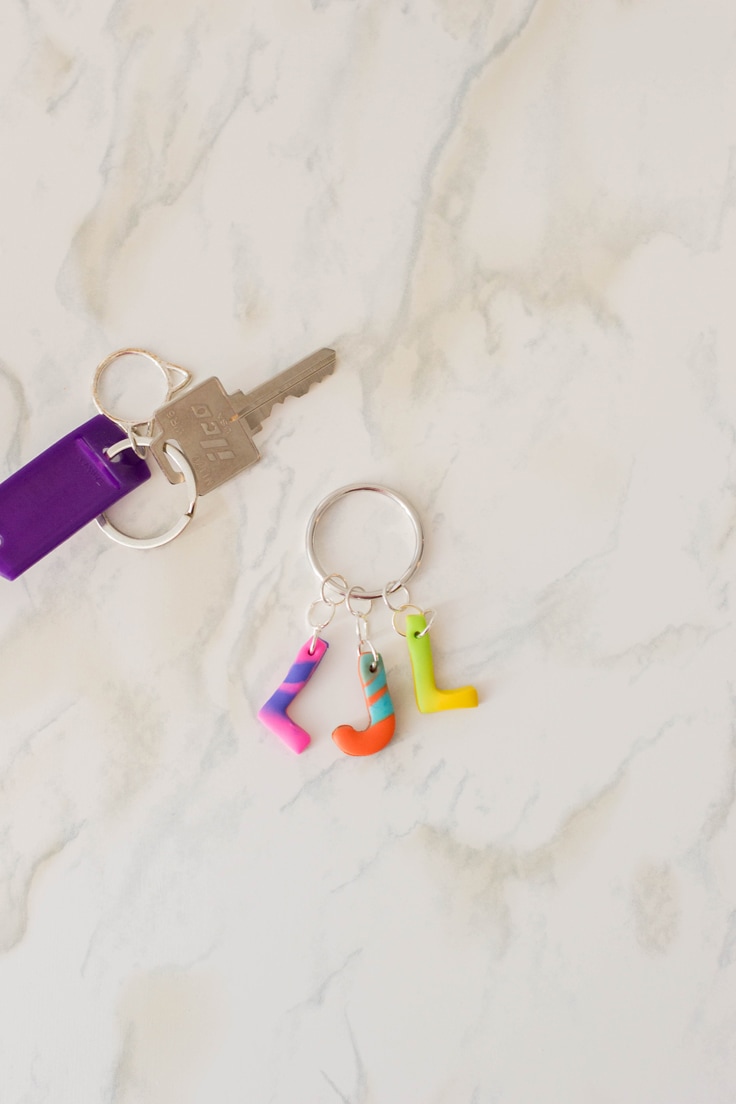
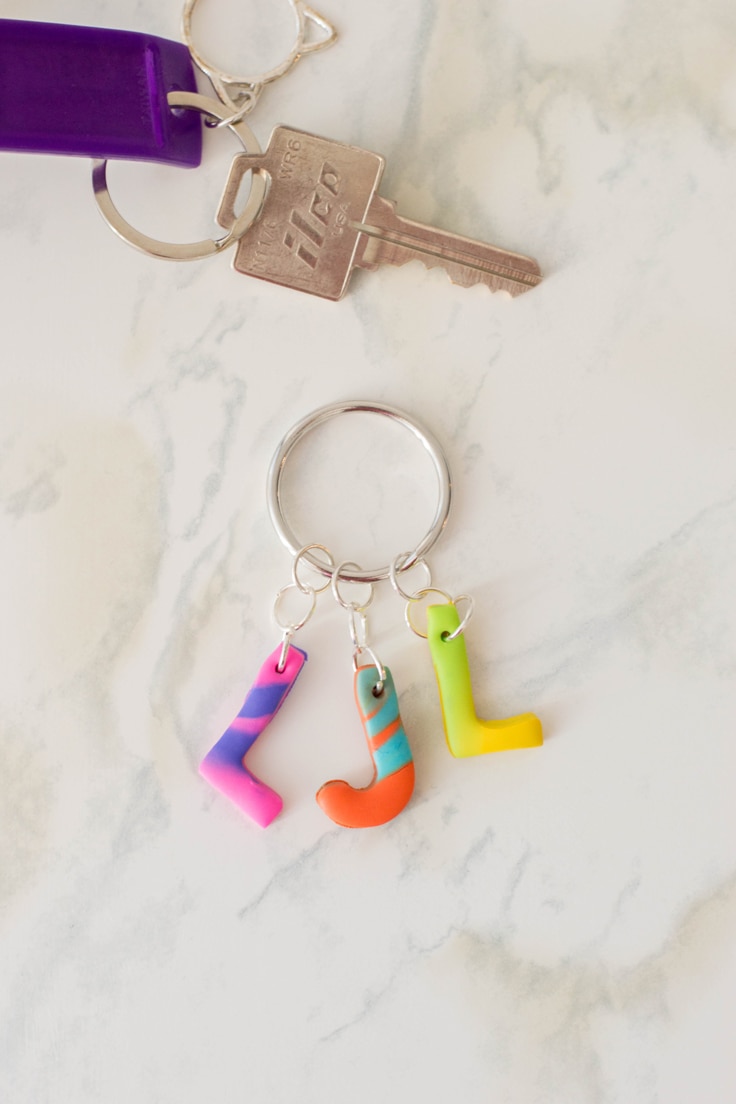
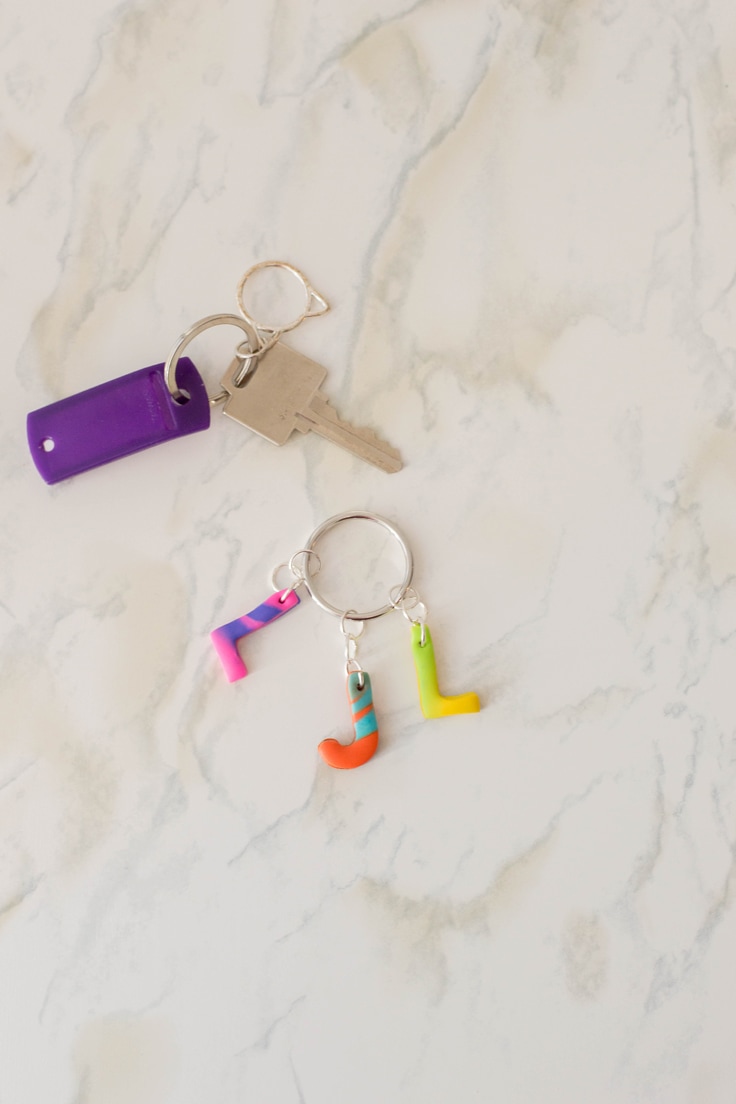
For this particular keychain, I put three polymer clay letters (my initials, my son’s and that of my husband’s – we’ll be giving them to my better half for his birthday!).
You can make keychains out of beads, string, and even paper. We have a tutorial for making paper jewelry that you can turn into a keychain really easily.
This all depends on your preference. Most people like smaller keychains, around an inch from top to bottom.
Yes, we baked this in the oven at 375 degrees.
Love the ideas you see here on Ideas for the Home by Kenarry®? Subscribe today to get our FREE DIY & Craft Planning Calendar, plus our weekly Ideas in Your Inbox newsletter filled with creative tips and exclusive offers!
What’s Next?
You may also enjoy these DIY keychain ideas on Ideas for the Home by Kenarry® –