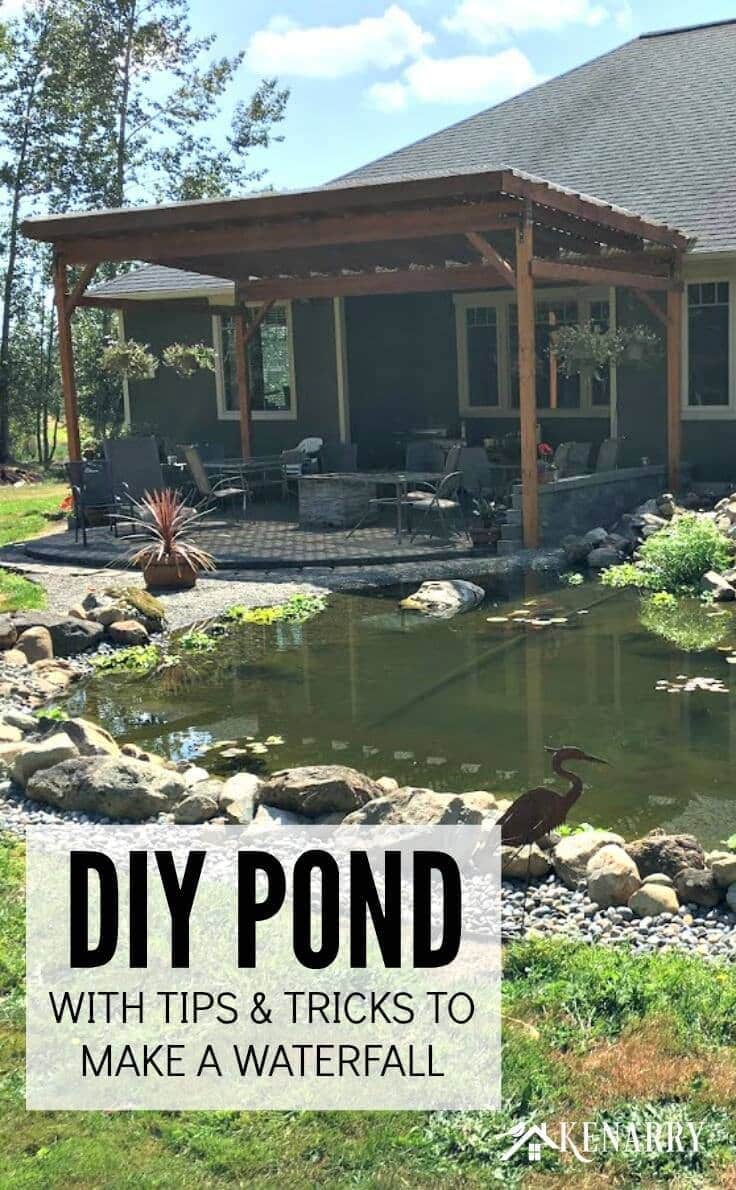
DIY Pond: How To Make A Backyard Oasis With Waterfall
THIS POST MAY CONTAIN AFFILIATE LINKS. PLEASE SEE OUR FULL DISCLOSURE POLICY FOR DETAILS.
Get inspired to make a DIY pond with ideas and tips for a waterfall. This tutorial will help you create a private oasis in your own backyard.
You are in for a special treat today! As you may recall, a few years ago my brother-in-law, Curt, and his wife built an amazing DIY covered patio to provide some shade and rain protection in their backyard. Curt is back at Ideas for the Home by Kenarry® today sharing how they made a DIY pond with a waterfall to complete their backyard oasis. I’ll let Curt tell you all about it!
In the last few years, I’ve been transforming my backyard starting with the patio. I built a covered area and I encourage you to check it out here. But after our family vacation I had some time to work on part 2 of my backyard project, a large DIY pond with a water feature. I started by helping my dad put a smaller one at his place, and then I was ready to start mine.
How to Make a DIY Pond in Your Backyard
Disclosure: This blog post contains affiliate links for products or services we think you’ll like. This means if you make a purchase from one of these links, Ideas for the Home by Kenarry® will make a small commission at no additional cost to you so we can keep the great ideas for the home coming your way. All opinions expressed are derived from personal experience.
Get inspired to make a DIY pond with these ideas and tips for creating a waterfall and a semi-natural filtration system. This tutorial will help you create a private oasis in your own backyard.
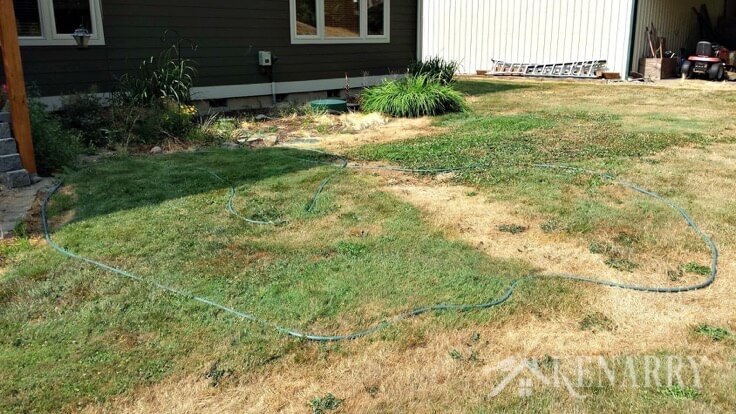
1. Determine the Size and Shape for Your DIY Pond
My wife and I had some long discussions about shape and size. Many times the garden hoses were laid out on the grass in different shapes and finally we agreed. It was surprising to me how easy my DIY pond turned into a 20’ X 30’ pool of intrigue.
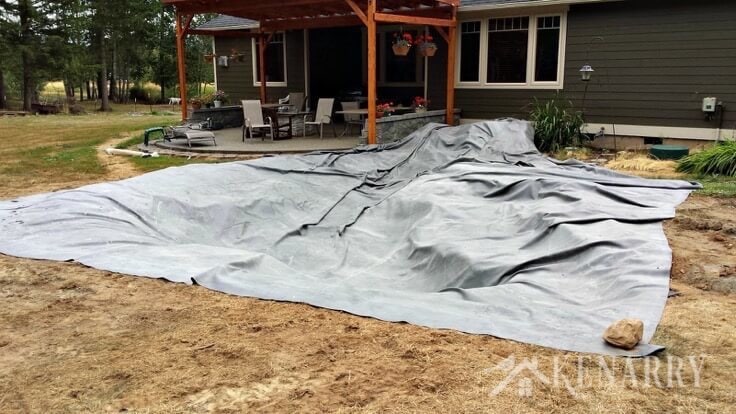
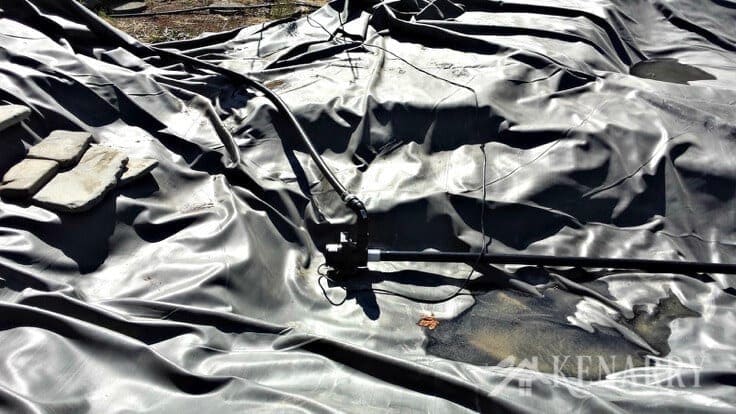
2. Prepare to Line the Bottom of the DIY Pond
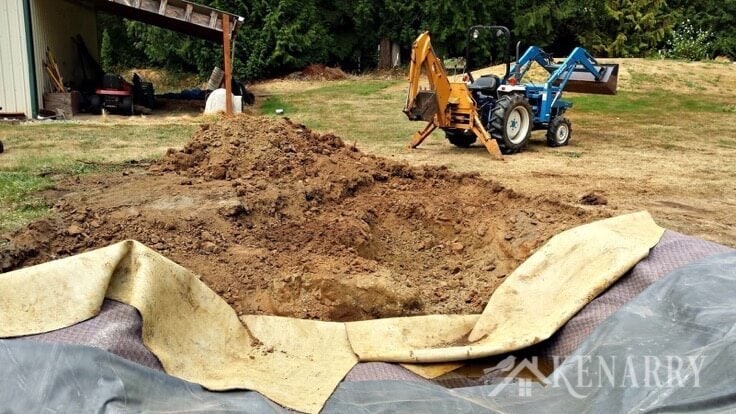
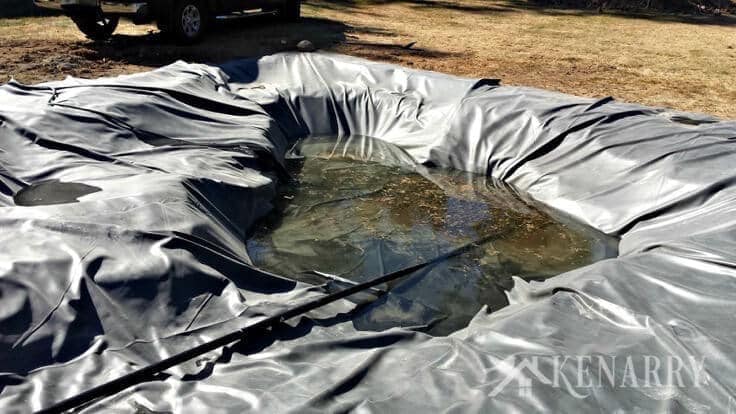
It is important to note that when you purchase your liner get at least a 45 mil thick liner. You need to remember that your liner is not just the measurement from one side of the hole to the other. You must double the depth of your hole and add it to your measurement.
In my case, my hole was 20 feet across and 30 feet long, 4 feet deep, and I wanted 2 feet to extend past the edge of the hole for backfilling needs. So while our hole was 20’ X 30’ our liner and underlayment needed to cover 32’ X 42’.
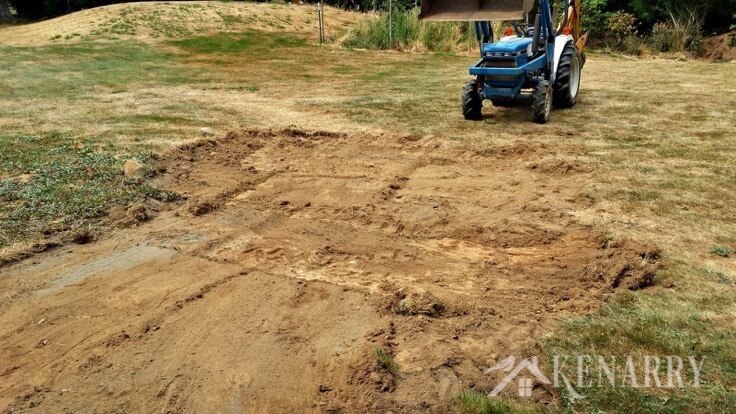
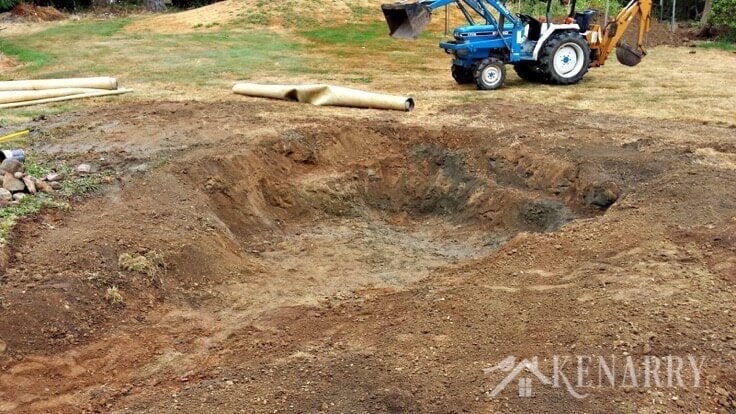
3. Excavate a Hole for the DIY Pond
The soil around the house is mostly clay so we used our small tractor and backhoe to excavate the hole for the pond. Unfortunately we ran into hardpan at about 3’6” and we were not able to reach our planned finish depth of 4’.
As you can see from the image below we spent time cutting in our shelves to hold plants that need different depths of water and places to place decorative rock. In hind sight I would double the width of the shelves. I had problems getting the rubber liner to fit snuggly to the angle and still leave room for something to sit there.
Money Saving Tip for Underlayment
One of the ways you can save some money is by using old carpet as a protective layer underneath the rubber liner for the DIY pond. We stopped by the local flooring store and got permission to take one of the rolls they had recently uninstalled. The carpet store didn’t have to pay for the disposal, and we got free underlayment.
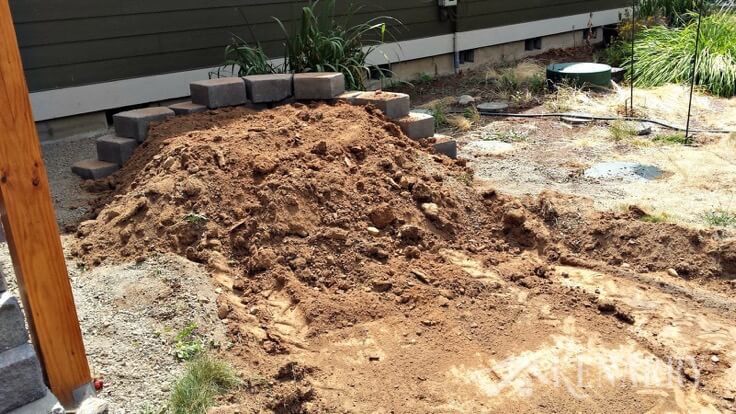
Space Saving Idea for Making a Waterfall
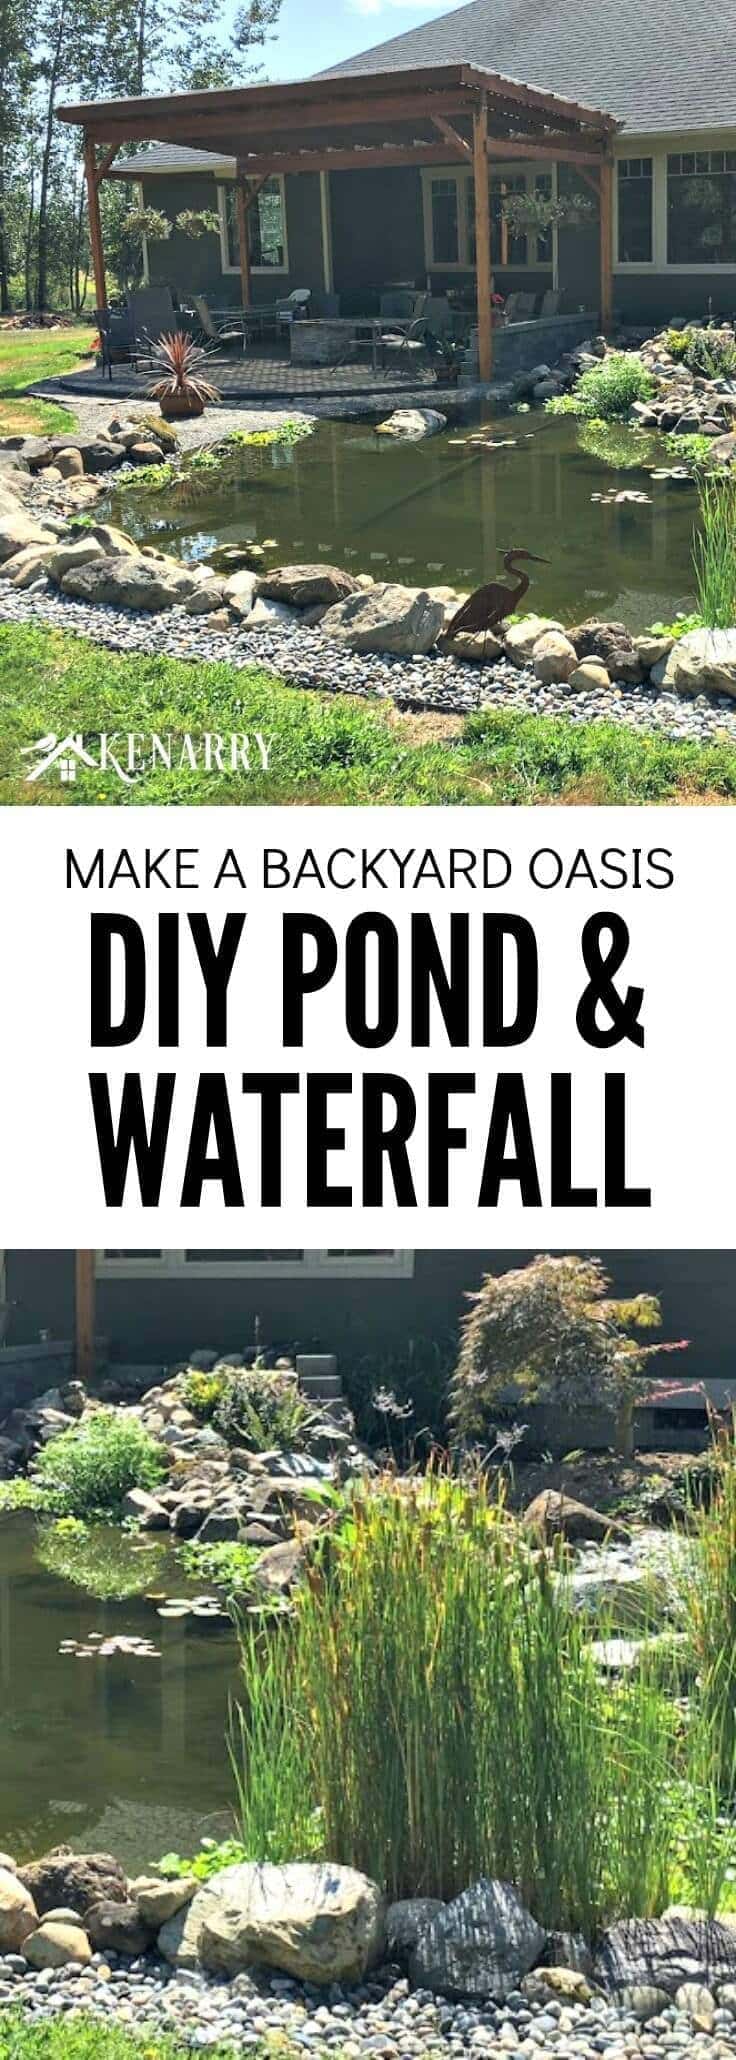
We wanted to create a nice waterfall feature to go with the DIY pond, but we did not have room to just create a large pile to work with. Our solution was to re-enforce the backside of the waterfall using retaining wall stones.
This kept the waterfall clear from the house and left us plenty of room to walk around the feature, run tubing as necessary, and leave an overall clean appearance.
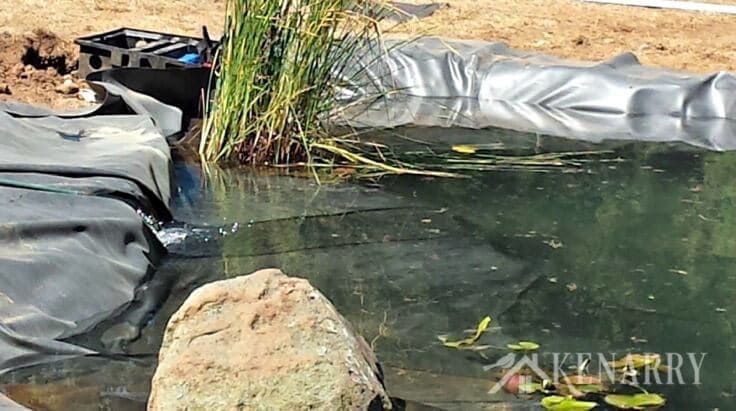
4. Use the Waterfall as a Semi-Natural Filter for Your DIY Pond
We decided to create a semi natural filtration system to keep our water clean. At the deepest level of the DIY pond we laid out 2” ABS pipe with slits cut up and down the sides. I used a chop saw with a finish blade so that I didn’t break the pipe into a gazillion pieces. Each leg is about 3’ long and capped on the end.

Then we covered the pipes with 2” to 3” washed drain rock. The drain rock acts like a large particle filter. We then ran piping from the bottom to a higher shelf in the pond and placed our pump there.
By raising the height of the pump we reduced the height the pump had to push the water to at the top of the waterfall. The shorter that distance is, the greater the flow will be down the waterfall. The water enters the spill box at the top of the falls, passes through bacteria gatherers, and a medium particulate filter before descending down the falls and back into the DIY pond.
5. Use The Correct tubing
I used a combination of 2” flexible PVC Pipe, 2” rigid ABS Pipe, and 1-inch water tubing to complete our pond. The water tubing is the most economical, but even with a hot air gun, it has limited flexibility.
When you start ordering your pumps, keep the skimmer pump’s GPH in line with the effectiveness of the UV light filtration, and do not skimp on the GPH for the falls. One of the best tricks was using flexible PVC couplings for connections between the pumps and the pipes. They create an easy way to get the pumps out of the pond for maintenance.
6. Install a Skimmer box for filtering the pond
The second part of our water filtration system uses a skimmer box at the far end of the pond from the waterfall. It pulls the top layer of water and debris into it and then passes the water to a UV light filter that handles most of our algae problems.
This water returns to the DIY pond bubbling up through pea gravel and plants in an effort to create an additional natural filtration system. During the height of the summer heat, we still need to occasionally add additives to help keep the water clear but for the rest of the year, this is very effective.
7. Pre-Lay the rock work
Before we ran any water down the falls, we took the time to pre-lay the rock work and used black insulation foam to hold everything in place. Only after 24 hours of drying time did we run water down the falls.

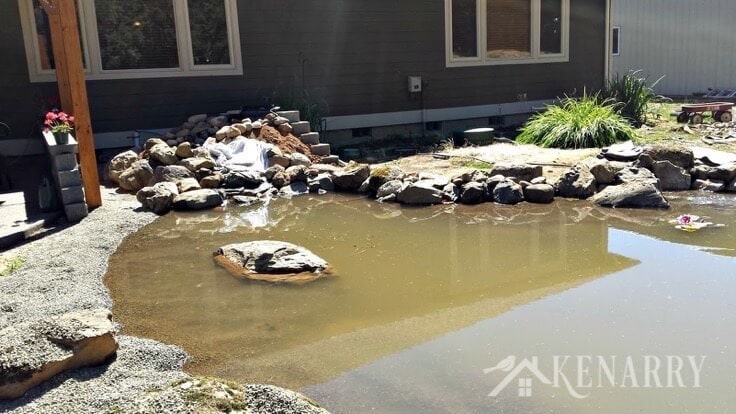
Landscaping Around the DIY Pond
The rest of the pond process was a lot of work moving stone to create our design and filling in drain rock and pea gravel onto the pond shelves.
A byproduct of all of this rock being moved into the DIY pond was an extensive amount of fine particle dirt in the water. We used an old sheet tucked in and around the waterfall to capture the fine silt as the water circulated. It took a few days, but the water cleared up nicely.
How to deter blue herons from your pond
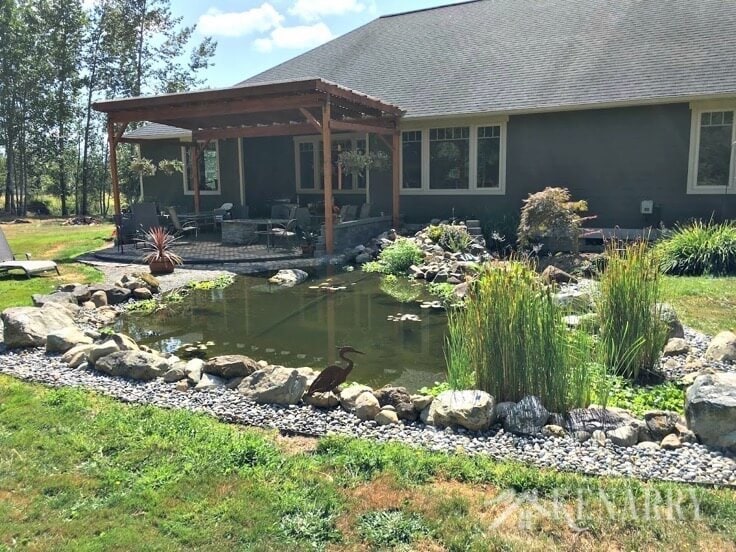
After the water cleared and our fish were very visible we had an un-welcomed blue heron stop by for a quick lunch. It was a persistent pest but with a little research we learned that they are territorial and a statue or decoy often will keep others away.
We had a neighbor taking shop classes at the local high school. He created a metal cut out (seen in the final picture) that does the job 90% of the time. Occasionally we still have a big bird stop by and essentially try to bully the statue out. In those times we wish we had the full decoy which is much bigger.
A DIY Pond Is always a work in progress
One of things we had to remember is that the first year of a DIY pond isn’t how it will always look. When you finish the pond it looks way more like a construction zone than an actual oasis.
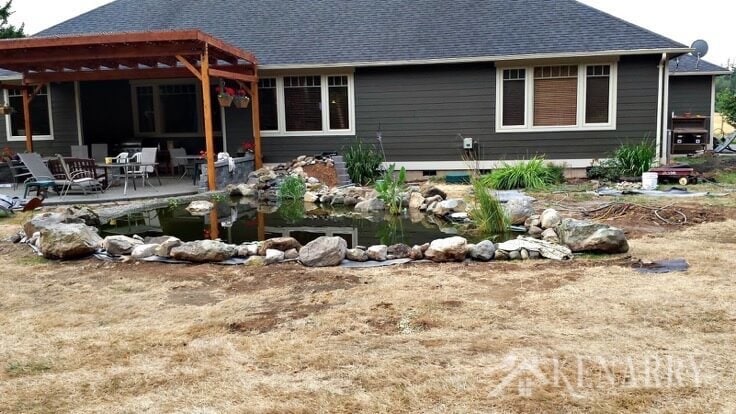
A Backyard Oasis At Last
Give it time to grow in. All of your hard work will pay off and you’ll soon be enjoying a restful retreat of peace and tranquility right in your own backyard.
Now you can relax and enjoy your DIY pond, especially watching the fish:
Love the ideas you see here on Ideas for the Home by Kenarry®? Subscribe today to get our FREE DIY & Craft Planning Calendar, plus our weekly Ideas in Your Inbox newsletter filled with creative tips and exclusive offers!
While you’re here, be sure to check out other DIY projects on Ideas for the Home by Kenarry® –
- How to Build a DIY Backyard Playground
- DIY Wood Sandbox
- And of course, Curt’s DIY Covered Patio
If you enjoyed this tutorial for how to make a DIY pond in your own backyard, please share this with your friends or pin it for later.
2 Comments