DIY Shell Frame: Embellish A Frame With Seashells
THIS POST MAY CONTAIN AFFILIATE LINKS. PLEASE SEE OUR FULL DISCLOSURE POLICY FOR DETAILS.
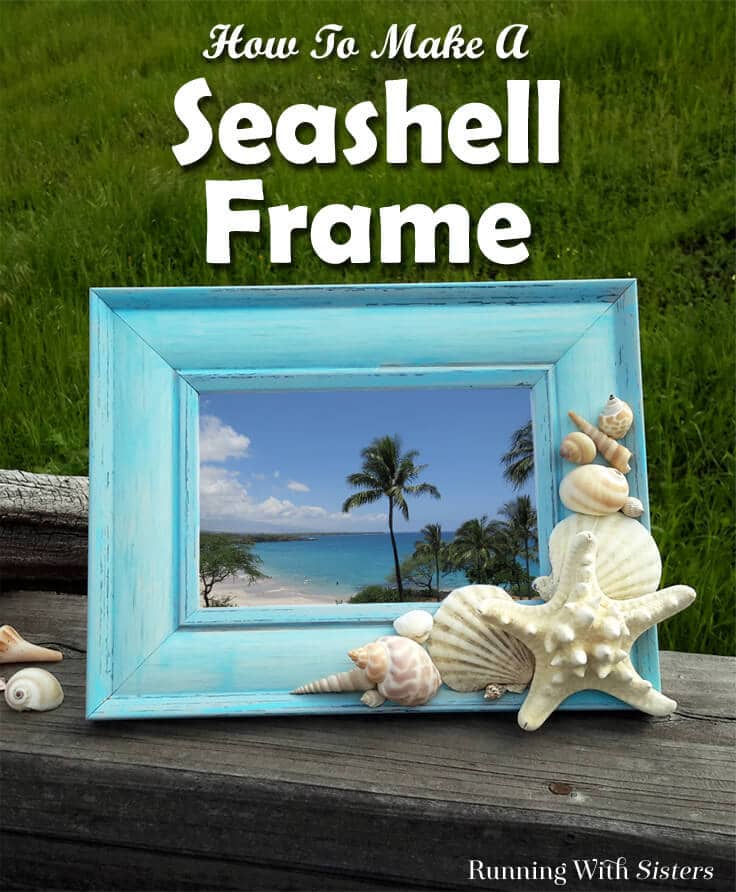
Make your own DIY Shell Frame. We’ll show you how to select and arrange the seashells and what kind of glue to use with this video tutorial.
Hi Kenarry Readers! We’re Jennifer and Kitty from RunningWithSisters.com, and we’re back to share a pretty shell project with you –– a DIY Shell Frame! We just got back from visiting family in Florida where we started each day combing the beach for shells. We looked for scallop shells, cat’s eyes, little conch shells––anything we thought would look pretty in a beachy craft project. And boy, did we find some beauties!
Disclosure: This blog post contains affiliate links for products or services we think you’ll like. This means if you make a purchase from one of these links, Ideas for the Home by Kenarry® will make a small commission at no additional cost to you so we can keep the great ideas for the home coming your way. All opinions expressed are derived from personal experience.
We love using shells in craft projects because they remind us of those sunny walks in the sand and bring a little of that vacation feeling into our décor. So we thought it’d be fun to share our love of shells with you by embellishing a picture frame. It’s perfect for a favorite beach vacation pic! You can use shells you’ve collected yourself or, if you haven’t been to the beach lately, shells from the craft store. They have some amazing seashells!
Here’s a video showing how to make a DIY shell frame, including tips for placing and layering the shells. Follow along with us as we make this DIY Shell Frame, then embellish your own frame using the steps below as your guide. And remember if you have any questions about the DIY Shell Frame, just leave us a comment below and we’ll reply. We are happy to help!
How To Make A DIY Shell Frame
Materials & Tools
- Wooden picture frame
- Acrylic craft paints (We used Plaid Folk Art Multi-Surface Acrylic Craft Paint in Wicker White #901 and Jamaican Sea #320.)
- Craft paintbrush
- Paper towels
- Sandpaper
- E6000 permanent adhesive
Shells
Here’s what we used:
- 1 starfish. 2-2 1/2″
- 2 scallop shells, 1 1/2″
- 1 cat’s eye shell, 1″
- 2 spiral auger shells, 1″
- 3-4 small conch shells, 1/2″
- 3-4 tiny conch shells, 1/4″
Steps
1. To give your frame a distressed “beachy” look, paint the frame with white craft paint, then wipe some of the paint off before it dries. This will give the frame a white-washed look. Next, paint a coat of aqua, again wiping the paint with a paper towel before it fully dries. Lightly sand the edges and surface of the frame. Be sure to sand the edges down to the wood to really make it look weathered.
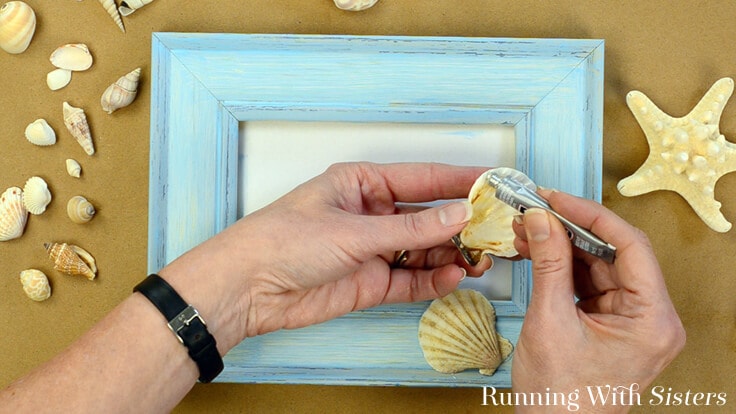
2. For this frame, we decided to embellish only the bottom right-hand corner of the frame with the shells extending out from the corner. To do this, start by gluing the two scallop shells just above and to the left of the corner.
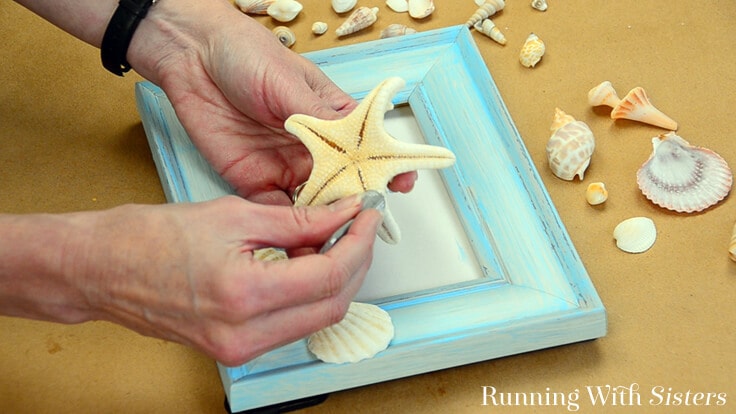
3. Next, glue the starfish in the corner so its “arms” rest on top of the two scallop shells.
4. Glue a medium-sized shell, like a cat’s eye or a conch-type shell, on either side of the scallops. It helps to place the shell on the frame first to see where the touch-points are for the shell, then add the glue just to those points.
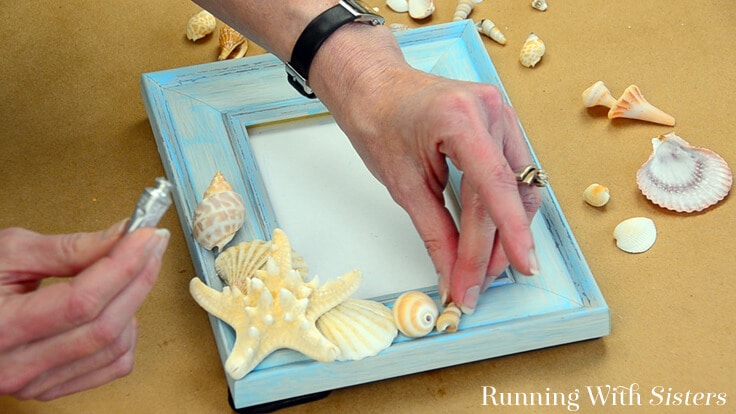
5. Finally, add a few more small shells on either side of the medium shells so the design extends out and tapers. Fill in any gaps with tiny shells.
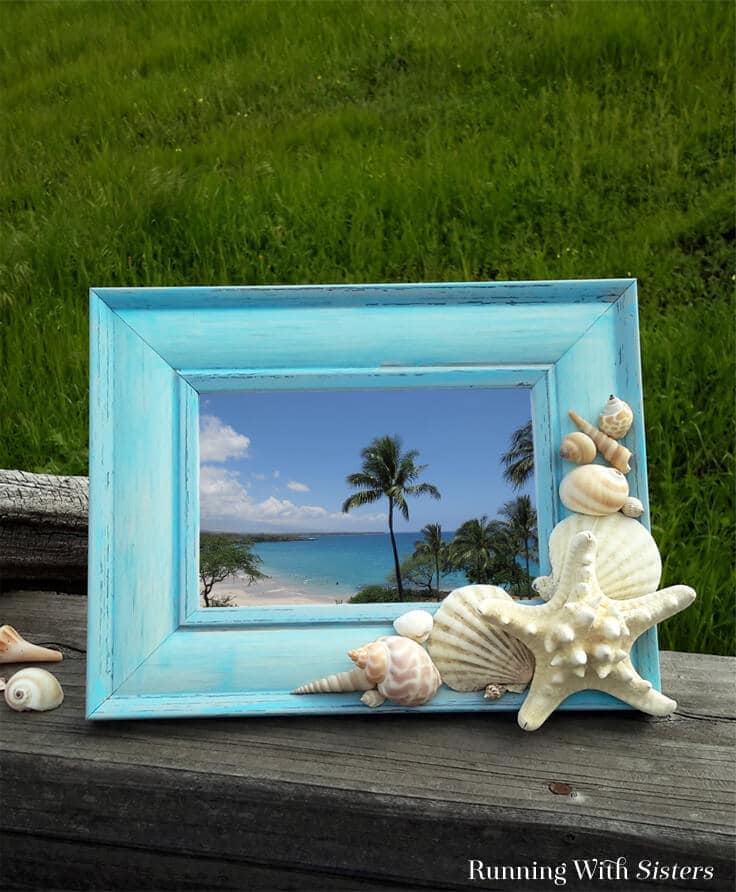
We showcased a pretty picture of palm trees in our DIY Seashell Picture Frame, and we think it looks decorator chic! Do you love shell crafts as much as we do? What have you embellished with shells? Let us know! We’d love to hear from you! Leave us a comment below!
You may also be interested in checking out our Easy Beaded Picture Frame if you’re looking for more ways to display your photos or this vase filled with shells to remember your beach vacation.
Happy Crafting,
Jennifer & Kitty
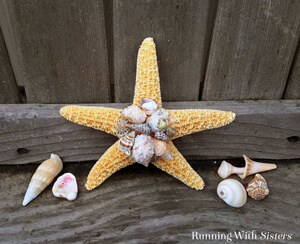
Make A Shell Embellished Starfish
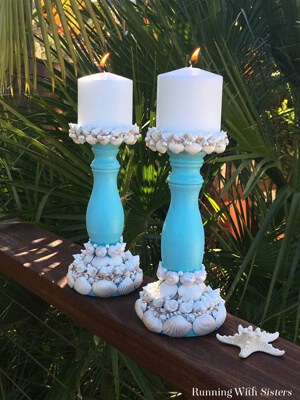
How To Make Seashell Candlesticks
Love the ideas you see here on Ideas for the Home by Kenarry®? Subscribe today to get our FREE DIY & Craft Planning Calendar, plus our weekly Ideas in Your Inbox newsletter filled with creative tips and exclusive offers!
What’s Next?
While you’re here, be sure to check out these other craft projects on Ideas for the Home by Kenarry® –
2 Comments