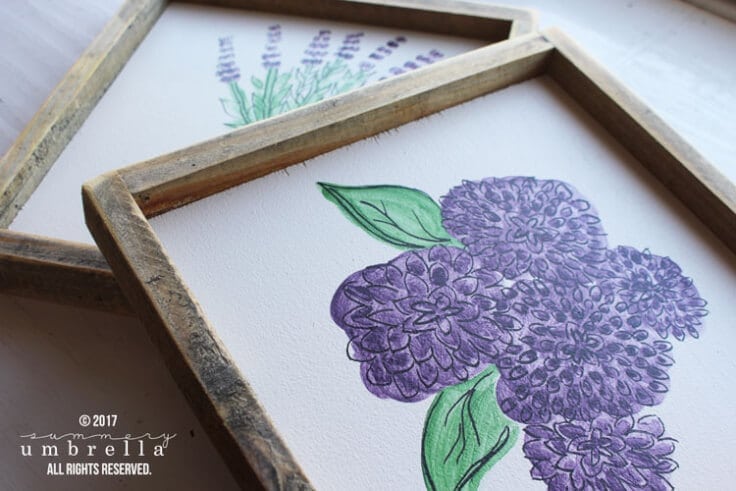
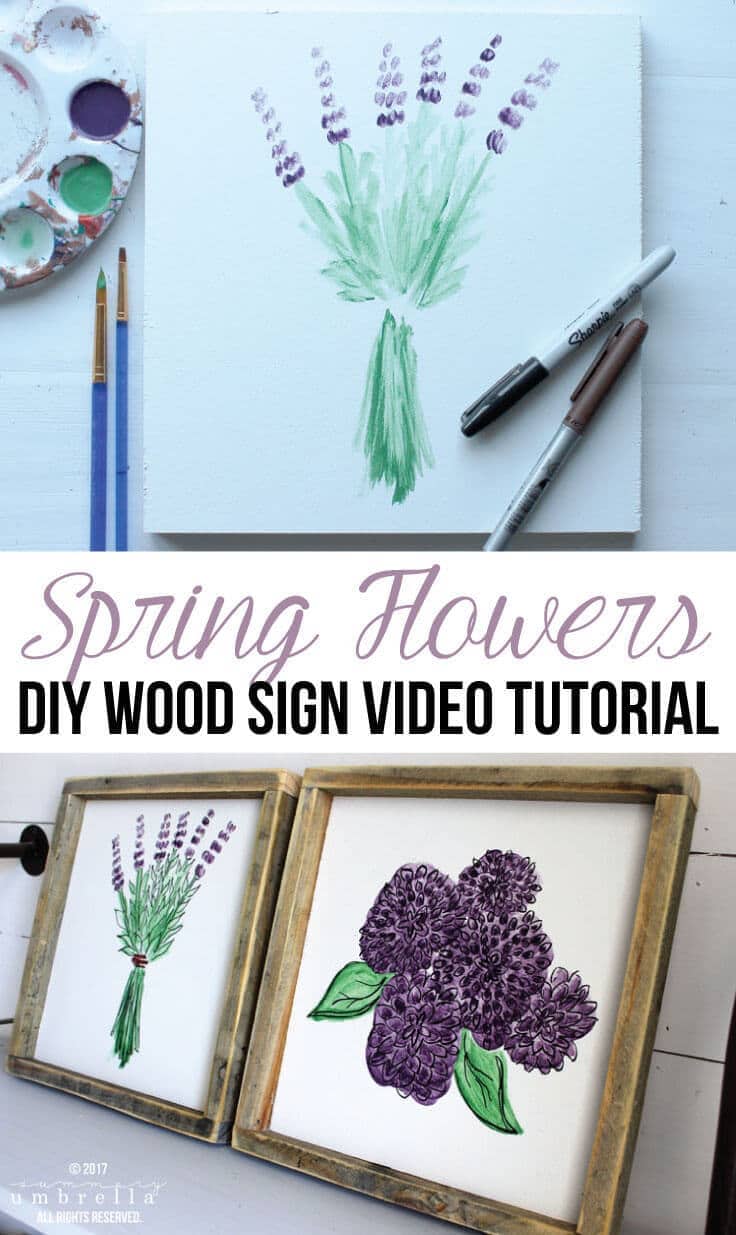
DIY Spring Flowers Wood Sign PLUS Video Tutorial
THIS POST MAY CONTAIN AFFILIATE LINKS. PLEASE SEE OUR FULL DISCLOSURE POLICY FOR DETAILS.
Spring is in the air, and it’s time to decorate your home! Learn how to create a DIY Spring Flowers Wood Sign to get started with the season.
Hello, Kenarry readers! I’m LZ from The Summery Umbrella, and I was so excited when Carrie asked me to share this gorgeous DIY Spring Flowers Wood Sign Tutorial with you. PLUS… there are two free video tutorials included so you can make your very own too! I don’t know about you, but I definitely love free stuff!
Disclosure: This blog post contains affiliate links for products or services we think you’ll like. This means if you make a purchase from one of these links, Ideas for the Home by Kenarry® will make a small commission at no additional cost to you so we can keep the great ideas for the home coming your way. All opinions expressed are derived from personal experience.
DIY Tutorial from LZ – The Summery Umbrella
Just in case you’ve never stopped by my neck of the woods (aka. my blog) I love to share my three favorite things: DIY, Design, and Decor projects. You’ll find everything from farmhouse style signs in my shop to DIY coffee stations to hand-drawn vectors for all of your crafting needs.
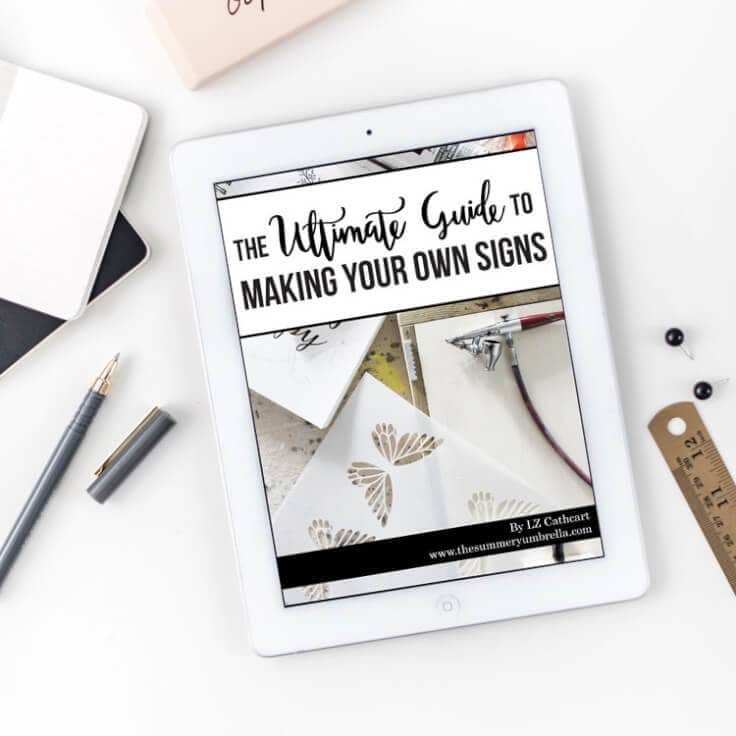
With that being said, a few months ago I decided to share my tips and tricks that I’ve learned over the past 5+ years running my own shop about sign making in an eBook I’ve written called The Ultimate Guide to Making Your Own Signs. It includes 30+ techniques, suggested materials, tutorials, videos, and countless other handy tips to help you create the best looking signs for your own home!
DIY Wood Sign Tutorial
And for today’s tutorial the below directions apply not only for both of these signs, but also for any that you plan on creating in the future.
Are you ready to get started?
Supplies
To make your own Spring flowers wood sign, you’ll need the following supplies:
- 1 – 1/2″ Cabinet Grade Plywood (10”x10”)
- White Satin Paint
- Pencil
- Sharpie Fine-Point Permanent Markers (in black)
- Acrylic or Latex Paint (in green and purple)
- Paintbrushes
- Matte Top Coat Spray Paint
- 1”x Material (or 1”X2” Furring Strips)
- 1-1/4” Brad Nails (or Finish Nails)
- Brad Nail Gun (or Hammer)
- Table Saw (for Ripping)
- Miter Saw
- Wood Glue
Steps
Now that you have your supplies, just follow these simple steps and you’ll have your own wood sign, ready for your DIY home decor!
- Clean off your plywood board. I like to literally brush off all of the dirt from my surface, and then use a damp paper towel to catch anything the brush may have missed.
- Paint the board. My preferred painting method is to use a 9” foam paint roller and cover. The key to success in this step is to use multiple, light coats. Typically I like to wait one hour between each coat, and usually, only need two. However, use your own discretion if you’d like to add more.
- Sand down any bumps. Between each coat (after each has thoroughly dried) I like to take 220-grit sandpaper and very gently remove any bumps that you may see.
- Let the sign cure for a week. After you have finished painting and sanding it is best to let your sign “cure” for a week. I’ve found that (especially if you’re using vinyl stencils) you will have less pulled-off-paint issues. NOTE: If you’ve noticed any light scuff marks from your sanding on your last coat of paint, don’t fret! Once your sign is completed a matte finishing spray will even everything out.
- Sketch out your sign on paper. Next, I like to use a pencil or watercolor drawing first during this stage for reference. It helps me get an idea of what my sign will look like before I actually start.
- Sketch it on the board. Carefully sketch out your drawing on your board.
- Paint it. Then, it’s time to paint your drawing!
- Add details. After your paint has dried add detail to your drawing with a permanent marker(s) until you are satisfied with the outcome.
- Add a top coat. Add a light layer of your top coat spray paint for protection and let it dry.
- Frame your wood sign. Now it’s time to add your frame, and my favorite method to use is a simple butt joint. This is two boards butted together.
- Cut the frame pieces. For this method use 1”x material (actual thickness is 3/4”). You can use a table saw to rip a 1X4” in two pieces, or a 1X2” furring strip can be used just as is with an overall dimension of 3/4”X1 1/2”.
- Cut the long sides of the frame. First, cut two boards to the length of the sides of your sign. Attach them with a thin bead of wood glue and nail them into place with finish nails or brad nails (preferred) 1 1/4” long every 3 inches ensuring they remain flush with the ends.
- Measure and cut the top and bottom pieces of the frame. Then, measure across the top of your sign and side pieces and cut your frame wood to fit. Attach the top pieces, in the same manner, ensuring you put two nails in the ends at the “butt joint”.
- Sand any overlapping spots. If you have any overlap it can typically be sanded flush with a palm sander.
- Add hangers. Last, add hangers to this beauty and hang it up!
DIY Spring Flowers Wood Sign Video Tutorial
If you are a visual person, here’s a tutorial I made just for you. You can watch it and see all the steps and make your very own DIY wood sign.
Thanks again for having me Carrie, and I hope everyone enjoyed the tutorial!! Please feel free to send me an email (**@****************la.com), or drop by my page for more info. I’m always looking for ways to help ?
Have a wonderful week!
Pssttt…. want to learn more about making your own home decor signs? Check out my new eBook, The Ultimate Guide to Making Your Own Signs, which includes 170 pages, 27 techniques, 35 projects, and 46 video tutorials (which is over 2+ hours of instructions)!
More DIY Home Decor Ideas
This DIY wood sign is going to look so cute in your home. Here are some more home decor ideas for you, straight from the Ideas for the Home by Kenarry® team.
- How to Make Easy Bunting
- DIY Faux Cement Ball Vases
- Spring Sign Collection
Originally published March 2017. Updated March 2018.