DIY Throw Pillow With An Adorable VW Bug Transfer
THIS POST MAY CONTAIN AFFILIATE LINKS. PLEASE SEE OUR FULL DISCLOSURE POLICY FOR DETAILS.
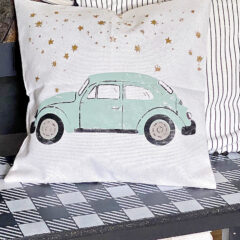
Make your own DIY throw pillow with the cutest VW Bug silk screen transfer. You can use any color you like to match your home decor. Plus, by using a pre-made pillow cover, this is also a no-sew project. You can’t get much easier than that!
Hello! Michelle back from Our Crafty Mom sharing a darling DIY throw pillow that has a fun retro vibe to it. It can be used all year long and was super simple to make with the following tutorial. Did I mention it’s no-sew?

A simple way to feed my throw pillow addiction is to make my own. It’s a great way to keep costs down. Plus, you can use both sides of the pillow to create different seasonal pillows. This saves on storage space too!
How to Make a DIY Throw Pillow
This sweet DIY throw pillow uses a pre-made pillow cover making it an easy project that can be made in 30 minutes or less!

What you need:
Want more ideas like this? Subscribe today to get our weekly Ideas in Your Inbox newsletter plus other exclusive gifts and offers — all for FREE!
Craft/DIY Tools Needed:
Supplies Needed:
These are the ingredients you’ll need. All the exact amounts are in the printable card at the bottom of this post.

DIY Throw Pillow:
Place Cardboard in The Pillow
It’s very important to place a barrier inside the pillow, so the ink doesn’t bleed through the pillow. You can use a piece of cardboard for this.
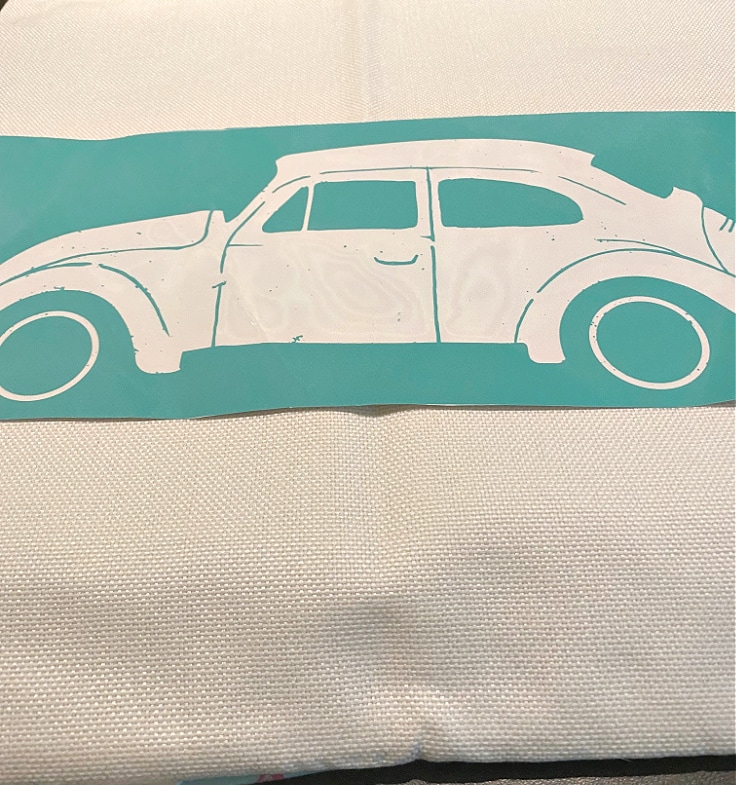
Apply The Transfer
Place the transfer where you want it on the pillow cover. Because it is sticky, it will stay where you place it. But, if it is crooked, just remove it and reapply. Easy peasy!
Apply The Chalk Ink
Once the transfer is placed on the pillow, smooth out any wrinkles. You can use your squeegee for this.
Next up, apply a small amount of chalk ink. Remember less is more when it comes to working with chalk ink. You can always go back and add more if you need it.
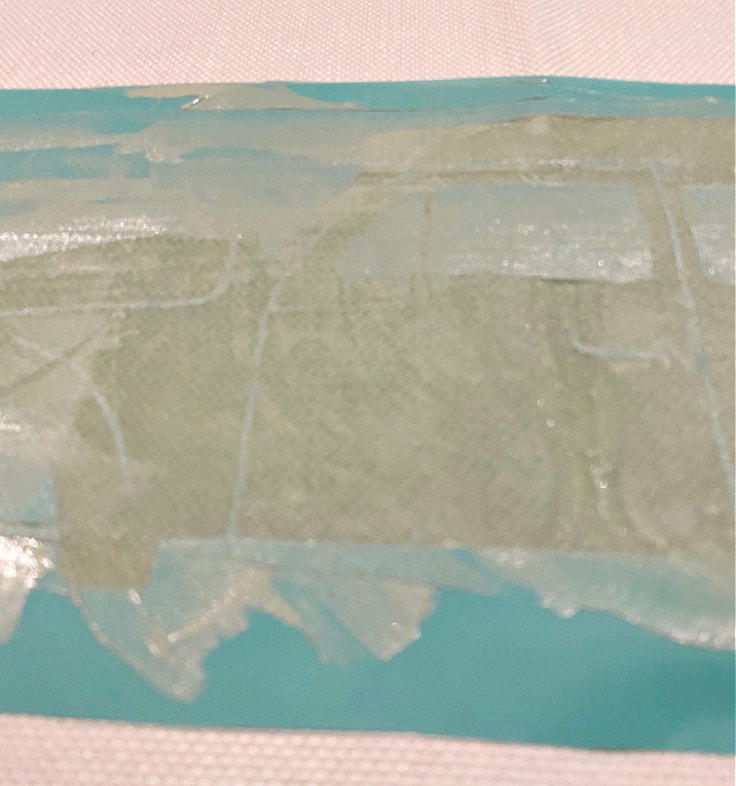
Slowly scrape the ink onto the transfer with the squeegee. You can also scrape off any extra at the end and add it back to your jar.
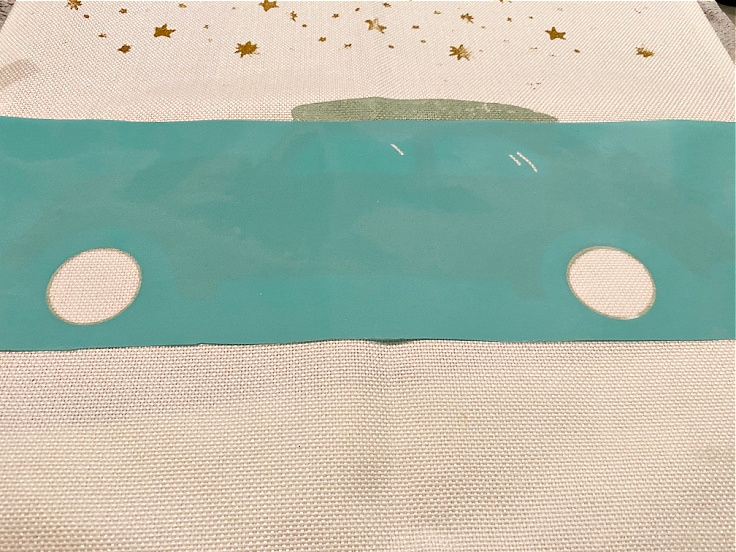
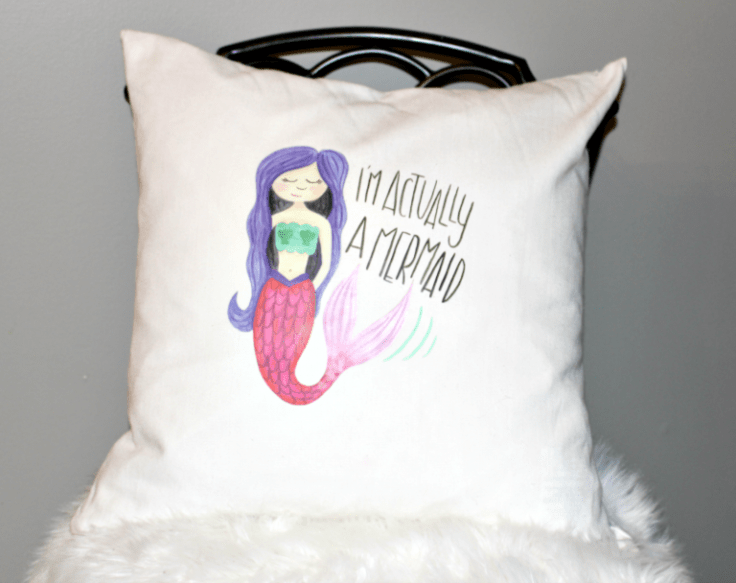
Some transfers are one layer, but this VW Bug is 2. There are special outlines on the transfer to show you exactly where to place the next layer.

It’s best to use a highlight color, like black, for the details. It really pops against the soft green shade of the car.
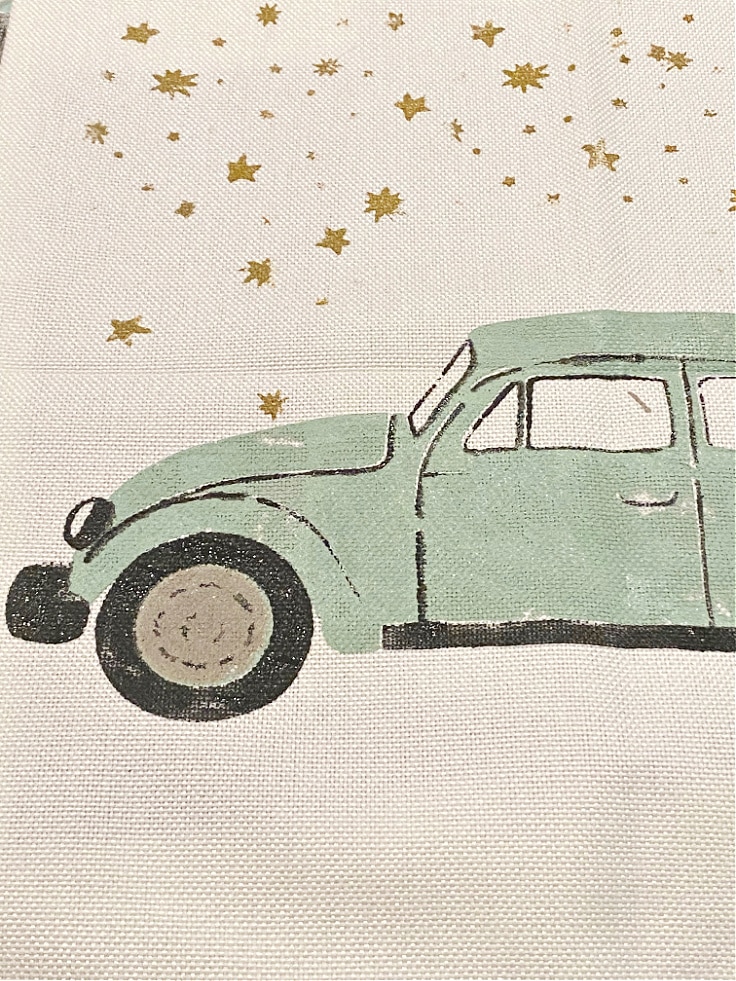
I also chose to add gold stars to the top of the pillow for a little extra detail. This is totally optional.

Heat Set The Transfer
To speed up the drying, I use a heat gun in between layers. It’s also very important to heat set the transfer. This will make the design on the pillow permanent. You can use an iron for this, or an EasyPress designed for crafting.


Now you just add your pillow form and you have an adorable DIY throw pillow that you made yourself. This would be a great gift idea for someone who drives a VW Bug too!

DIY Throw Pillow with VW Bug Transfer
Equipment
- Squeegee
- Iron
- Heat Gun
Supplies
- White Pillow Cover
- Transfer
- Chalk Ink
Instructions
- Place the pillow cover on a flat surface with a piece of cardboard inside the pillow.
- Place the transfer onto the center of the pillow.
- Use your squeegee to add chalk ink across the transfer in the color of your choice.
- Use a heat gun to dry the ink.
- Add the next layer if applicable.
- Heat set the image with an iron, or heat press.
- Place a pillow form into the pillow cover.
Love the ideas you see here on Ideas for the Home by Kenarry®? Subscribe today to get our FREE DIY & Craft Planning Calendar, plus our weekly Ideas in Your Inbox newsletter filled with creative tips and exclusive offers!
What’s Next?
If you enjoyed this DIY throw pillow, then you’ll enjoy these DIY pillow ideas too.


You may also enjoy these DIY pillow ideas on Ideas for the Home by Kenarry® –