DIY Upcycled Clock Idea: Easy Stenciling Project
THIS POST MAY CONTAIN AFFILIATE LINKS. PLEASE SEE OUR FULL DISCLOSURE POLICY FOR DETAILS.
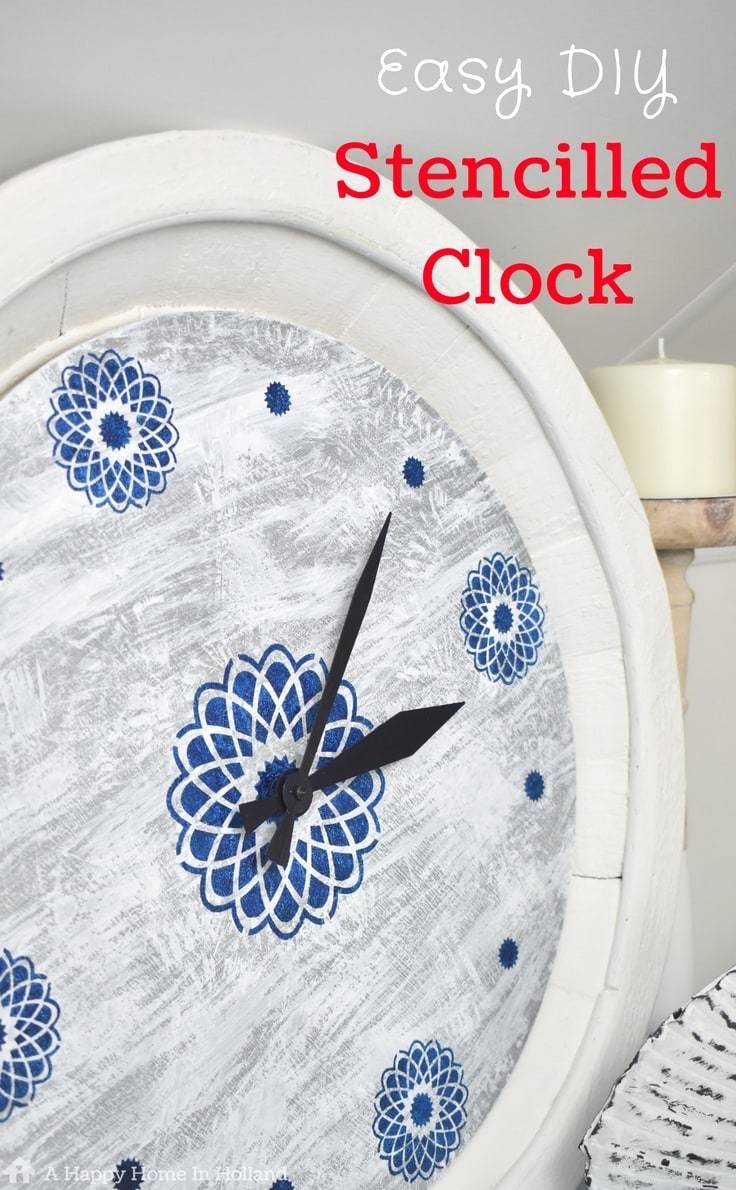
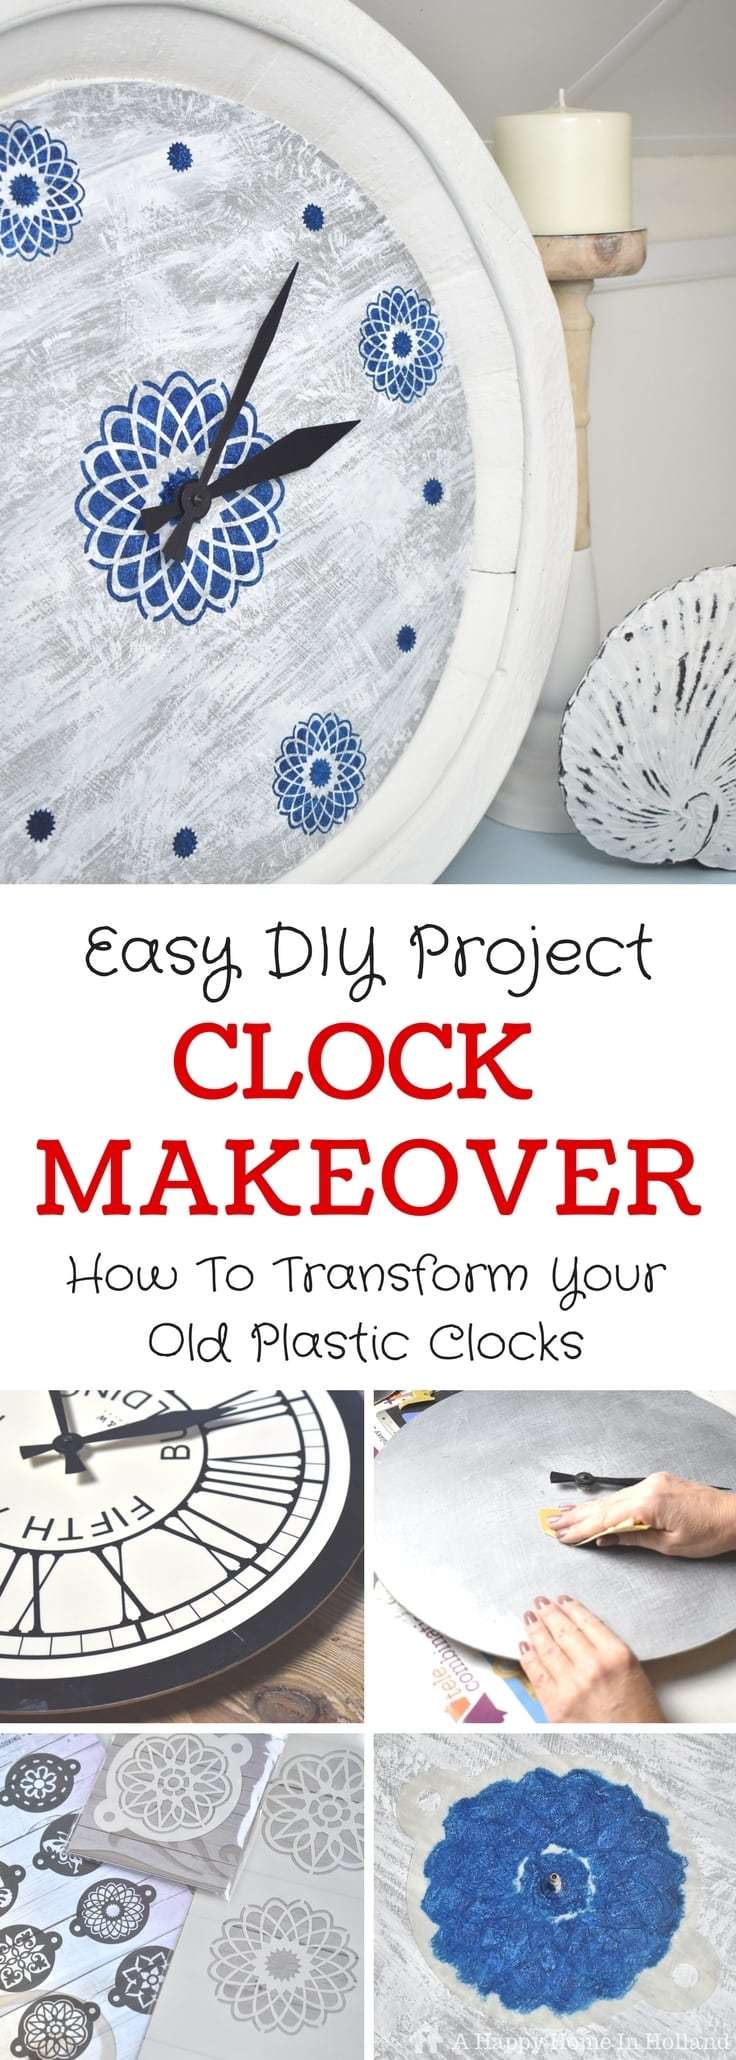
Using just paint and stencils see how to transform old clocks into beautiful home decor accents for your wall. You’re going to love this DIY upcycled clock makeover!
If you are a thrift store fan like me then this DIY upcycled clock makeover is definitely a project for you. Using a combination of chalk paint, acrylic paint and patterned stencils you can transform your old plastic clocks into beautiful and modern home decor accents for your walls.
Disclosure: This blog post contains affiliate links for products or services we think you’ll like. This means if you make a purchase from one of these links, Ideas for the Home by Kenarry® will make a small commission at no additional cost to you so we can keep the great ideas for the home coming your way. All opinions expressed are derived from personal experience.
Thrift Store Upcycled Clock Idea
Hello Kenarry friends, I’m Sam from A Happy Home In Holland and I am happy to be back again this month to share another easy DIY Home Decor Idea with you all.
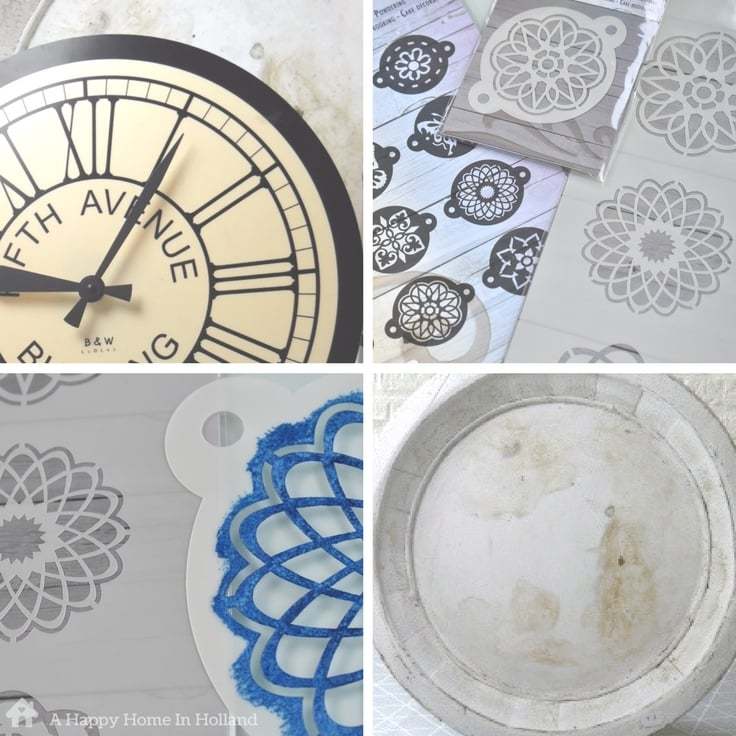
Last month I shared a Thrift Store Mirror Makeover with you and this month I have been hitting the junk shops yet again. This time I found a big plastic clock that was looking a little bit sorry for itself and was crying out for a little bit of love and attention.
On the photo, the clock doesn’t actually look too bad but in reality, it was looking rather tired and the plastic was beginning to yellow.
When I started the makeover, if I’m honest, I didn’t have a clear plan for it and decided to use some metallic chalk paint that I already had.
Upcycled Clock: Materials & Equipment
- Old thrift store plastic clock
- Metallic silver chalk paint (I used this because I had it anyway but you can just as easily use spray paint)
- White acrylic paint
- Phthalo blue acrylic paint (shades can vary from brand to brand)
- Fan shaped paint brush
- Small flat stiff-haired paint brush (I used this because I had it at home but you can also get proper stencilling brushes or sponges if you prefer to use them)
- Round pattern stencils 2.5″ & 5.5″
- Sandpaper
- Small pair of pliers
- Old round oversized wooden tray (this is optional)
Upcycled Clock Tutorial: How I Did It
First, I wiped away any grime and dust and removed the clock hands. There was a tiny screw that held them in place and I was able to undo this wth a tiny pair of pliers making it easy to just slip the hands off.
Next, I marked all the positions of the numbers on the back of the clock so that I would know where to stencil once the clock face had been painted.
Applying The Paint
Then, I started by painting it with the metallic chalk paint. I had put the paint on pretty roughly (I was a bit too slap-happy) and the brush marks were a little too prominent for my liking. So, I gave it a light sanding to try and rectify it but the metallic finish still didn’t look the way I wanted to.
I left it for a few days to ponder what I was going to do with it and then decided to see what it would look like if I added some white paint on top of the silver paint and create a bit of texture.
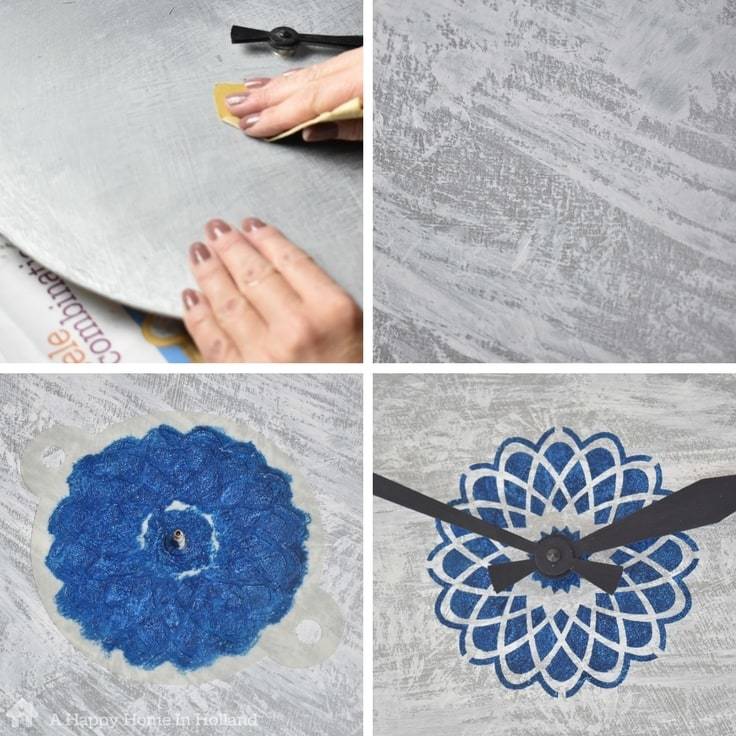
Using a dry flat splayed out fan brush, I dabbed a little bit of the white acrylic paint on the end of the paint brush and started adding rough random patterns. First, side to side, then up and down and then dabbing it with the splayed out end of the paint brush.
Once dry, I was pretty pleased with the effect as it looked a bit like a marble finish and I figured this was a good base to further pretty it up using some stencils.
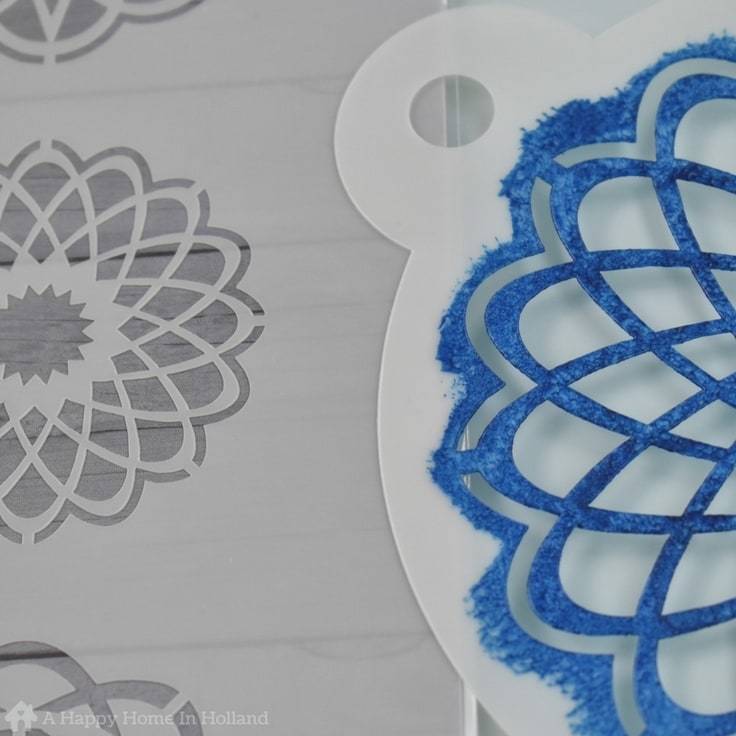
Applying The Stencils
I had found some really lovely stencils a few weeks back on sale for next to nothing and I knew that these would be perfect.
I had 2 different sized stencils – 5.5″ and 2.5″ I used the larger one in the middle section of the clock and the smaller one at the 12, 3, 6 & 9 points. For the other numbers, I just used the shape from the centre of the smaller stencil.
For the stencilled patterns I used acrylic paint again but this time I used a mix of two different brands of phthalo blue to give me the shade I wanted (one was too light and the other too dark).
Before I started using the stencils I used a pencil to very lightly mark the number positions on the side edge of the clock so I could see better where to add the stencil without keep having to turn it over.
To apply the stencils, I didn’t have a special stencil brush but used the end of a stiff flat brush.
I used a dabbing technique to apply the acrylic paint, keeping my brush vertical and taking care not to get the paint under the stencil (tip – apply the paint half on top of the stencil and half on the cut-out bit as this will help stop the bristles sliding underneath the stencil).
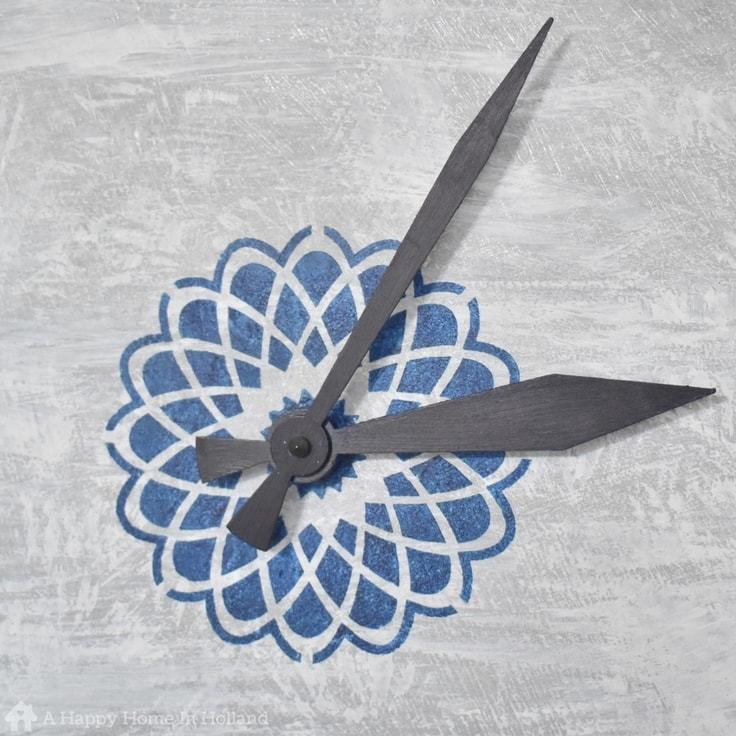
The Clock Hands
The clock hands were black and I was going to leave them as they were but upon laying them upon the finished clock I thought that the contrast was a bit too stark.
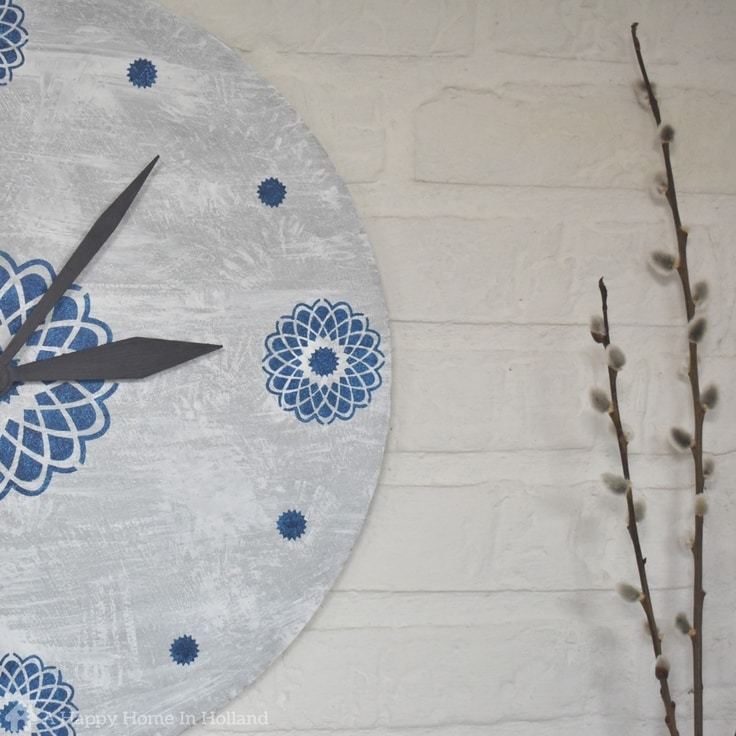
So I gave the clock hands a light coat of the same colour blue acrylic paint.
They still look black but I think the hint of blue on top compliments the clock face better.
To display it, I added it on top of an oversized round wooden tray which was another thrift shop find that I bought a while back and re-painted with chalk paint (I love this tray and use it to display all sorts of projects and wall art).
This was another very simple makeover idea (I like easy ) but I do think (in my opinion) that my upcycled clock turned out pretty good and looks rather chic displayed on the white walls in my home. Check out these 13 Clever Upcycling Ideas for Your Home for more amazing transformations.
If you liked this upcycled clock idea, why not pin it for later and share it on your favourite hangouts (any shares are always much appreciated 🙂 ).
And talking of simple DIY makeover ideas, here are a few of my latest projects that you can find over on the A Happy Home In Holland website. I’d love for you to pop by (and say hello).

DIY Mod Podge Photo Transfer + Free Flower Images
Kids Ikea Mammut Stool Makeover

DIY Spring Bulbs Arrangement Idea
Love the ideas you see here on Ideas for the Home by Kenarry®? Subscribe today to get our FREE DIY & Craft Planning Calendar, plus our weekly Ideas in Your Inbox newsletter filled with creative tips and exclusive offers!
What’s Next?
While you’re here, be sure to check out other DIY projects on Ideas for the Home by Kenarry® –
Sam, this is a fantastic idea! I actually picked up a couple of clocks from some yard sales a couple of weeks ago with the idea that I was going to paint and stencil them to give them new life! Thanks for this inspiration!!
Oh fun! Can’t wait to see how your clocks turn out, Pam!