THIS POST MAY CONTAIN AFFILIATE LINKS. PLEASE SEE OUR FULL DISCLOSURE POLICY FOR DETAILS.
Create an Easter wreath using burlap ribbon and this easy video tutorial. This craft idea brings a rustic touch to your spring home decor.
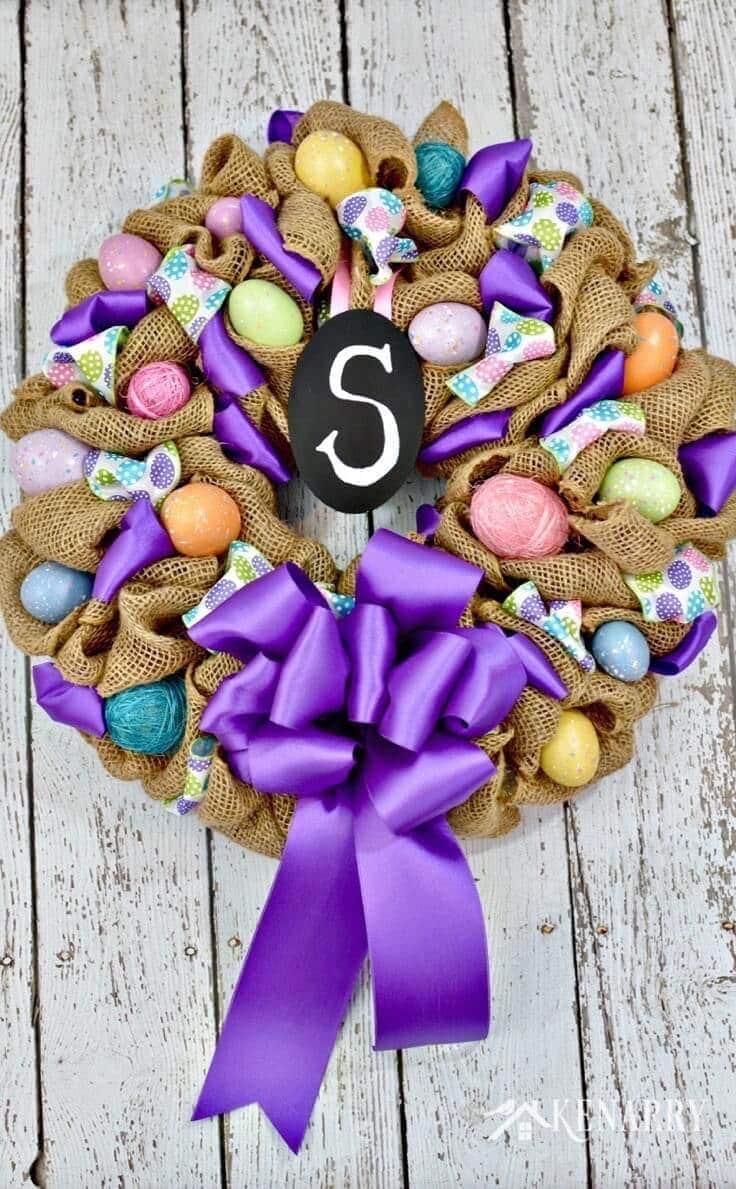
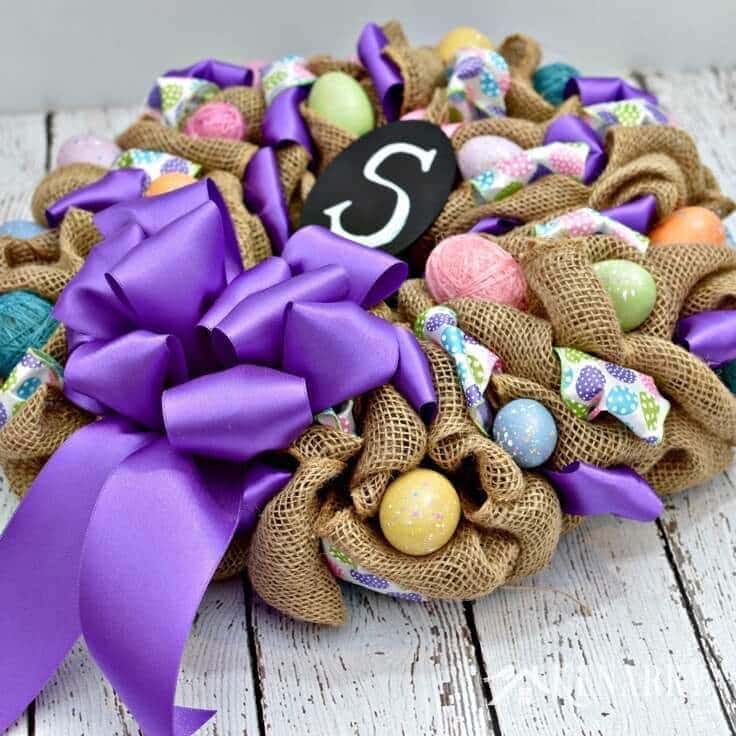
Today we’re sharing and easy, pretty craft idea for an Easter wreath! The burlap ribbon gives it a rustic look — and the Easter eggs and bright purple accents make it look fun and festive to decorate any home for spring.
How Our Family Celebrates Easter
Year after year, we spend Easter weekend with my Aunt Ronda and Uncle Bob. They are amazing hosts who go above and beyond to create special family traditions for Easter. Our boys can’t imagine going anywhere except their place for Easter and talk about the festivities all year long.
My cousin, Jessica (their daughter) lives on the same street a few houses down from them. She is highly involved with the plans and preparations for Easter. We always bring them some sort of Easter-themed hostess gifts to thank them for all their time and hard work.
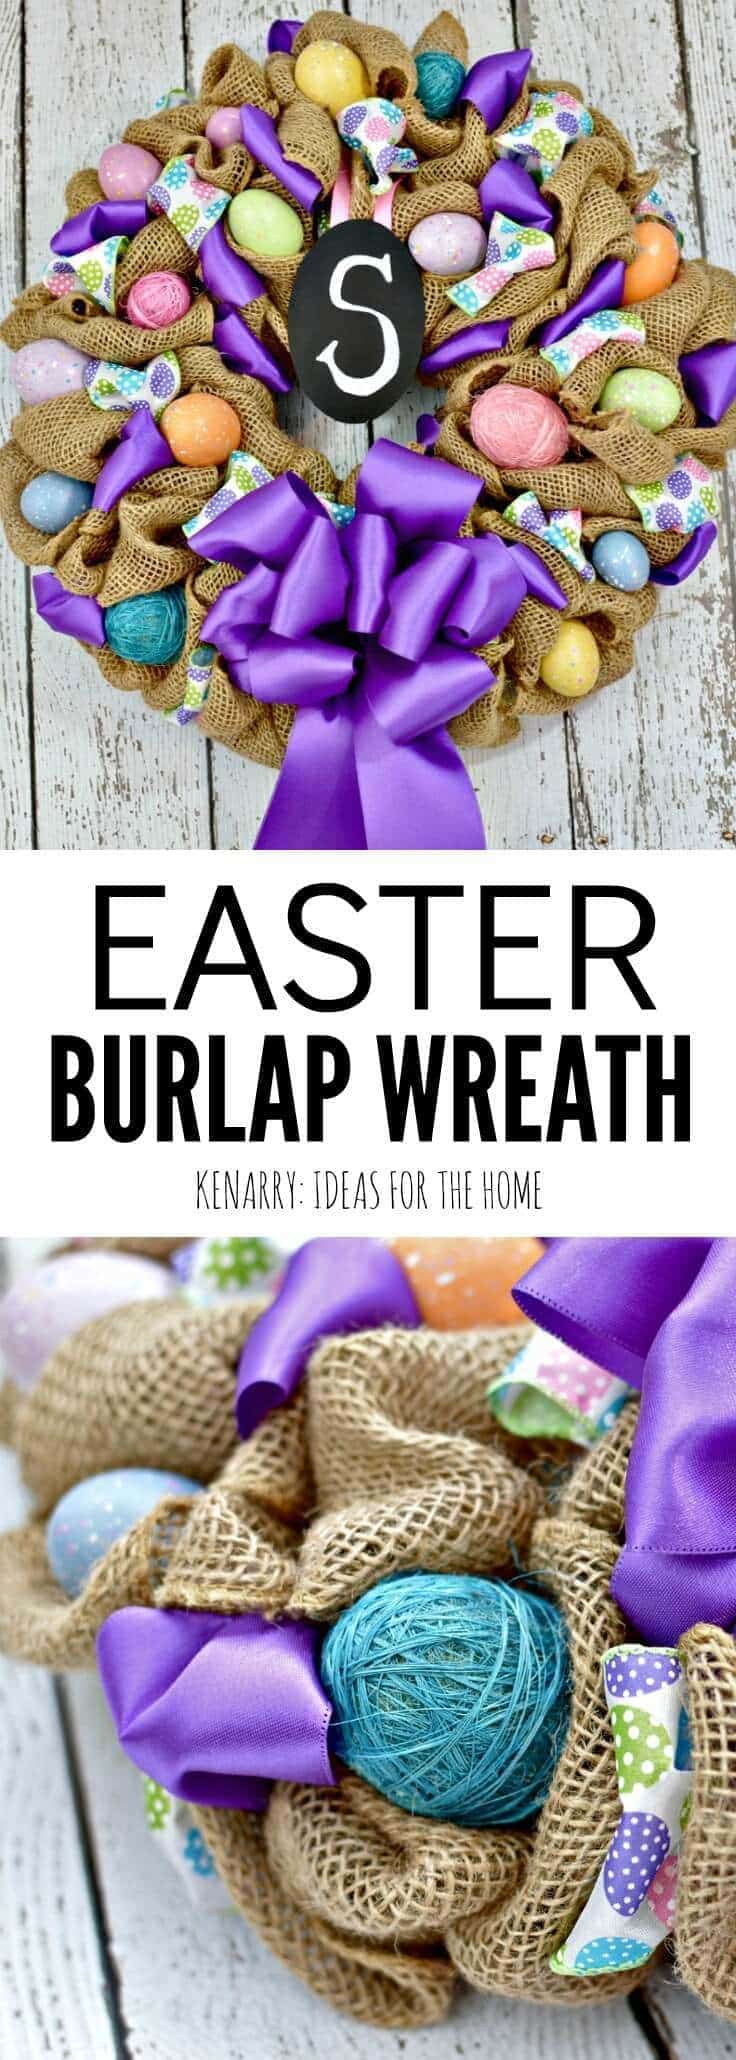
A few weeks ago, I shared the Easter Bunny Burlap Wreath that my sister and I made for Jessica last year. Today, I’m following up to share the other Easter wreath that we made for Aunt Ronda. Making burlap wreaths is an all-time favorite craft that my sister and I love to make. They’re quick, super easy and make great hostess gifts for friends and family for any season or holiday throughout the year.
The Perfect purple burlap easter wreath
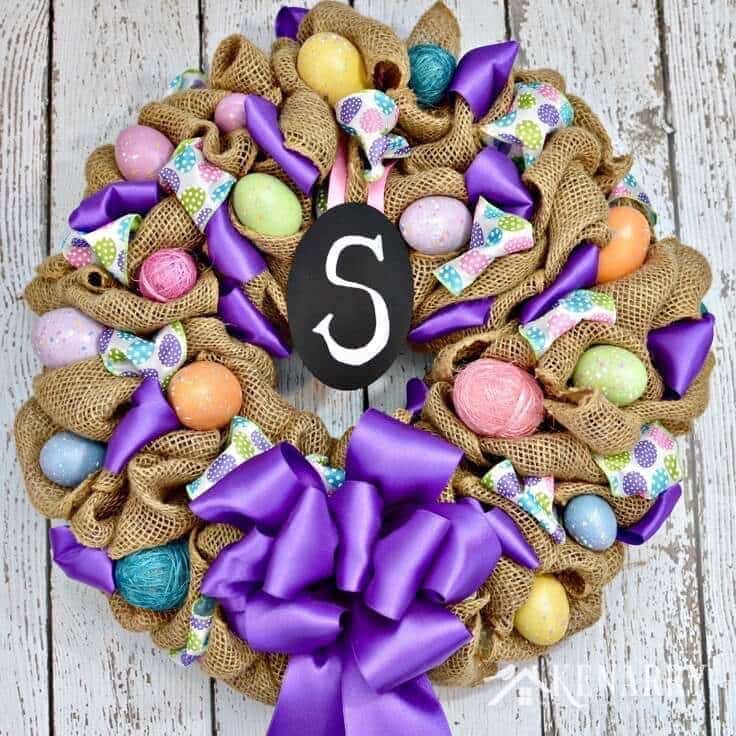
When we think of our Aunt Ronda, we think of generous laughter and hugs, late-night card games, loads of delicious food and the color PURPLE! My sister and I love to use two different complementary accent ribbons when we make burlap wreaths.
For Aunt Ronda’s Easter wreath, we first found a beautiful accent ribbon with Easter eggs on it at Hobby Lobby. Then we picked a vibrant shade of purple for our second ribbon to really emphasize her favorite color. Today we’re sharing how we put it all together including a video tutorial for how to make a burlap wreath. Plus you’ll find a link to the instructions for how to make a gorgeous decorative loopy bow!
Your privacy is important to us. We promise not to spam you or share your information. You can opt-out at any time. See our privacy policy for more information.
Once you’ve confirmed your e-mail address, we’ll send you the free digital eBook in addition to the coupon code. Plus you’ll have the opportunity to get our weekly Ideas In Your Inbox newsletter as well as access to our resource library stocked with free printables, product discounts and other content that is EXCLUSIVE for Idea Insiders only.
How to Make an Easter Wreath with Burlap Ribbon
If you love the kind of mindless crafts you can make while watching a chick flick or catching up on the TV shows you DVR’d, you’ll love making an Easter wreath with burlap ribbon. My sister and I can each make a burlap wreath in just a few hours. If you’ve never made a burlap wreath before, I shared a full tutorial for how to make a burlap wreath on Kenarry a few years ago. You can check out that post to get specific details and step by step instructions.
16″ wire wreath (You could also use an 18 inch wire wreath, but I would add at least a few more yards of burlap if you want your wreath to have a fuller appearance like mine.)
Here’s how to make your own Easter wreath. It’s a lot easier than you might think!
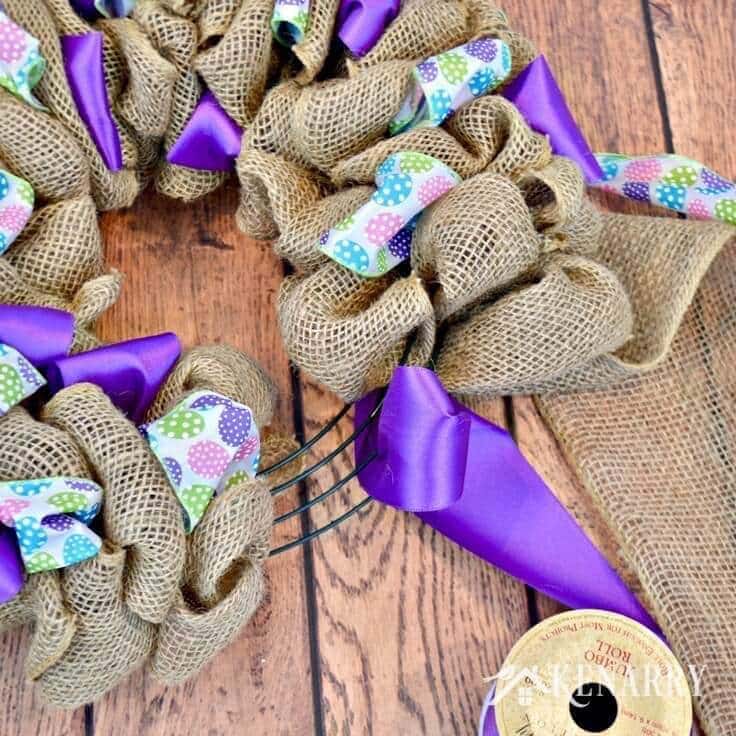
1. Weave Ribbons Through the Wire Frame
Tie the burlap ribbon to the wreath frame along with the two accent ribbons. One by one, twist and weave the ribbons through the wreath frame alternating the accent ribbons after 2-3 burlap loops.
Each time you end one of the ribbons or add spools, tie your ends on the wire wreath to hold them in place. Keep going around the wire wreath frame until it’s full.
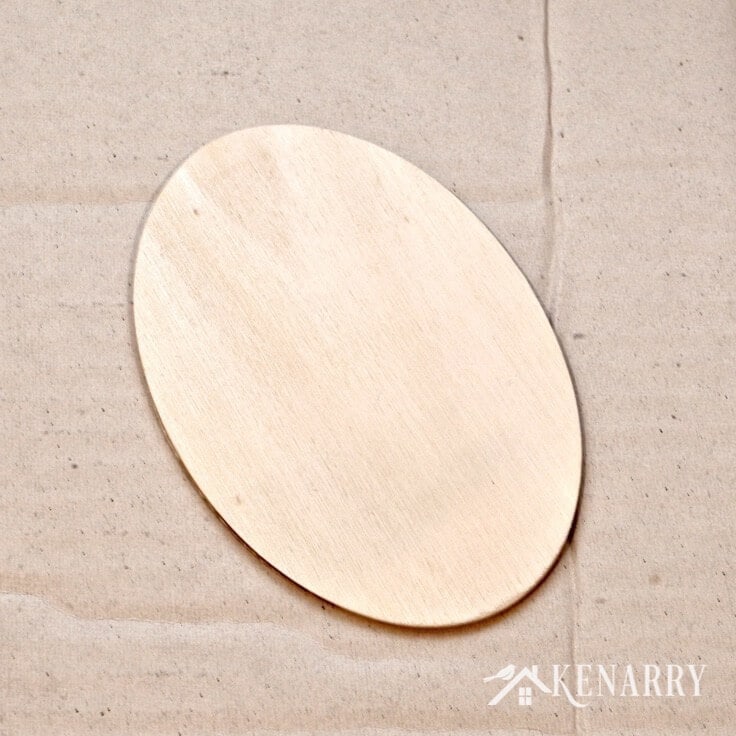
2. paint and attach the signs
My sister and I found this unfinished oval wood sign at a craft store. We liked how it was “Easter egg” shaped.
We painted the wood oval with black chalkboard paint to give it a rustic appearance. You may need to do a few coats to get the desired coverage. You could distress it as well if you want, but we left ours solid.
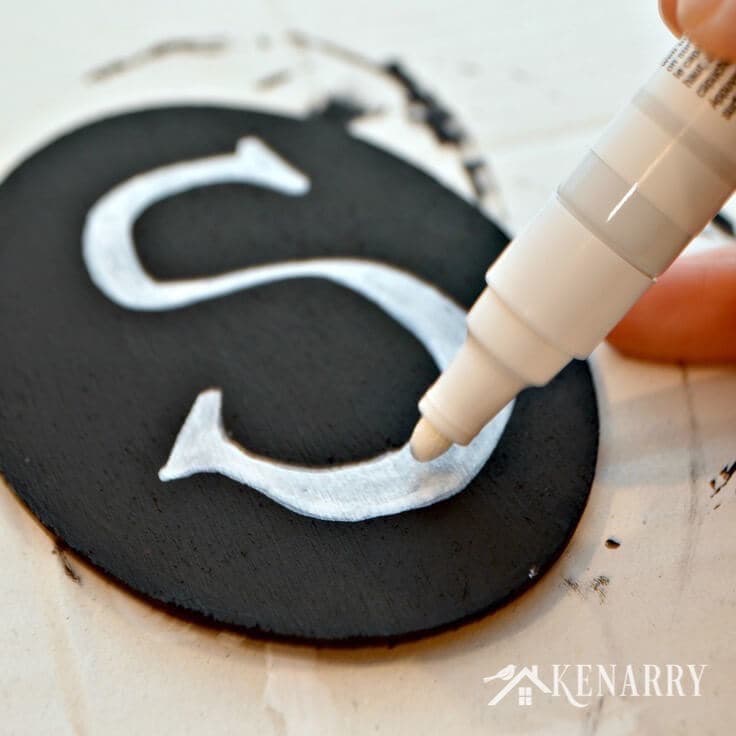
Next, we used a white paint pen to draw the first initial of their last name on the center of the Easter egg. We just wrote the letter freehand, but you could use a stencil. We let the letter “S” dry between coats. To get the white paint to look like chalk, I only did a few coats and didn’t worry about getting the paint to appear solid.
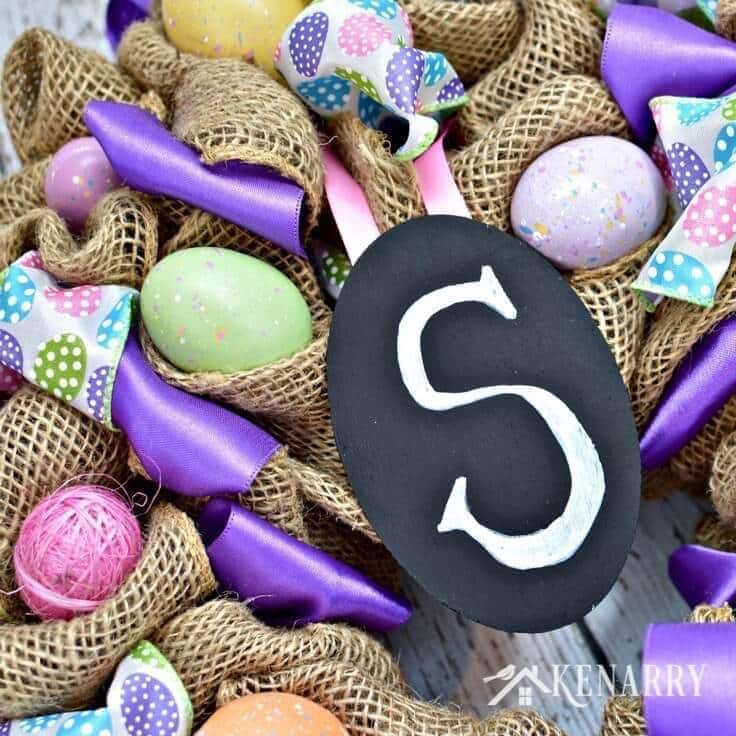
When the sign is dry, attach ribbon to the back using a hot glue gun. Then tie the sign to the top of the Easter wreath.
3. Embellish the Easter Wreath with Eggs
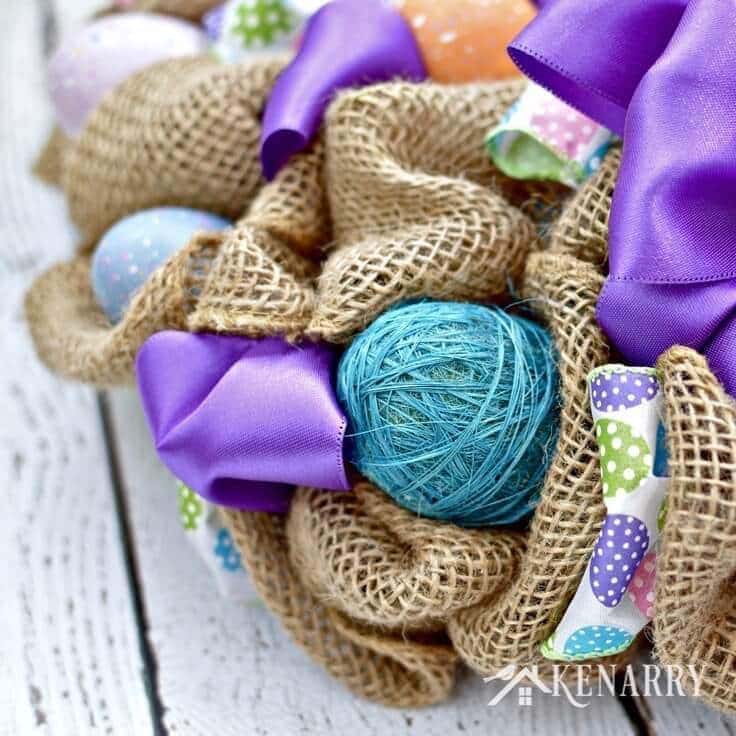
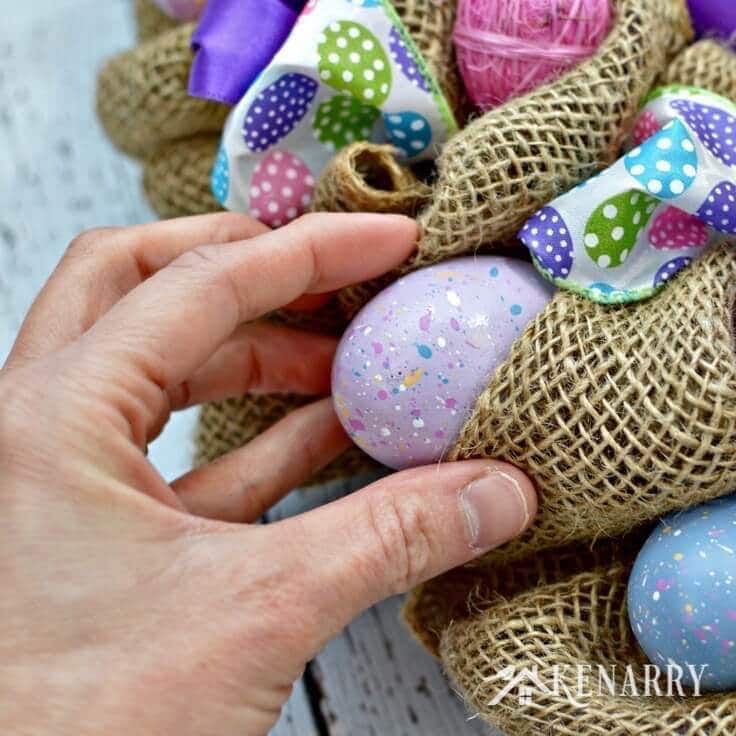
My sister and I found these beautiful Easter eggs on a long Easter garland at Hobby Lobby. We used wire cutters to snip the Easter Eggs off the garland. There was a hole on the end where the eggs were originally attached to the garland. We covered the hole with hot glue and then wedged that side of the Easter eggs between folds or loops in the burlap ribbon.
The Easter eggs on the garland came in different shapes and sizes. Some were wrapped with string and others were painted and speckled. We used all different kinds in the Easter wreath because we loved the variety. Don’t these Easter eggs look like they’re snuggled in a big burlap nest?
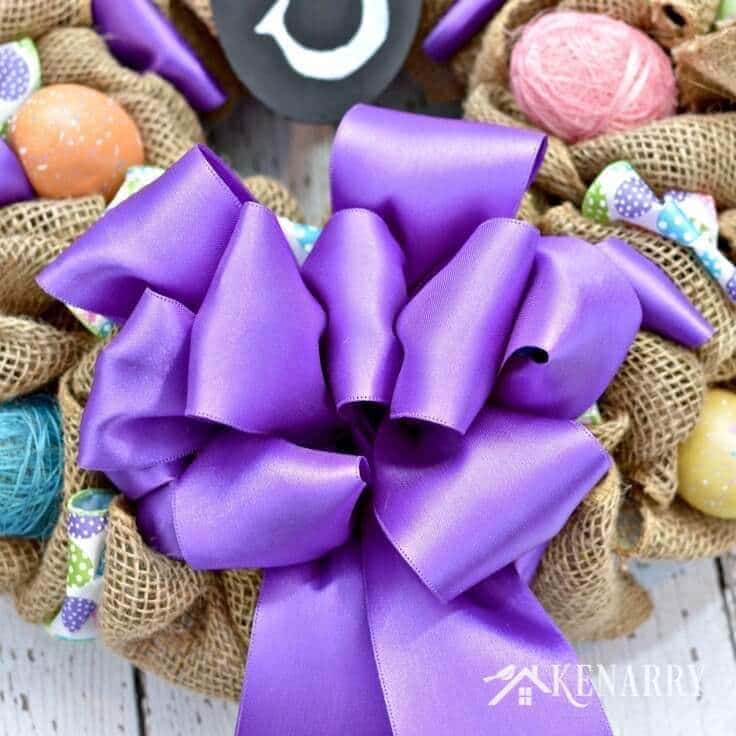
4. Create a Big Loopy Bow
Since Aunt Ronda loves the color purple, we really wanted to emphasize it in her Easter wreath. We learned how to make a big decorative loopy bow in a video tutorial from the O’Neil Sisters.
Our loopy purple bow turned out just as big and vibrant as we hoped it would be. We looped a long piece of wire through the center of the bow like we saw in the tutorial. Then used that wire to attach the big loopy bow to the wreath frame.
Last we folded the ends of the ribbon in half vertically and cut them at an angle, like the O’Neil Sisters suggested in their video. This gives the “tail” of the loopy bow a more decorative finished edge. Plus we think it just looks prettier when it’s hanging down from the Easter wreath.
5. Enjoy and Hang Your Easter Wreath
You have a few options for hanging the Easter Wreath on your wall.
One way is to hang the wire wreath frame on a long nail in your wall.
Another option would be to tie a loop of ribbon to the back of the burlap wreath. Then use that to hang the Easter wreath on your wall.
No matter which option you choose, this Easter wreath is sure to be a head-turner when people come over to your house. The burlap ribbon gives it a beautiful rustic appearance that’s really popular with home decor right now.
Carrie is the chief writer, crafter and creator here at Ideas for the Home by Kenarry®. She's an optimist by nature and enjoys sharing recipes, trying new craft ideas, planning for parties and events as well as organizing and decorating. She and her husband, Kent live in Michigan. She also loves to hide away in a castle under the stairs reading to her two young boys and help guests plan vacations at Sunshine Villa at Glenbrook Resort, their short term vacation rental home in Orlando near Walt Disney World.
Hi Cheryl,
I’m so glad to hear that the video was helpful for you and can’t wait to see your wreath. Please tag me @kenarryideas if you post a pic on social media so I can check it out. Have a wonderful weekend!
Best wishes,
Carrie from Ideas for the Home by Kenarry®


Enjoyed your video. You explain it really well and not going fast!! Thank you so much ??
Hi Cheryl,
I’m so glad to hear that the video was helpful for you and can’t wait to see your wreath. Please tag me @kenarryideas if you post a pic on social media so I can check it out. Have a wonderful weekend!
Best wishes,
Carrie from Ideas for the Home by Kenarry®