• About Us
    • Contact Us
    • Work With Us
    • The Creative Team
    • Disclosures
  • Subscribe
  • Shop Our Products
  • My Account
  • Cart
  • Nav Social Menu

    • Facebook
    • Instagram
    • Pinterest
    • Twitter
  • DIY & Decor â–¾
    • Crafts
    • Home Decor
    • Home Improvement
    • Technology
  • Recipes â–¾
    • Breakfast
    • Appetizers
    • Side Dishes
    • Easy Dinner Ideas
    • Slow Cooker
    • Fun Food
    • Desserts
  • Clean/Organize
  • Kid Ideas â–¾
    • Birthdays
    • Castle Playroom
    • Outer Space Bedroom
    • Teacher Appreciation
    • Travel Tips
  • Free Printables
  • Holidays â–¾
    • Valentine’s Day
    • St. Patrick’s Day
    • Easter
    • Cinco de Mayo
    • Mother’s Day
    • Memorial Day
    • Father’s Day
    • Independence Day
    • Halloween
    • Thanksgiving
    • Christmas
    • New Year’s
    • Gift Ideas

Ideas for the Home

You are here: Home / Craft Ideas / Easy to Make DIY Tile Coasters from 12-Inch Tiles

By Pam Baker on March 13, 2017 Leave a Comment

Easy to Make DIY Tile Coasters from 12-Inch Tiles

Craft Ideas· Gift Ideas· Home Decor Ideas

  • Share
  • Tweet

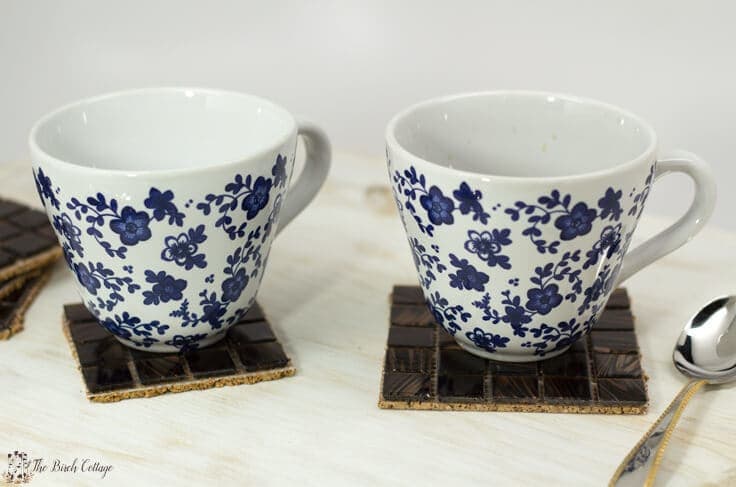
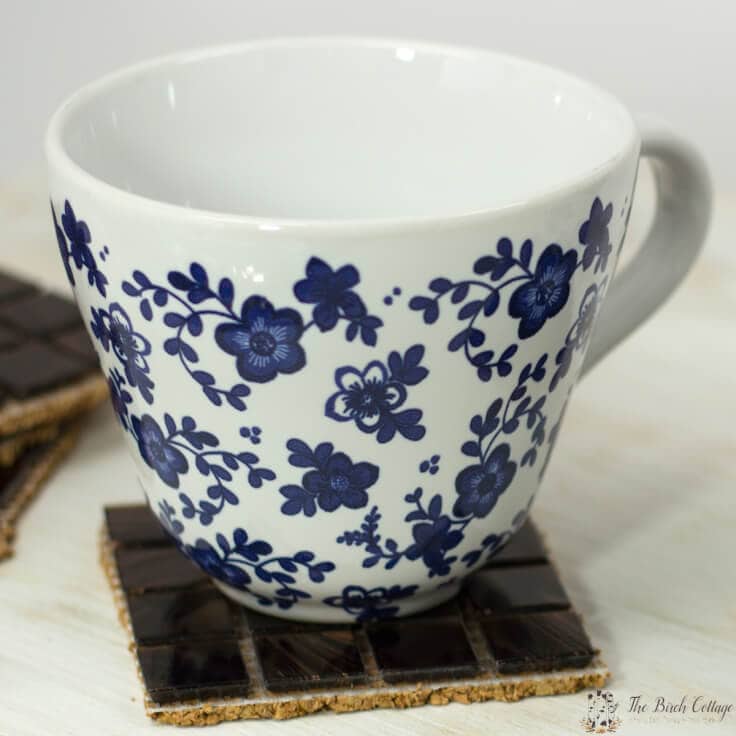
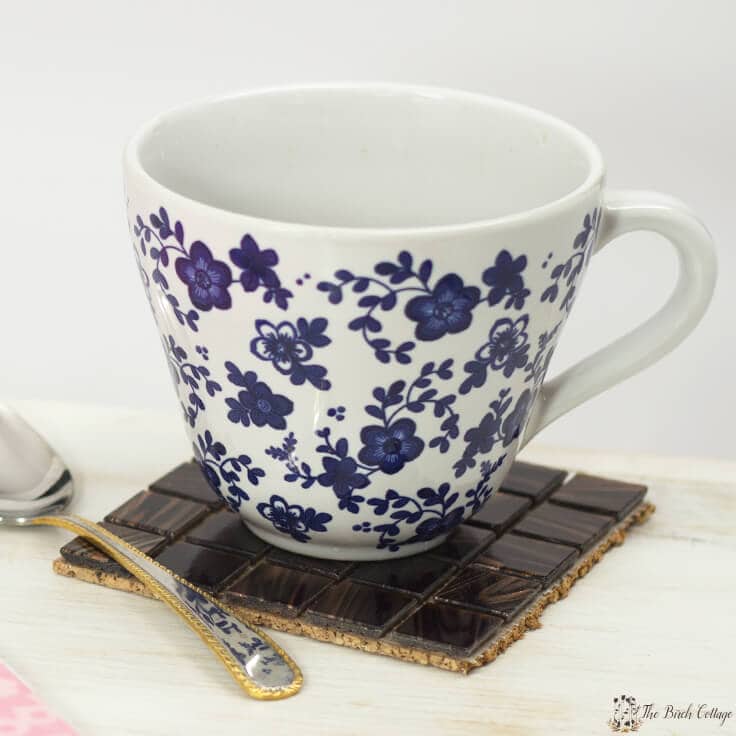
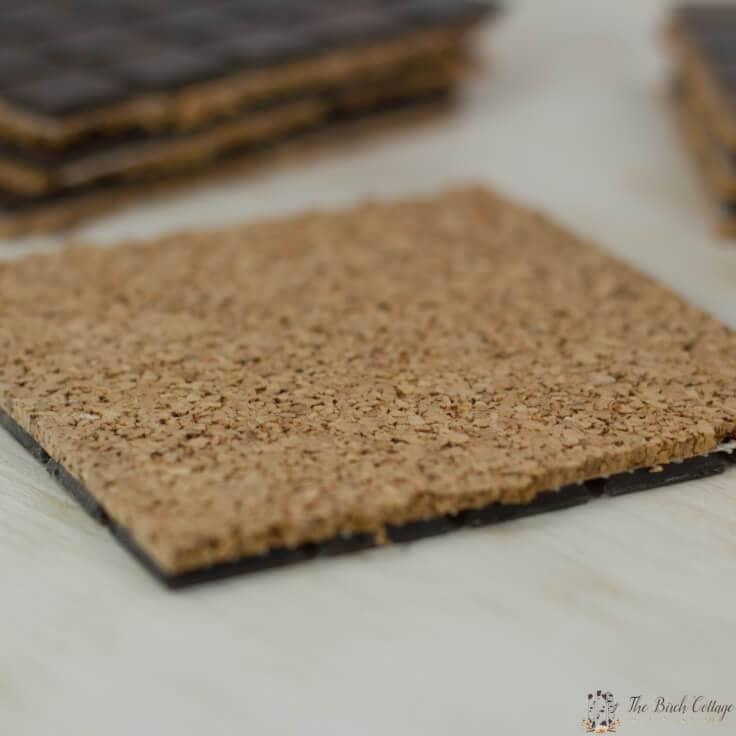
DIY tile coasters are made from 12-inch tile, cork and spray adhesive. Tile coasters are functional, easy to make and add glam to your decor.

These DIY Tile Coasters are made from 12-inch tiles and are so easy to make! Happy almost Spring, Ideas for the Home by Kenarry® friends! I’m Pam from The Birch Cottage and I’m back again this month to share another easy project with you.

DIY Tile coasters - Easy to make from 12-inch tiles

Disclosure: This blog post contains affiliate links for products or services we think you’ll like. This means if you make a purchase from one of these links, Ideas for the Home by Kenarry® will make a small commission at no additional cost to you so we can keep the great ideas for the home coming your way. All opinions expressed are derived from personal experience.

More Crafts You Can Make from 12-inch tiles

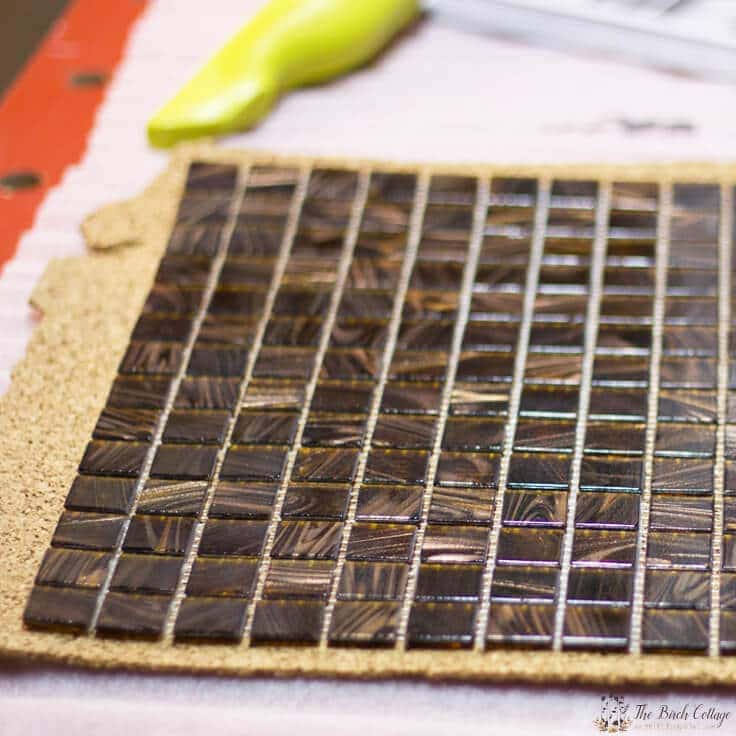
You may recall that I shared a detailed tutorial last month on how to make some super easy DIY Tile Placemats from 12-inch tiles. Well, these coasters are made from the same type of tile and use the same technique. The fact that the tile is comprised of 1-inch tiles, makes it absolutely perfect for cutting. You just have to decide what size you want your coasters.

These DIY Tile Coasters are easy to make and make a great handmade gift! Get the full tutorial from The Birch Cottage!

How to make different sizes of coasters from tiles

There are lots of different sizes you can make from the same 12-inch tiles. Here’s how I made my coasters, from small to really large.

4″ x 4″ Tile Coasters

To make the tiles 4″ x 4″, you simply cut the webbing between the tiles so that it makes a 4-inch square.

These DIY Tile Coasters are easy to make and make a great handmade gift! Get the full tutorial from The Birch Cottage!

5″ x 5″ Tile Coasters

To make the tiles 5″ x 5″, you simply cut the webbing between the tiles so that it makes a 5-inch square. (Are you seeing a pattern here?)

These DIY Tile Coasters are easy to make and make a great handmade gift! Get the full tutorial from The Birch Cottage!

If you make a 4-inch coaster, you can actually get 9 coasters out of one 12-inch tile.  If you make a 5-inch coaster, you can make 4 coasters out of one 12-inch tile.

These DIY Tile Coasters are easy to make and make a great handmade gift! Get the full tutorial from The Birch Cottage!

How To Make DIY Tile Coasters

For these DIY Tile Coasters, you’re gonna need a few supplies. I have these huge rolls of cork that my husband purchased via an online auction for just a couple of dollars. It’s the kind of cork used for underlayment for tile flooring. But, you can purchase cork at your local home improvement store, hardware store or even craft store. You, of course, are going to need some 12″ tiles.

You can pick up all the supplies at your local home improvement store, use what you have on-hand or even purchase them online. To make your shopping a little easier, we’ll provide a link to similar products that you can purchase on Amazon, where applicable.

Dress up your Valentine's Day tablescape with this easy DIY Tile Placemat tutorial from The Birch Cottage.

Supplies for DIY Tile Coasters

  • 12″ x 12″ Tiles
  • 12″ x 12″ Sheet of Cork
  • Adhesive Spray
  • Utility Knife
  • Marker
  • Ruler

Once you have your supplies, creating the coasters will take you about 10 minutes – tops!

Instructions for DIY Tile Coasters

Dress up your Valentine's Day tablescape with this easy DIY Tile Placemat tutorial from The Birch Cottage.

The instructions are simple and very similar to the DIY Tile Placemats.

1. Gather your supplies

First, get all your supplies together. You will need a clear space with plenty of room to work.

2. Cut Out cork

If you purchased 12″x12″ sheets of cork, you can skip ahead to Step Three.

Lay your tile on top of your cork and trace it with a marker. Lay your ruler along one of the lines you drew on the cork with a marker. Holding the ruler in place, use your utility knife to cut along the marked line.

Using a ruler as a guide will help you to cut straight lines. You really only need to score the cork. Don’t worry if you don’t cut all the way through. Simply fold the cork back along the scored line and it will just break right off

3. Spray Adhesive to the cork and tile

Next, spray adhesive on the back of the cork and the back of the tile. Wait a couple of minutes for the adhesive to become tacky.

4. attach the cork to the tile

Then pick up the cork, starting at one corner, lay the cork on top of the tile. Apply pressure on the back of the cork with your hand. Wait just a couple of minutes for the adhesive to dry (follow the instructions on the back of the spray adhesive).

These DIY Tile Coasters are easy to make and make a great handmade gift! Get the full tutorial from The Birch Cottage!

5. Cut out the coasters

Using scissors or a utility knife (I found scissors actually made a cleaner cut), cut out your 4″ x 4″ squares or 5″ x 5″ squares.

That’s it! You now have homemade coasters!

These DIY Tile Coasters are easy to make and make a great handmade gift! Get the full tutorial from The Birch Cottage!

Since making these coasters to coordinate with my placemats, I’ve since paid another visit to Home Depot and picked up some 12″ tile that’s comprised of 2″ squares. The tones are more earthy and I’ll be making these coasters as a gift.

Can you make coasters without cork on the back?

The cork on the back protects your table from getting scratched by the sharp tiles. If you don’t have cork, I suggest using something else like felt.

How do you store the coasters?

You can keep the coasters stacked on top of each other on your table. If you love DIY crafts, you can build a little wooden holder for your coasters too.

How do you cut the tile?

This is the most difficult part of the project. A tile cutter is the best way. You can also score it with a glass cutter and break the tile- but this isn’t as easy as just using a tile cutter or a saw.

These DIY Tile Coasters are easy to make and make a great handmade gift! Get the full tutorial from The Birch Cottage!

I hope you liked this DIY Tile Coasters tutorial. If you try this out, I’d love to hear about it! 

For more DIY project ideas and family-friendly recipes that will save you time in the kitchen, be sure to stop by The Birch Cottage blog for more inspiration like these:

Healthy Chocolate Chunk Muffins

These Chocolate Chunk Muffins are healthy and decadent. Get the recipe from The Birch Cottage.

English Muffin Bread Recipe for the Bread Machine

English Muffin Bread Recipe for the Bread Machine by The Birch Cottage

Pomegranate Sugar Hand Scrub

DIY Sugar Hand Scrub from The Birch Cottage uses Dawn Hand Renewal Dish Soap and Sugar for a fantastic gift idea!

What’s Next?

If you liked this project, you might also like these projects from The Birch Cottage on Ideas for the Home by Kenarry® –

  • DIY Tile Placemats
  • How to Make a Cheese Cutting Board from Ceramic Tile
  • How to Make Coasters from Ceramic Tiles 
  • Easy Sew Burlap Placemats
  • Share
  • Tweet

Craft Ideas· Gift Ideas· Home Decor Ideas

About Pam Baker

Pam is the creative behind The Birch Cottage, a lifestyle blog with an emphasis on family-friendly DIY projects, recipes and tutorials. An accounting clerk by day and a self-proclaimed Pinterest addict by night, you are sure to find creative ideas and meal inspirations at The Birch Cottage.

Pam has been sharing her great ideas on Ideas for the Home by Kenarry® since June 2015. Follow Pam on Facebook, Twitter, Pinterest and Instagram.

In this ultimate guide, you'll learn how to make a burlap wreath with ribbon for your home. The FREE eBook includes easy step-by-step instructions plus inspiring craft and decor ideas to make wreaths for fall, Christmas, Easter and other holidays.

Subscribe today to get ideas in your inbox plus FREE exclusives only for Idea Insiders!

Almost there! Now just check your email to confirm your e-mail address and get your free eBook.

There was an error submitting your subscription. Please try again.

You're already signed up! YAY! As an Idea Insider you have instant access to our Kenarry Idea Insider Resource Library with exclusive printables, offers and other freebies as soon as you confirm your subscription.
Previous Post: « Easter Bunny Burlap Wreath: An Easy Craft Idea
Next Post: $10 Faux Succulent Beach Terrarium »

Reader Interactions

Leave a Reply Cancel reply

Your email address will not be published. Required fields are marked *

Recipe Rating


This site uses Akismet to reduce spam. Learn how your comment data is processed.

Primary Sidebar

Welcome

Carrie Ypma from Ideas for the Home by Kenarry®Hello, I'm Carrie! Welcome to Ideas for the Home by Kenarry® where we want to help you create a home you love. We're glad you're here! Read more...

Sign Up and Get a Free Gift

Subscribe to become an Idea Insider. You'll get our weekly newsletter plus special deals and other resources that are only for subscribers -- all for FREE!

Almost there! Now just check your email to confirm your e-mail address and get your free eBook.

There was an error submitting your subscription. Please try again.

You're already signed up! YAY! As an Idea Insider you have instant access to our Kenarry Idea Insider Resource Library with exclusive printables, offers and other freebies as soon as you confirm your subscription.
In this ultimate guide, you'll learn how to make a burlap wreath with ribbon for your home. The FREE eBook includes easy step-by-step instructions plus inspiring craft and decor ideas to make wreaths for fall, Christmas, Easter and other holidays.
  • About Us
  • Subscribe
  • Shop Our Products
  • My Account
  • Cart

Footer

Disclosure: Posts may include affiliate links for your convenience. As an Amazon Associate I earn from qualifying purchases. All opinions are our own. You are reading and following advice from Kenarry, LLC at your own risk. Always use safety precautions. You should read and follow manufacturer’s directions for the products and tools you use. Read more.


Privacy Policy: The privacy of your personal information is important. We make every effort to safeguard your information and will never sell it to third parties. Read more.

Terms of Use: You are welcome to link to this site or use a single image and brief description to link back to any post. Republishing posts in their entirety is prohibited without permission. All images are property of Kenarry, LLC. Do not crop or remove watermark. Do not reproduce without link back or permission. If you do link to this site, please contact us to let us know. All free printables offered are for personal use only. Pinning is always welcome and appreciated. Thank you!

As it relates to comments and content posted on this blog by those other than the owners, any such content that contains the copyrighted and/or proprietary work of others is expressly prohibited and will be removed. Repeated posting of such content by the same user may result in that user being banned from this site.

Copyright © 2021 Kenarry LLC · Powered by Captivating Theme on Genesis Framework · WordPress · Log in