• About Us
    • Contact Us
    • Work With Us
    • The Creative Team
    • Disclosures
  • Subscribe
  • Shop Our Products
  • My Account
  • Cart
  • Nav Social Menu

    • Facebook
    • Instagram
    • Pinterest
    • Twitter
  • DIY & Decor â–¾
    • Crafts
    • Home Decor
    • Home Improvement
    • Technology
  • Recipes â–¾
    • Breakfast
    • Appetizers
    • Side Dishes
    • Easy Dinner Ideas
    • Slow Cooker
    • Fun Food
    • Desserts
  • Clean/Organize
  • Kid Ideas â–¾
    • Birthdays
    • Castle Playroom
    • Outer Space Bedroom
    • Teacher Appreciation
    • Travel Tips
  • Free Printables
  • Holidays â–¾
    • New Year’s
    • Valentine’s Day
    • St. Patrick’s Day
    • Easter
    • Cinco de Mayo
    • Mother’s Day
    • Memorial Day
    • Father’s Day
    • Independence Day
    • Halloween
    • Thanksgiving
    • Christmas
    • Gift Ideas

Ideas for the Home

You are here: Home / Home Decor Ideas / Easy Upcycled Ottoman Tray – Made With Driftwood

By Stacy White on July 20, 2018 2 Comments

Easy Upcycled Ottoman Tray – Made With Driftwood

Home Decor Ideas

  • Share
  • Tweet

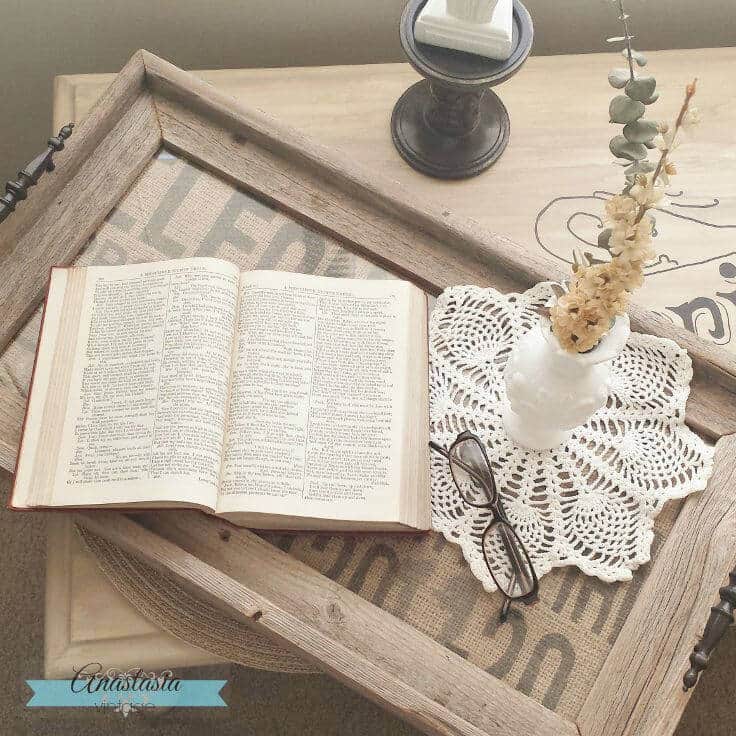
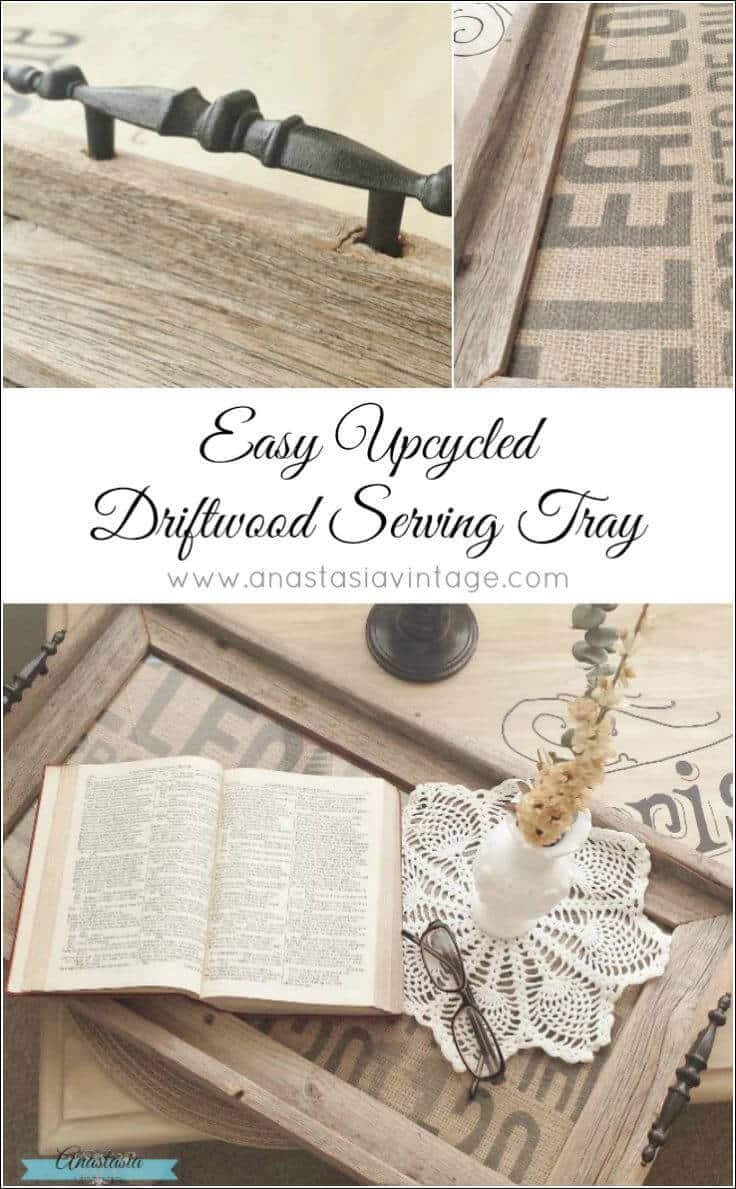
If you enjoy rustic home decor and DIY projects, then you will LOVE this DIY ottoman tray. It’s so easy, just find some driftwood and get crafting!

Good morning, dear readers! It’s Stacy from Anastasia Vintage joining you here again at Ideas for the Home by Kenarry®! This month, I’m sharing a simple, rustic DIY idea that you can use to add a touch of vintage style to your home. Take a look at how I created this easy upcycled driftwood serving tray with just a few simple supplies!

upcycled repurposed driftwood reclaimed wood picture frame serving tray

DIY Ottoman Tray – Easy Home Decor Craft

This is so easy. I literally found an old wood frame and knew I wanted to turn it into a serving tray. So here’s how you can make one too.

Supplies:

  • Barn wood frame
  • Drawer Pulls / Handles
  • Burlap Fabric

How to Make A DIY Ottoman Tray Out of A Picture Frame

These steps are so simple. Here’s how to make your own ottoman tray.

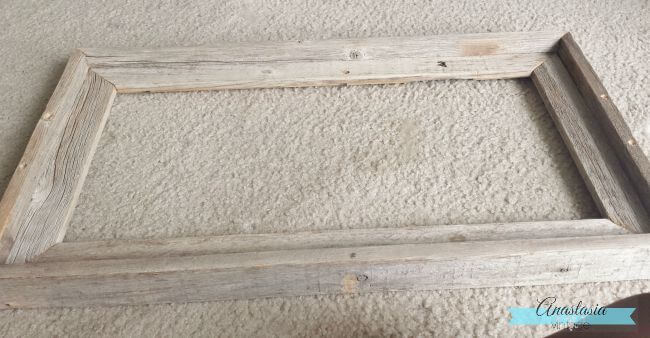
1.) Find a Rustic Wood Frame

While at a local garage sale last weekend, I found a worn and very charming barn wood frame for just a few dollars. Sometimes it takes a while for inspiration to strike when I pick up random garage sale finds, but not this time!

I knew right away that the 8×10 opening and raised sides would make a perfect tray with just a few simple additions.

driftwood picture frame made out of reclaimed wood

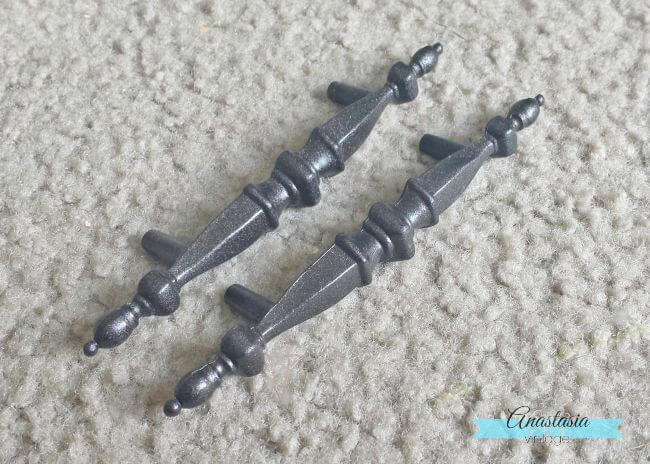
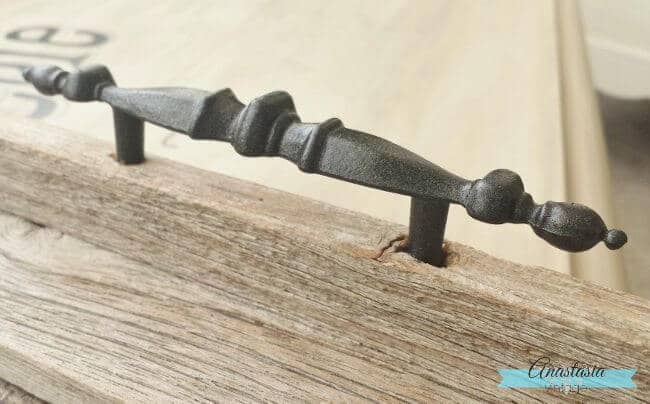
2.) Choose the Handles for the Tray

Just a few days later, I found a pair of antique drawer handles at the thrift store, and revived them with a shot of Rustoleum spray paint in Old Rubbed Bronze.

antique drawer handles pulls oil rubbed bronze

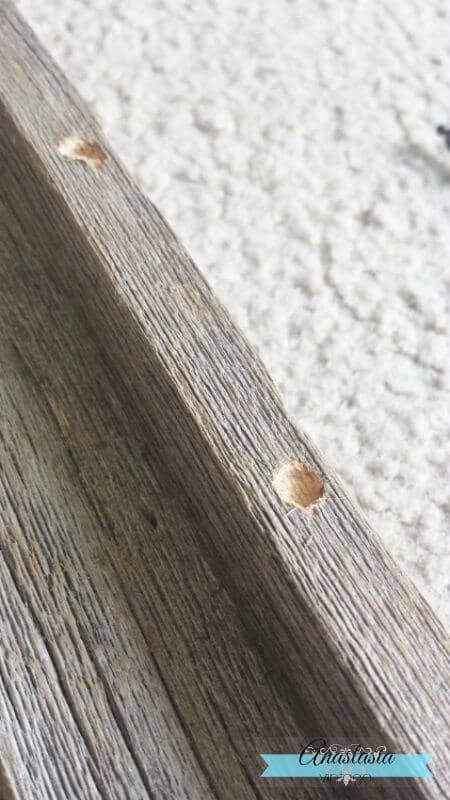
3.) Attach the Handles to the Tray

Since the handles would be used to carry the weight of the tray, I wanted to recess them into the frame to give it more stability. After a cleaning and light sanding, I drilled a pair of 1/4 inch holes about a 1/4 inch into each side of the frame.

drilled holes driftwood picture frame tray

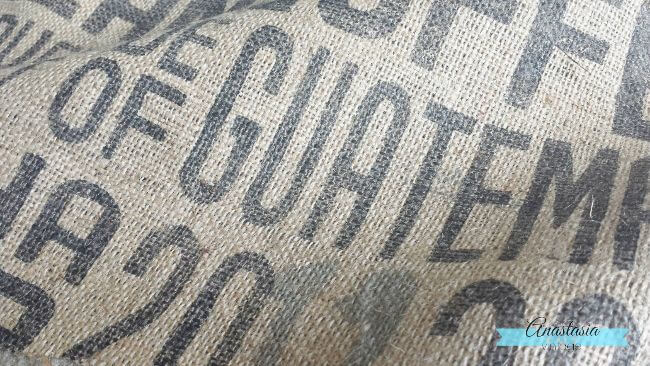
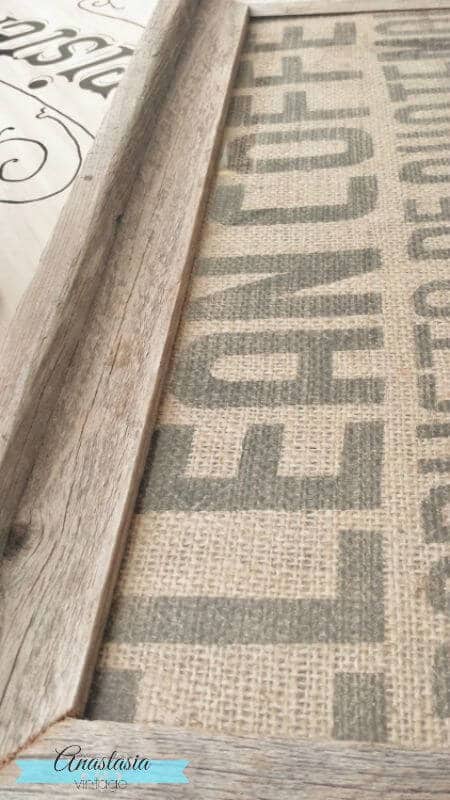
4.) Put Fabric Behind the Frame’s Glass

I debated for some time what I would use to fill the frame’s opening. Textured wallpaper? One of my many scraps of fabric? When I stumbled on a set of burlap coffee sacks I’d purchased last summer, I knew I’d hit the jackpot! I mean really, how perfect is that coffee graphic for a serving tray?!

burlap coffee sack graphic

5.) Assemble the Pieces of your Ottoman Tray

Then, it was just a matter of assembling the pieces – first the glass from the frame, then the coffee sack, a piece of cardboard backing, and a 1/8″ thick piece of hardboard to give the bottom a clean finish. Lastly, I attached the handles with some epoxy adhesive.

And there you have it! Simple, right?

upcycled repurposed driftwood picture frame serving tray

What Can You Use to Attach the Tray Handles?

Since I originally published this tutorial, I’ve received questions about the best ways to attach the handles. Since you will be using the handles to carry the tray, it’s important that they don’t fall off.

I used epoxy glue and it has held up fantastically over the years. If you don’t have epoxy glue or can’t find any, these options will also work:

  • Drill and Screws – Most handles have a place you can screw them into the boards. Attach them from the underside of the picture frame.
  • Wood Glue – You can also use wood glue. But make sure it doesn’t overfill, or it will appear messy.
antique drawer handle serving tray
driftwood picture frame serving tray coffee sack graphic
repurposed burlap coffee sack driftwood serving tray

The weathered texture of driftwood is one of my favorite looks for the home. And the great news is that you can recreate this look with just about any picture frame; you can even build a simple wooden frame to make a custom-sized tray and give it a weathered finish.

I love the finished tray so much that I’ve already started working on the plans to build some more.

I’ll be sharing an easy weathered wood tutorial at Anastasia Vintage next week that is perfect for this tray – here’s a sneak peek:

weathered wood driftwood faux finish crate

Be sure to check it out, as well as these other great repurposing ideas!

DIY Desk-less Drawer to Rustic Decor

old desk drawer repurposed rustic entryway organizer chalkboard

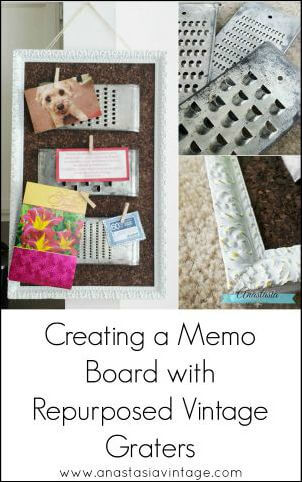
Creating a Memo Board with Repurposed Vintage Graters

repurposed upcycled vintage grater shredder memo cork board

Repurposed Kitchen Tools Into Farmhouse Decor

vintage kitchen tools flour sifter colander repurposed upcycled decor

See you next month with more DIY inspiration! And if there’s a vintage idea you’d love to learn more about, feel free to send me a message at [email protected].

upcycled DIY repurposed driftwood reclaimed wood picture frame serving tray

More DIY Home Decor Ideas

Check out these home decor ideas on Ideas for the Home by Kenarry® –

  • DIY Wood Sign With Quote
  • DIY Rustic Mirror
  • Succulent Napkin Rings
  • DIY Monogrammed Wooden Stovetop Cover and Tray

Originally published July 2015. Updated July 2018.

  • Share
  • Tweet

Home Decor Ideas

About Stacy White

Stacy is a writer, designer, and crafter at Anastasia Vintage, a little corner of the web where she and her husband, Eric, bring unloved vintage goods back to life. On their blog, you'll find DIY furniture revival projects, vintage-inspired crafts, free printables, and tips & tricks for adding contemporary vintage style to your space. When they aren't looking after their sweet furbaby, Kylie, you'll find the pair enjoying music, good books, and international cuisine.

Stacy shared her great ideas on Ideas for the Home by Kenarry® from June - September 2015.

In this ultimate guide, you'll learn how to make a burlap wreath with ribbon for your home. The FREE eBook includes easy step-by-step instructions plus inspiring craft and decor ideas to make wreaths for fall, Christmas, Easter and other holidays.

Subscribe today to get ideas in your inbox plus FREE exclusives only for Idea Insiders!

Almost there! Now just check your email to confirm your e-mail address and get your free eBook.

There was an error submitting your subscription. Please try again.

You're already signed up! YAY! As an Idea Insider you have instant access to our Kenarry Idea Insider Resource Library with exclusive printables, offers and other freebies as soon as you confirm your subscription.
Previous Post: « Key Holder Tutorial: A Quick, Easy Idea to Organize
Next Post: Star Wars Party Favors: Free Printable Treat Tags »

Reader Interactions

Trackbacks

  1. Easy Upcycled Driftwood Serving Tray {Contributor Post on Kenarry} says:
    June 4, 2017 at 8:12 pm

    […] finds. Today, I’m sharing a simple, rustic DIY decor idea for my contributor post over at Ideas for the Home by Kenarry® – and of course, it’s created from one of my summer scores […]

    Reply
  2. 25 Creative and Fun Vintage Gift Ideas {Gift Guide} | Adventures of Mel says:
    November 26, 2017 at 9:45 am

    […] 23. Kenarry turned a garage sale find into an Easy Upcycled Driftwood Serving Tray. […]

    Reply

Leave a Reply Cancel reply

Your email address will not be published. Required fields are marked *

Recipe Rating


This site uses Akismet to reduce spam. Learn how your comment data is processed.

Primary Sidebar

Welcome

Carrie Ypma from Ideas for the Home by Kenarry®Hello, I'm Carrie! I'd love to personally welcome you to Ideas for the Home by Kenarry® where we curate and share great ideas you can create at home. Whether you're cooking, crafting or creating for your family, you're bound to find inspiration. Please pour yourself some coffee and stay awhile. We're glad you're here! Read more...

Sign Up and Get a Free Gift

Subscribe to become an Idea Insider. You'll get our weekly newsletter plus special deals and other resources that are only for subscribers -- all for FREE!

Almost there! Now just check your email to confirm your e-mail address and get your free eBook.

There was an error submitting your subscription. Please try again.

You're already signed up! YAY! As an Idea Insider you have instant access to our Kenarry Idea Insider Resource Library with exclusive printables, offers and other freebies as soon as you confirm your subscription.
In this ultimate guide, you'll learn how to make a burlap wreath with ribbon for your home. The FREE eBook includes easy step-by-step instructions plus inspiring craft and decor ideas to make wreaths for fall, Christmas, Easter and other holidays.
  • About Us
  • Subscribe
  • Shop Our Products
  • My Account
  • Cart

Footer

Disclosure: Posts may include affiliate links for your convenience. As an Amazon Associate I earn from qualifying purchases. All opinions are our own. You are reading and following advice from Kenarry, LLC at your own risk. Always use safety precautions. You should read and follow manufacturer’s directions for the products and tools you use. Read more.


Privacy Policy: The privacy of your personal information is important. We make every effort to safeguard your information and will never sell it to third parties. Read more.

Terms of Use: You are welcome to link to this site or use a single image and brief description to link back to any post. Republishing posts in their entirety is prohibited without permission. All images are property of Kenarry, LLC. Do not crop or remove watermark. Do not reproduce without link back or permission. If you do link to this site, please contact us to let us know. All free printables offered are for personal use only. Pinning is always welcome and appreciated. Thank you!

As it relates to comments and content posted on this blog by those other than the owners, any such content that contains the copyrighted and/or proprietary work of others is expressly prohibited and will be removed. Repeated posting of such content by the same user may result in that user being banned from this site.

Copyright © 2021 Kenarry LLC · Powered by Captivating Theme on Genesis Framework · WordPress · Log in