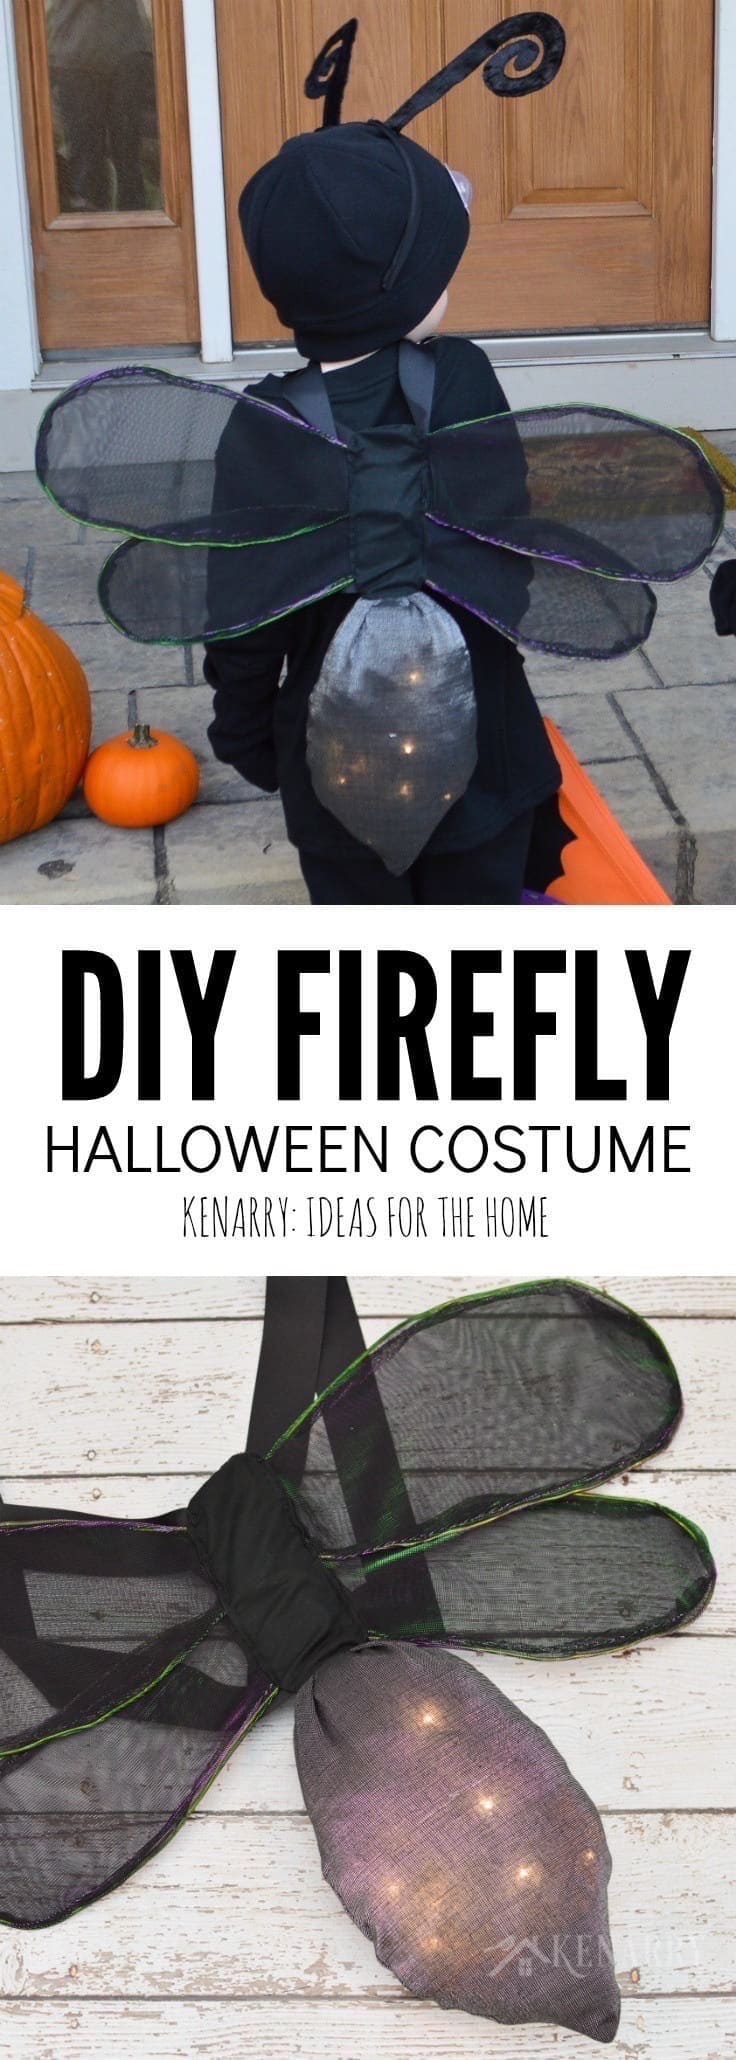
Firefly Costume: DIY Lightning Bug Idea For Halloween
THIS POST MAY CONTAIN AFFILIATE LINKS. PLEASE SEE OUR FULL DISCLOSURE POLICY FOR DETAILS.
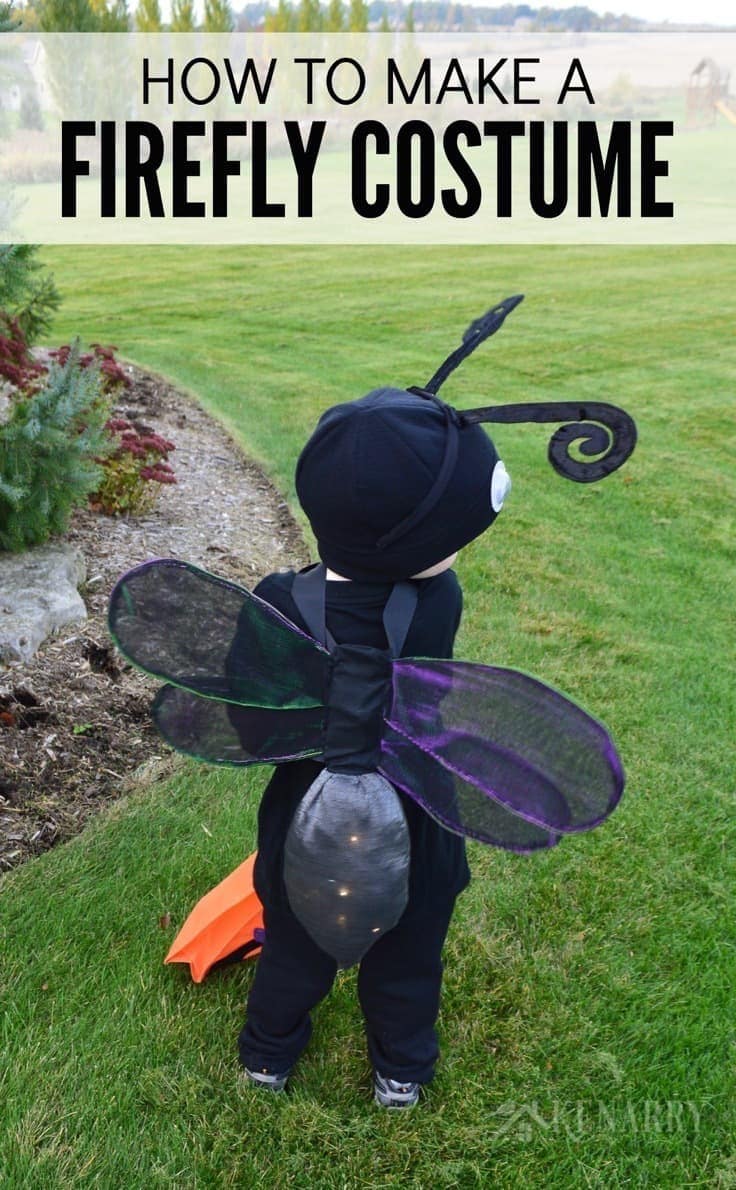
Make a lightning bug or firefly costume for kids with this sewing tutorial. The DIY wings light up to keep children safe on Halloween night.
Need a cute Halloween dress up idea for your children? Today, I’ll show you how to make a lightning bug or firefly costume for kids with this sewing tutorial and a few other costume pieces. The DIY wings even light up to help keep your child visible and safe on Halloween night.
I’ve got to be honest with you, I have mixed feelings about Halloween. I could do without all the creepy blood, guts, gore and scary creatures. I am not a thrill seeker and if I never see a horror movie or haunted house again in my life, so much the better!
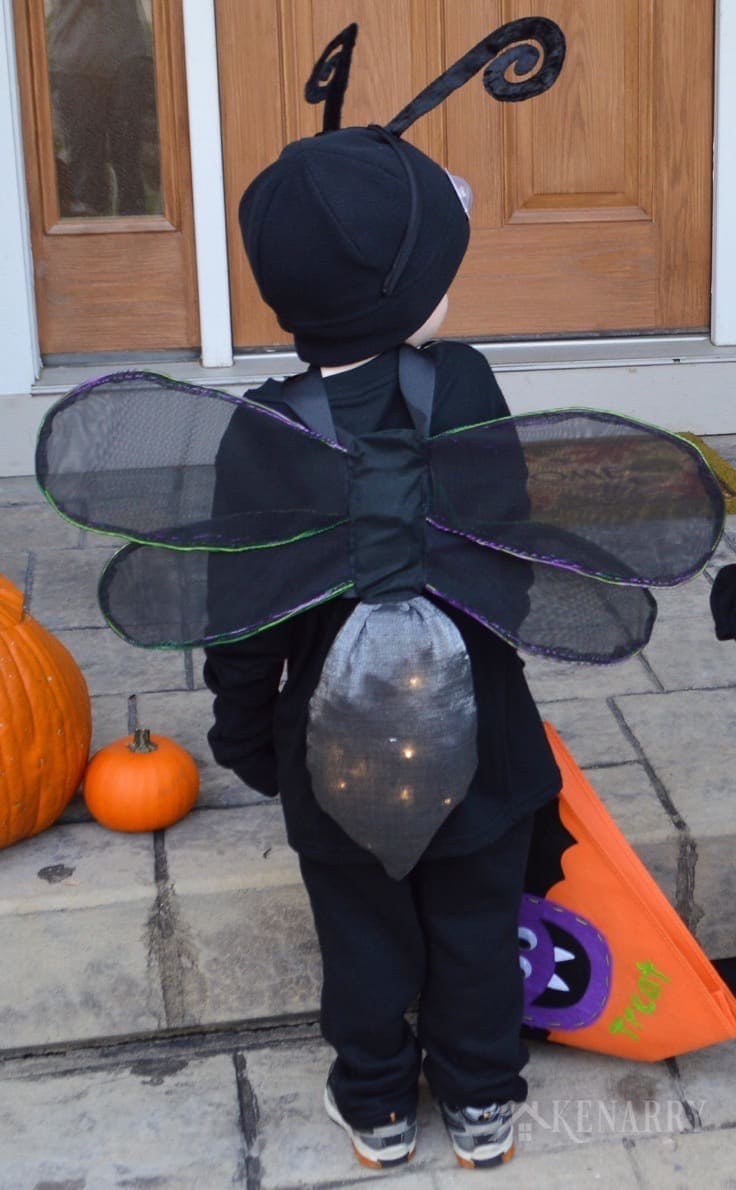
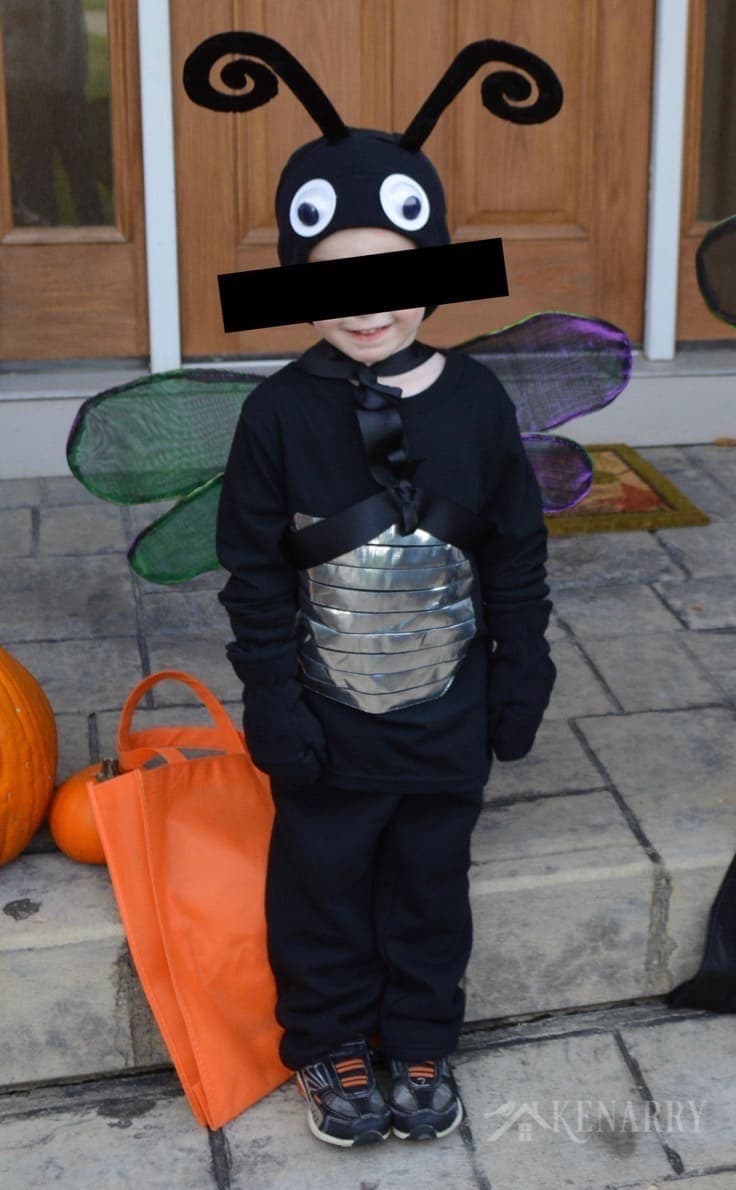
But I absolutely LOVE seeing little kids going door to door in creative and cute Halloween costumes. My boys have dressed up as many things over the years including super heroes, Curious George, Humpty Dumpty and even Minions. However, my favorite so far is when they let me make firefly costumes for them last year.
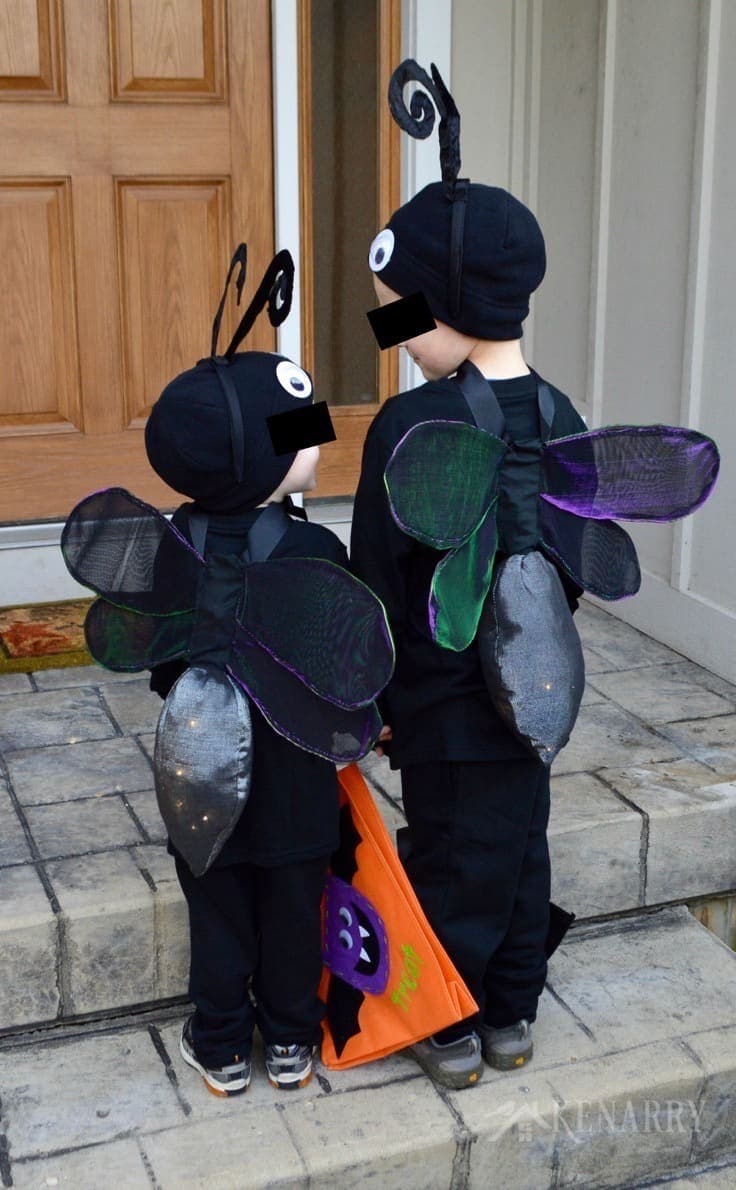
Okay so I know I’m completely and totally biased, but seriously — how cute are these little lightning bugs?! It took a little thinking on my part but making a firefly costume was something unique, original and fun – I only wish they’d wear them again this year!
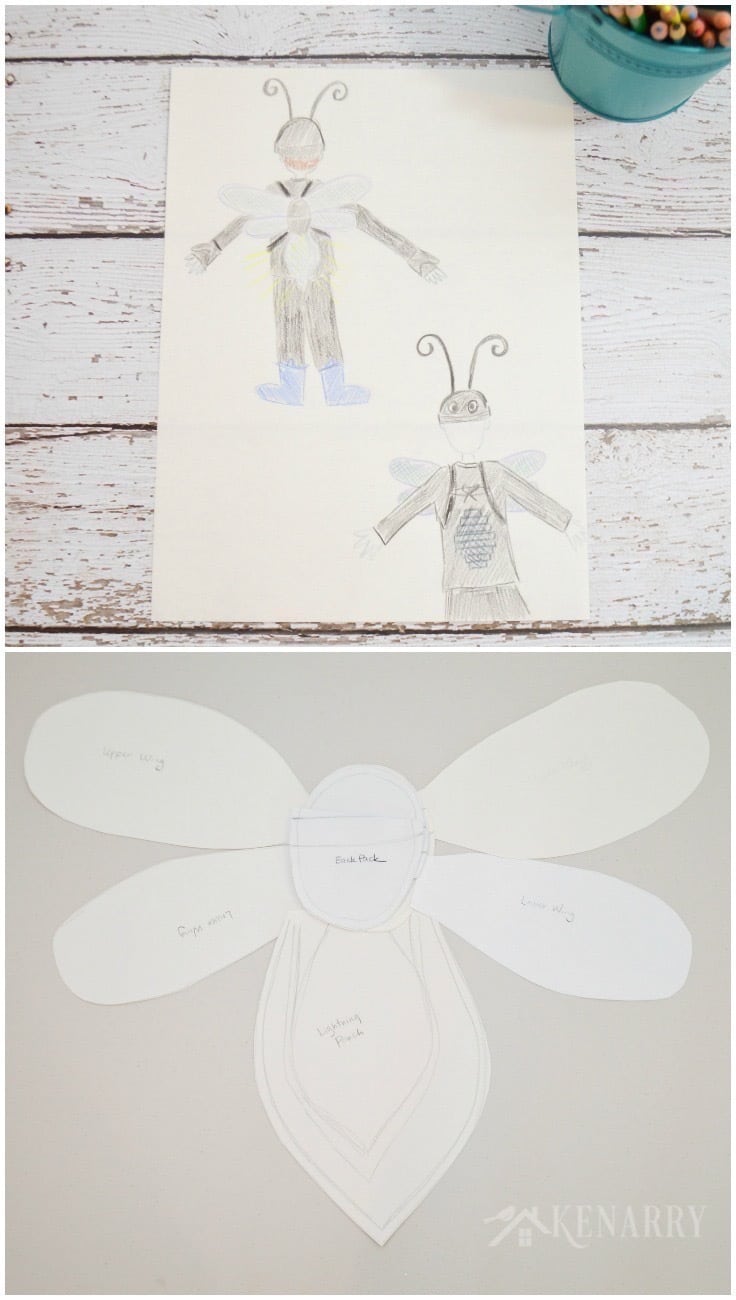
First, I started by making sketches of my ideas for the firefly costume. Then I created a little template or pattern for the DIY wings. Next I took step-by-step photos as I put the pieces and ideas together. I thought I’d share a little tutorial with you today in case you were inspired to make a firefly costume like this for your own kids.
How to Make a Kids Firefly Costume for Halloween
Disclosure: This blog post contains affiliate links for products or services we think you’ll like. This means if you make a purchase from one of these links, Ideas for the Home by Kenarry® will make a small commission at no additional cost to you so we can keep the great ideas for the home coming your way. All opinions expressed are derived from personal experience.
What You Need:
For the DIY Wings:
- Colorful iridescent fabric – 1 yard (I got the fabric I used at JoAnn Fabrics and Crafts.)
- Silver shiny metallic fabric – 1 yard (This was also from JoAnns. You’ll want to make sure you can see light through this fabric.)
- Black cotton fabric – 1 yard
- Black thread
- Sewing machine
- Straight pins
- Black grosgrain ribbon
- White tulle roll
- 12 gauge lime green aluminum floral wire
- Tin snips
- Sewing hand needle
- Battery operated holiday lights – I got a string of 18 warm white LED micro lights made by Philips at Target, but I don’t see them available right now online. Just make sure you choose ones that say they’re “cool to the touch”.
- Download my sketches as a pattern (see below) or create your own
For the rest of the Firefly Costume:
- Black antenna headband (These are similar.)
- Black hat (Mine was a fleece one from Target. This is similar.)
- Long sleeved black t-shirt
- Black sweatpants
- Large white wiggle eyes
- Reflective metallic craft tape

Instructions:
1. Cut your fabric for the DIY Wings
You’ll find instructions below for how you can download the sketches I used as a pattern or you can make your own for the firefly wings. For each set of wings you make, you’ll need to cut:
- 4 upper wing pieces from the colorful iridescent fabric
- 4 lower wing pieces from the colorful iridescent fabric
- 2 large tear drop shaped pieces from the silver shiny metallic fabric
- 4 large ovals from the black cotton fabric (see notes and lines on the sketches in the PDF)
Download My sketches for the pattern
Exclusive for Kenarry subscribers, receive the FREE printable firefly wing pattern by signing up below. You’ll get the download link sent directly to your inbox.
Your privacy is important to us. We promise not to spam you or share your information. You can opt-out at any time. See our privacy policy for more information.
All printables from Ideas for the Home by Kenarry® are for your own PERSONAL USE ONLY.
After you’ve signed up, watch for an e-mail to confirm your e-mail address and download the free digital printable. Plus you’ll have the opportunity to get the weekly Kenarry Ideas In Your Inbox newsletter, as well as product discounts, special offers and other content that is EXCLUSIVE for Kenarry subscribers only.
You can also join our Idea Insider VIP Club to get unlimited access to the full vault of unique and beautiful printables we offer to make gift giving, holidays and everyday life more special. A lifetime membership in our Idea Insider VIP Club is a great way to save time and money with easy access to hundreds of printable cards, tags, wall art and more right at your fingertips.
NOTE: This printable is not in the Idea Insider VIP Club. It’s available for FREE through the sign-up form above.
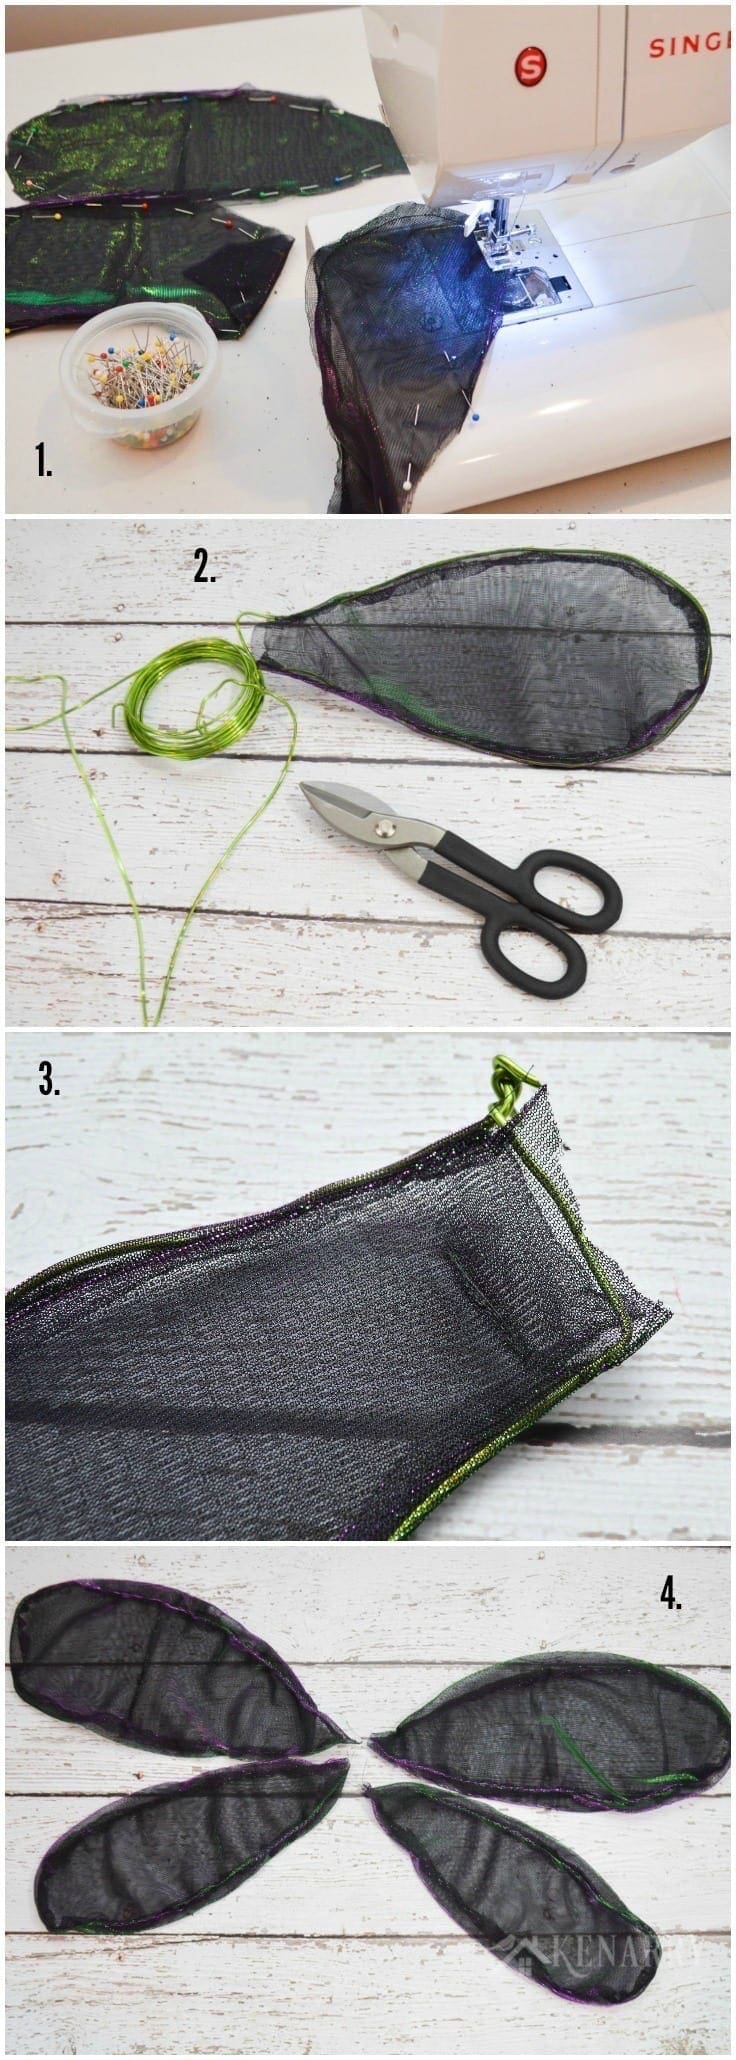
2. Create the Firefly Wings
2.1 – Using a sewing machine, sew around the outer edge of two pieces of the upper wing with a 1/4″ seam allowance. Leave the end of each wing open. Turn the wing right side out.
2.2 – Insert a loop of heavy floral wire into the end of the wing. Bend it as you go to create the shape of a wing.
2.3 – Cut the end of the floral wire with tin snips and twist it into a knot to hold it in place. Then use the sewing machine to sew the end of the fabric closed.
2.4 – Repeat these steps with the other three wing pieces, so that you have two upper wings and two lower wings.
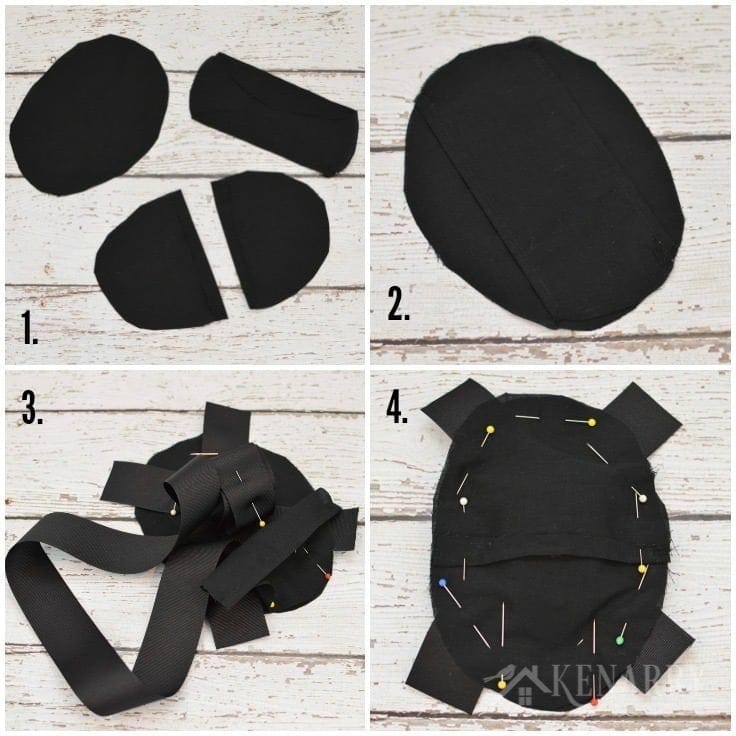
3. Sew the Back Pack for the Wings
Now we’ll use the four black ovals to create the backpack that holds the DIY wings all together.
3.1 – Leave one oval in tact and trim the other three pieces as shown in figure 3.1 below. You’ll need one full oval, one vertical strip, one lower oval and one upper oval. The lower and upper ovals should each be about 2/3 of an oval so that they overlap slightly. Turn the straight edges of the lower and upper oval pieces about 1/4 of an inch and hem them with the sewing machine to create a finished edge.
3.2 – Turn the edges of the long vertical strip piece and run them through the sewing machine to hem them. Then sew the long vertical piece to the full oval piece, only at the top and the bottom. Leave the sides of the long vertical piece open. In step 6, you’ll slide the ends of the wings into those openings.
Create the Straps
3.3 – Cut two long pieces of the black grosgrain ribbon, long enough to make straps for the backpack. Pin the edges of the ribbons to the front of the large oval to hold it in place. Then roll the ribbons into little spools and temporarily secure them with pins. You’ll want the ribbon straps to stay tucked inside the back pack while you move on to the next step.
3.4 – Place the upper and lower ovals over top of the rolled ribbons, so that the finished sides are facing the inside and the straight edges overlap slightly. Pin the ovals together around the edges. Use two straight pins to mark where you want to leave about a two inch gap at the bottom of the oval to attach the firefly tail in step 4. In figure 3.4 below, you’ll see I put a yellow vertical straight pin on the left and a red vertical straight pin on the right. Then sew about 1/4″ seam around the outer edge of the ovals from the yellow pin to the red pin, leaving the two inch gap at the bottom that you marked with pins.
Once you remove the straight pins, you should be able to turn the entire back pack right side out where the upper and lower oval pieces overlapped. Then you can also remove the pins you were using to keep the backpack straps secured and out of the way.
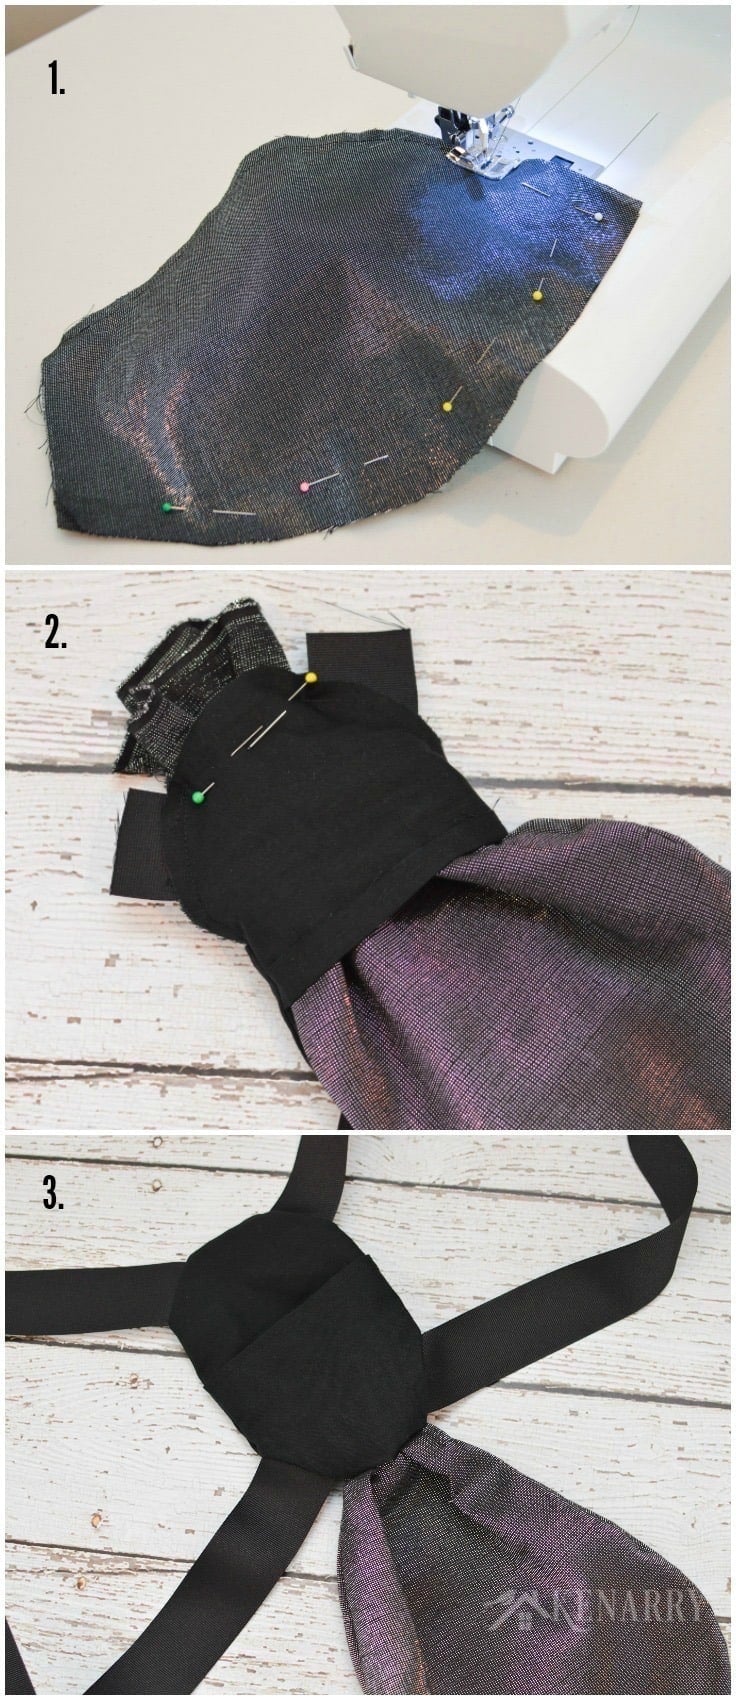
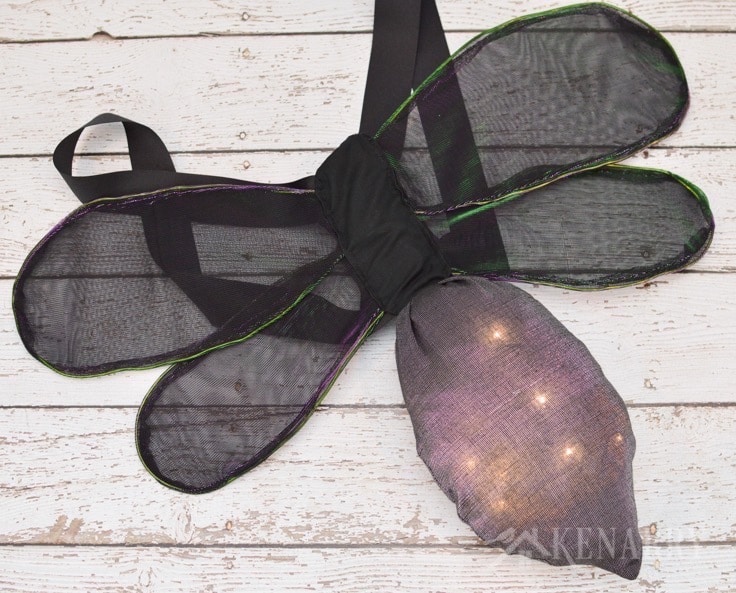
4. Sew the Pouch for the Firefly’s Light Up Tail
4.1 – Using the sewing machine, sew 1/4″ seam around the two pieces of the silver shiny metallic fabric for the tail of the firefly costume. Leave a 2 inch opening at the top. Turn the metallic piece right side out.
4.2 – Turn the lower half of the black backpack piece inside out again. Line up the opening of the tail with the opening of the backpack and secure with straight pins. Next use a regular sewing needle to sew around the opening of the two pieces to attach them to one another. Do not sewing the opening closed.
4.3 – Flip the backpack right side out again. You should now to able to reach all the way through the opening in the backpack into the tail pouch.
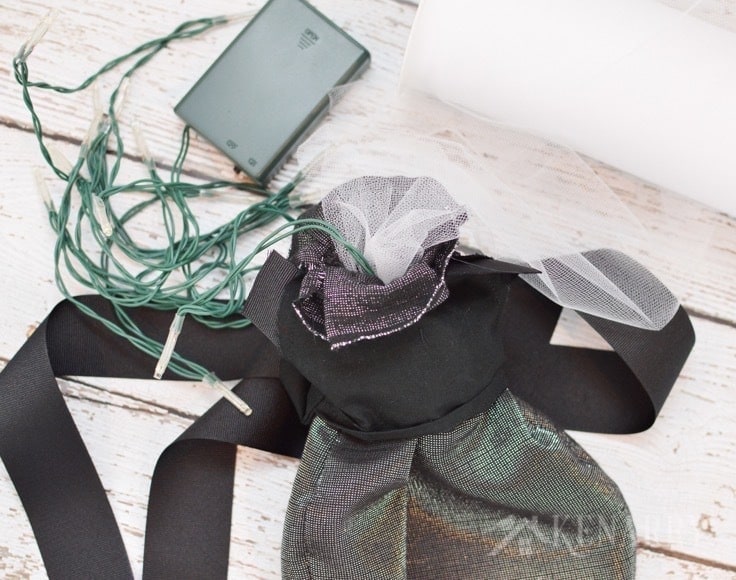
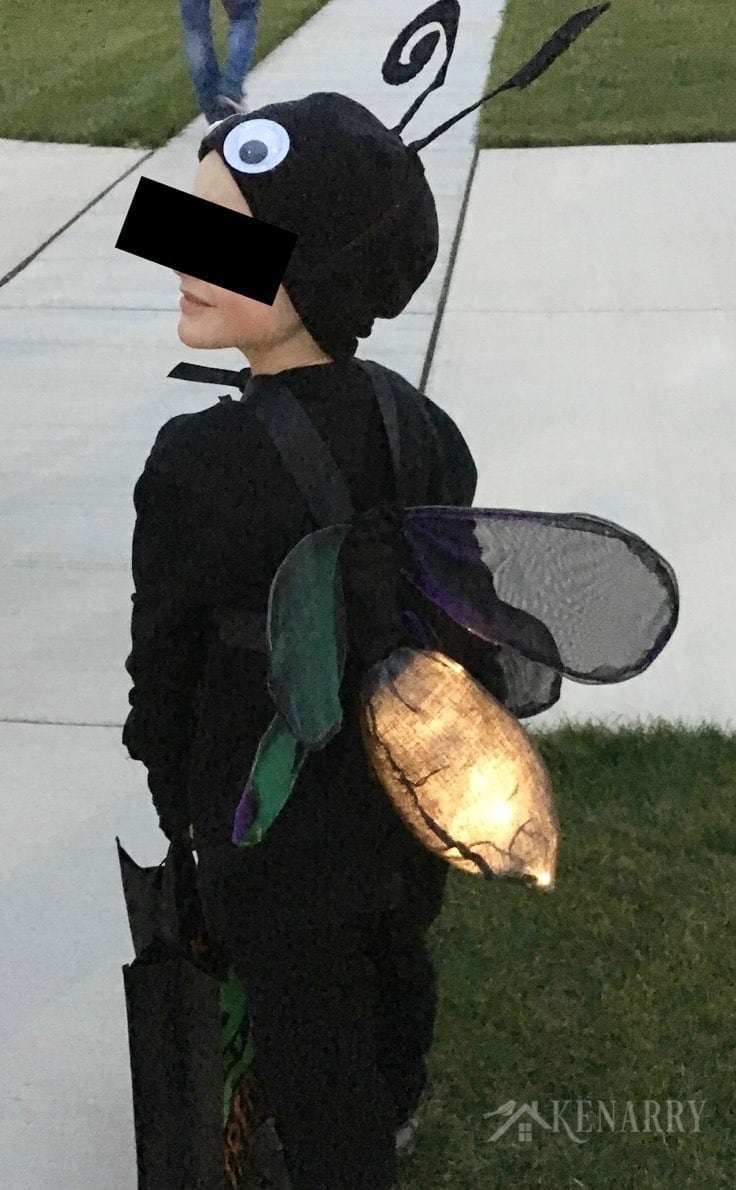
5. Fill the Firefly Tail
Stuff mesh tulle and holiday lights through the opening in the backpack to fill the tail pouch. Keep going until all the lights are inside of the firefly tail. You can then tuck the battery pack for the lights inside the backpack.
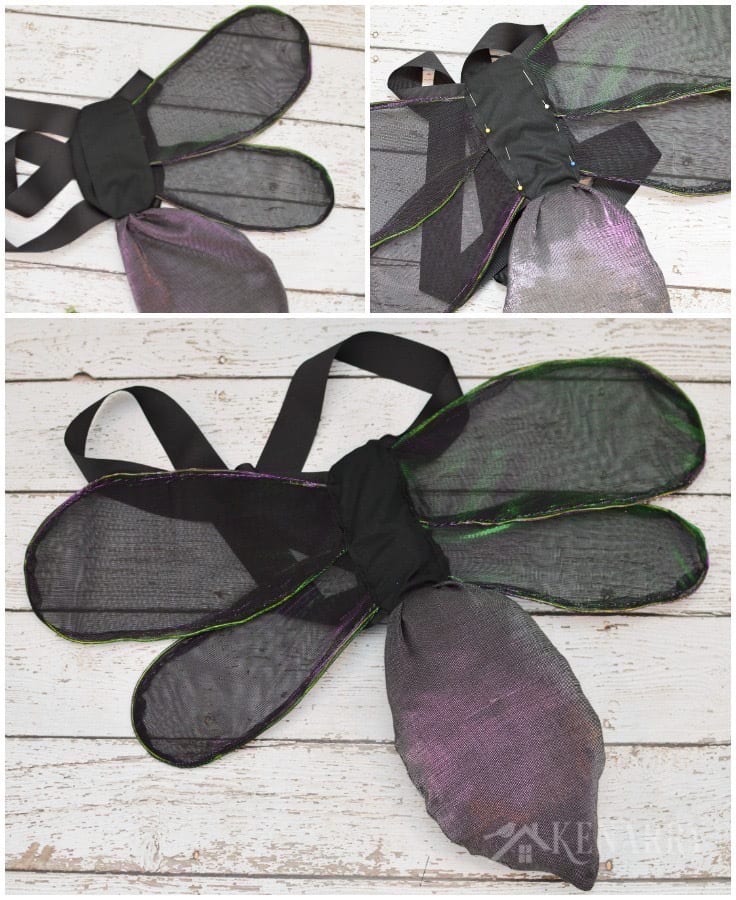
6. Attach the Wings to the Firefly Costume
Tuck the end of each wing under the long vertical strip in the backpack. The upper wings should overlap slightly with the lower wings. Use pins to hold the wings in place. Then hand sew the wings to secure them to the backpack. I chose to sew all the way through the three layers of the backpack. This created a tighter pocket for the battery pack in the holiday lights so it wouldn’t slip out as the boys ran from house to house.
7. Test the Lights
Now this is the fun part — switch the battery pack to on and test out the beautiful twinkle lights for the firefly costume.
You may need to manually move the lights or tulle around in the firefly tail to get the amount of light you want to shine through.
8. Create the Rest of the Firefly Costume Pieces
Use a needle to punch small holes in the edges of the large googly eyes. Then use a needle and thread to sew the eyes onto the hat. You may be able to use hot glue or something to attach the eyes, but I was concerned they might fall off. I also wanted to easily remove the eyes after Halloween so the boys could use the hats for winter.
Next cut and place long strips of reflective tape across the front of a black long sleeved t-shirt. This tape creates the abdomen for the firefly costume.
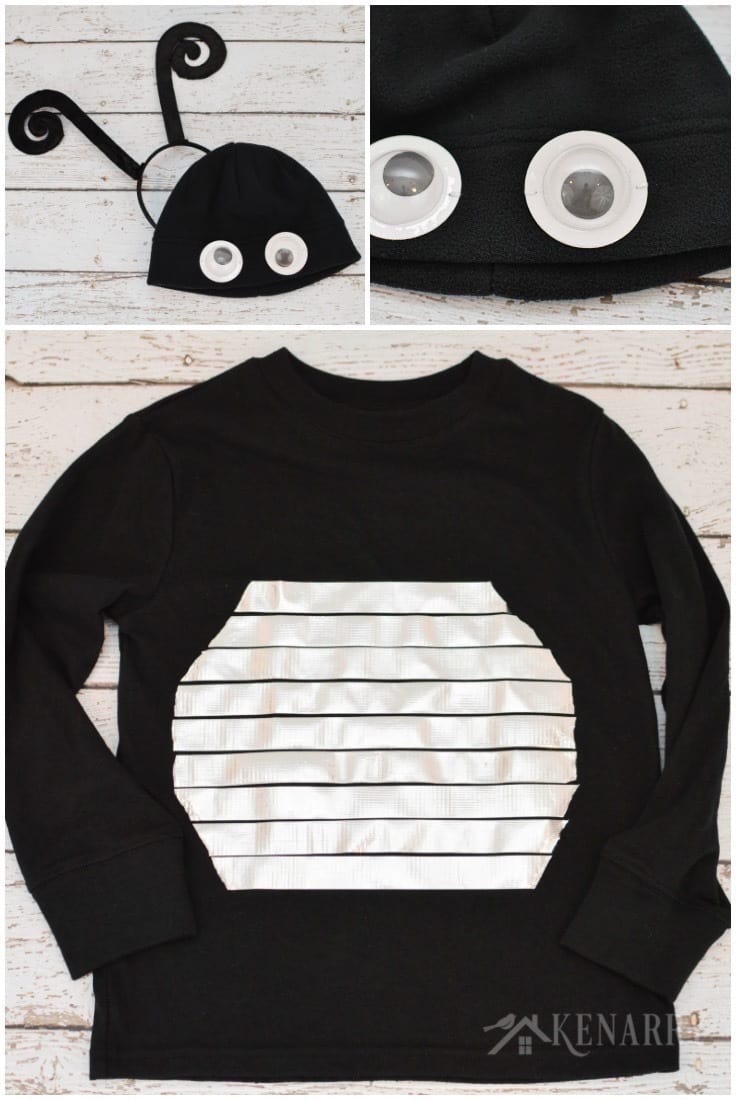
The reflective tape also serves as an important safety feature for the firefly costume. With this much black fabric, I was really concerned about the boys’ visibility at night as they walked between houses to trick or treat. The light up tail on the DIY wings makes the kids easy to see from the back side. But they really needed the reflective tape on the front so cars could see them head on too.
9. Trick or Treat and Enjoy!
Once you’ve completed all the parts and pieces for the firefly costume, you’re ready to go when October 31st rolls around. On Halloween night, just have your child put the costume on starting with the black sweatpants and shirt. Then turn on the lights and strap the DIY wings to their back.
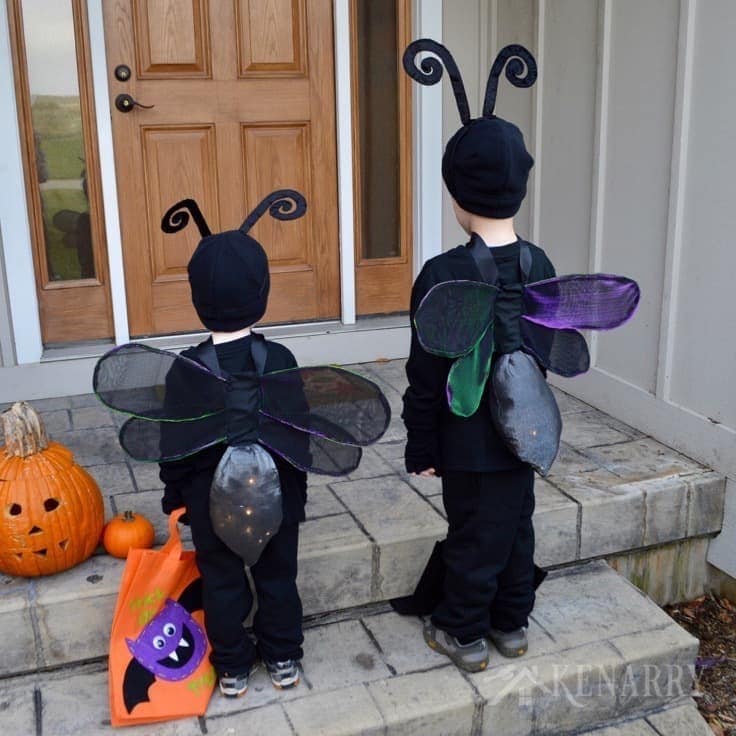
I made the straps a little too long, so I used two smaller pieces of ribbon to tie the straps together in the front to hold the wings in place.
As Halloween night gets darker and darker, you’ll really see this firefly costume come alive. We got so many compliments on it as the boys walked from house to house collecting candy in their trick or treat bags.
Have a Happy Halloween!! I would love to see how you take this firefly costume idea and make it your own for your child. If you make a lightning bug or insect of some sort for Halloween or a school play using this tutorial, please post a photo on Facebook or Instagram and tag me @kenarryideas so I can see!
Love the ideas you see here on Ideas for the Home by Kenarry®? Subscribe today to get our FREE DIY & Craft Planning Calendar, plus our weekly Ideas in Your Inbox newsletter filled with creative tips and exclusive offers!
While you’re here be sure to check out other Halloween Ideas on Ideas for the Home by Kenarry® –
- Free Halloween Water Bottle Printable
- Tin Can Pumpkins
- Fun Food Ideas for Halloween
- Blockbuster Video Costume: Easy Halloween Idea
If you enjoyed this firefly costume tutorial, please share this with your friends or pin it for later:
One Comment