Boho Chic Napkin Rings: Get Started Woodburning
THIS POST MAY CONTAIN AFFILIATE LINKS. PLEASE SEE OUR FULL DISCLOSURE POLICY FOR DETAILS.
Get started woodburning with Boho Chic Woodburned Napkin Rings. In this video tutorial, we’ll show you how to use a woodburning tool to make custom designs.
Hi Kenarry Readers! We’re Jennifer and Kitty from RunningWithSisters.com, and we have a cool craft for you –– How To Get Started Woodburning! We’ve seen some really amazing projects done with woodburning, so we had to try it ourselves. It is so fun!
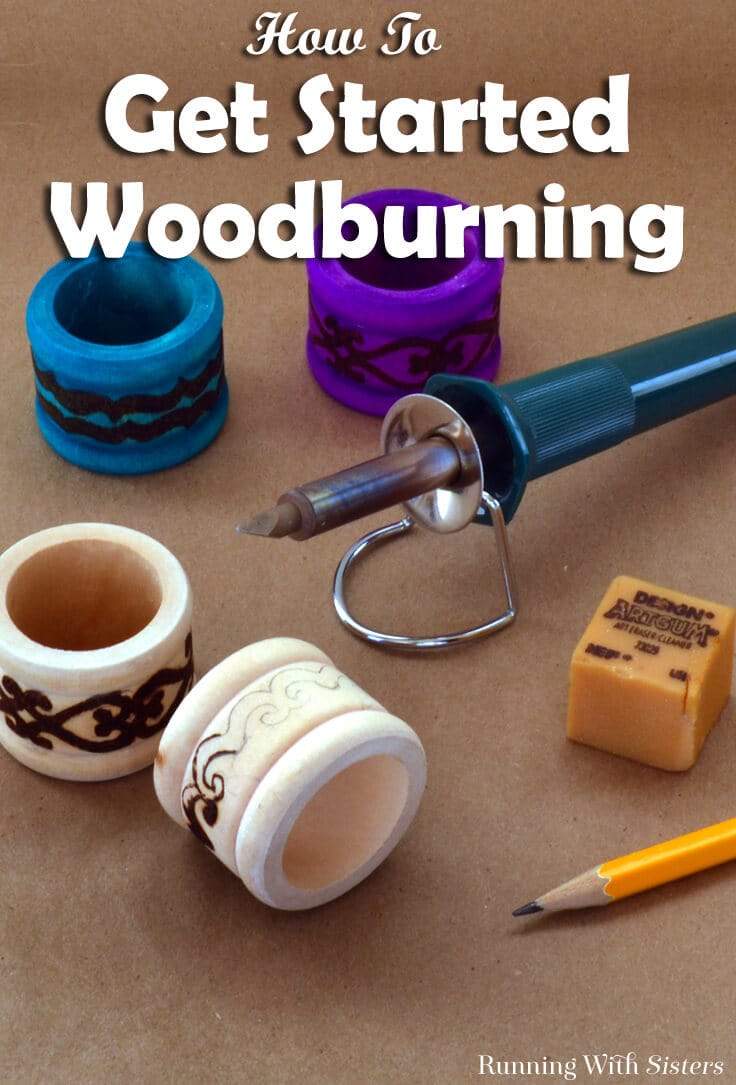
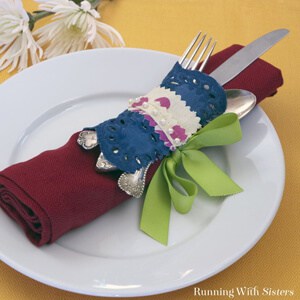
We love the Boho look, and it goes perfectly with the woodburned look! So we made Boho Chic Wooden Napkin Rings featuring modern woodburned patterns. If you’ve never done woodburning before, don’t fret. It’s easier than you think! We’ll show you how to get started woodburning by using stickers to create your design (makes it so professional looking!). Then we’ll show you how to hold the woodburning tool, our favorite technique for outlining the design, and a great way to fill it in. It’s a lot like coloring in a coloring book––only more amazing because you’re actually burning the design into wood! To add a little color, we decided to dye the napkin rings in rich Boho hues. This step is optional, but so easy you may want to try it. It’s just two simple steps to get dramatic color!
Here’s a video we made showing how to get started woodburning. Once you watch, you’ll see why we love it. It’s so easy and so cool! Follow along with us on the video, then try it yourself using the steps below. And remember if you have any questions, leave us a comment and we’ll reply. We want to help!
How To Get Started Woodburning To Make Boho Chic Napkin Rings
Disclosure: This blog post contains affiliate links for products or services we think you’ll like. This means if you make a purchase from one of these links, Ideas for the Home by Kenarry® will make a small commission at no additional cost to you so we can keep the great ideas for the home coming your way. All opinions expressed are derived from personal experience.
Materials & Tools
- 4 wooden napkin rings
- Woodburning tool with universal tip
- Border stickers
- Plaid Ultra Dye: Tantalizing Teal, Hot Pink, Lady Marmalade, Rendezvous (Purple)
- Pencil
- Eraser
- Foam paintbrush
- Scissors
- Paper towels
- Gloves
- Disposable plate
Steps To Make One Napkin Ring
1. To get started woodburning, get yourself a woodburning tool. We got ours at the craft store. It came with four tips. We like the “universal point” tip for this project. While you are shopping for your woodburning tool, pick up four wooden napkin rings. They should be in the same section of the craft store. You might also get some extra wooden shapes so you can practice on them before you try your hand on the napkin rings.
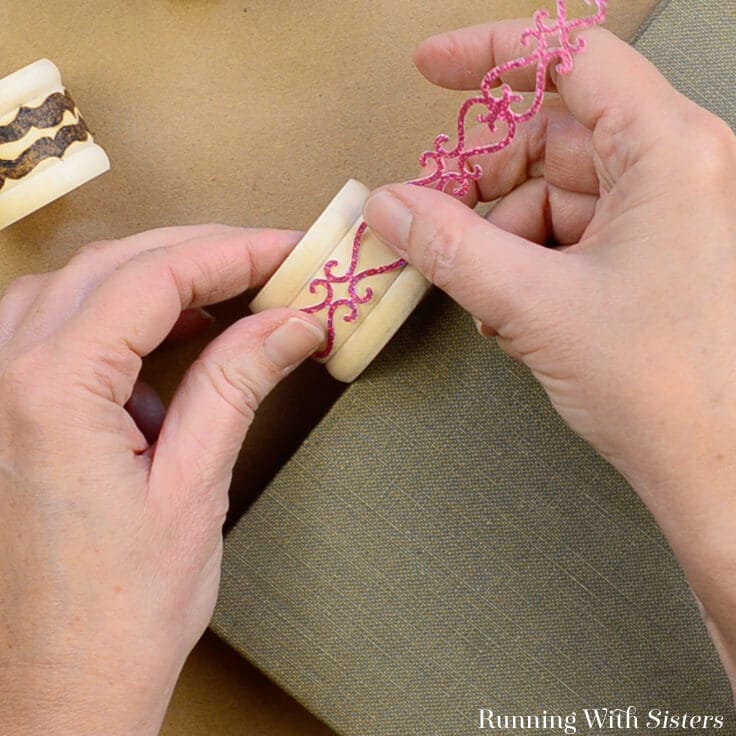
2. To create a design on the napkin ring, wrap a border sticker around it.
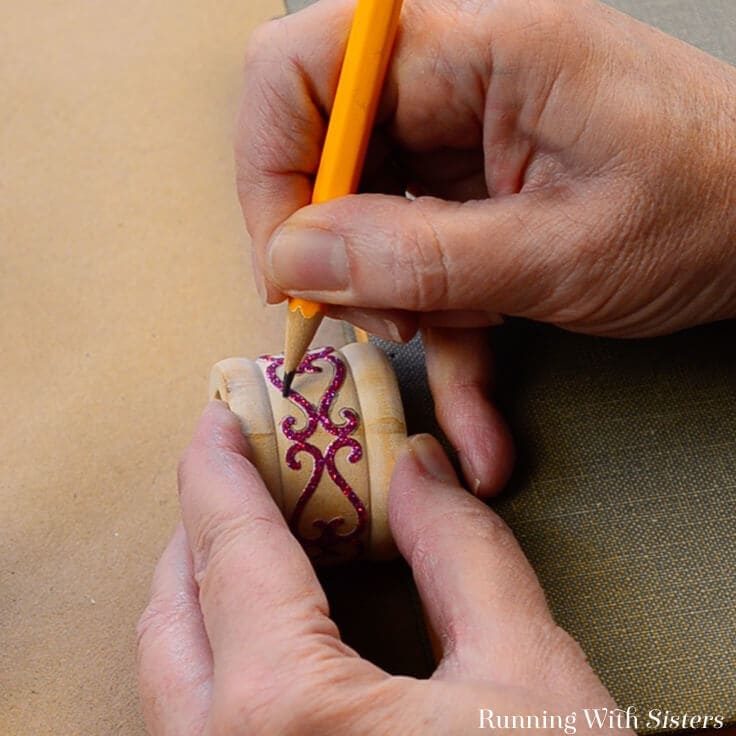
Then outline the border sticker with pencil. This will create guidelines for you to woodburn. Peel off the sticker.
3. Turn on the woodburning tool and let it heat up for 5 minutes. It will get super hot, so be careful! Hold the woodburning tool like a pen and start “drawing” the outline of the design.
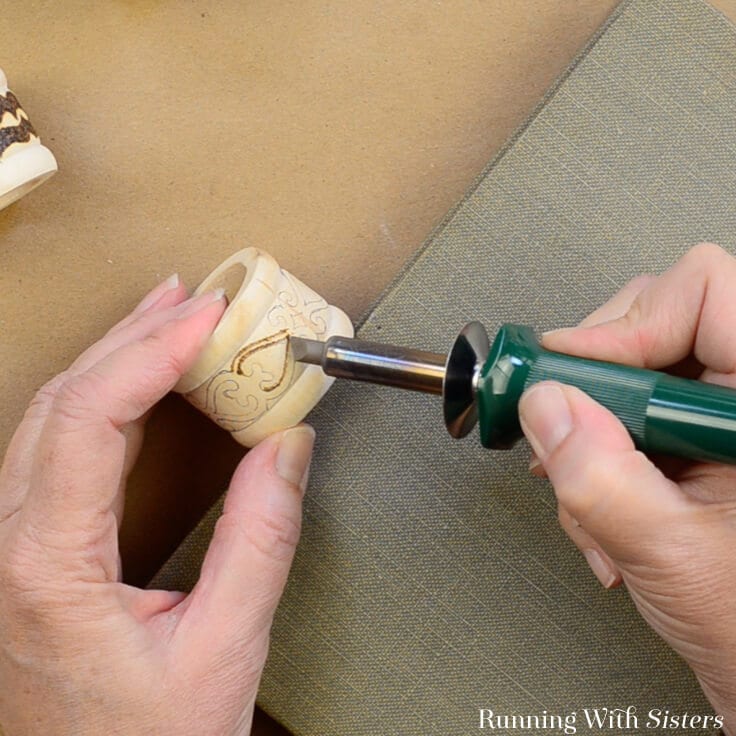
Start with a light touch so you can see how hard to press the woodburning tool into the wood. If you press too hard or leave the tip in the same spot for too long, it will burn deeply and create a divot. So keep moving. But not too fast. We find you get a better result when you darken the outline by going over it repeatedly with light passes rather than trying to get the desired color in one stroke.
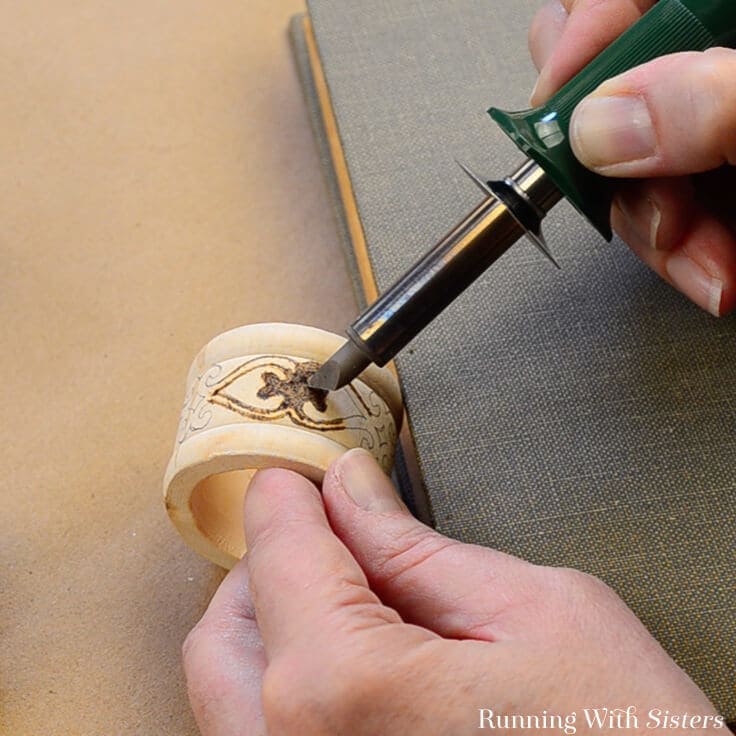
4. Once you have an area outlined, start “coloring” it in. We like to use hash marks like we would in a coloring book. We draw with the woodburning tool in one direction, then go back over it in a different direction to fill in the color. Continue coloring in the outline and going over the design until you like the darkness of the burned wood.
5. After you have completed the woodburning, let the napkin ring cool. The wood really retains heat! Then erase any pencil lines that are leftover from your original outline.
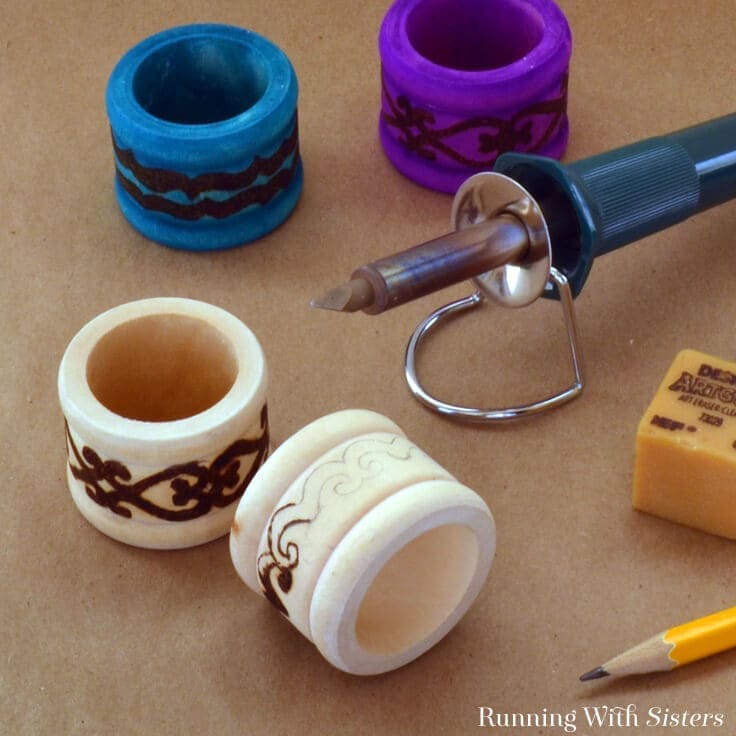
6. You can leave your napkin ring naked with the woodburned design. But we love color, so of course, we chose to dye ours! If you’d like to dye yours, put on gloves and pour a small amount of Ultra Dye out on a disposable plate. Dab some dye onto a foam paintbrush and stroke it onto the napkin rings, right over the woodburned design. Then immediately wipe the excess Ultra Dye off with a paper towel. The color will amaze you!
We love how our woodburned designs turned out! And woodburning is fun for other crafts, too. You could woodburn a name onto a cutting board as a gift or woodburn an inspiring phrase on a plaque to hang. The sky’s the limit! And remember if you have any questions about this project, leave us a comment and we’ll reply. We are here to help!
Happy Crafting,
Jennifer & Kitty
No-Sew Projects From A Dishtowel
Love the ideas you see here on Ideas for the Home by Kenarry®? Subscribe today to get our FREE DIY & Craft Planning Calendar, plus our weekly Ideas in Your Inbox newsletter filled with creative tips and exclusive offers!
What’s Next?
While you’re here, be sure to check out these other craft projects on Ideas for the Home by Kenarry® –
One Comment