Spooky DIY: Simple Halloween Countdown Board
THIS POST MAY CONTAIN AFFILIATE LINKS. PLEASE SEE OUR FULL DISCLOSURE POLICY FOR DETAILS.
Now that October’s here, have you started counting down the days to the spookiest time of the year? Here’s how you can make your very own Halloween Countdown Board!
Hey, everyone! Lisa here from Moments With Lisa and I am thrilled to share my very first tutorial on Kenarry!
I am all about holidays and celebrations. The clock is ticking until Halloween and so I am making sure I have everything prepped and ready. In fact, I’ve been so eager that I whipped up these Mummy Cookies.
Aside from baked goods, I realized that we needed some decor pertaining to the spooky holiday, so I made our family’s first Halloween Countdown Board. Let me tell you: it is so easy to put together! Here’s how you can make your own:

Spooky DIY: How to Make a Halloween Countdown Board
What can I say? I’m a DIY and baking fanatic. As a (new!) busy mom, I can’t always make the most complicated stuff. I managed to put together this board in a few minutes and let me tell you: it’s been a conversation starter with my guests ever since I put it up.
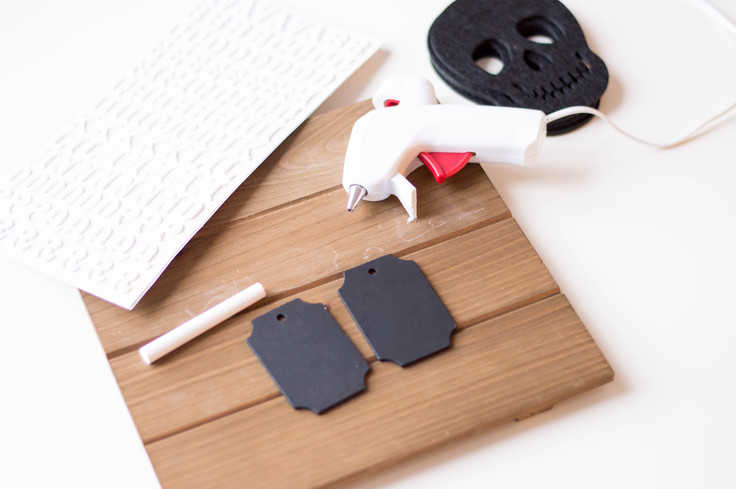
What you need:
Want more ideas like this? Subscribe today to get our weekly Ideas in Your Inbox newsletter plus other exclusive gifts and offers — all for FREE!
Supplies Needed for Your Halloween Countdown Board:
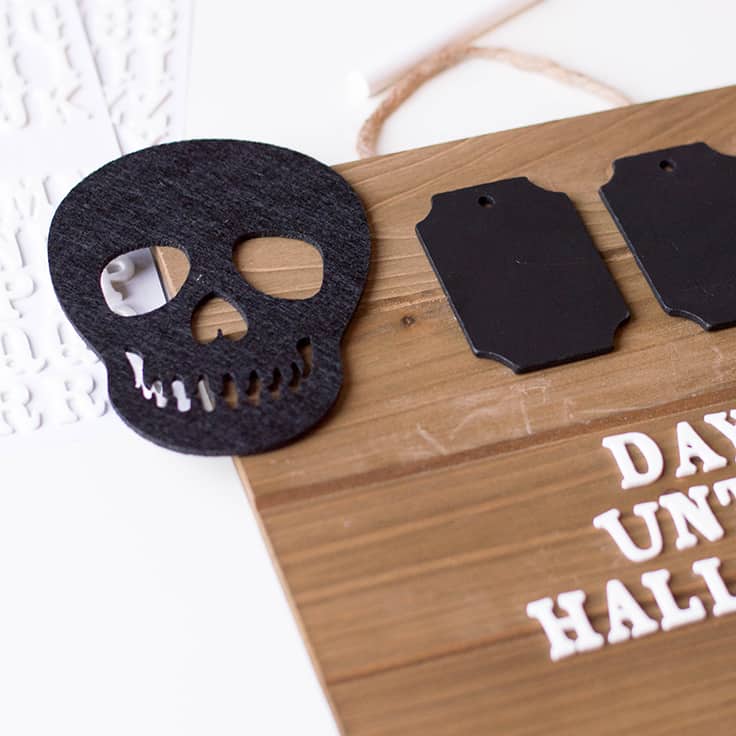
- Wooden board (approx. 10 in. x 10 in. in-size)
- 4-5 inches twine
- Hot glue gun
- 2 small chalkboard pieces
- Stick-on letters
- Halloween felt decor pieces (I used a skull one but you can also purchase something like this and cut off the pieces you desire)
- 3M Hook for hanging your sign in your designated spot (apply the hook 24 hrs before you make/hang your sign)
- Chalk
Instructions:
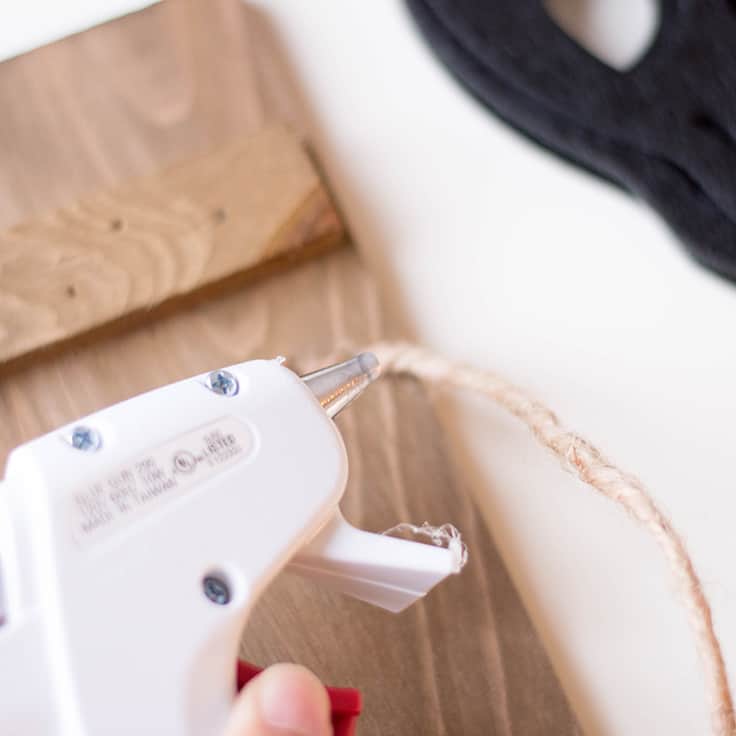
1. Glue the Twine
Use your hot glue gun to secure the twine on the back of your board. Ensure that it’s secure and allow to set.
2. Place the Chalkboard Pieces
You’ll want to make sure everything is centered. Place the chalkboard pieces at the top center of your board. Don’t glue until it’s right where you want it. You can even use a ruler to map and measure everything out.
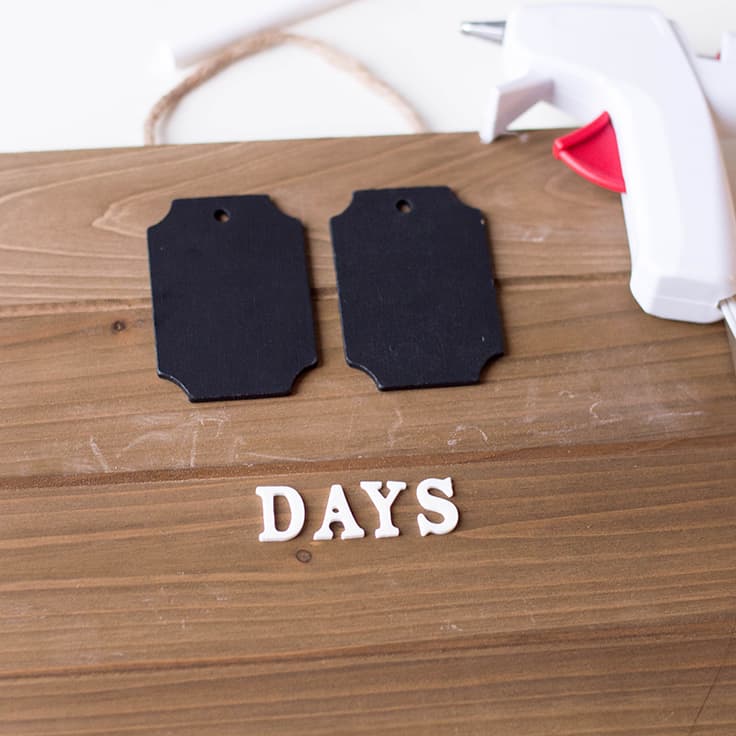
3. Spell it Out!
Start placing your letters so that it spells out “Days Until Halloween.” I put each word on its own line. To ensure that everything was centered, I started with the middle letters and worked each word from there.
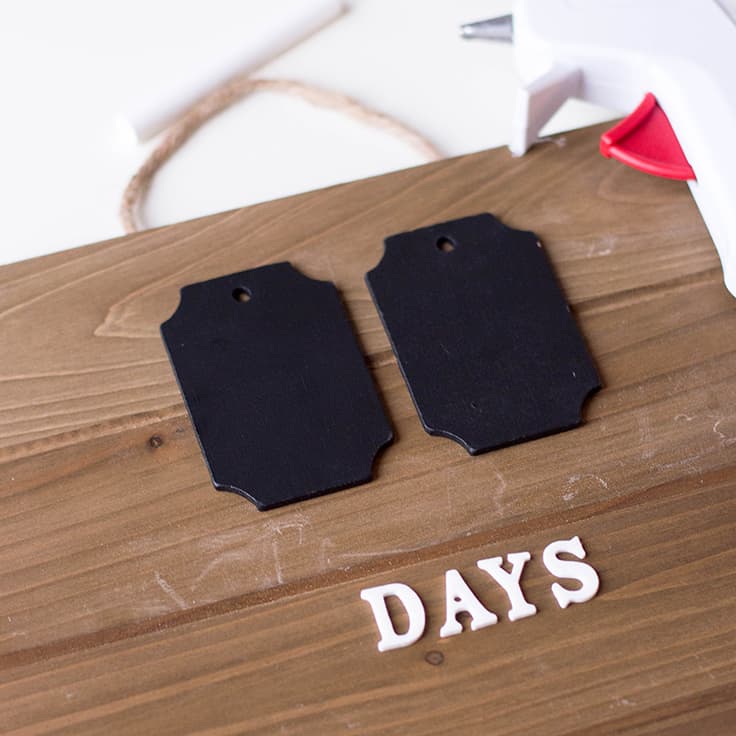
4. Glue the Chalkboard Pieces
Now that your letters are in place, you can glue and secure the chalkboard pieces.
5. Skull-it-Up!
Before gluing, decide where you want to place your Halloween felt pieces. Once you’re happy with the look, secure it with your hot glue gun.
I’m so happy with how it looks! And how easy was that?!


Again, you can check out my Halloween Mummy Cookies as well as other Halloween posts found on Fabulous Habits:

Tips on Trick-or-Treating with Infants

You may also enjoy these Halloween ideas on Kenarry: