Mini Embroidery Hoop Ornaments
THIS POST MAY CONTAIN AFFILIATE LINKS. PLEASE SEE OUR FULL DISCLOSURE POLICY FOR DETAILS.
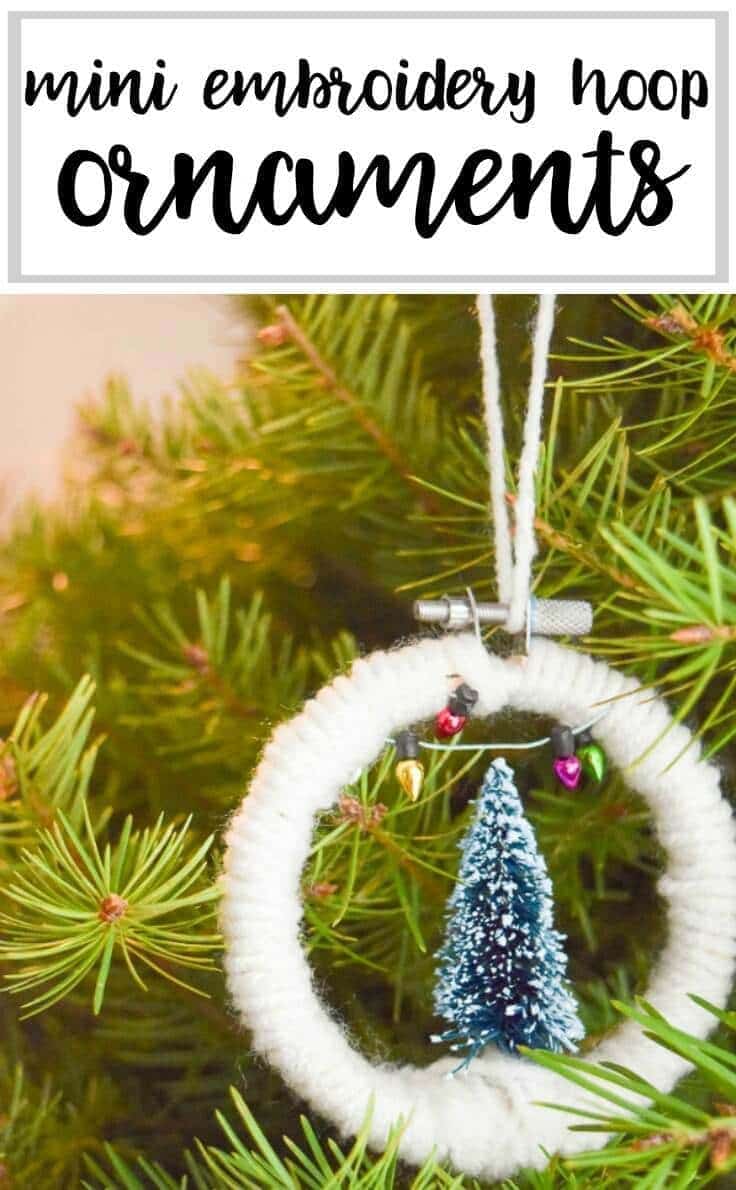
These Mini Embroidery Hoop Ornaments took only minutes to whip up and add a personalized touch to your Christmas Tree!
I am SO excited it is finally officially the Christmas season. If you pop over to my blog, you’ll notice I’ve mentioned how excited I am for the holidays ohhhh just shy of 100 times.
And I’m not talking about the shopping because I’m an online ordering, praying Amazon prime gets there in the promised 2 days, last minute shopper, kinda gal.
I’m talking about the Christmas decor!!!
To me, dusting off those big bins in your basement and pulling out all the greenery, glitter and signs is like the joy of being a kid on Christmas morning. All those crafts and DIYs you made last year that you’ve since forgotten (okay, maybe that’s just me) are just as exciting as brand new decor.
It’s seeing how many ornaments you break this year and how many the kids will rip off the tree. It’s testing out the lights and finding that several are burnt out (every.single.year.). I swear the companies do this on purpose so you have to rebuy every year!
All of this holiday decorating doesn’t have to cost a fortune.
In fact, I try to DIY as much as possible and ornaments are an easy way to start. I have a whole board on Pinterest dedicated to Christmas DIYs that I’m dying to try!
It seemed fitting, in the spirit of budget-friendly Christmas decorating, to share a sweet little DIY pair of ornaments I made in just a few minutes.
Disclosure: This blog post contains affiliate links for products or services we think you’ll like. This means if you make a purchase from one of these links, Ideas for the Home by Kenarry® will make a small commission at no additional cost to you so we can keep the great ideas for the home coming your way. All opinions expressed are derived from personal experience.
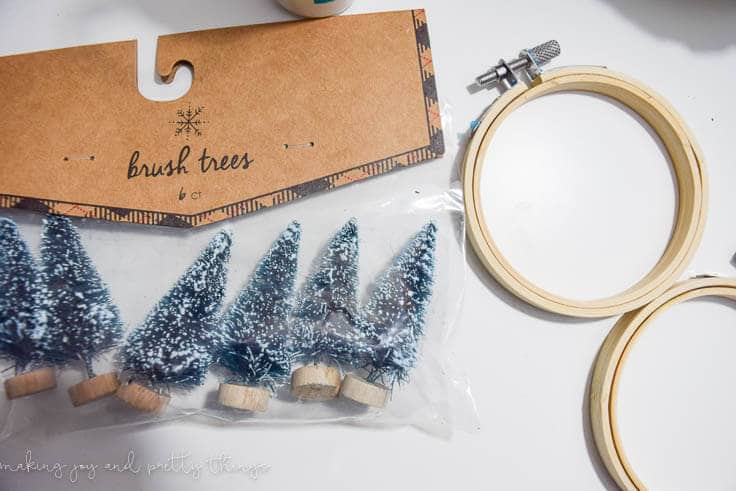
Supplies:
- Mini Bottle Brush Trees – mine are from the Target dollar spot (similar item)
- Mini Embroidery Hoops (similar item)
- Craft Glue
- Plaid Washi Tape – also from Target dollar spot (similar item)
- Mini Christmas Light Bulb Garland –> can be found at Michaels
- White Yarn
- Scissors
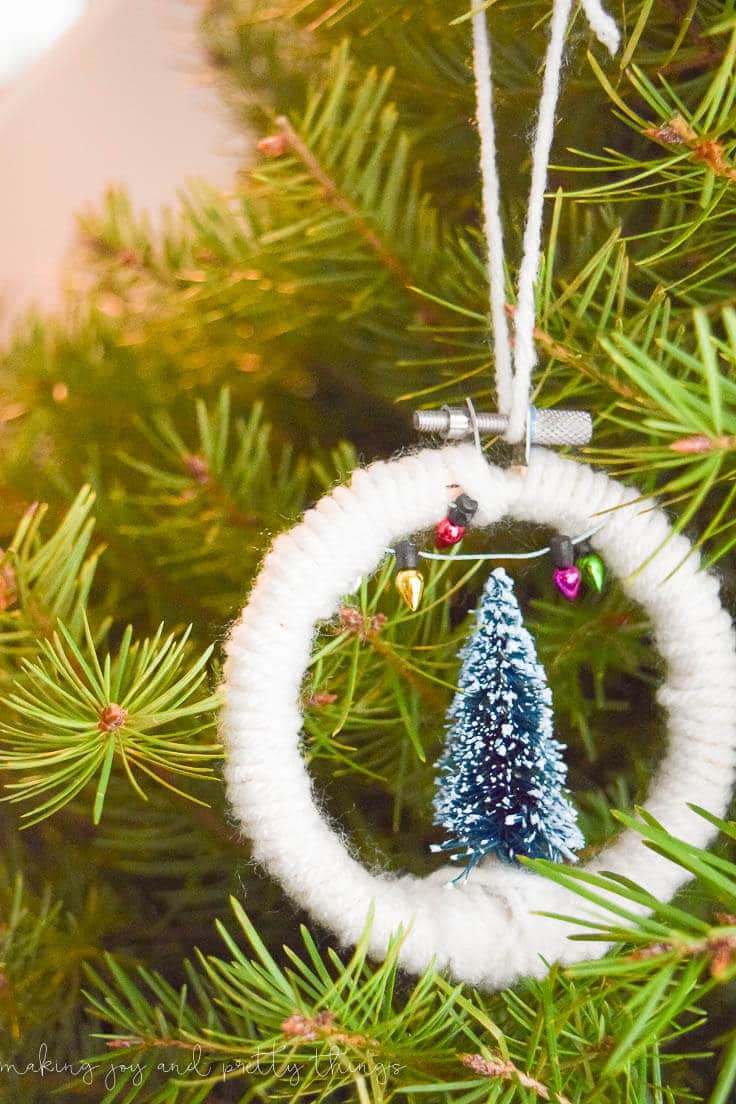
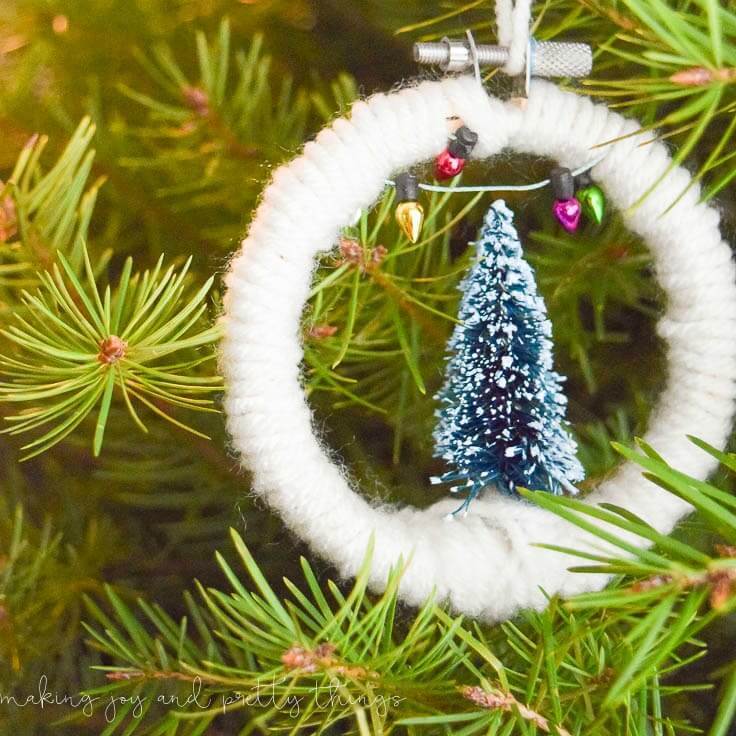
Yarn Embroidery Hoop Ornament
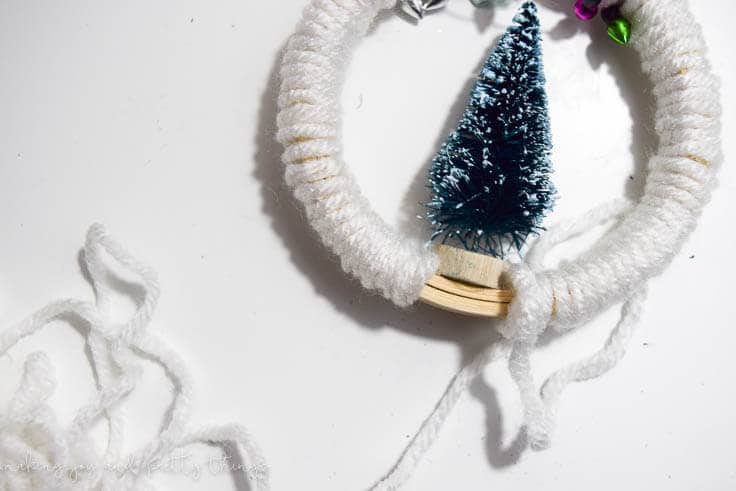
I started by glueing a brush tree to the very bottom of the inner circle of the embroidery hoop.
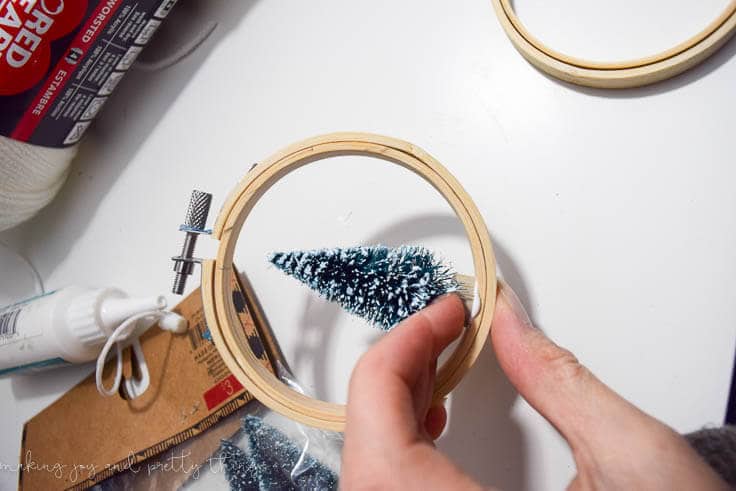
For the first hoop, I loosened the top and removed the inner part of the embroidery hoop. (There probably are more official names to the parts of the hoop…sorry!).
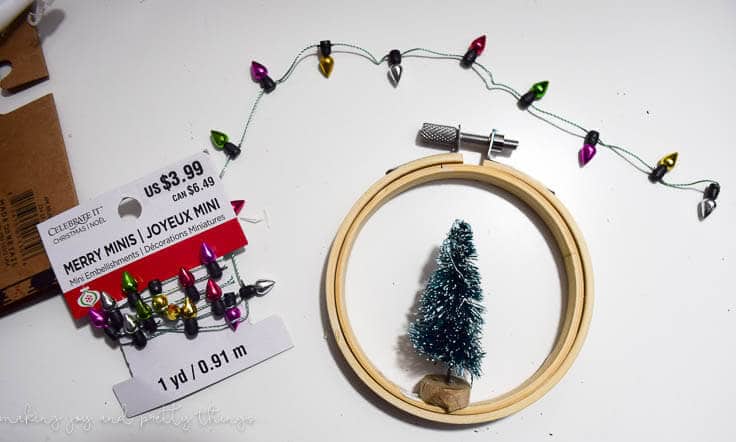
With the inner hoop removed, I strung the mini light around it twice and pushed it back into the larger hoop.
Then, I took the yarn and wrapped it around the hoop. Be sure to cover the base of the brush tree!
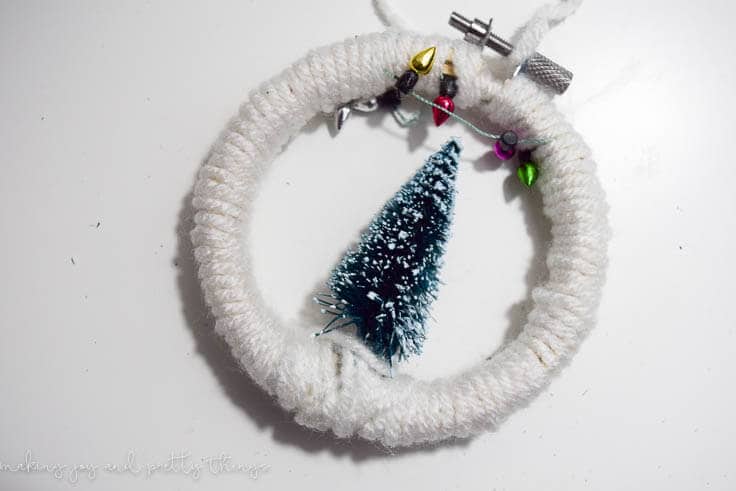
So simple, right?!
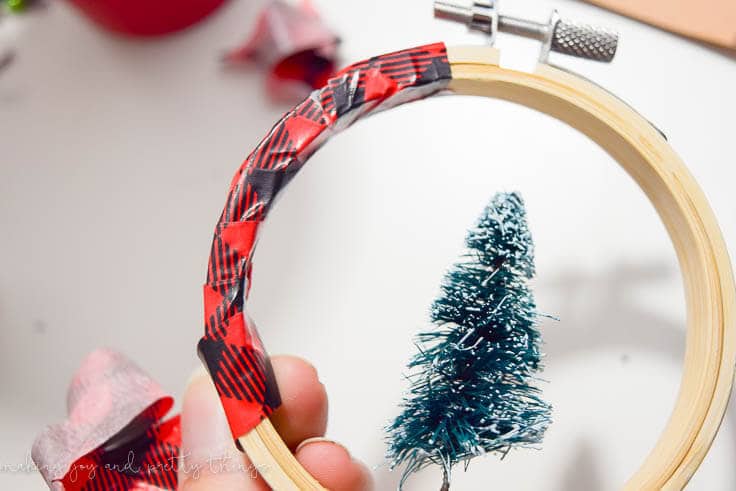
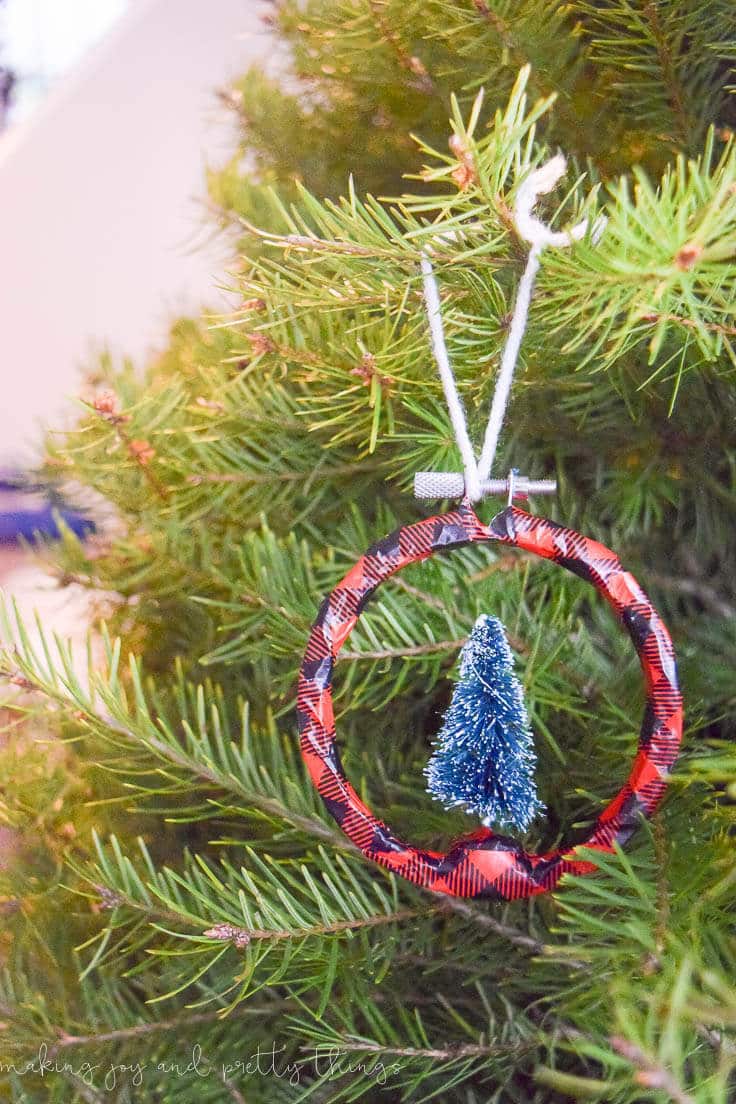
Plaid Washi Tape Embroidery Hoop Ornament
For the second hoop, I glued the brush tree again and simply wrapped the washi tape around the hoop until it was covered.
It’s easier to cut the washi tape into smaller sections than to keep the whole roll intact. It can also wrinkle pretty easily so be sure to smooth out as many wrinkles as possible.
Last, I used the same white yarn from the first ornament to make a little hoop for both ornaments to hang on the tree.
Just a few minutes of crafting and you have the cutest ornaments. They could also be used as gifts for family or friends! Or, tie on top of wrapping paper for a pretty gift topper.
So, what do you think? Which style is your favorite?
I have to say, I think I’m partial to the sweet little lights on the first hoop. The miniatures section at Michaels gets me every time. Everything is SO cute!
If you’re in full blown Christmas mode like me, I have a TON of DIYs and crafts planned over the next several weeks. Here are a couple I finished recently:
How to Make your own Wood Bead Garland

DIY Rustic Christmas Countdown Sign
Until next month…
Wishing you a joyful day!
You may want to check out these other great DIY ornament ideas on Ideas for the Home by Kenarry® –
2 Comments