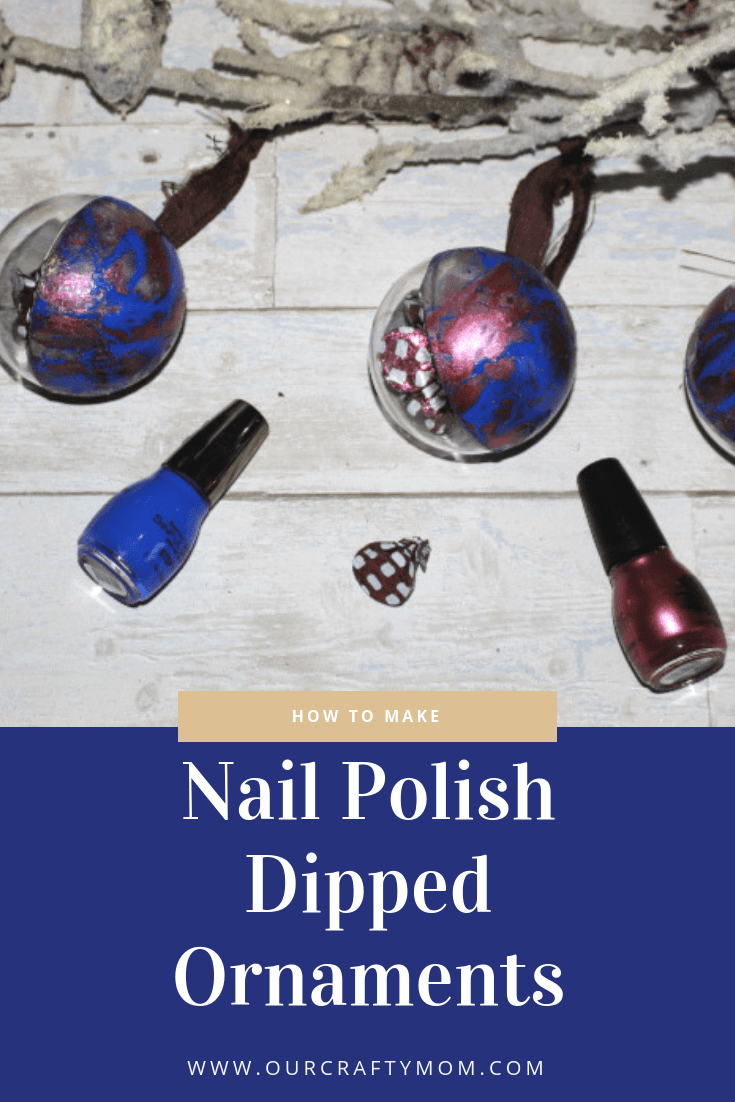
How To Make Nail Polish Dipped Christmas Ornaments
THIS POST MAY CONTAIN AFFILIATE LINKS. PLEASE SEE OUR FULL DISCLOSURE POLICY FOR DETAILS.
Learn how to make fun nail polish dipped Christmas ornaments that you can fill with treats. You can even slip a few dollars in there if you really want to make the kids smile!
Hi friends. Michelle visiting again from Our Crafty Mom. I’m very happy to be back sharing nail polish dipped Christmas ornaments. They are unique and fun, but most of all, easy to make.
I am always looking for smaller gifts to attach to a Christmas present, or stocking. These ornaments are perfect for that, as they are plastic so you don’t have to worry about them breaking.
How to Make Nail Polish Dipped Christmas Ornaments
Let me show you how simple these are to make with just a few supplies. You can use colors that the gift recipient loves to really personalize it.
What you need:
Want more ideas like this? Subscribe today to get our weekly Ideas in Your Inbox newsletter plus other exclusive gifts and offers — all for FREE!
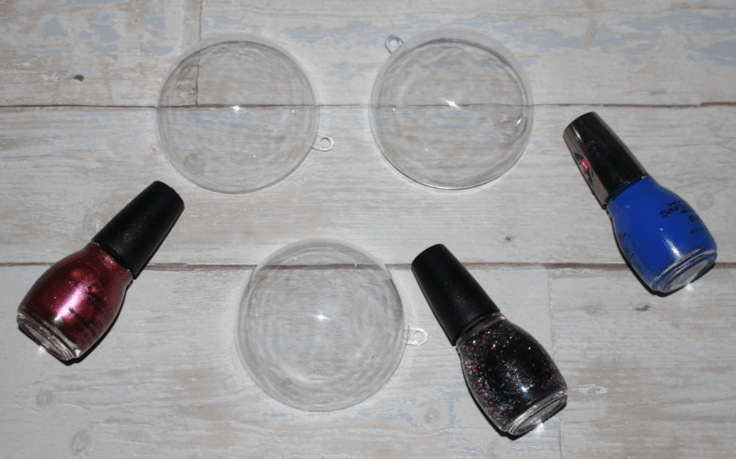
Craft/DIY Tools Needed:
Supplies Needed:
- Nail Polish – colors of your choice. Use at least 2-3 different colors.
- Plastic Fillable Christmas Ornaments
- Candy or goodies to fill the ornament.
Instructions
Here’s how to make your own unique works of art. After you do it once you’ll have fun teaching your friends and your kids how to do it.
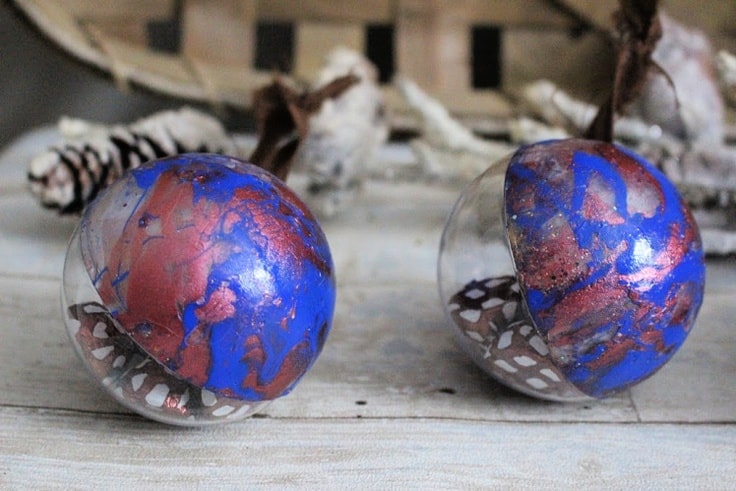
1. Add The Nail Polish To The Water
Fill the plastic bowl about halfway with water. Slowly pour the nail polish into the water. Use a toothpick to blend the colors.
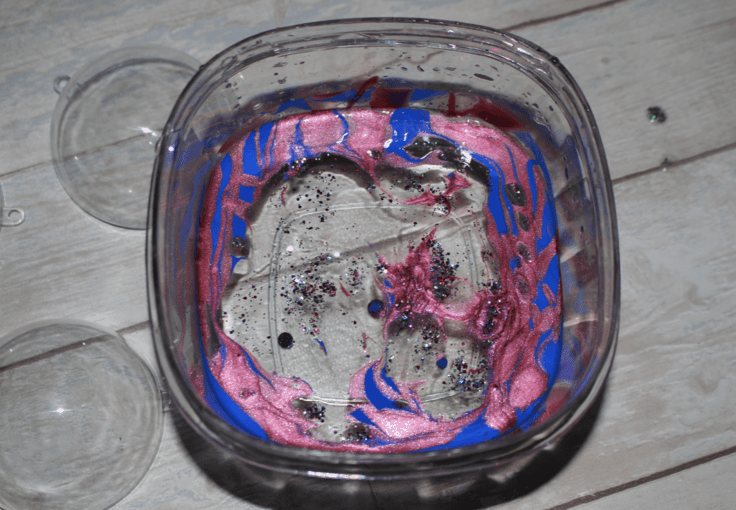
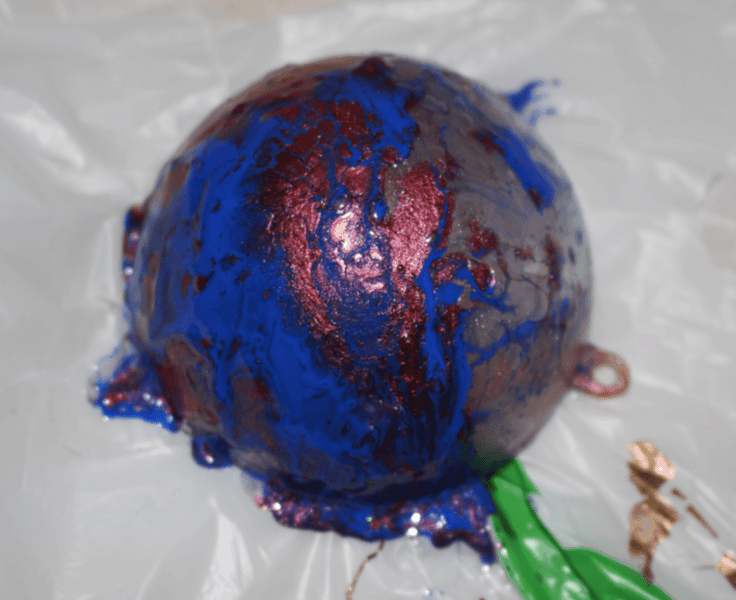
2. Run The Ornament Through The Water Picking Up The Color
Hold the ornament by the top, where the small hole for the hook is located. Slowly run the ornament through the bowl of water picking up the nail polish colors as you go. It is really cool to see how the colors basically lift onto the ornament. Place on a small cup to dry. Be sure to have old cardboard or plastic down, as it can be messy. Let dry.
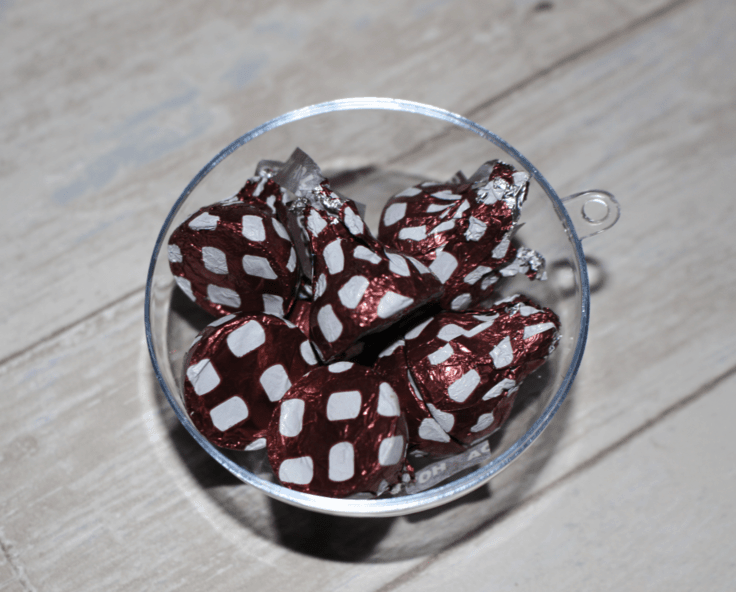
3. Fill The Ornaments
Once the ornaments are dry, fill the uncolored half of the ornament with candy-I used Hershey Kisses. But you can also fill with coins, dollar bills, or anything that you know the recipient will like.
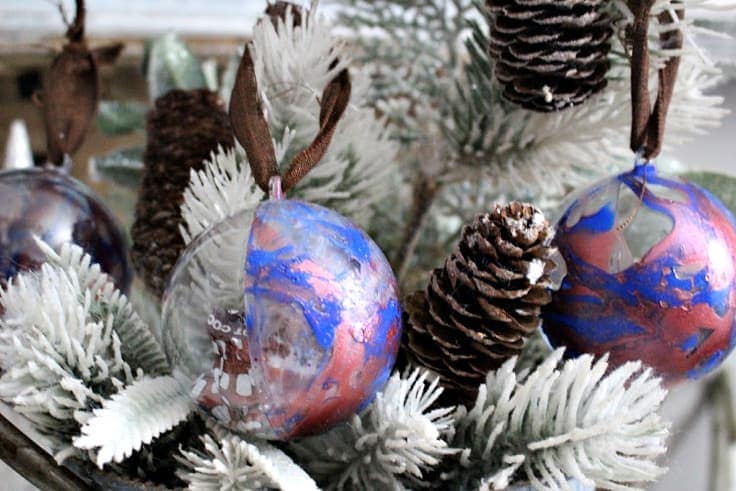
4. Put The Ornaments Together
The last step is to put the ornaments together. I left the clear half filled with candy as the top and the nail polish dipped ornament as the bottom. Add a pretty ribbon for hanging and you are done! You can even add a name tag if you like and attach it to your gifts. There are so many possibilities with these ornaments.

Can you use glass ornaments instead?
Plastic ornaments that can come apart work best for nail-polish dipping. However, if you want, you can use glass ornaments.
After you dip the ornament, hang it up while it dries. If you try to lay a whole glass ornament on the table, it will make the nail polish marbling smudge too much.
Love the ideas you see here on Ideas for the Home by Kenarry®? Subscribe today to get our FREE DIY & Craft Planning Calendar, plus our weekly Ideas in Your Inbox newsletter filled with creative tips and exclusive offers!
What’s Next?
Dollar Store Snow Globe – Our Crafty Mom
Mason Jar Lid Christmas Ornaments – Our Crafty Mom
Angel Ornaments – Our Crafty Mom

You may also enjoy these Christmas Ornament ideas on Ideas for the Home by Kenarry® –
- Mini Embroidery Hoop Ornaments
- Homemade Cinnamon Stick Christmas Ornaments
- Easy To Make Colorful Beaded Christmas Ornaments
- How to Paint Clear Christmas Ornaments
Updated November 2019.