Painted Wood Crate Storage Idea
THIS POST MAY CONTAIN AFFILIATE LINKS. PLEASE SEE OUR FULL DISCLOSURE POLICY FOR DETAILS.
Learn how to paint wood crates with this simple tutorial! This wood crate storage idea is perfect for storing toys, books, games, DVDs, and more!
Happy Spring Kenarry Readers! This is Jess from Jessica Welling Interiors. Well the weather is finally warming up, and that means one thing around here: I can finally spray paint outside! So today I’m going to show you some easy painted wood crate storage ideas.
Want more ideas like this? Subscribe today to get our weekly Ideas in Your Inbox newsletter plus other exclusive gifts and offers — all for FREE!
When we were first married I got these crates to go in an Ikea bookshelf in our home office. I was in my wild color experimenting phase, and I painted the office walls orange-yellow. Do you remember when Crayola came out with the color, “macaroni & cheese”? I think I was is second grade and it was a really big deal. The walls were about that color. And then I painstakingly painted these crates in Fall colors to go with it. It didn’t quite have the effect I had hoped, but we’ve had these crates in ugly colors for years.
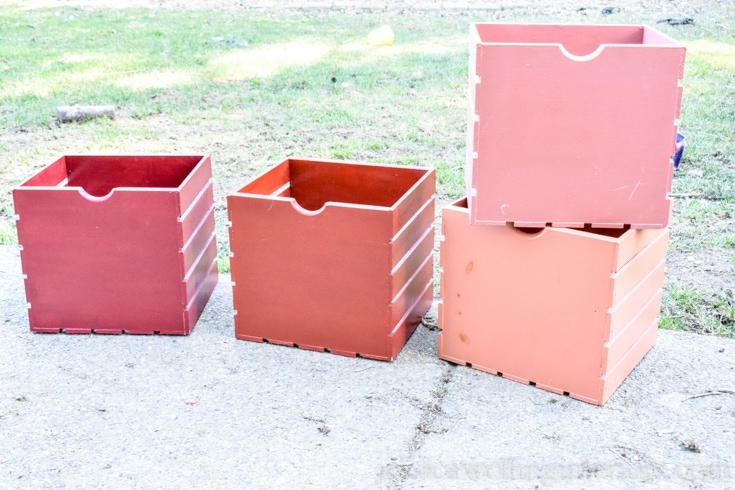
I just got this big Kallax bookshelf room divider for my new office/studio space, and the other side of it will be the playroom. The ugly colored crates fit perfectly in the bookshelf holes, so of course, they’re getting a long-overdue makeover. I had been putting it off because I was envisioning hours and hours of sanding- ugh!
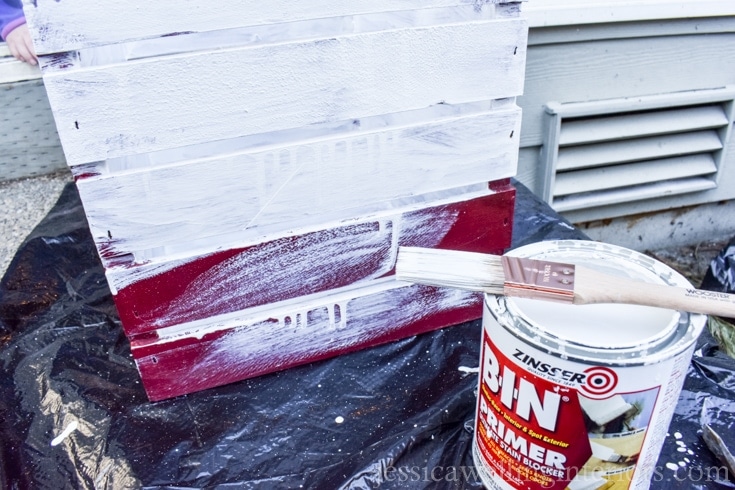
But I just discovered this amazing shellac-based primer that sticks to pretty much anything, so I’m using it right over the top of the glossy varnish on the crates. This primer is the secret sauce! In fact, I used it to paint the tiles around my fireplace a couple of weeks ago too. And I just discovered that it comes in spray paint form! You can also see in the photo above that there are brown spots where the knots in the wood have bled through over the years. The BIN primer will take care of those too.
How to Paint Wood Crates
What you need:
- Wood crates (mine were already painted, but you can also start with unfinished wood)
- Zinsser BIN shellac-based primer
- Denatured alcohol (to clean up primer)
- Stencil brush
- Angle-tipped artist’s brush
- Spray paint
- Acrylic paint
- Drop cloth
- Scissors
- Paper or plastic plate for paint palette
- Rag or paper towels
- Masking tape
Instructions:
1. Wipe down crates with a damp rag
My crates have been sitting in the garage and are just a bit dusty, so they got a thorough wipe-down before priming.
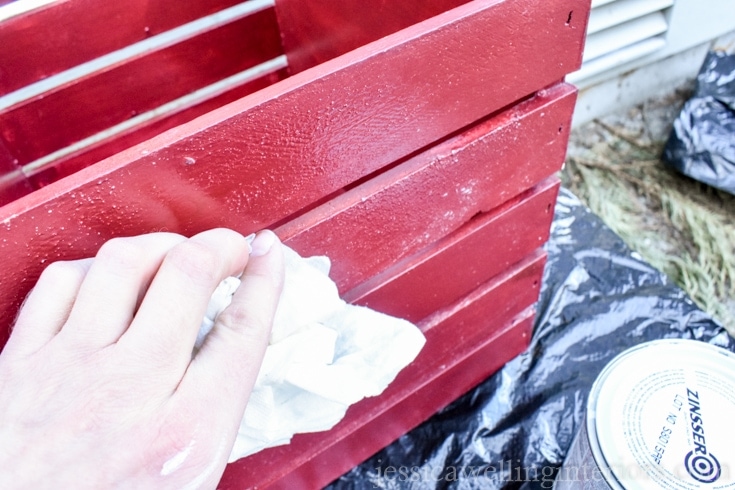
2. Prime your crates
This was the first nice day in a while. A perfect day for painting outside! I primed my crates with a brush by hand. But I’m told the spray version will work just as well, and trim some time off the project. This BIN primer dries fast. 45 minutes, to be exact. It’s best to paint as soon as possible after the primer is dry.
I primed the insides of the crates first, then flipped them over to get the outsides.
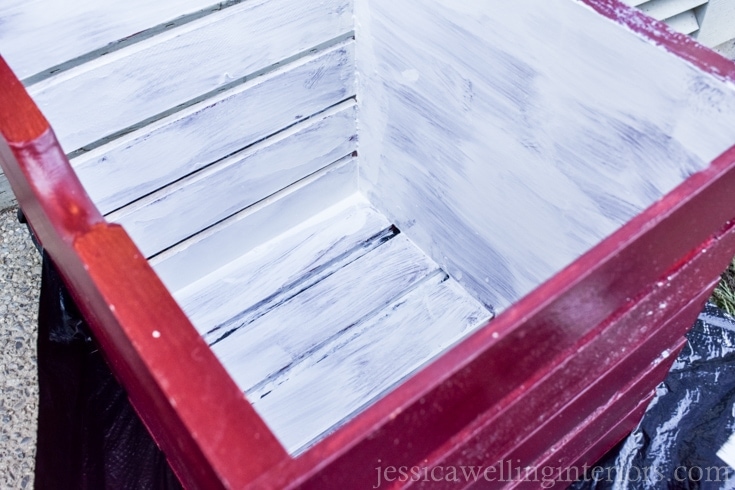
3. Spray paint your crates
I spread out my giant drop cloth and spray painted the crates with white matte spray paint. I’m a spray paint enthusiast lately because it makes projects go so much faster! Especially crates, which have a lot of nooks and crannies that are tedious to cover with a brush.
Shake the can well, and from about 12-15 inches away, move your hand back and forth, covering the crates with just a light spray. You’re not looking for full coverage on the first coat. Come back about ten minutes later and spray it again, this time covering, but being sure not to hold your hand in one spot, so as not to cause drips.
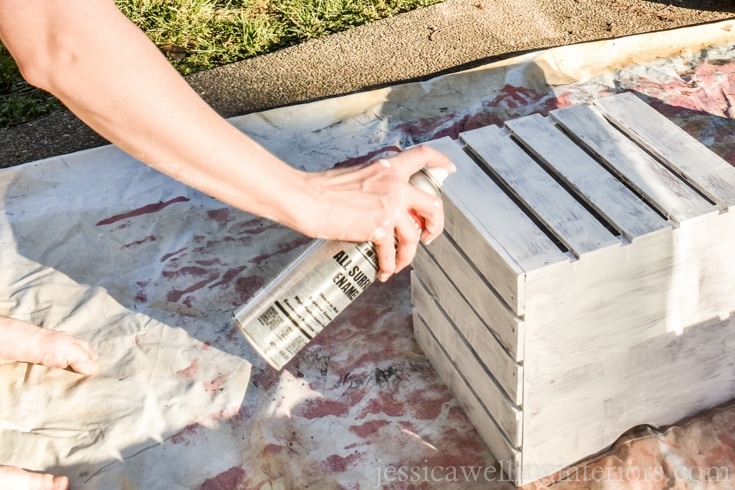
Once the crates are dry (you’ll need to wait at least a few hours), flip them over and paint the insides.
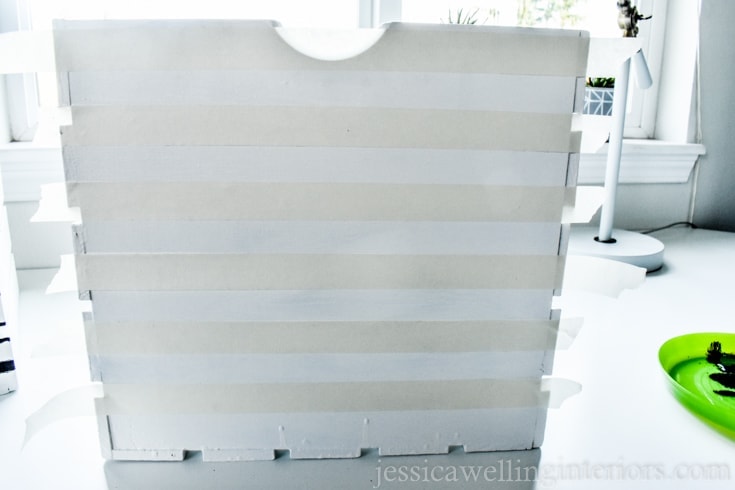
4. Mask off your patterns
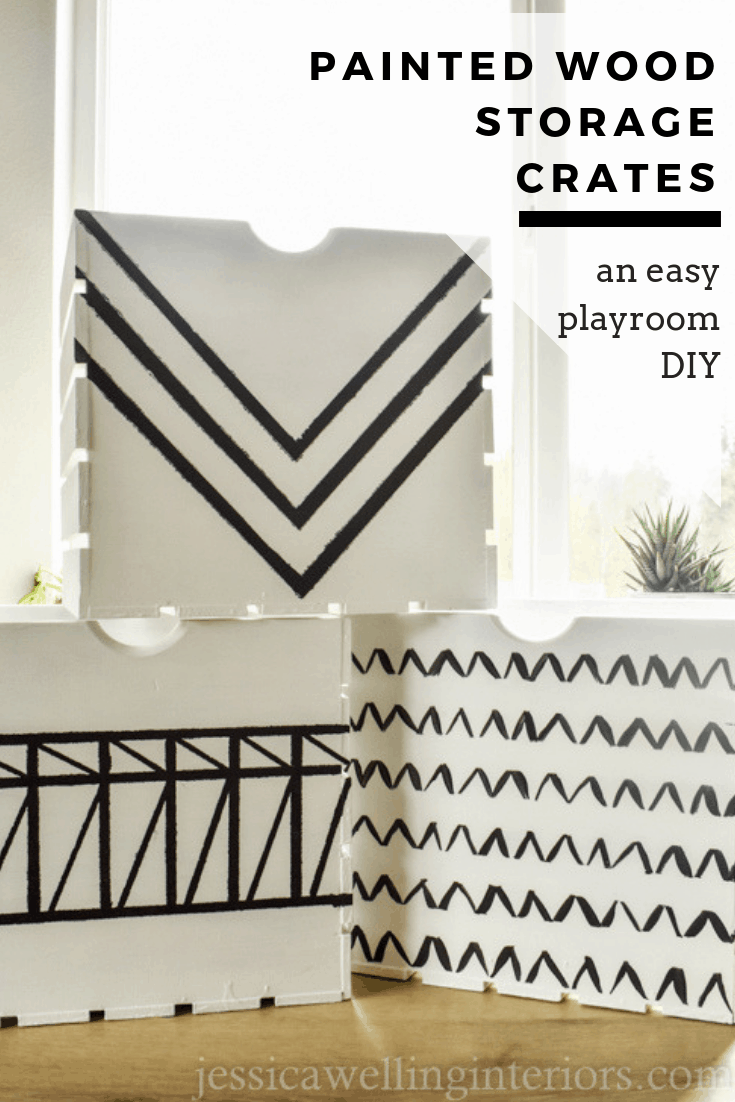
Now it’s time for the fun part! You can create whatever patterns you like. I chose to do modern line patterns in black to complement the decor in our playroom. I’m going to show you how I made these three different patterns.
A. Modern “V” Pattern
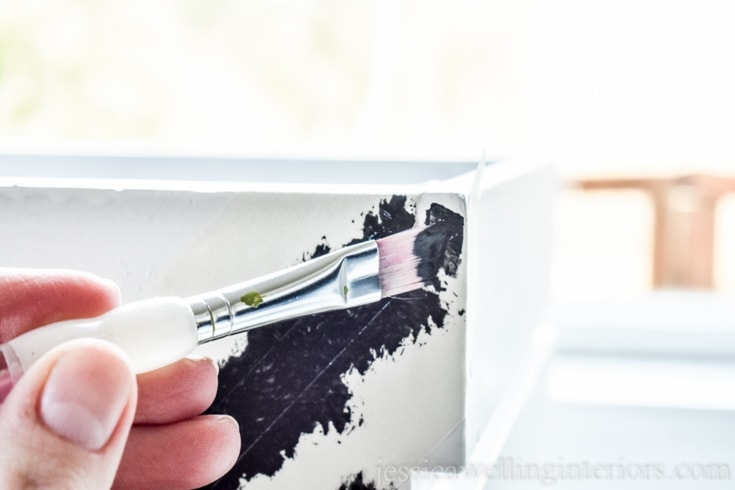
I used a roll of standard masking tape, but you could also use painter’s tape. It was easy to find the center line without measuring. This is all just eyeballed. I pressed the tape down hard to get the best seal possible.
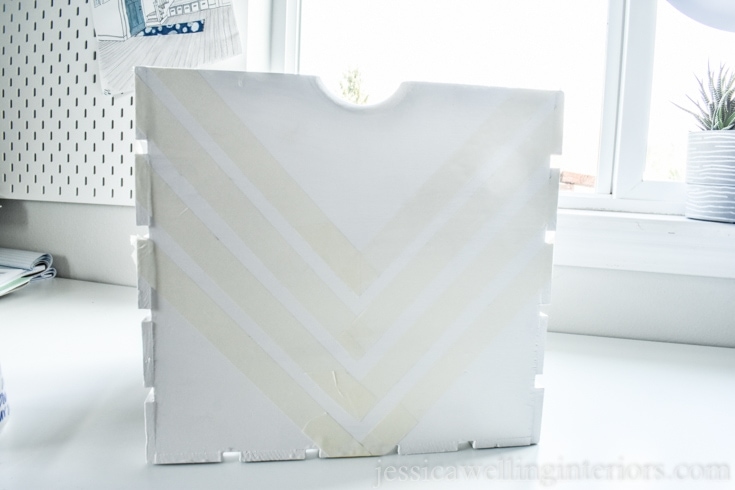
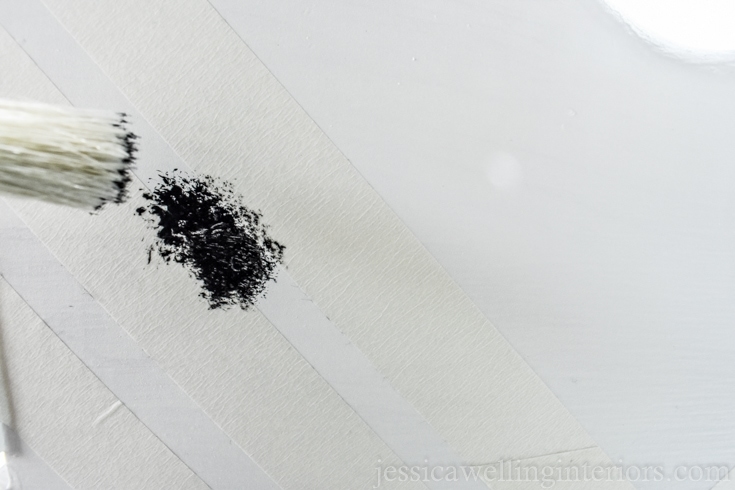
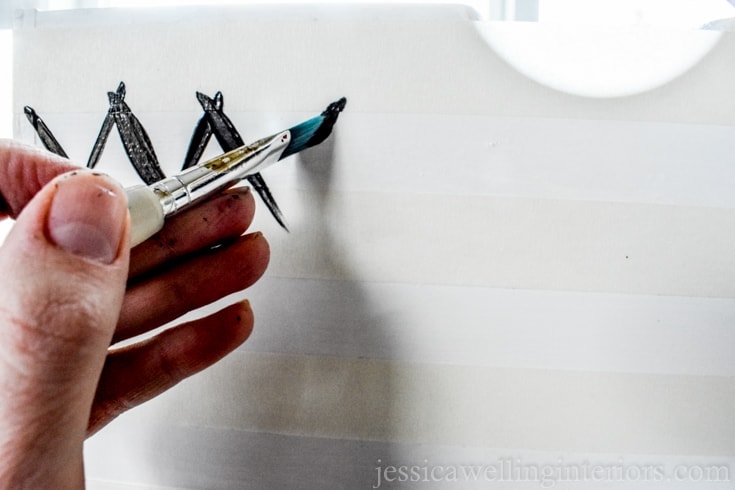
Next, I painted the lines with a stencil brush. It’s called the “dry brush method”. This means there’s a very small amount of paint on your brush, and once you’ve dipped it in the paint, you swirl it gently on your pallet (or plate in my case), to get any excess paint off.
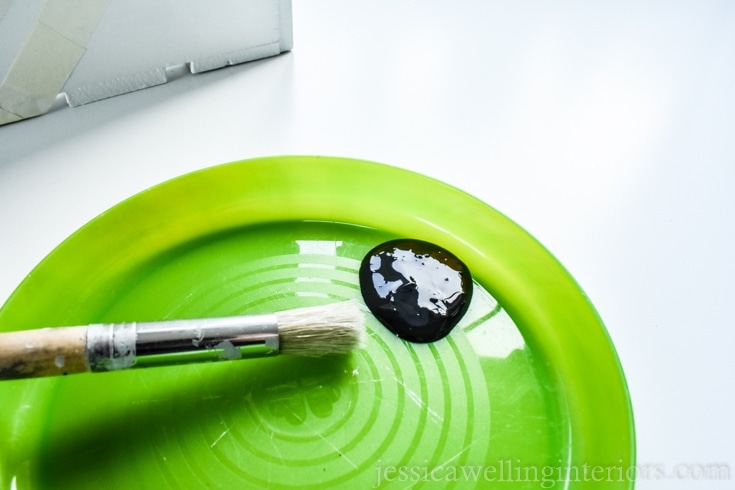
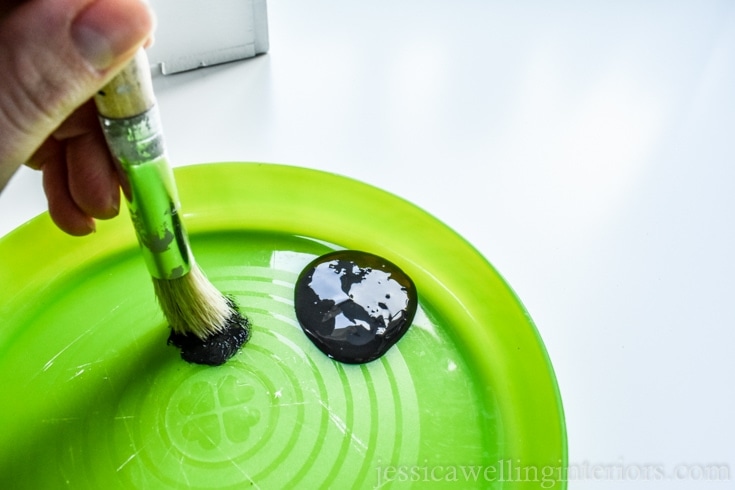
Next, dab the paint onto the crate with a “tap tap tap tap tap” motion. The goal here is to get the paint only in the gaps between the tape, and not underneath it.
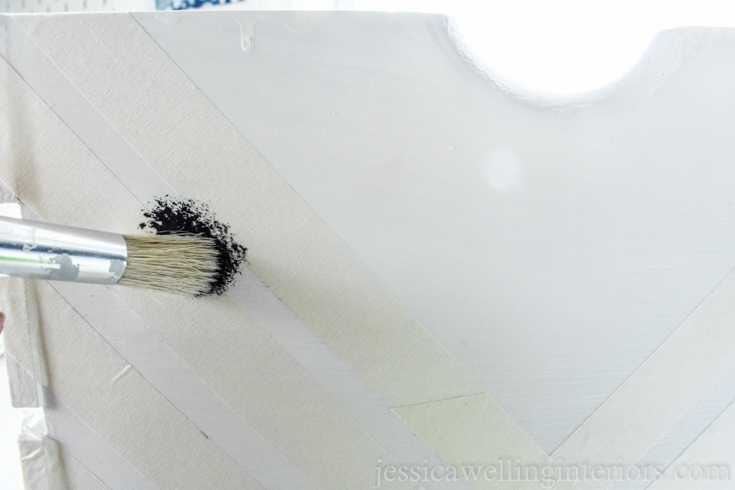
Notice that I’m not trying to do detail work on the edges with the stencil brush. I’m just getting close to the edges, and I’ll come back and touch them up later with a more precise brush.

Now, using an angle-tipped artist’s brush (my favorite for most small detail work), come back and get the outside edges, being careful not to push paint under the masking tape.
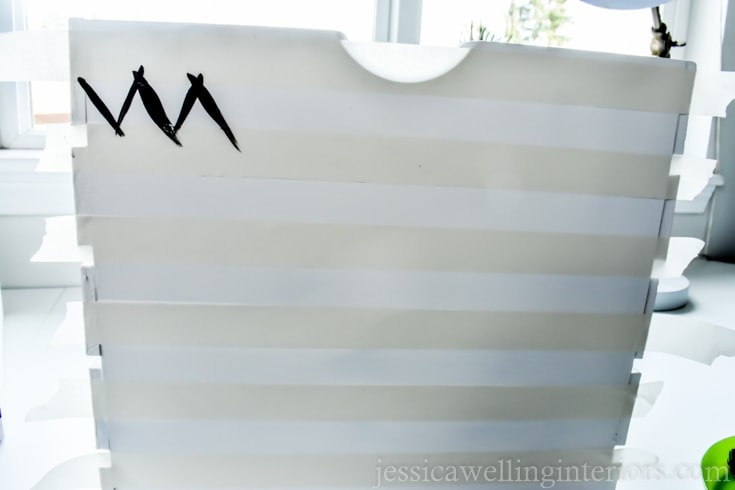
Depending on your preference, you may want to go over the lines with the stencil brush a second time to get better coverage. The dabbing method can leave you with a blotchy sponge-painted look if you just do a single coat.
I’ve tried it both ways, and I don’t think it makes a big difference whether you remove the masking tape before or after the paint is dry. I tend to be impatient, so I usually do it before.
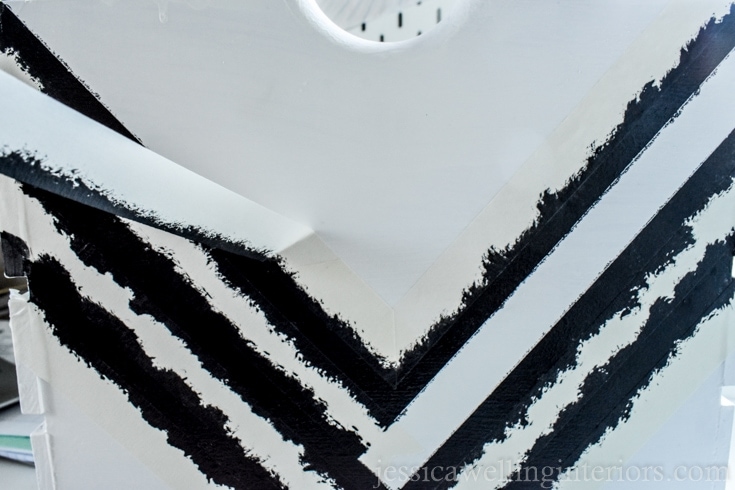
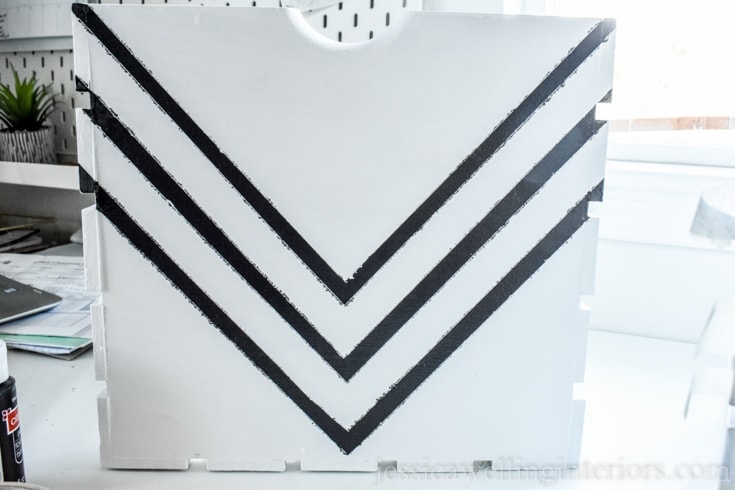
Now my edges are a little fuzzy, but I decided to just embrace it. If you don’t care for this look, you can always go back and touch up the edges with white paint (or your background color).
B. Block Line Pattern
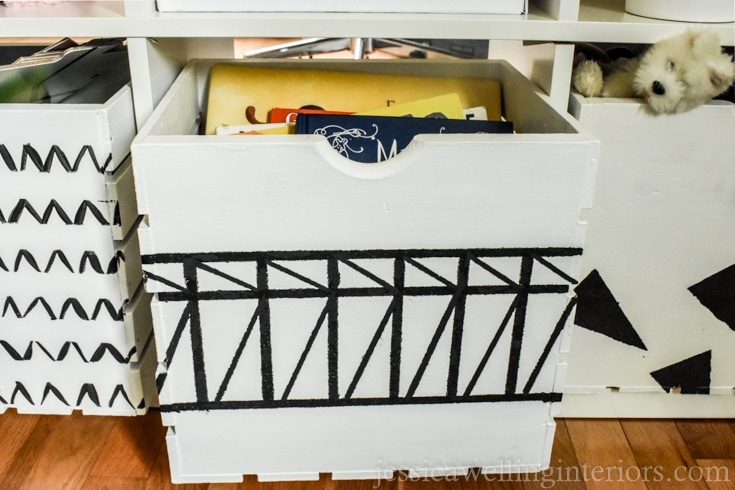
This next pattern takes a little more patience, since you have to wait for the paint to dry between taping some of the lines. But I’m really happy with the result!
First, I taped and painted the horizontal lines using the same techniques as above, then waited several hours for the paint to dry. Then I removed the tape.
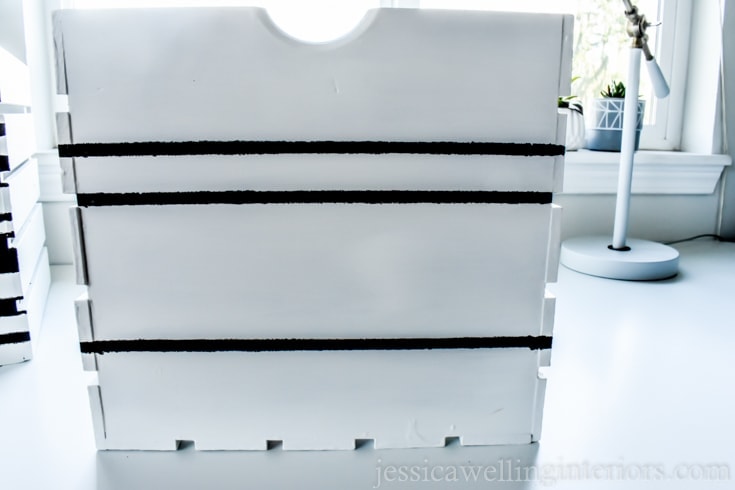
Next, I taped and painted the vertical lines, and removed the tape.
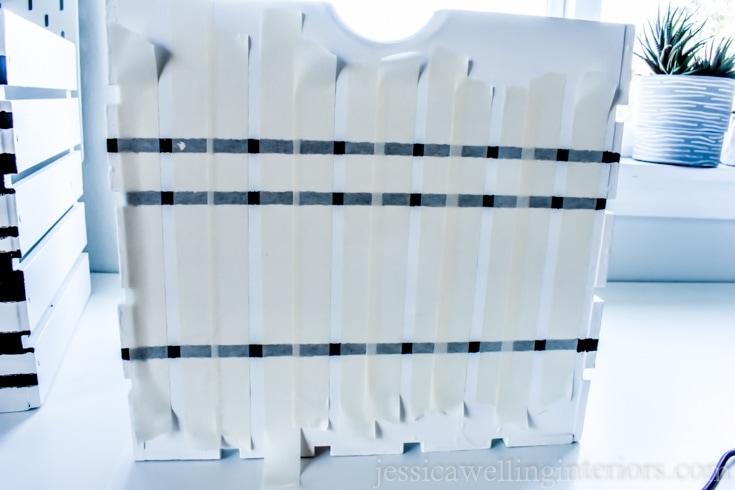
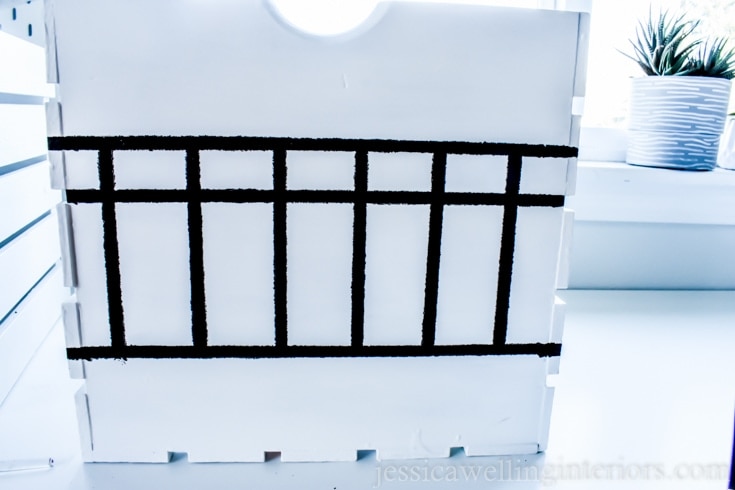
Finally, I taped and painted the diagonal lines.
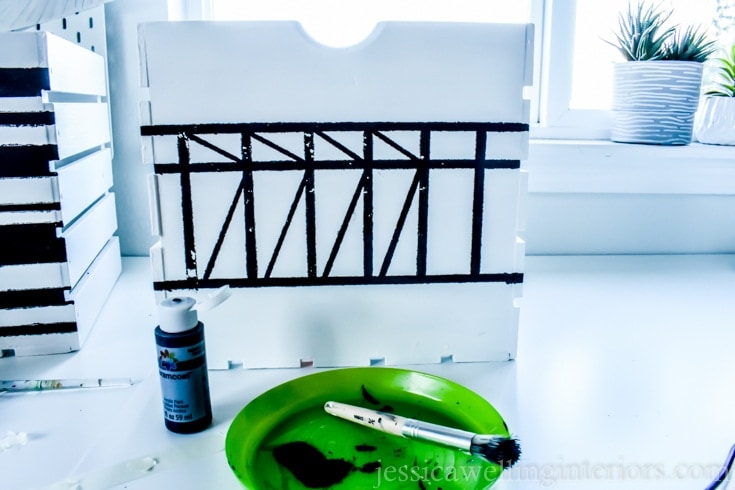
As you can see, the tape peeled a bit of the black paint off. But it was simple to touch up afterward with the angled artist’s brush.
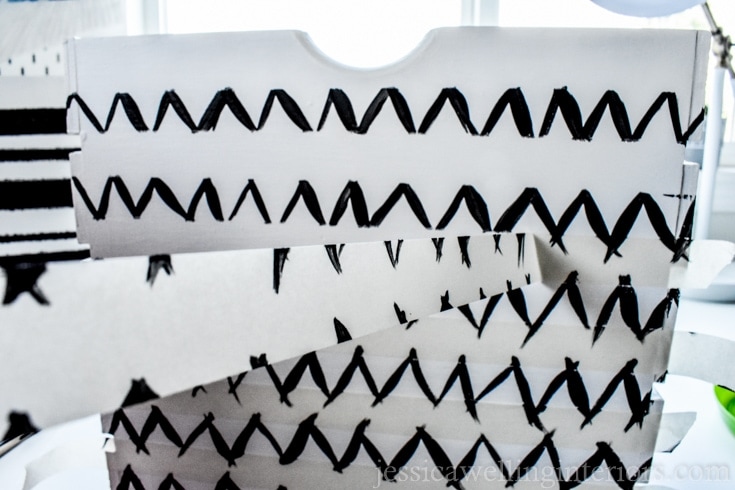
C. Chevron Pattern
This last painted wood crate storage idea was really easy. First, I taped horizontal lines on the crate.
And using the angled artist’s brush, I did swishes up and down within the white spaces between the tape lines.
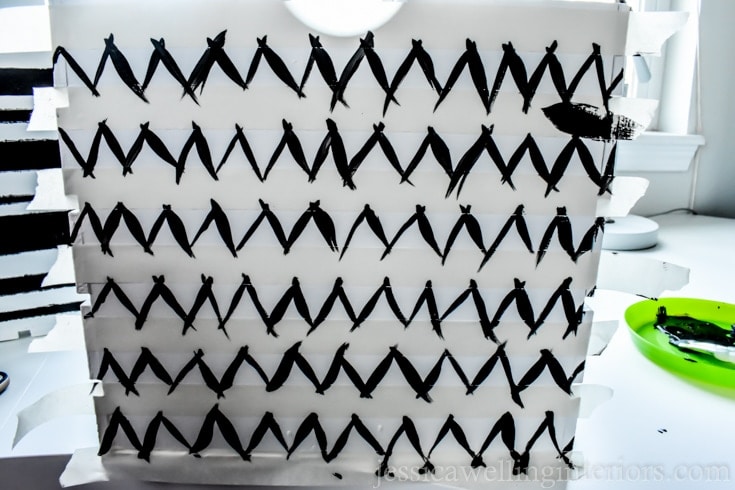
Finally, I peeled off the tape.
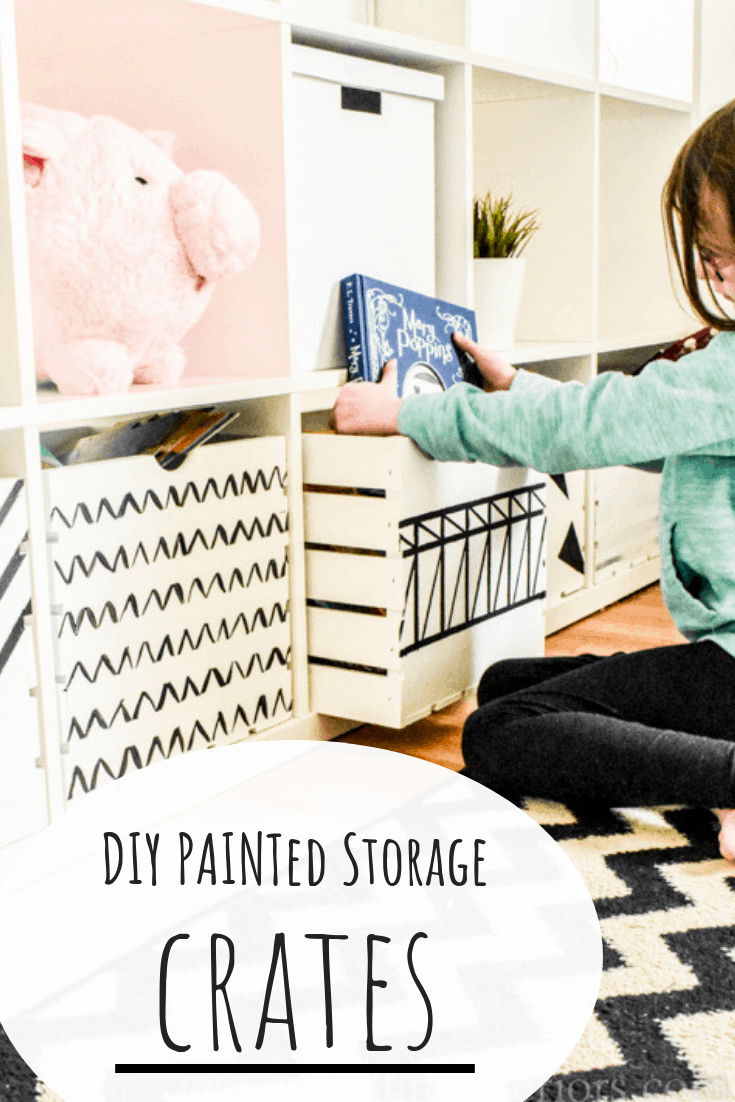
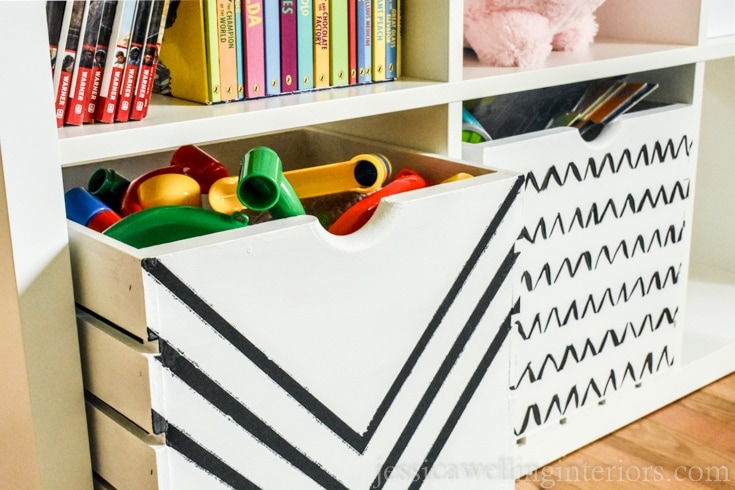
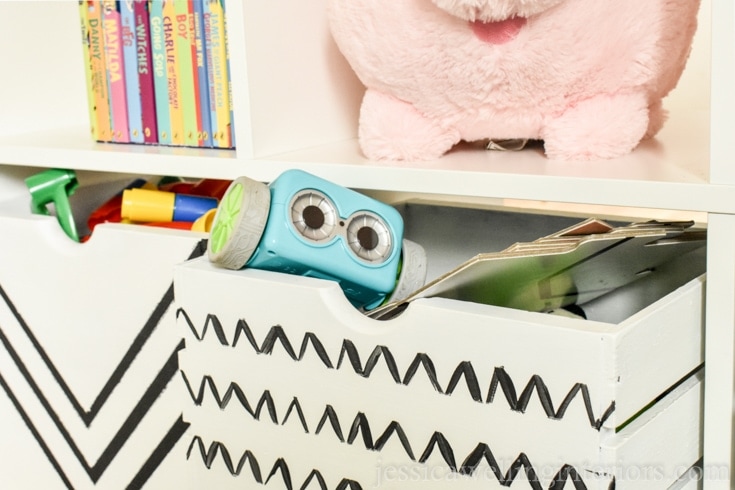
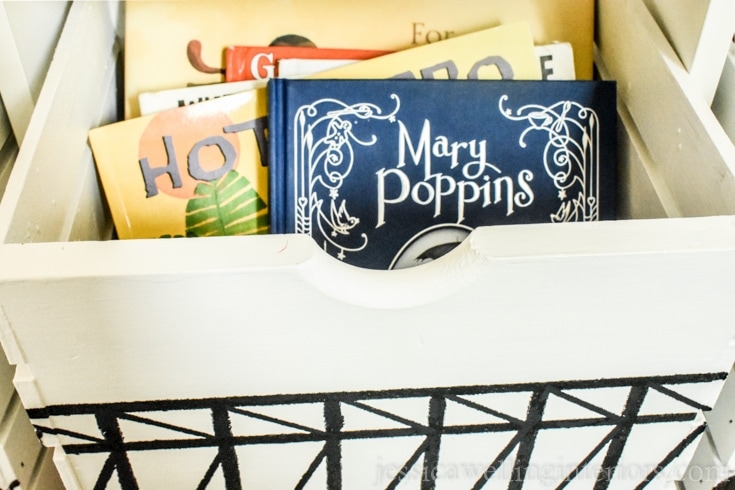
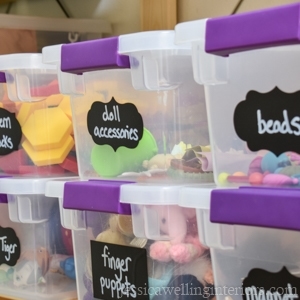
And there you go! That was pretty easy, right? These crates are great for storing toys and books! We also use them in the TV room for DVDs.
Wood Crate Storage Ideas
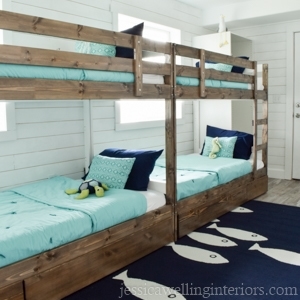
Here’s how we’re using these crates now in our playroom.

Love the ideas you see here on Ideas for the Home by Kenarry®? Subscribe today to get our FREE DIY & Craft Planning Calendar, plus our weekly Ideas in Your Inbox newsletter filled with creative tips and exclusive offers!
What’s Next?
If you enjoyed these painted wood crate ideas, you may like these spaces for kids and organization ideas too.
Organize all the Toys, Books, & Games!
You may also enjoy these playroom ideas on Kenarry: