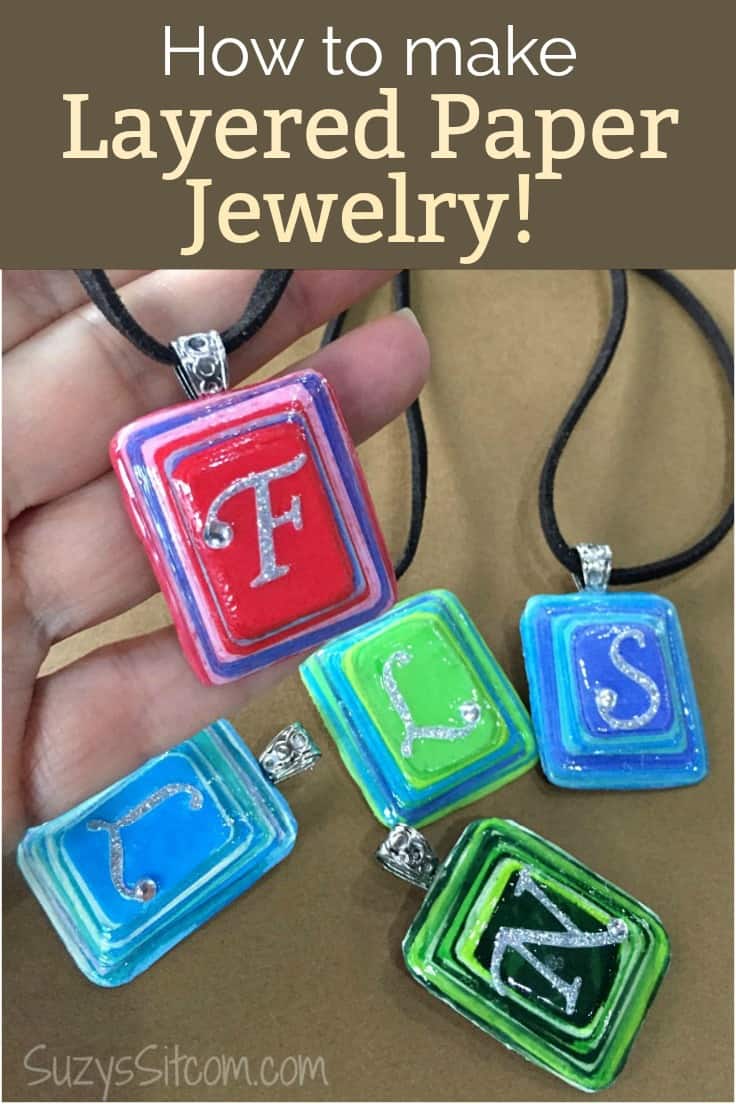
Handmade Gift Idea: How To Make Layered Paper Jewelry
THIS POST MAY CONTAIN AFFILIATE LINKS. PLEASE SEE OUR FULL DISCLOSURE POLICY FOR DETAILS.
Looking for a unique DIY gift idea for the holidays or a craft night with friends? Here is an easy way to make beautiful layered paper jewelry!
Make something special for your friends and relatives! It is that special time of year for those of us that love to create. This is Suzy from Suzy’s Sitcom, and I would love to show you how to make unique Layered Paper Jewelry Pendant! It is not only fun to make, but you can personalize it too!
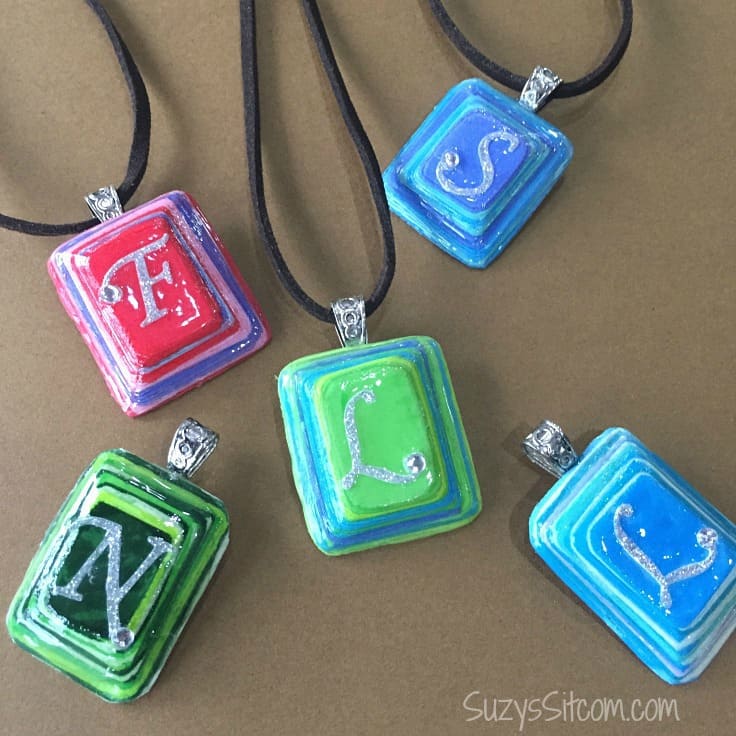
Making layered paper gemstones is simple and the color choices are endless. Create beautiful unique jewelry by adding layers of colored paper, and then sanding them down to a smooth finish. This is a great project for this time of year. Sit down with a warm beverage, a pair of scissors, paper, and watch a fun movie while you create awesomeness!
How to Make Layered Paper Jewelry
This project works best using paper card stock or construction paper. Choose and experiment with lots of colors for unique looks!
I made layered paper jewelry necklaces. But you can also turn these into creative earrings just by changing the shapes and attaching earring hooks or make Pandora-style beads using a similar technique.
Want more ideas like this? Subscribe today to get our weekly Ideas in Your Inbox newsletter plus other exclusive gifts and offers — all for FREE!
What you need:
- Card Stock or Construction Paper
- White Glue
- Mod Podge Dimensional Magic
- Leather Necklace Cords
- Jewelry Bails
- Letter Stickers
Craft/DIY Tools Needed:
Instructions:
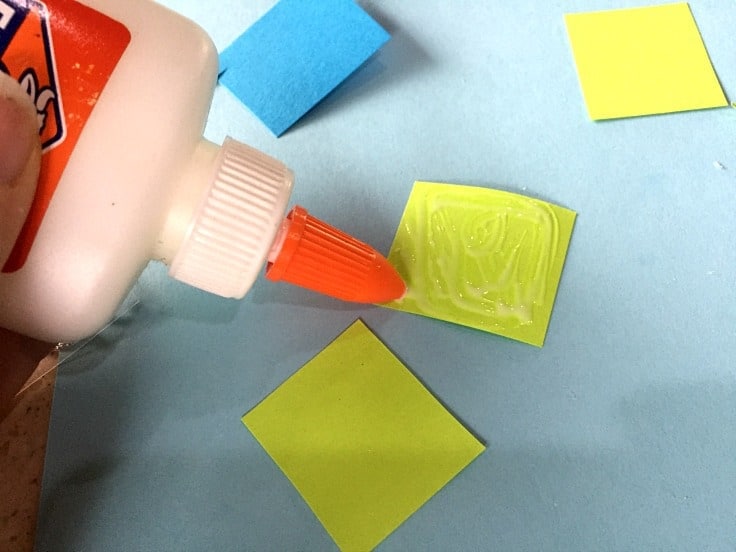
1. Begin by cutting the paper to size
Decide what size you would like your pendant to be and begin cutting several squares or rectangles of colored paper to that size. Use the white glue to add a thin layer of glue to the bottom paper (making sure to go to the edges of the paper), then place another square of paper on top.
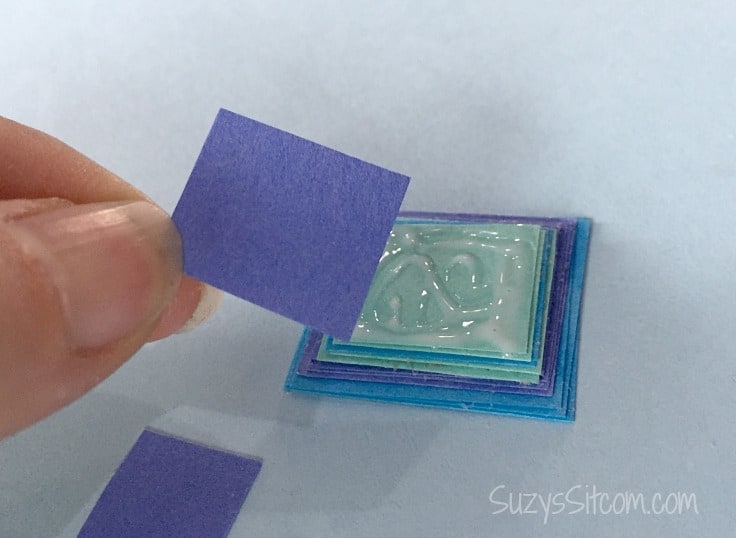
2. Add more layers of paper
Add more layers of colored paper, decreasing the size as you go. Be sure to add a thin layer of white glue to each layer going to the edges. Gently push the paper down and wipe off any excess glue from the edges as you go.
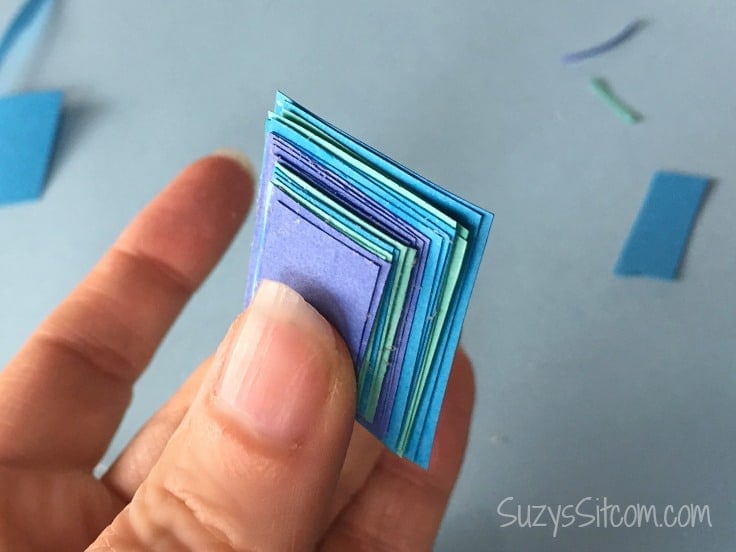
3. Make each layer smaller than the last
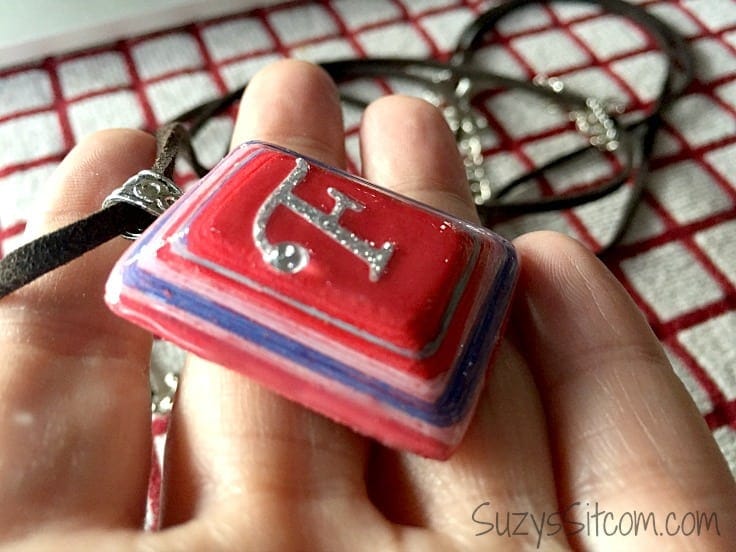
Keep adding layers of paper until your paper gemstone is the size and thickness that you would like. There is no wrong way to do this. Layers do not have to be perfect as you will be sanding it out later. I wanted to add an initial to mine, and stopped when the top layer was the right size for the initial.
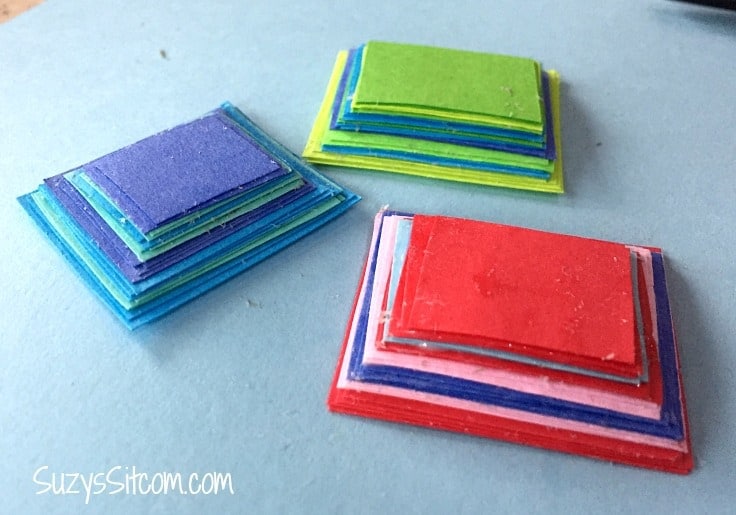
4. Allow the glue to dry
It takes about one hour for the white glue to dry enough so that the pendant is ready for sanding.
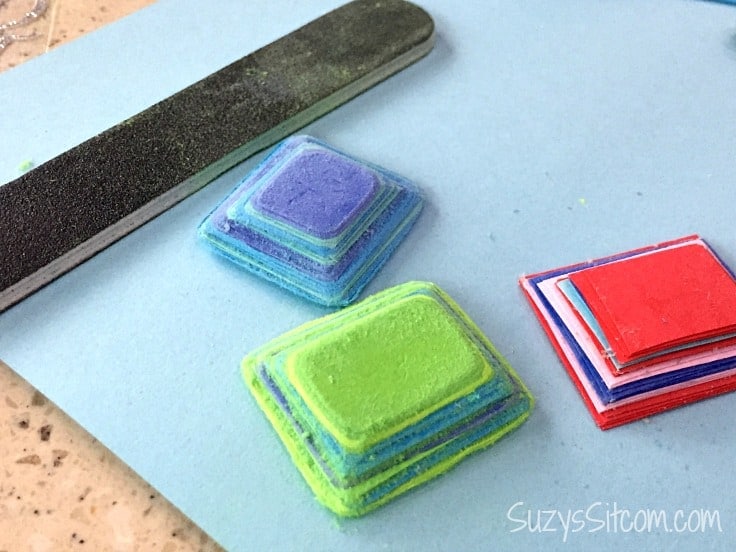
5. Sand the edges
Use a nail file to sand the edges of your layered paper gemstone. Sand the layers smooth, rounding the corners down. The more you sand, the more the layers of paper will show up.
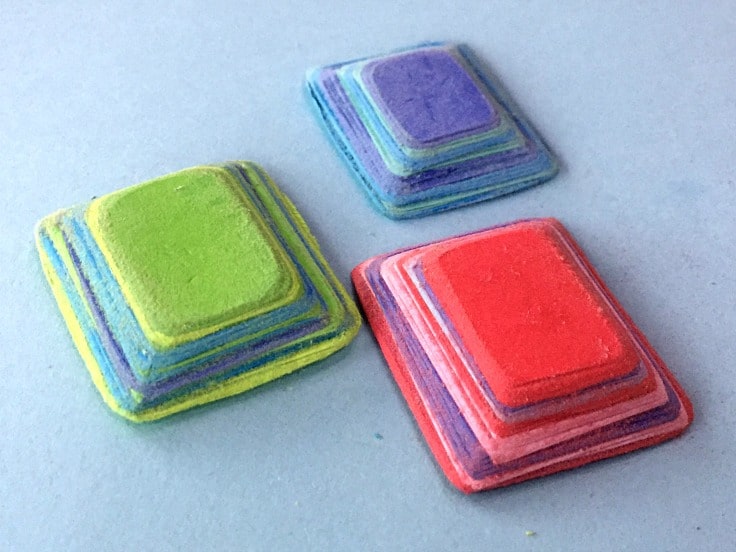
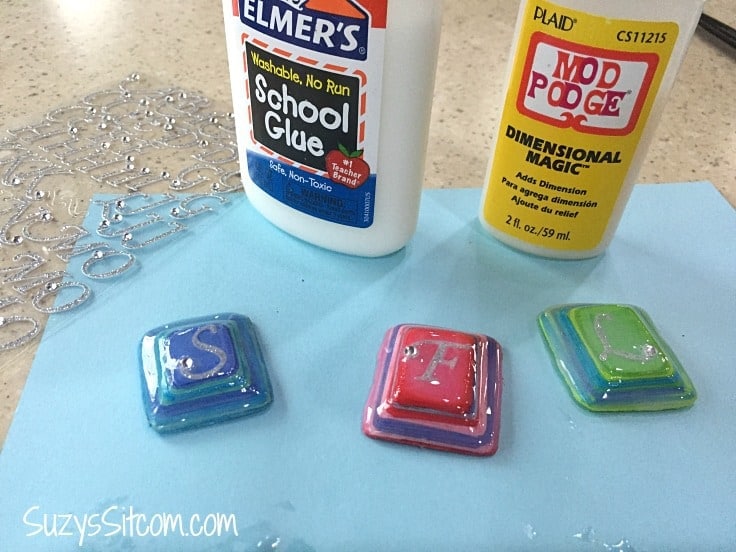
6. Finish the jewelry
Wipe down each layered paper gemstone to get off any extra paper dust.
Add an initial sticker to the top, and then carefully add drops of Mod Podge Dimensional Magic to the top and sides of each layered paper gemstone. (Do not shake the Dimensional Magic as it will result in bubbles). This will add a shiny, hard coating to each piece of layered paper jewelry.
Allow the Dimensional Magic to dry thoroughly for about 2 hours before going to the final step.
Use the E6000 glue to glue on a bail. Allow to dry and then add the lanyard.
Each piece of layered paper jewelry will be entirely unique! It is fun to experiment with different colors, shapes and layers. These DIY pendants are a perfect, unique gift idea!
This Rainbow Bead Necklace is another easy jewelry craft if you’re looking for more ideas!
Would you like more unique paper ideas?
How to make a Paper Mache Santa Ornament!
How to make Beautiful Wrapped Ornaments with Paper!

Create Beautiful Paper Reed Frames!
Love the ideas you see here on Ideas for the Home by Kenarry®? Subscribe today to get our FREE DIY & Craft Planning Calendar, plus our weekly Ideas in Your Inbox newsletter filled with creative tips and exclusive offers!
What’s Next?
You may also enjoy these paper craft ideas on Ideas for the Home by Kenarry® –
Thank you for a wonderful way to use all that scrapbook paper sitting in my drawer! These are SO COOL!!
You are very welcome!
Suzy always has great ideas. Each project has step by step pictures with instructions. Go join her website for lots of free ideas. I think I’ll try this one and maybe make one in polymer clay too. Thanks for another great idea Suzy.
Thank you so much for your kind words! Would love to see what you make!
Thank you for all the great ideas and especially how to accompolish these wonderful pieces
You are very welcome!
Thank you for sharing the layers paper tutorial I wanted to know how to make
Thanks Pauline! We’d love to see photos of how your layered paper jewelry turns out!
Best wishes,
Carrie
Ideas for the Home by Kenarry
LOVE IT…thank you ..I am now pumped to try this.
So glad you liked it, Annette! We’d love to see photos of how your jewelry turns out!
Best wishes,
Carrie
Ideas for the Home by Kenarry