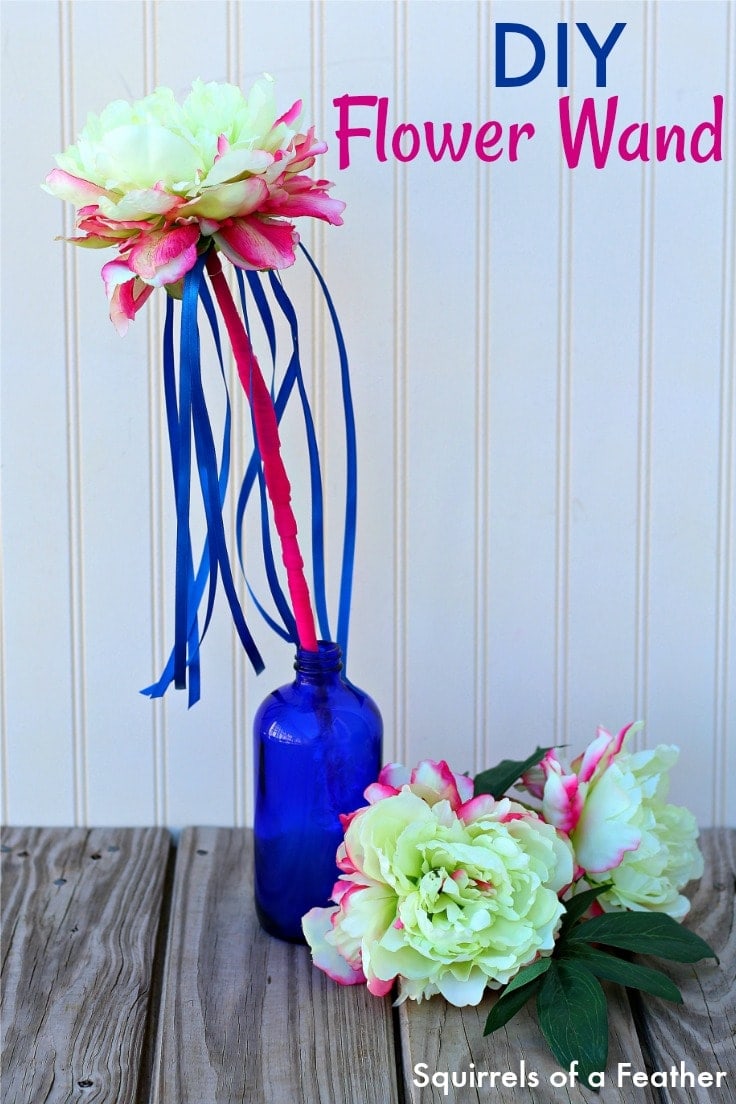
Spring Flower Wand with Ribbons
THIS POST MAY CONTAIN AFFILIATE LINKS. PLEASE SEE OUR FULL DISCLOSURE POLICY FOR DETAILS.
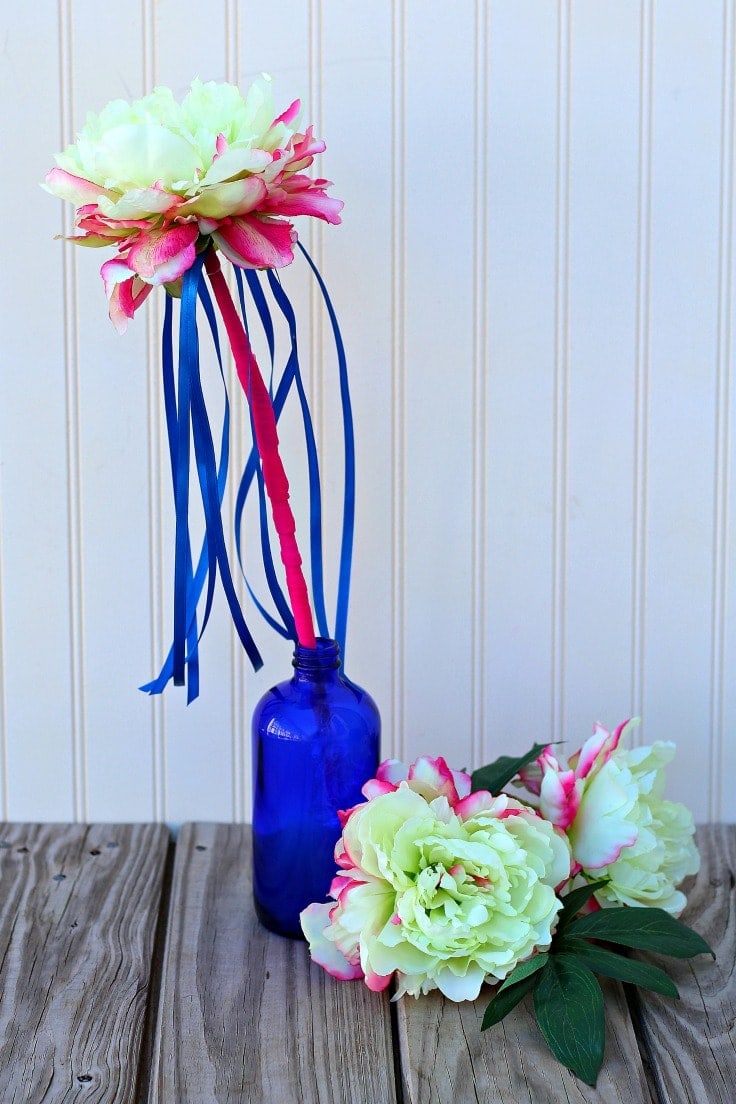
Attention all flower fairies (or mothers of aspiring flower faeries)! Find out how to make this DIY flower wand using your favorite flower, some ribbons, and a little magic — and by magic, of course, I mean, hot glue! This DIY wand makes a wonderful party favor or pretend-play activity for little girls.
Hoppy spring, Kenarry readers! This is Marissa from Squirrels of a Feather leaping in with this playful take on DIY flower wands!
This spring flower wand is sure to set any secret flower fairy’s heart aflutter! Read on to find out how to make it yourself.
How to Make a Flower Wand
This flower wand requires very few supplies and is ready in minutes!
I had some peonies left over from a chalk painted vase project I shared over at my blog and I have been brainstorming ways to use the extra flowers for a while!
This DIY fairy wand is a great way to use leftover craft supplies to create something imaginative for your child.
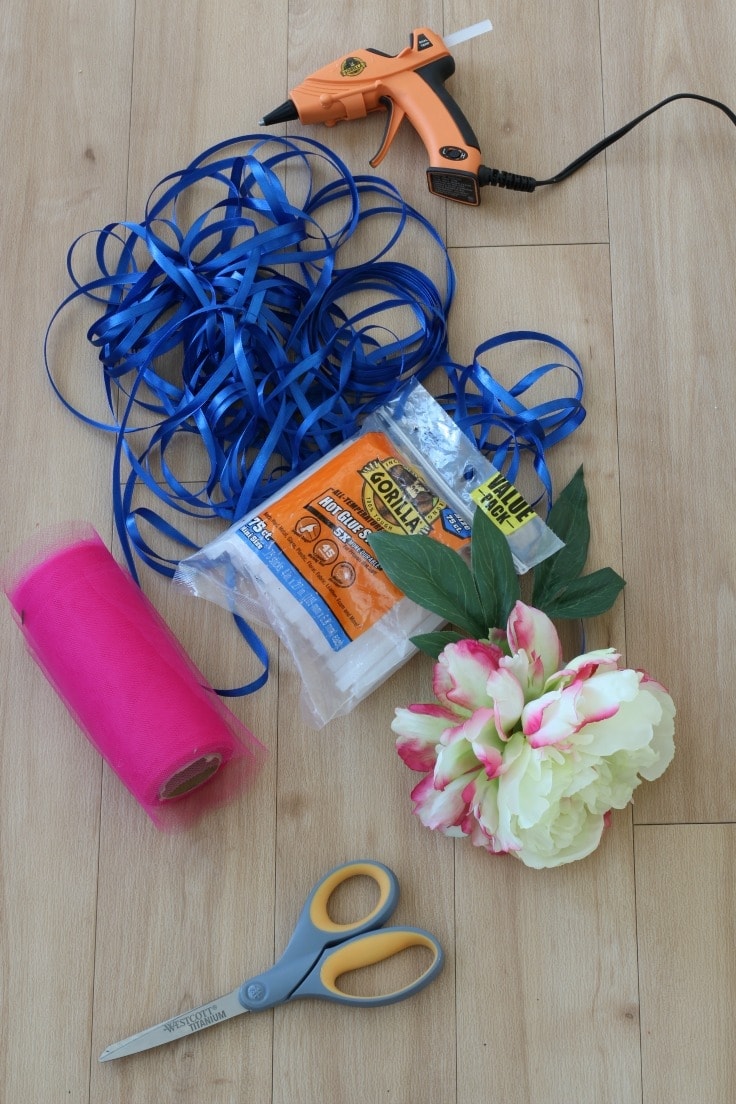
What you need:
Want more ideas like this? Subscribe today to get our weekly Ideas in Your Inbox newsletter plus other exclusive gifts and offers — all for FREE!
Craft/DIY Items Needed:
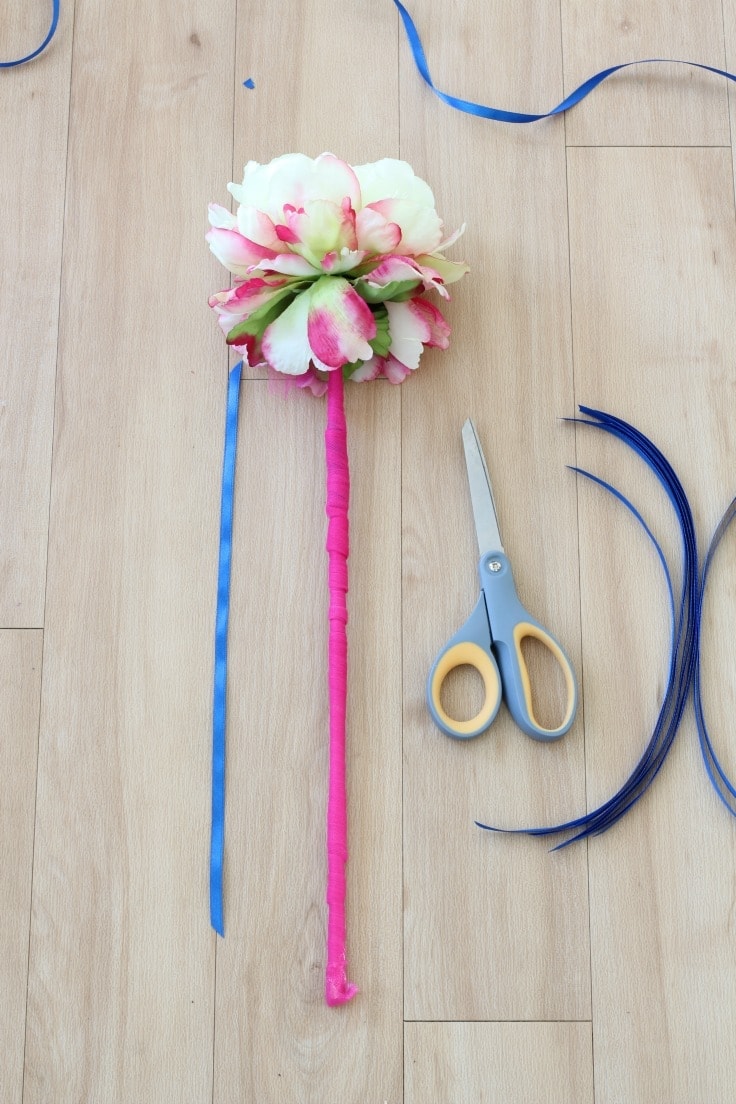
- Favorite faux flower with a long stem (I used a peony from Michael’s)
- Hot glue
- Thin ribbons (for the loose ribbons)
- Thick ribbon or tulle (for the wand)
- Scissors
Flower Wand Instructions:
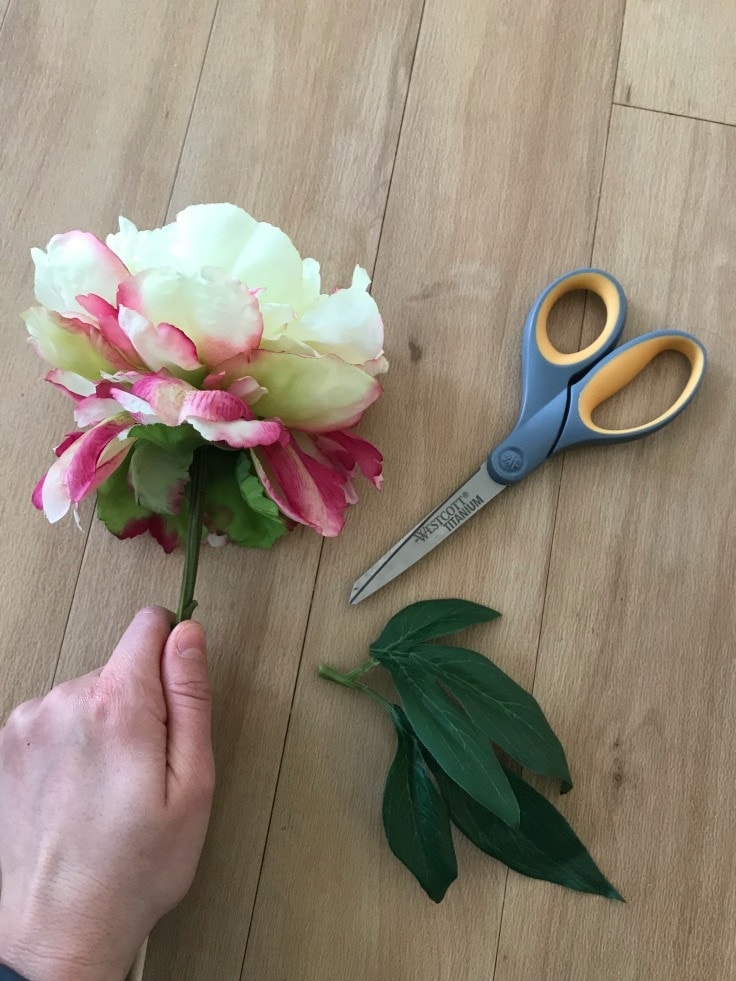
1. Trim the faux flower
DO NOT CUT THE LENGTH OF THE STEM!
Leave the stem intact but snip off any excess twigs or leaves that you don’t want on the long part of the stem.
Since we will be wrapping our stem this is an important step so that your flower wand can have a smoothly finished grip.
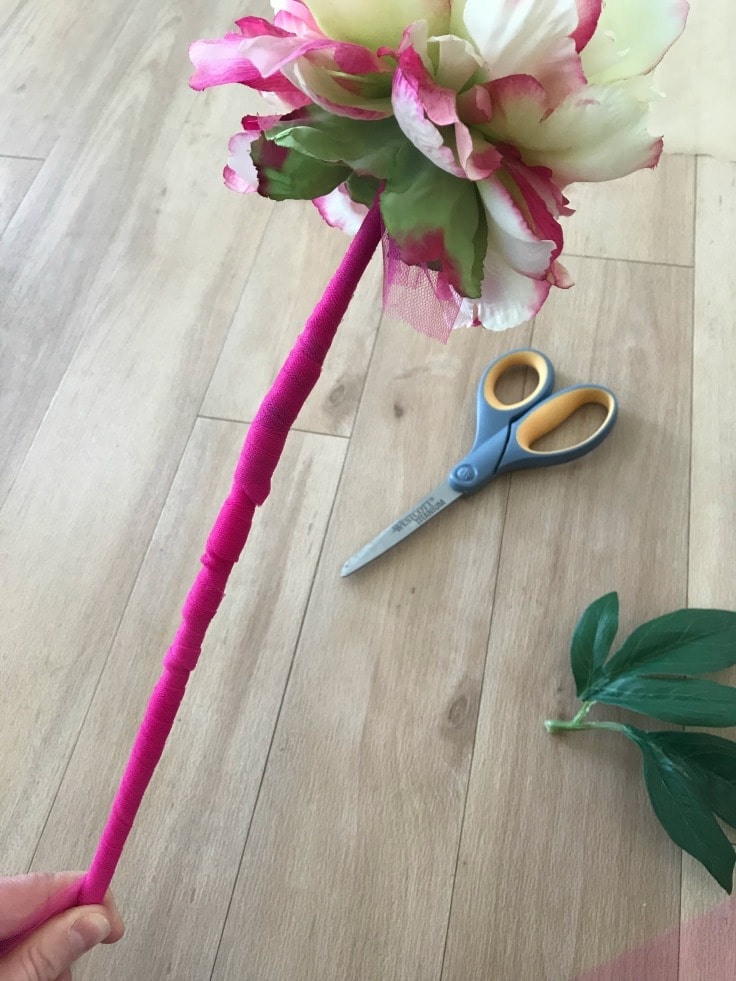
2. Wrap the flower wand stem
(This step is optional. You could choose to leave the stem green and natural if you wish! I decided to wrap it with some leftover pink tulle I have been saving.)
Using the larger ribbon or tulle begin to wrap the flower stem.
Tie the ribbon or tulle at the top, underneath the flower, hot glue it in place, and then once it is dry begin to wind it down towards the bottom end.
Try and wrap evenly and thickly enough that the stem does not show through. Hot glue everything in place at the bottom of the flower.
3. Cut thin ribbons for the wand
Take your thin ribbon and hold it next to the flower wand to measure out the length that you want the ribbons to reach down.
Cut one piece of ribbon based on your measurement, and then cut around 10-12 more ribbons of the same size.
(It’s better to cut ribbons that are too long versus too short because you can always trim off the length if you aren’t pleased, but it will be harder to fix if you cut too short.)
I think it looks prettier if you cut at a sharp angle to finish the ribbon, so that is what I did!
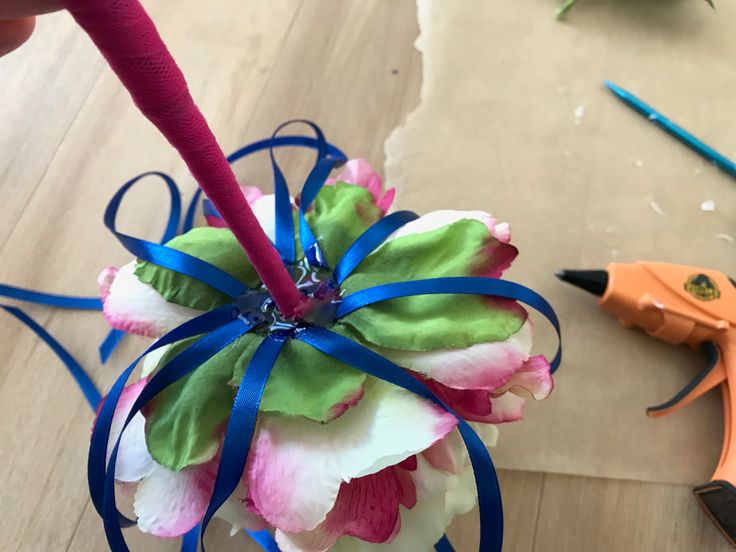
4. Glue the thin ribbons to the wand
Finally, hot glue all the ribbons underneath the flower wand, right where the flower underside meets the stem.
Pro-tip! I like to use a large metal knitting needle to press the ribbons into the hot glue (this is the exact size and brand I used). This way, you don’t burn your fingertips trying to get them nicely pressed in. 🙂
Once you have them all in place, add one final layer of glue on top. Allow everything to dry for at least 10 minutes.
Then get to playing!
What’s Next?
If you enjoyed this flower wand DIY you may also like these other creative crafts from Squirrels of a Feather:
Super Cute Fox Tail for Pretend Play
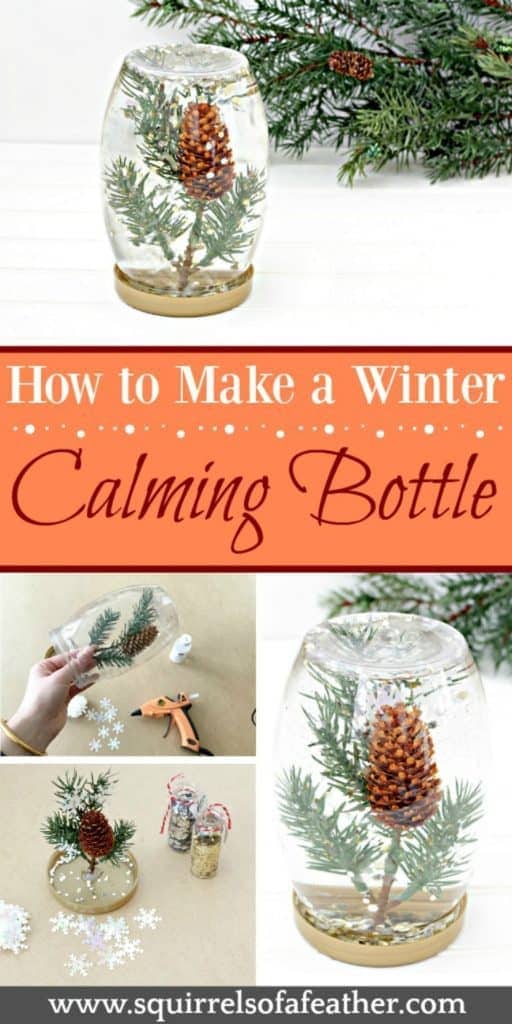
Pine Tree and Glitter Calming Bottle
Easter Find the Bunny Sight Word Game

You may also enjoy these easy DIY ideas on Ideas for the Home by Kenarry® –