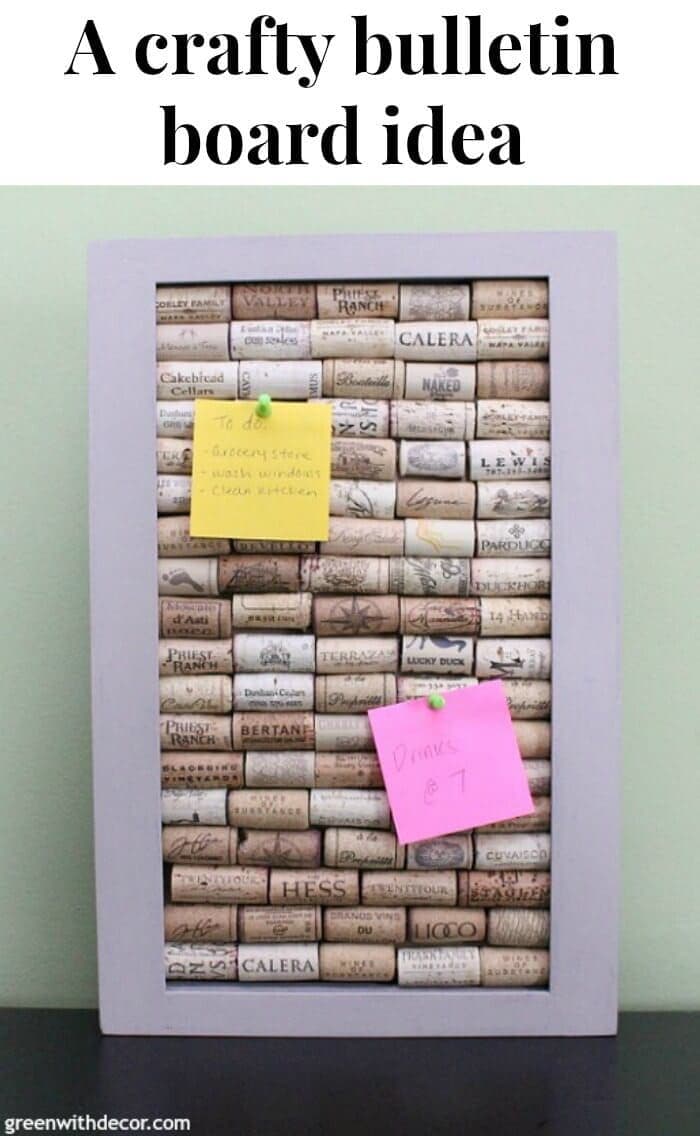
Wine Cork Message Board: A Crafty Bulletin Board Idea
THIS POST MAY CONTAIN AFFILIATE LINKS. PLEASE SEE OUR FULL DISCLOSURE POLICY FOR DETAILS.
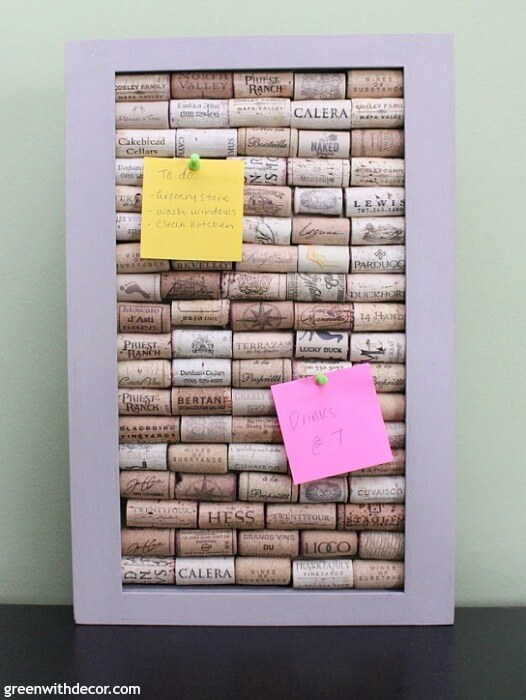
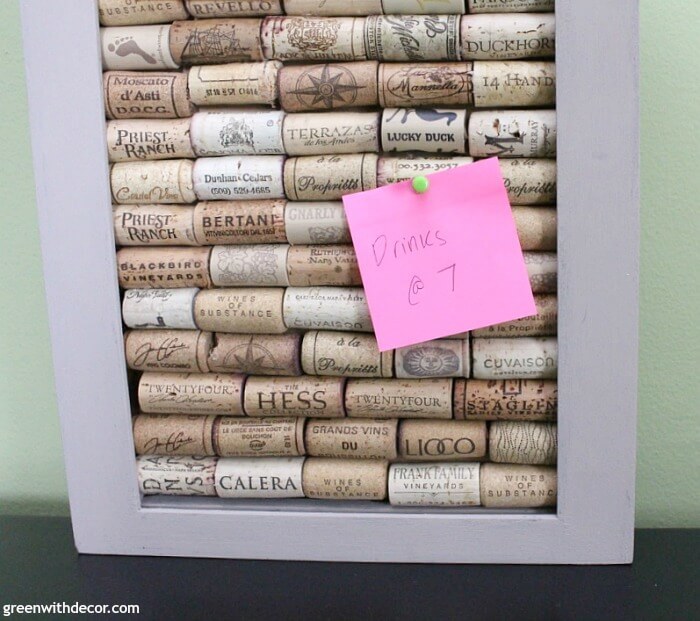
Use leftover wine corks to make a bulletin board! It’s super easy with this step-by-step tutorial. All you need is some corks, a hot glue gun, and a frame.
Hi all! I’m Meg from Green With Decor, back with another easy craft project today.
I have quite the wine cork obsession (see this wall decor project, this easy countertop project, these wedding place cards or, if you’re in the Christmas spirit, this one or this one).
Well that didn’t stop me from using some of my corks for yet another DIY project.
Disclosure: This blog post contains affiliate links for products or services we think you’ll like. This means if you make a purchase from one of these links, Ideas for the Home by Kenarry® will make a small commission at no additional cost to you so we can keep the great ideas for the home coming your way. All opinions expressed are derived from personal experience.
How to make a wine cork bulletin board:
This is a really easy home decor craft. You can even get your kids to help you. If you have some friends that enjoy DIY decor, make some extras and give them as gifts.
Here’s how to make your own bulletin board, with some step-by-step pictures.
Supply list:
- Old frame or a shadow box frame
- Paint (I used Country Chic Paint’s Harmony. You can see all of my Country Chic Paint projects here, I love their paints!)
- Paint brush
- Corks
- Hot glue gun
- Thumbtacks or push pins
Note: you can either find a deep frame (like I did) that will fit full corks, or you’ll have to cut the corks in half so they fit inside a shallower frame. I went the easy route and picked a deeper frame!
DIY Bulletin board Directions
Here’s how to turn a pile of wine corks into a DIY cork board! It’s super simple and an easy weekend craft.
1. Paint an old frame
I painted this old frame last year and used it as a chalkboard for awhile. (Also a super easy craft project, you can read how I did it here.)
Be sure to paint the inside of the frame, too, if you’ll be able to see any part of it after the corks are in.
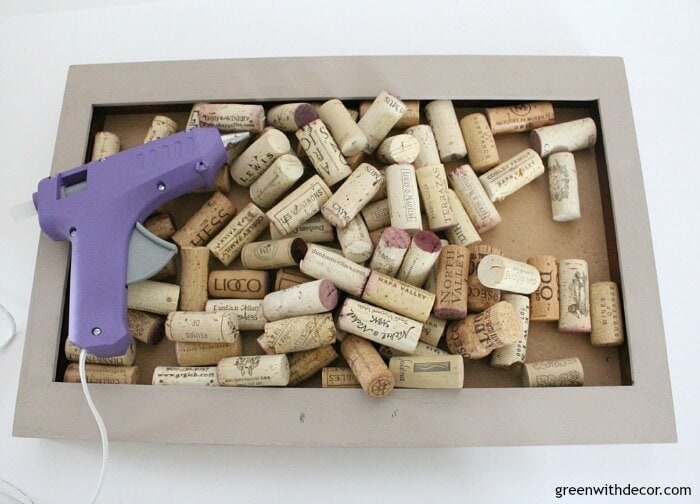
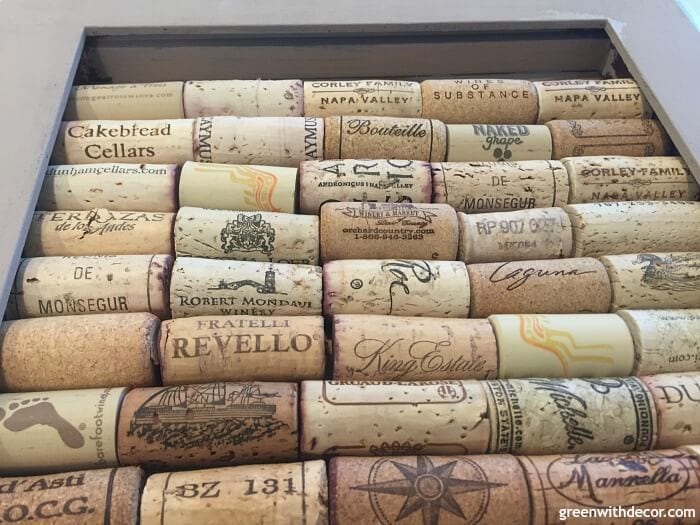
2. Line up your corks inside the frame
Don’t glue them in until you make sure they all fit. It’s kind of a big puzzle, moving all of the corks around till they fit.
You can cut the ends of corks, too, if you can’t get them to line up exactly inside the frame, but I played around with them to make them all fit.
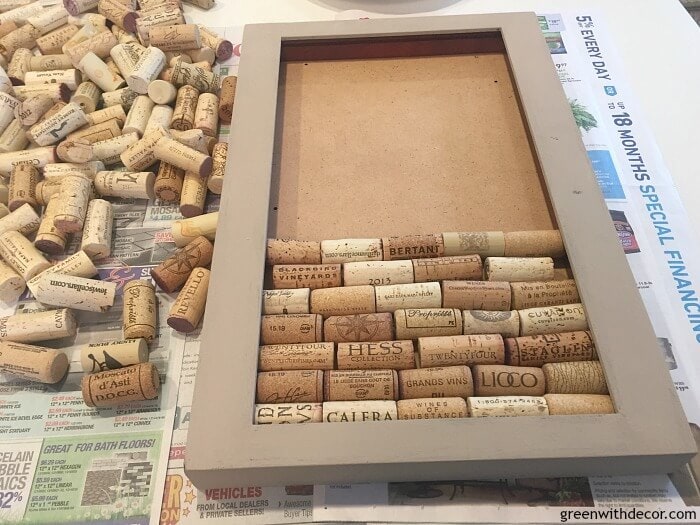
3. Glue the corks onto the back of the frame
I took out the bottom row, then started gluing from the second row up, moving up one row at a time.
When I was toward the top of the frame, I left out the second row and glued the top row in first.
I finished by gluing the corks in the second to top row and the very bottom row.
Let it dry for an hour or two before turning it up right.
You can hang it on the wall, but since this frame was so thick, I just set it on the desk in our office. You can see a full tour of the home office here.
If you love DIYing, these are a few of my most popular projects:

Get extra storage in your kitchen cabinets with this easy trick
An easy dresser makeover with spray paint and new hardware
A two-toned makeover: White and wood nightstands
Love the ideas you see here on Ideas for the Home by Kenarry®? Subscribe today to get our FREE DIY & Craft Planning Calendar, plus our weekly Ideas in Your Inbox newsletter filled with creative tips and exclusive offers!
More DIY Home Decor Ideas
Here are some more home decor ideas from Ideas for the Home by Kenarry!
- Easy Nightstand Decor Ideas
- How to Stencil Faux Tile Around Your Fireplace
- May Tray: DIY Nautical Decor
Originally published April 2017. Updated April 2018.
This is so pretty until I would find it hard to stick any pins into these beautiful corks
I totally agree, Ivory! I bet it would be pretty just to hang it on the wall as is — just as a way to display wine corks.