Create Textured Art With Stencils
THIS POST MAY CONTAIN AFFILIATE LINKS. PLEASE SEE OUR FULL DISCLOSURE POLICY FOR DETAILS.
Create beautiful textured art with just stencils and joint compound. These amazing textured designs only take a few minutes to make!
Want more ideas like this? Subscribe today to get our weekly Ideas in Your Inbox newsletter plus other exclusive gifts and offers — all for FREE!
Working with stencils and joint compound (sheet rock putty), creating textured wall art is a simple process that can be completed in an afternoon. It is a simple technique using readily found materials. Create beautiful art for your home!
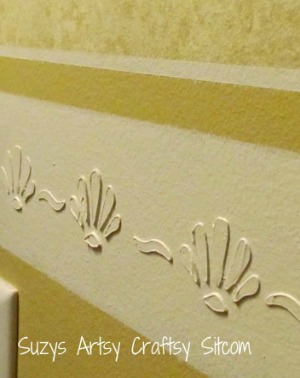
This is Suzy from Suzy’s Sitcom. Ten years ago, when I first created my website, this technique was one of my very first tutorials. I used a much simpler stencil in order to create a faux textured chair rail for one of my bathrooms. The project was a huge success, and that beautiful bathroom was one of the selling points of our home when we eventually put it on the market.
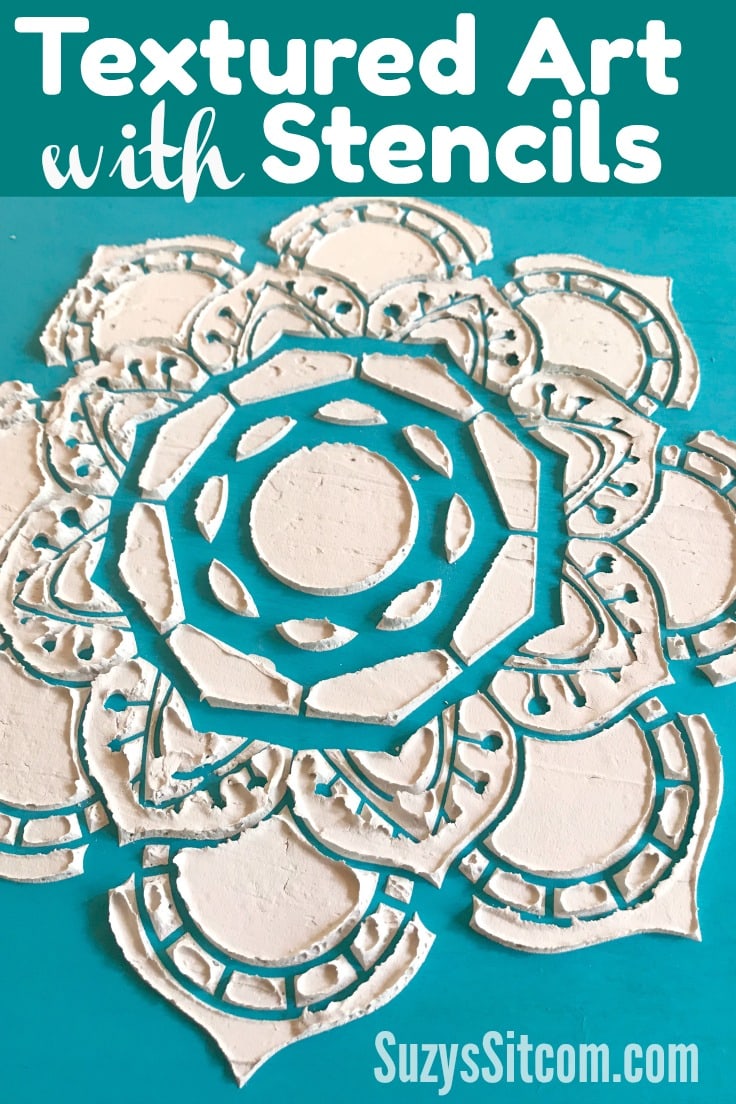
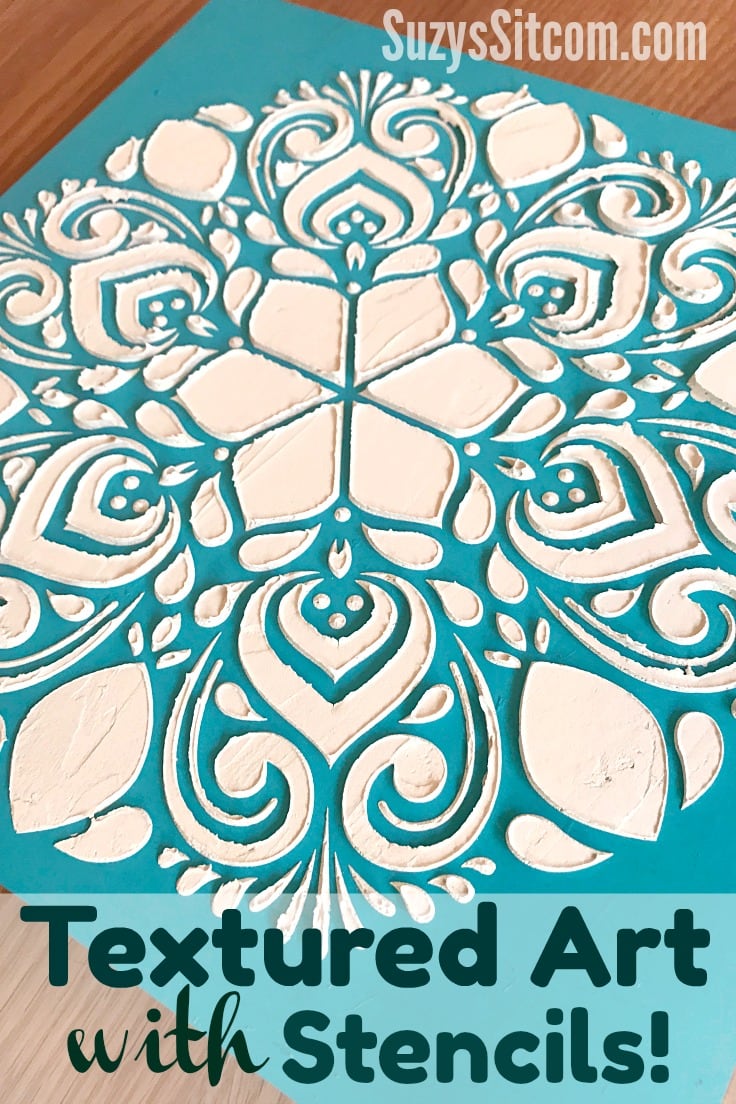
I decided to revisit this technique and create something totally different. In my stash are some 12″ mandala stencils that I purchased last year and did a project here on Kenarry.com for Decorative Painted Stepping Stones. I decided to reuse those stencils to create some beautiful textured wall art.
Create Textured wall art with stencils
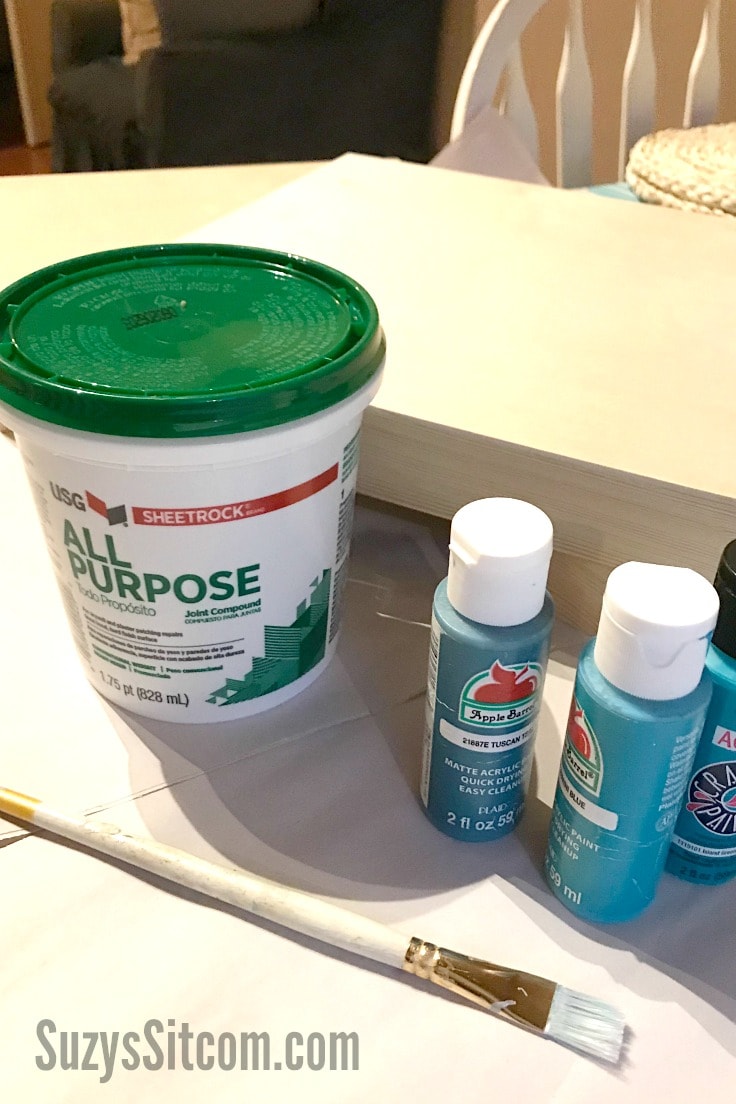
The supplies for this project are simple. Most home supply stores carry the joint compound. You would want to purchase the ready-to-use. No mixing is necessary and it makes the project that much simpler to complete.
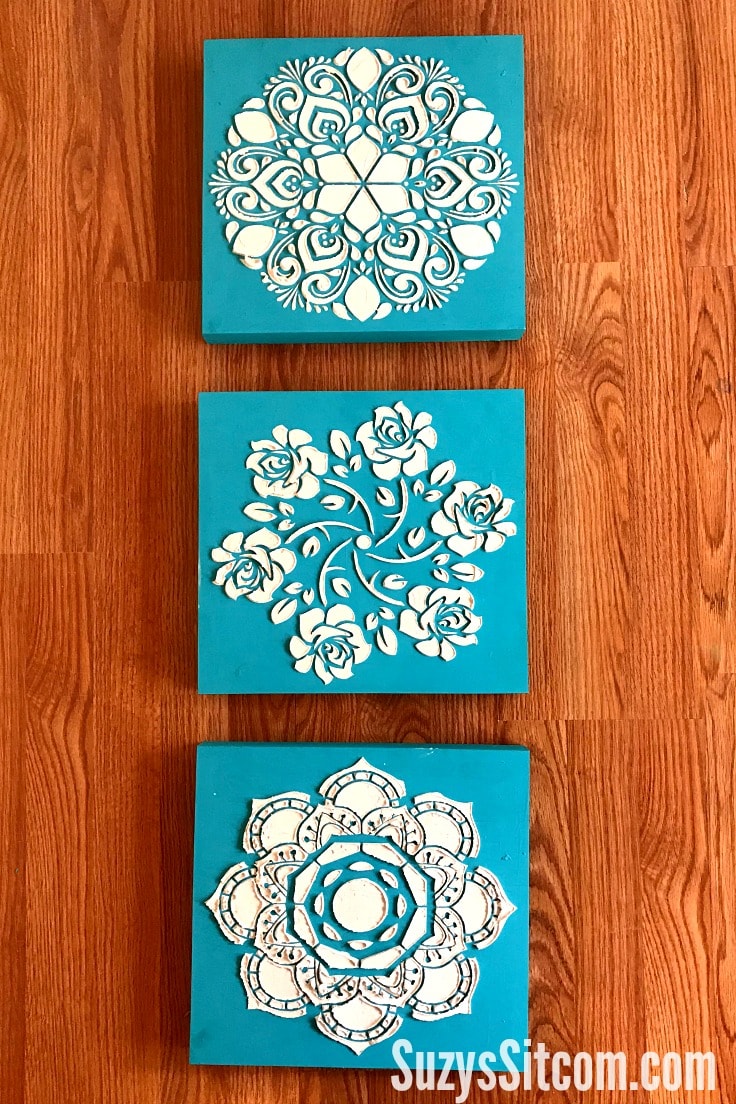
I also used 12″ wooden canvases. Wood is not necessary for this project to be successful, in fact, you can add texture with the joint compound to most anything.
What you need:
How to make textured wall art:

1. paint the canvases
Choose your background color. This will be the color that contrasts the design of your stencil. I chose teal. Most dark colors would work well. Black would be a wonderful contrast to the white of the joint compound!
Paint the front and all four sides of the canvases and allow them to dry before going to the next step.
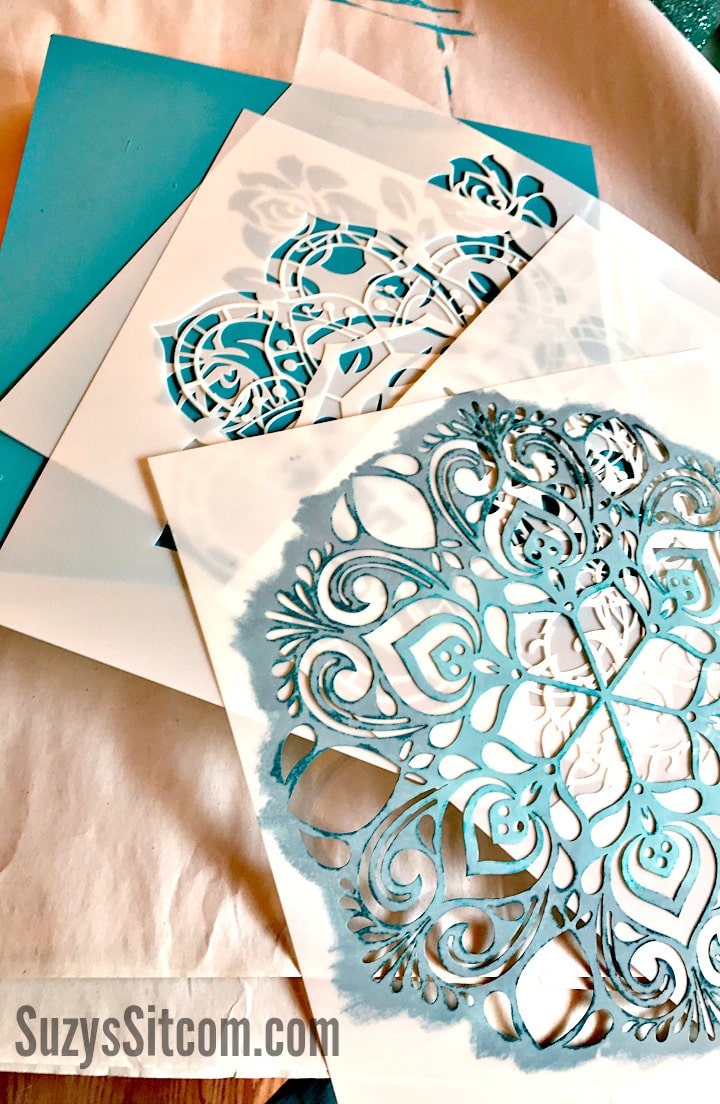
2. Choose the stencils
For this project, I used 12″ mandala stencils. You can see that I have used these stencils a few times already. Apparently, I’m a bit partial to the color teal…
Any stencil will work for this process as long as they are plastic stencils.
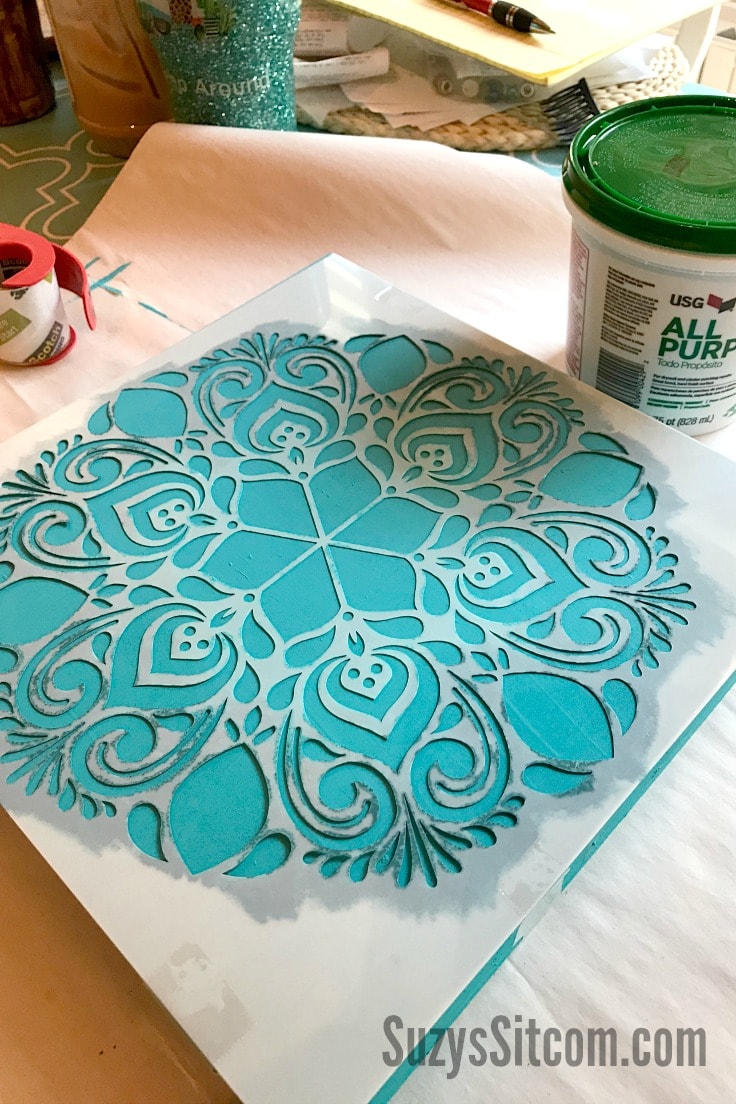
Lay the chosen stencil on top of the canvas. Use a couple pieces of tape to attach to stencil and prevent it from moving around during the next step.

3. apply joint compound to the canvas
The ready-mixed joint compound is amazing to work with. It has the consistency of peanut butter and spreads just like it.
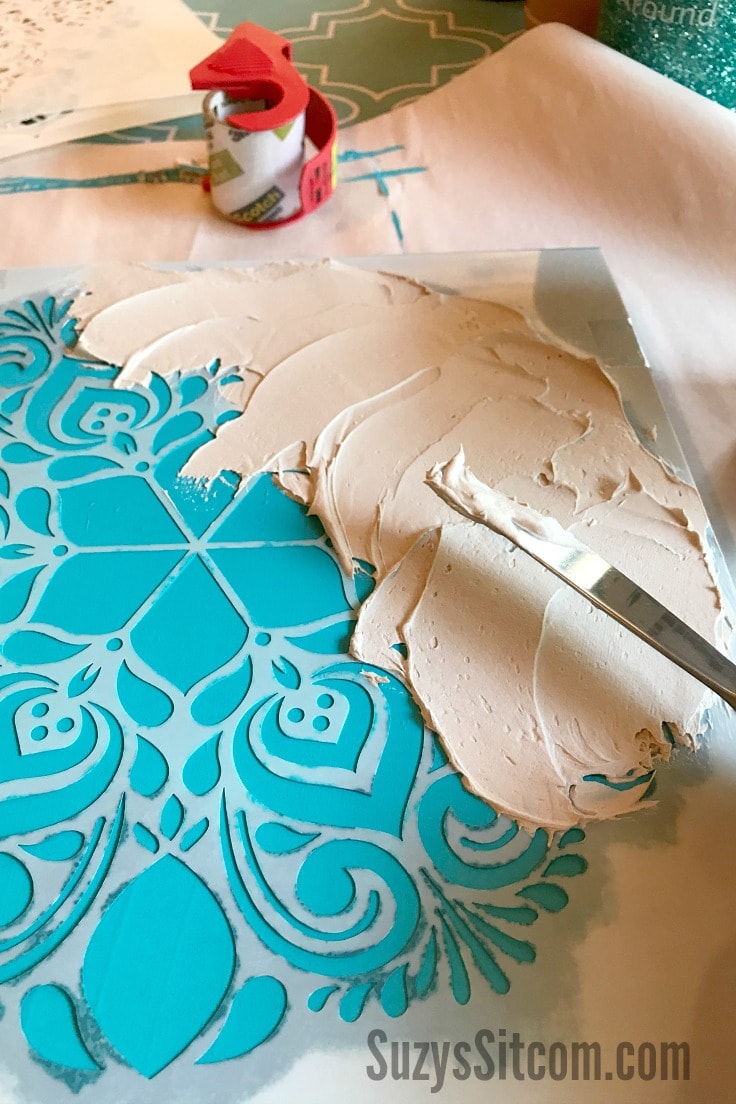
Lightly spread the joint compound using a knife. Cover the entire piece, being sure to not move the stencil.
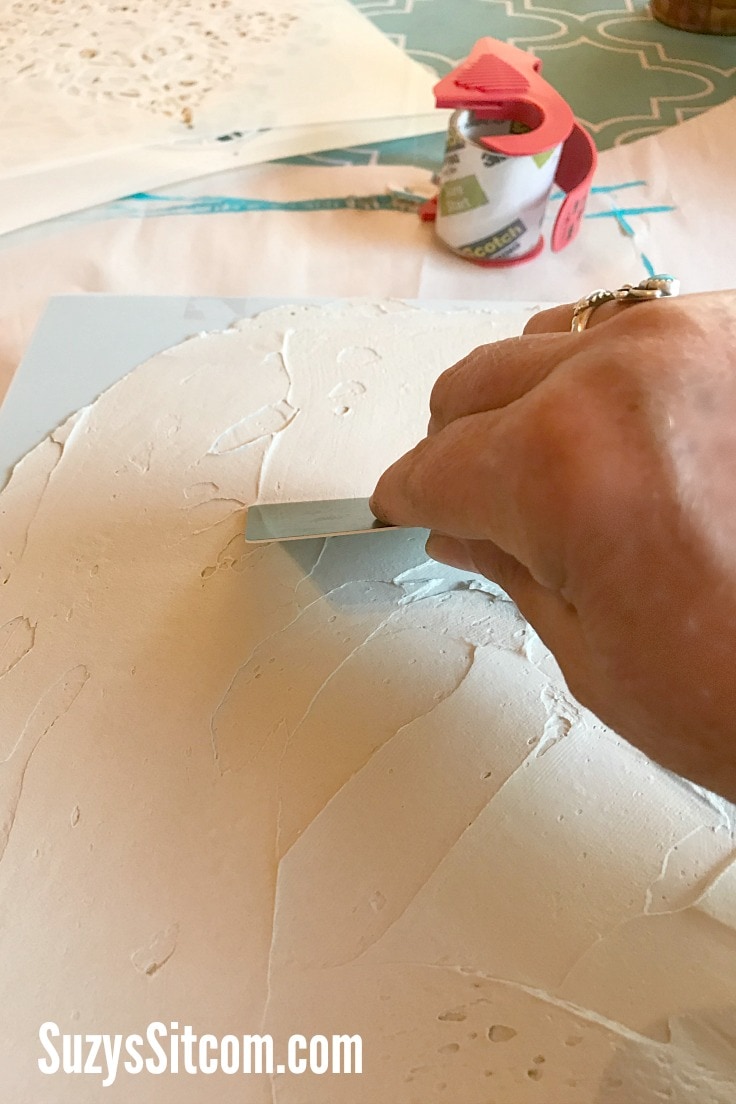
Use a flat edge to lightly smooth the top of the joint compound. Nothing fancy here, in fact, I used an old gift card for this!
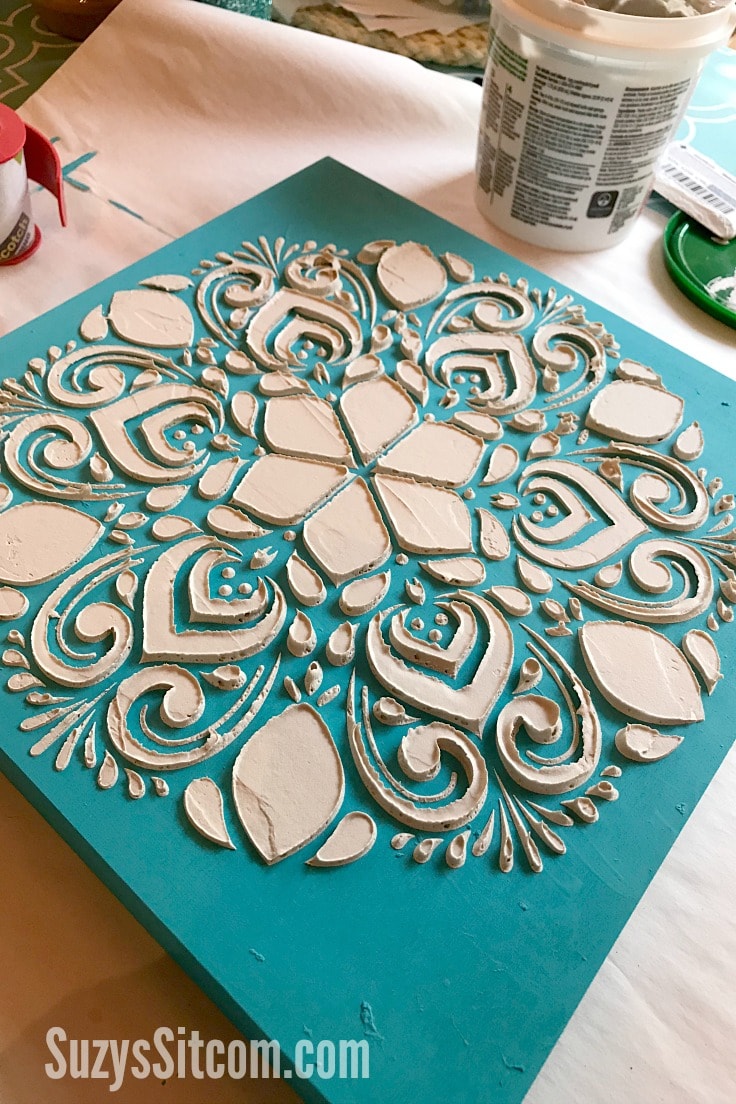
Carefully remove the tape holding the stencil down and gently lift the stencil off of the canvas. So pretty!
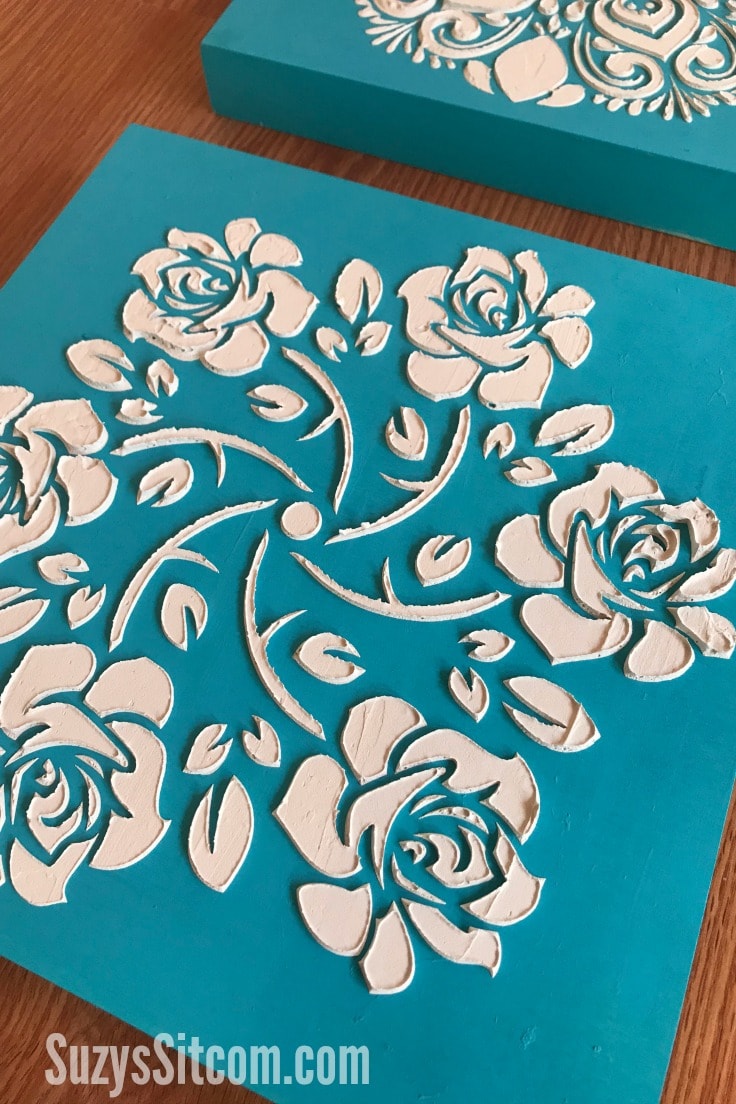
Allow the joint compound to dry for about 2 hours. The finished project will make a beautiful addition to your decor!
This technique has so many possibilities. Consider it for adding texture and design to your walls or furniture. With the variety of stencils available, there is so much that you can create!
Love the ideas you see here on Ideas for the Home by Kenarry®? Subscribe today to get our FREE DIY & Craft Planning Calendar, plus our weekly Ideas in Your Inbox newsletter filled with creative tips and exclusive offers!
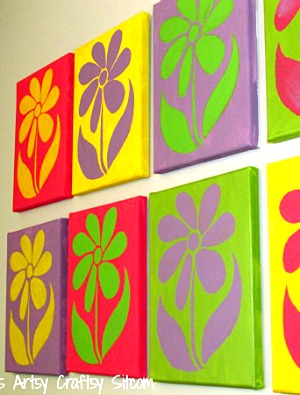
Love working with stencils?
Here are some more stencil projects that you might be interested in, including the original project idea for Faux Textured Chair Rail from Suzy’s Sitcom!
Create a Faux Textured Chair Rail with Joint Compound
How to make your own Stencils!
Create Pretty Stenciled Bird Houses!
You may also enjoy these 3 stencil ideas on Ideas for the Home by Kenarry® –
Can you add color to the sheet rock putty?
Hi Sara,
Great question! You can add colored paint to joint compound to give it color. This post on DoItYourself.com will give you some great tips. One thing to keep in mind is that the joint compound will automatically lighten the color of your paint so you choose a paint color that is a little darker than your desired color. Also, be careful not to thin the joint compound too much or you may cause it to run under your stencil.
Hope that helps! Suzy and I would love to hear how your project turns out – and to see photos.
Happy crafting!
Best wishes,
Carrie
Ideas for the Home by Kenarry