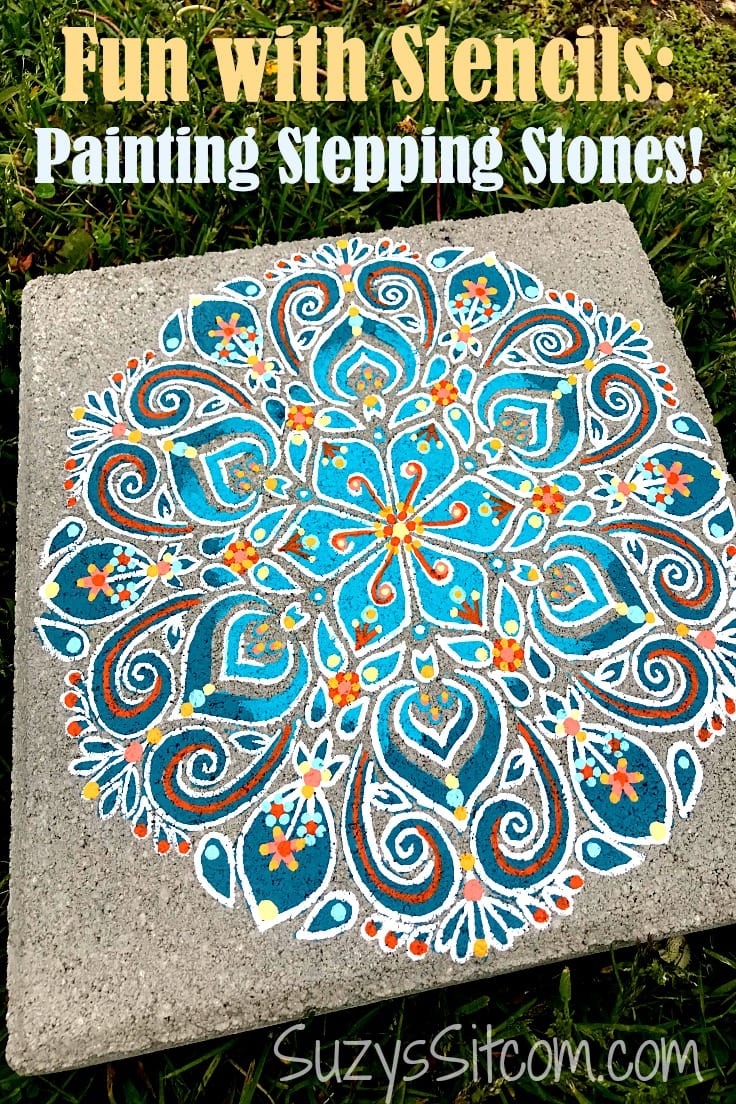
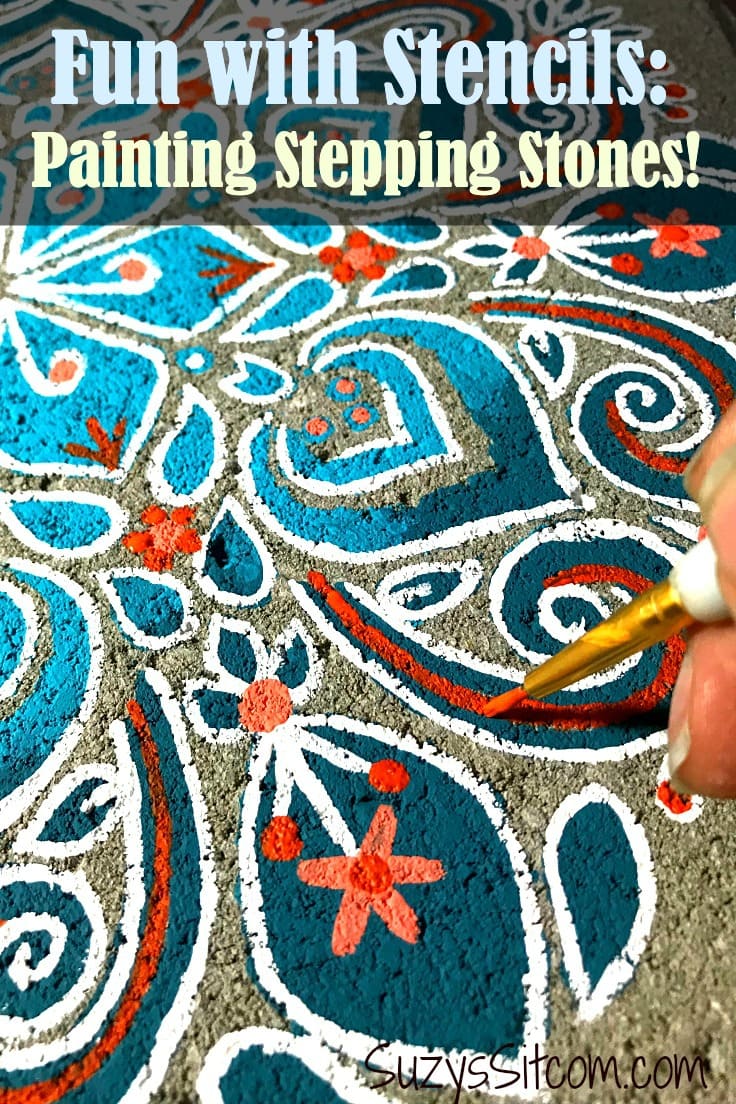
How to Paint Beautiful Stepping Stones with Stencils
THIS POST MAY CONTAIN AFFILIATE LINKS. PLEASE SEE OUR FULL DISCLOSURE POLICY FOR DETAILS.
Creating with stencils can be very rewarding. Painting elaborate designs using stencils as a base design is a simple method. This easy tutorial shows you how to paint beautiful stepping stones with stencils!
This is Suzy from Suzy’s Sitcom, and I’d love to show you a method to create decorative painted designs the simple way. I’m talking about stencils. Stencils not only make life easier when painting multiple pieces, but they can serve as a great base for a much more elaborate design! This tutorial features a fun idea for how to paint beautiful stepping stones with stencils!
When I sit down to paint, I find that I have a tendency to get pretty elaborate. I love swirls and colors and flowery designs. So when I ran across these pretty stencils, I could not resist! These stencils have so much potential. Create a stepping stone with just the stencil itself, or go crazy and add lots of your own touches to the design!
Whether you simply use a stencil and end it there, or add a bunch of your own designs, your end result will be something beautiful for your garden! So, let’s create!
How to paint beautiful Stepping stones with stencils!
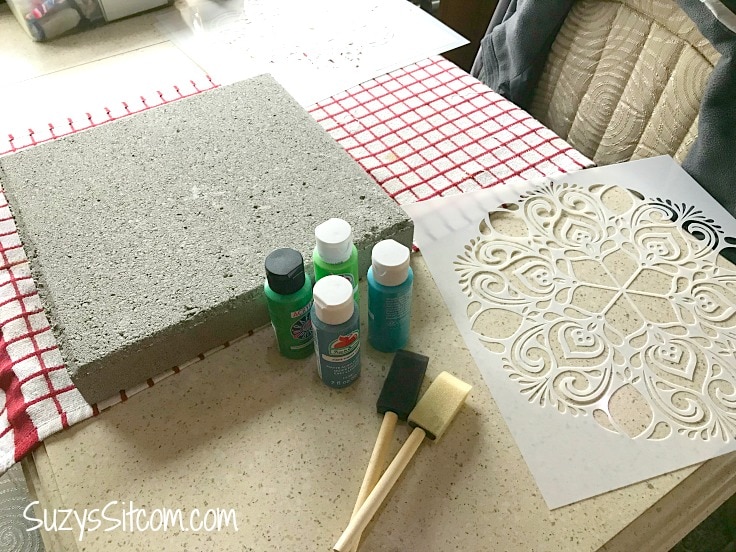
Before beginning this project, I did a search on the internet for pretty stencils. I already had my 12″ stepping stones and was looking for something amazing to use with them. I found a great set of four that made me smile. The main problem I had was choosing which one to paint first!

What you need:
Want more ideas like this? Subscribe today to get our weekly Ideas in Your Inbox newsletter plus other exclusive gifts and offers — all for FREE!
- 12″ x 12″ concrete stepping stone
- 12″ x 12″ stencil
- Acrylic paints in your choice of colors
- Pouncing sponges
- Artist brushes
- Clear acrylic sealant
Instructions:
1. assemble your stenciling supplies
Choose the stencil that you would like to work with and assemble your supplies. Begin by selecting acrylic paint colors for your project. For an ombre (gradient) look, I used a lighter and a darker teal blue.
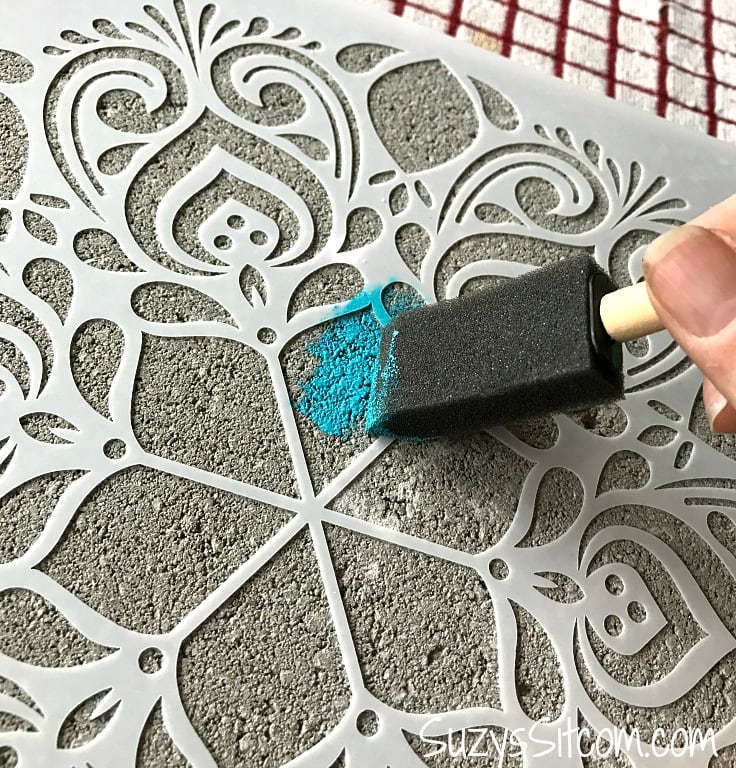
2. Using the stencil on your project
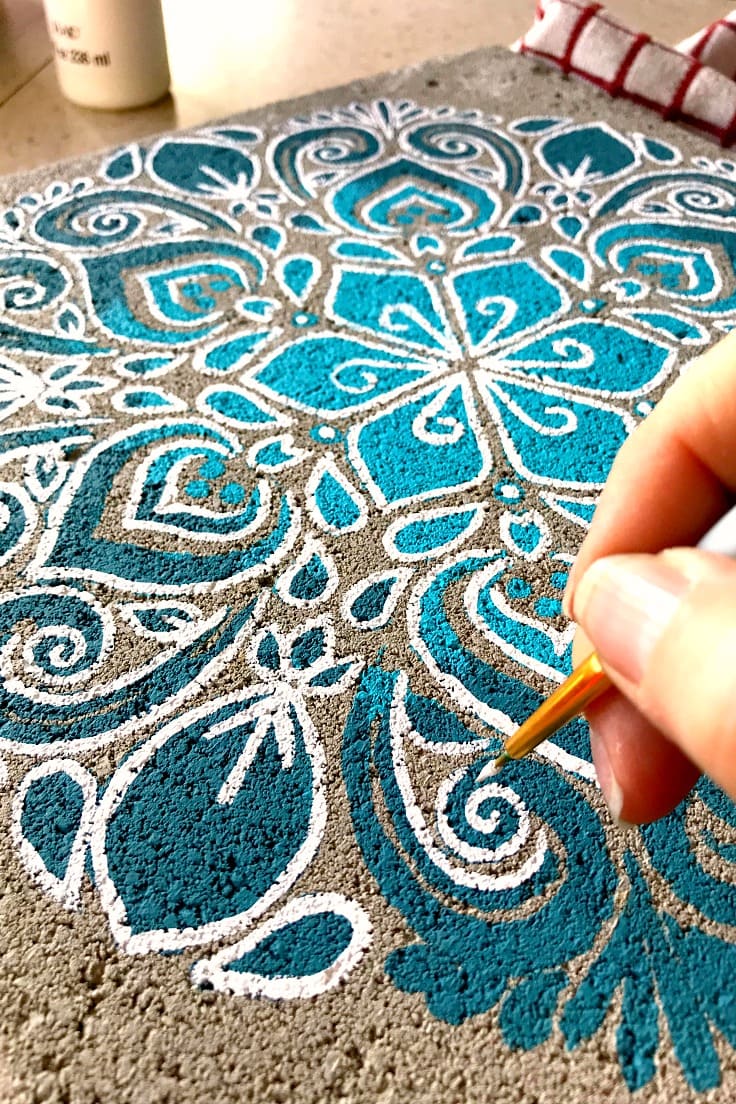
Center the stencil on the stepping stone. Hold the stencil in place with one hand. Dab the stenciling sponge into the paint and begin dabbing the paint onto the stenciled area. Gently dab the paint straight down onto the surface. DO NOT rub it back and forth as if you were using a paintbrush. This will cause the paint to squeeze under the stencil and make a mess. Just gently up and down.
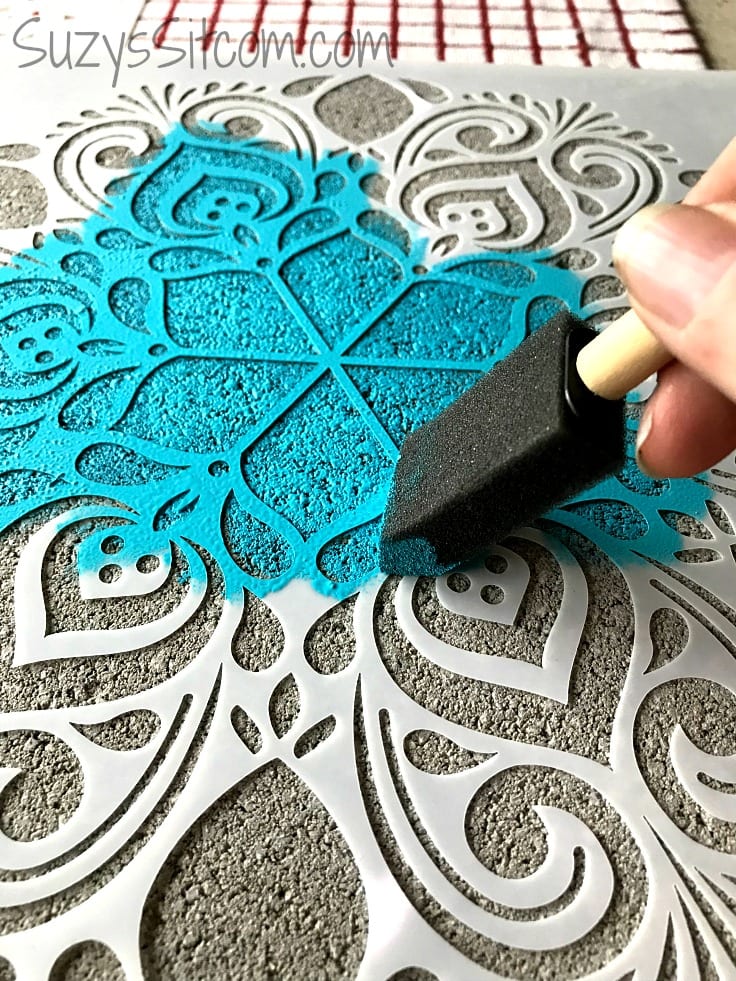
If you are going for the ombre look as in my design, start with the lighter color on the inside of the stencil and then add the darker color to the outside of the edges of the stencil. Continue until the whole stenciled area is covered.

3. removing the stencil
You can see in the photo above where I changed color to achieve the ombre look. Once the entire piece is covered with paint, it is time to remove the stencil!

So pretty! You can certainly stop at this point and finish up with a coating of clear acrylic to protect your paint. Or… you can now start embellishing!
4. Adding embellishments to the stenciled design
On this project, I began by adding a bright white to the outside edges of the design with a small brush. This included adding in little details such as swirls and extra touches.
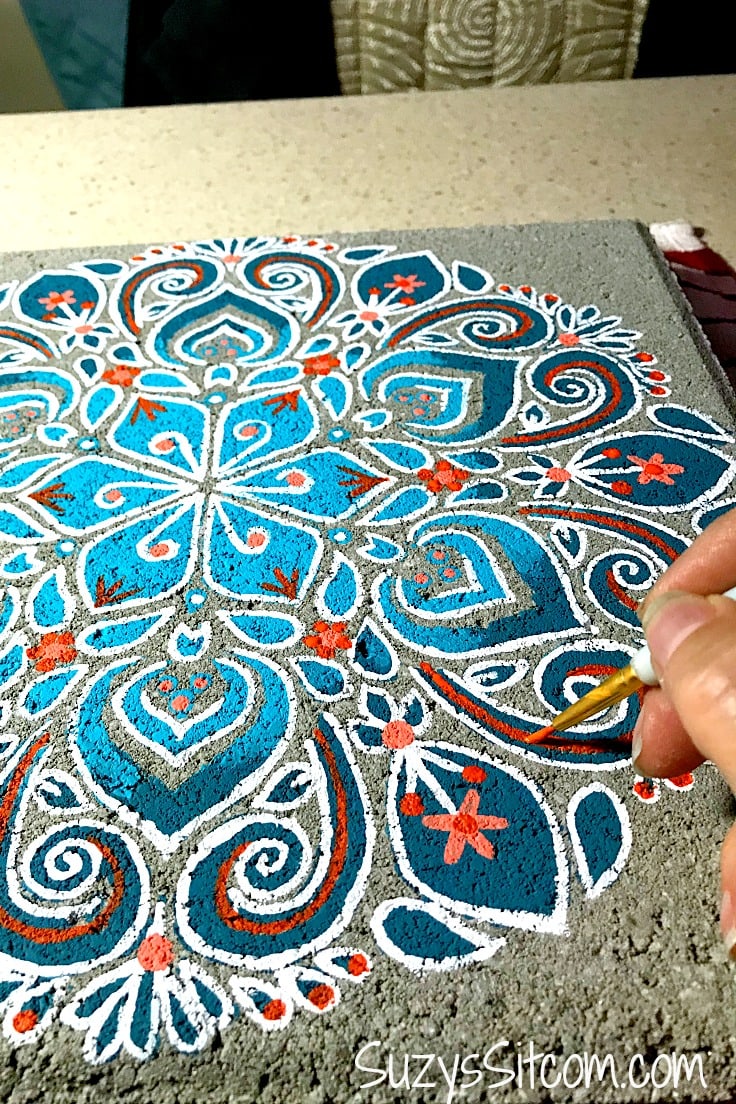
Add more and more embellishments such as dots in contrasting bright colors, flowers, and added swirls. There is absolutely no wrong way to do this! Do as little or as much as you would like. Make the design your own!

5. Finishing and protecting your design
Once the design is completed to your satisfaction, allow the paint to thoroughly dry. Add several coats of clear acrylic sealant to protect the paint from the weather. The finished piece makes a bright addition to your garden!
Using stencils as a background, your finished design looks amazingly intricate and beautiful! And you did it the simple way!
Love the ideas you see here on Ideas for the Home by Kenarry®? Subscribe today to get our FREE DIY & Craft Planning Calendar, plus our weekly Ideas in Your Inbox newsletter filled with creative tips and exclusive offers!
Do you love painting with stencils?
If you enjoyed this stenciled decorative painting project, then you might enjoy some of these other fun stencil tutorials from Suzy’s Sitcom!
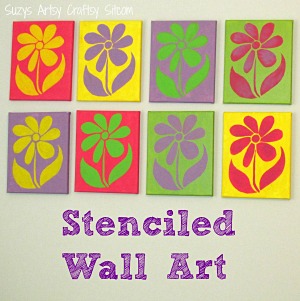
Stenciled Wall Art – With FREE Flower Pattern!
Create Colorful Stenciled Birdhouses!

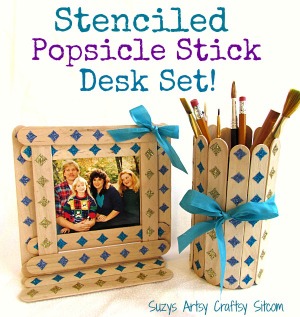
Stenciled Popsicle Stick Desk Set!
You may also enjoy these stencil ideas on Ideas for the Home by Kenarry® –
Beautiful work and such a fun idea to pretty up my drab garden! All I need is a concrete block and a dazzling stencil…thanks so much!
Thanks Kathy! We think so too. We just love the bright colors that Suzy used for this project.
Best wishes,
Carrie
The link for the stencils is incorrect. This link simply takes me to amazon and other products but not stencils. I like yours very much and would like to know exactly where you got them from.
Thank you
Hi Lis,
I just double checked and the link for the 12″ x 12″ stencil on the “What You Need” List is working correctly for me. Are you clicking on a different link in the post. Here is the specific stencil set on Amazon that Suzy used for this project – https://www.amazon.com/gp/product/B07QNY8WJT/ref=as_li_ss_tl?ie=UTF8&linkCode=sl1&tag=kenacomideafo-20&linkId=23d68c0b78ecb63a7c7263abd9c80b77&language=en_US
Please let us know if that link works for you!
Best wishes,
Carrie
Hi! Dang I wish I was half that artistic! I have a question about stencil paint. I have trouble with acrylic paint being too runny and running under the stencil. So I’d CVlove to use stencil paint but surely can’t afford that stuff! So I got online and looked around and found a way to make chalk paint! The formula said 3 parts paint. I mixed it up and let it set up overnight. It was almost TOO thick so I just added a little more paint till it was the consistency I wanted and it is working very well! Just thought I would share!
That’s awesome, Melanie! Thanks for taking the time to hop on here and share with the rest of us. The other trick with stencils is to just dab the paint on to the stencil – don’t swipe it on with a brush. It also helps to just go easy on it with a little at a time. If you try to use too much at one time, you’ll have trouble with the paint running under the stencil.
Good luck with your project! Suzy and I would love to see how it turned out!
Best wishes,
Carrie from Ideas for the Home by Kenarry
I soooo love this steppping stone. I created a secret garden 2 years ago and I’ve been wanting to change my pathway. This!! is what I’m going to do. Thank you so much for posting.
Leslie Landrum
Hi Leslie!
This is music to our ears! We are ecstatic that you love these stepping stones. Be sure to let us know when you are all done with your project – we’d love to see how yours turned out!
– Lisa, Ideas for the Home by Kenarry Customer Care
I would LOVE to see pics of you garden!!!
Is it possible to purchase the mandala stencil that is showcased on this site?
Hi Deborah!
Yes, absolutely! When you scroll through the post, you’ll find a list of supplies that are linked to the places where we purchased them. You can find the stencil here: https://amzn.to/3sBwNCq
Happy crafting!
– Lisa, Ideas for the Home by Kenarry Customer Care