Easy Painting Technique: How To Paint A Crackle Finish
THIS POST MAY CONTAIN AFFILIATE LINKS. PLEASE SEE OUR FULL DISCLOSURE POLICY FOR DETAILS.
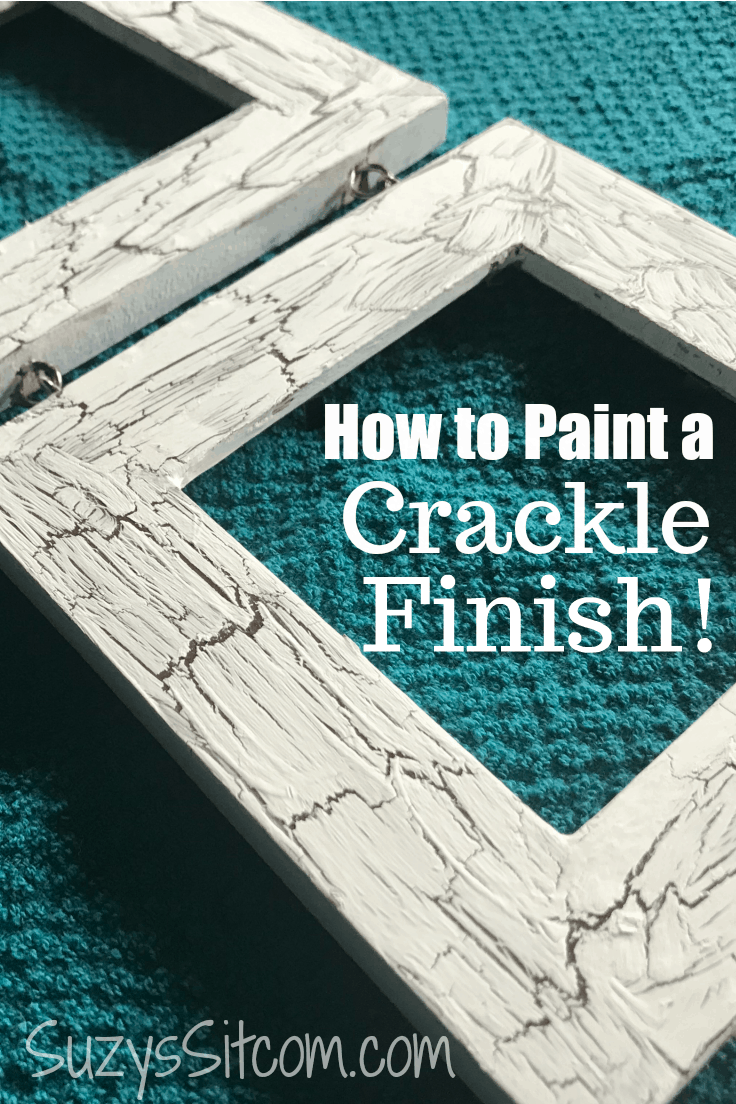
Create a beautiful rustic look with simple wooden frames and an easy painting technique. Learn how to paint a crackle finish in 3 easy steps!
Using a few dollar store wooden frames and my easy technique for creating a crackle finish with supplies that you most likely already have in your home, this project comes to life quickly! Painting a crackle finish adds a rustic touch and fun texture to your project. Turn a boring frame into something exciting! Learn how to paint a crackle finish!
This is Suzy from SuzysSitcom! Decorating can be a hassle. Especially when you aren’t sure of color schemes and don’t have a ton of money to spend. I personally spend a bunch of time decorating with things like toilet paper tubes and disposable aluminum pans. I’m a cheapskate at heart.
Now that we live full time in our RV as we travel, I have even less opportunity and space to express my decorating whims. Every single thing that I put in my home now needs to have a purpose.

After a lengthy FaceTime phone chat between my granddaughter, Esme and my dog, Ralph, it occurred to me that I simply do not have enough photos of Esme in my motorhome. I needed to locate an empty wall and fill it with photos. We miss her so much!
Time to create some new decor!
how to paint a crackle finish
Learn how to paint a crackle finish! I’m a huge fan of this fun technique. You will use supplies that you most likely already have, and no two crackle projects are exactly alike. Half the fun is waiting for it to dry to see the beautiful results!
What you need:
Want more ideas like this? Subscribe today to get our weekly Ideas in Your Inbox newsletter plus other exclusive gifts and offers — all for FREE!
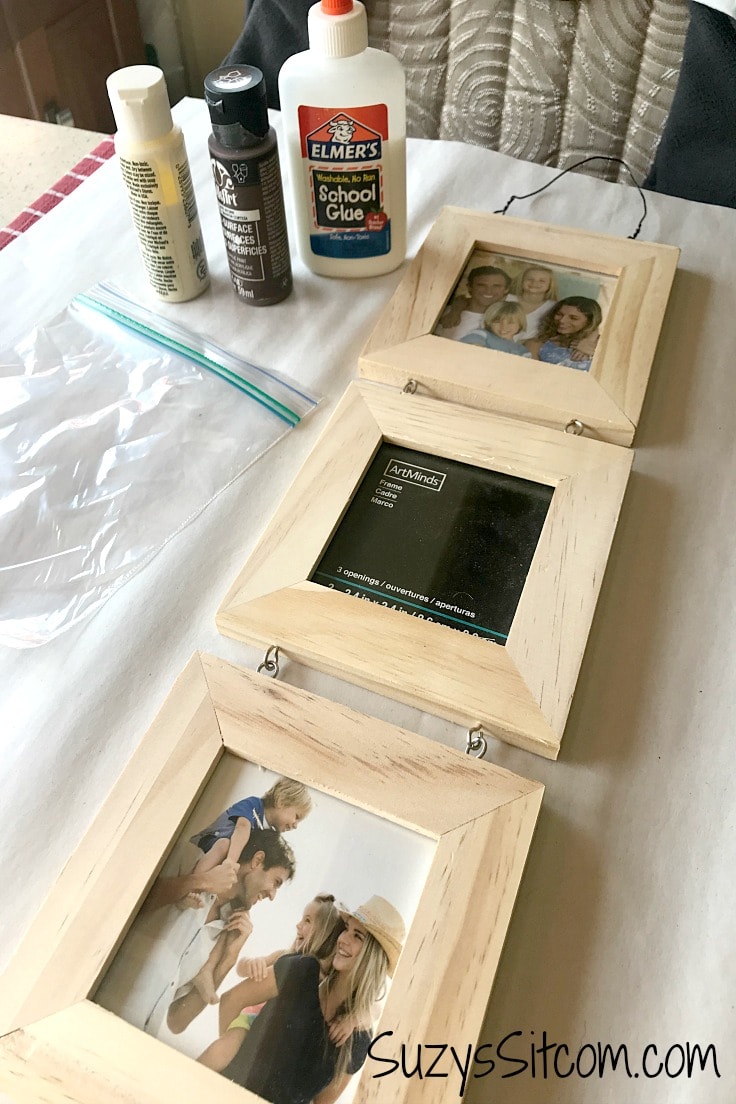
supplies Needed:
Instructions:
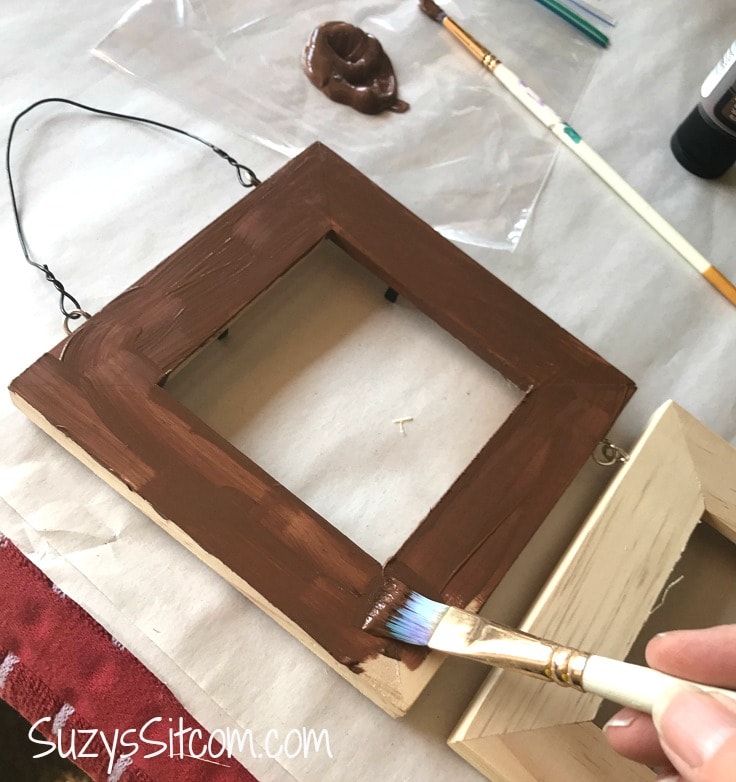
1. Crackle technique: paint the base coat
Choose a dark color of acrylic paint for the base coat. For this project, I used a dark brown. Any dark color will work. This coating of paint will be mostly covered by your lighter top coat but will peek through after the crackling has occurred.
Paint all edges of your frames with the base coat of paint. Allow this coat to fully dry before going to the next step.
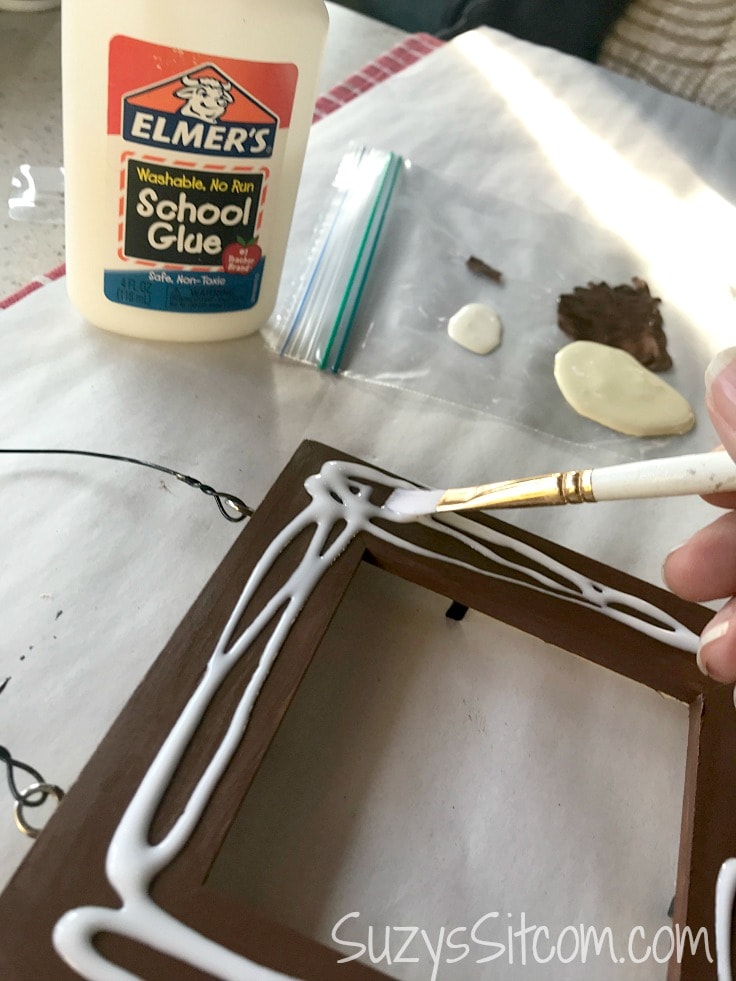
2. Crackle technique: add glue
Once the base coat is thoroughly dry, add a thick coat of white glue. Paint it over top of all of the base coat. Immediately go to step 3 before the glue dries.
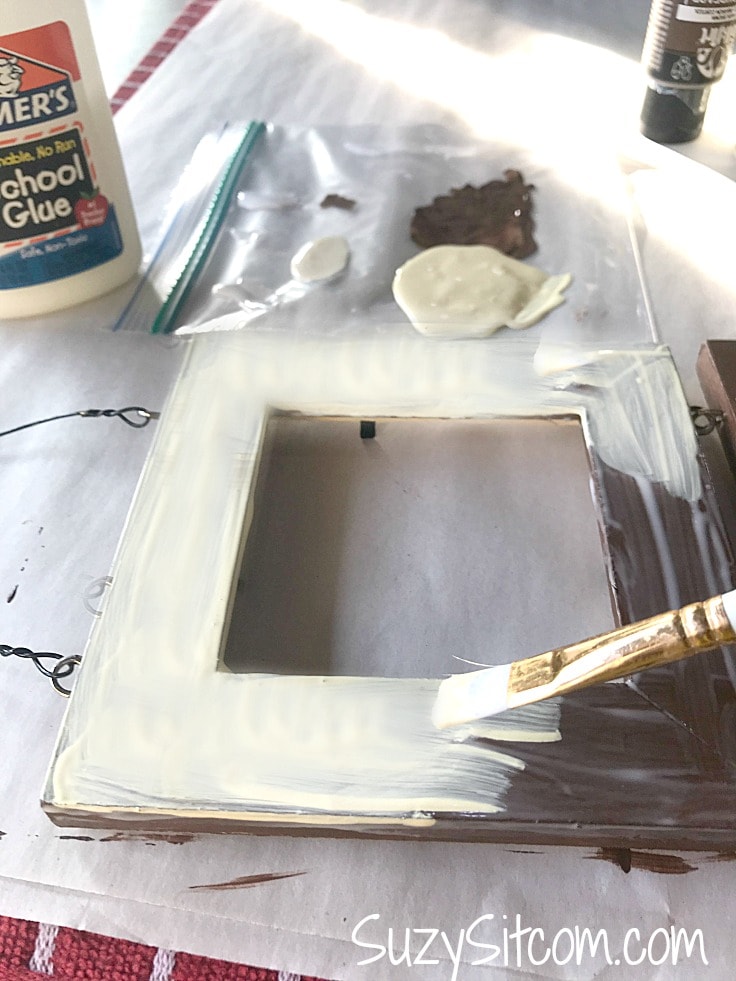
3. Crackle technique: paint the top coat of paint
While the glue is still wet, add a thick coating of your chosen top coat of acrylic paint. In my example, I am using white acrylic paint. (It is important to do this third step while the glue is still wet).
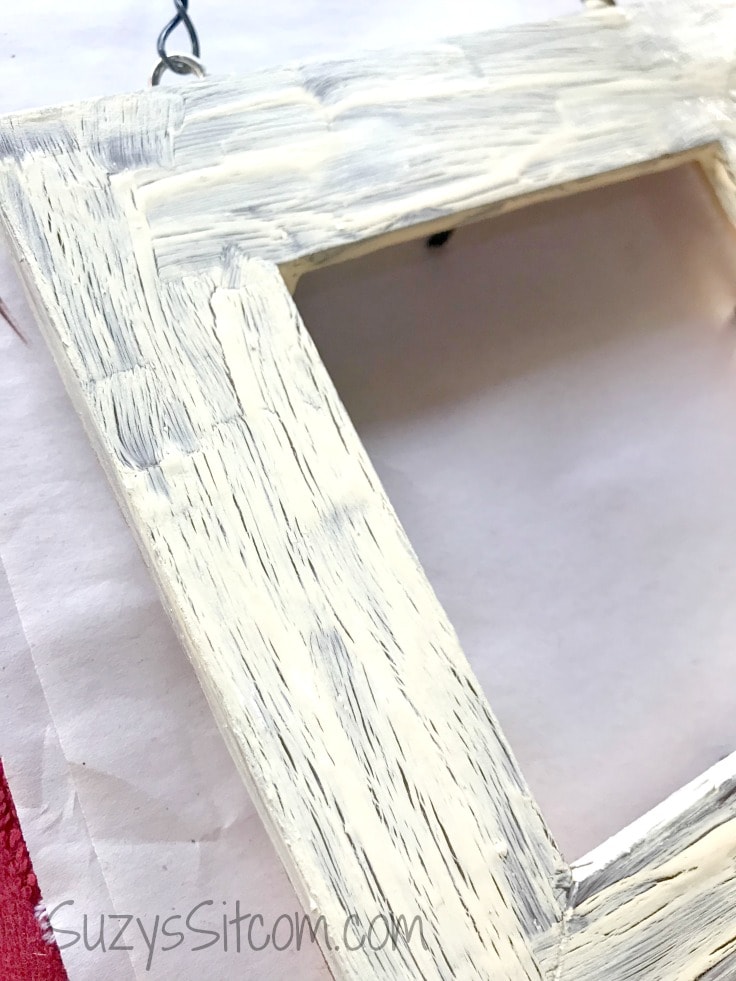
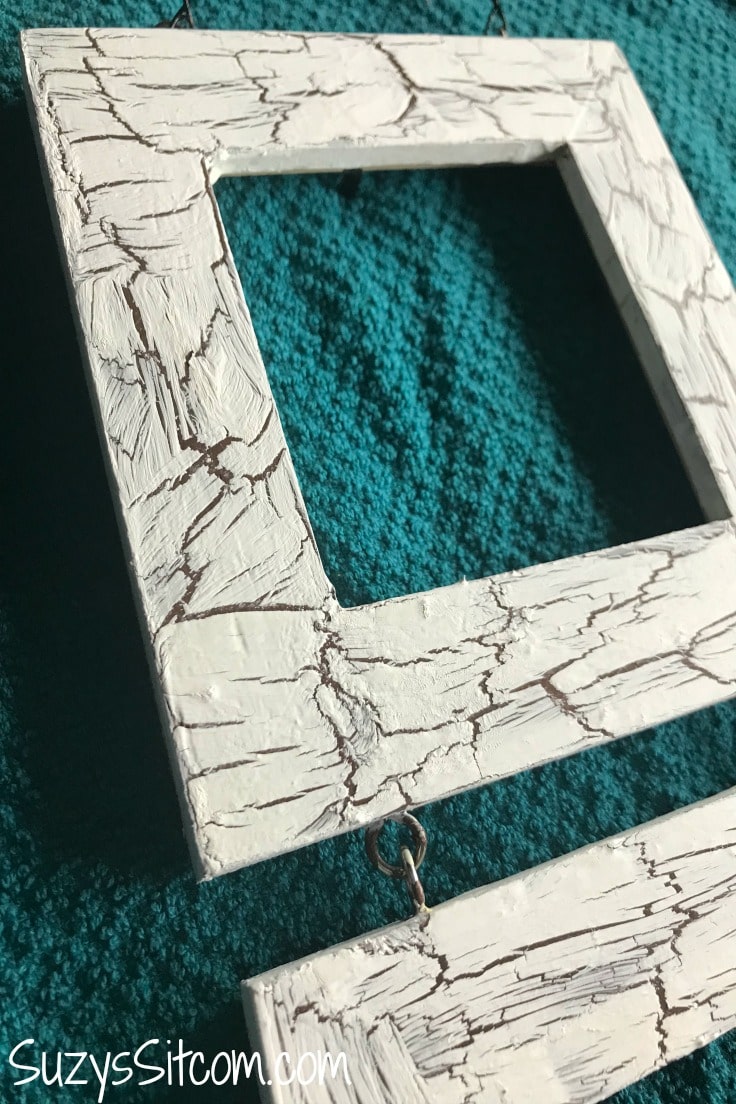
As the glue and paint begin to dry, you can watch the colors separate and crack. No two projects will be alike. Half the fun is watching it dry!
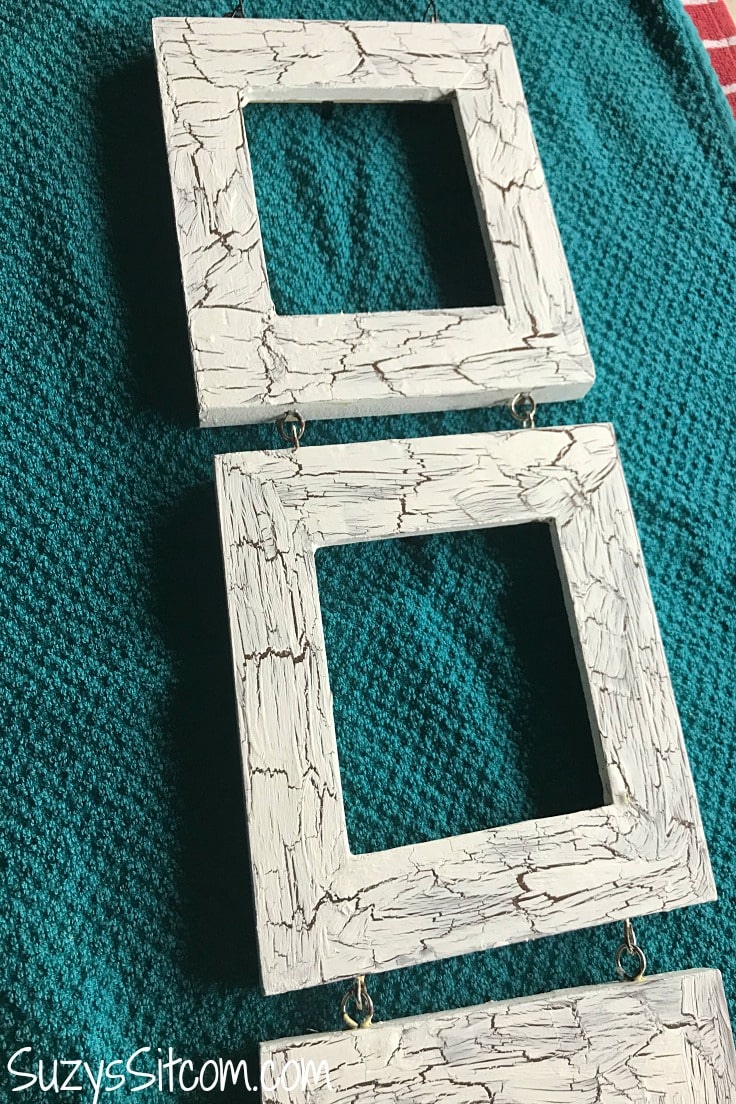
So much fun to see how it turns out! The crackle technique creates a beautiful piece with lots of personality!
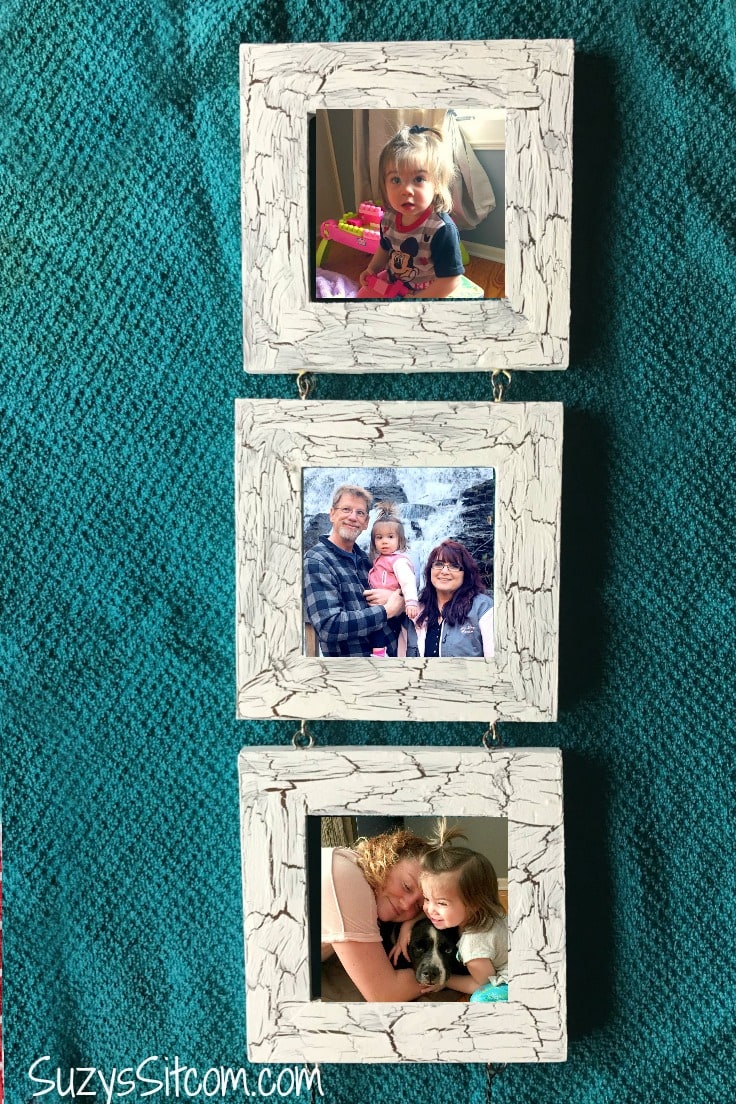
Almost as much personality as my cute little granddaughter. Now the hard part is to choose which photos to use!
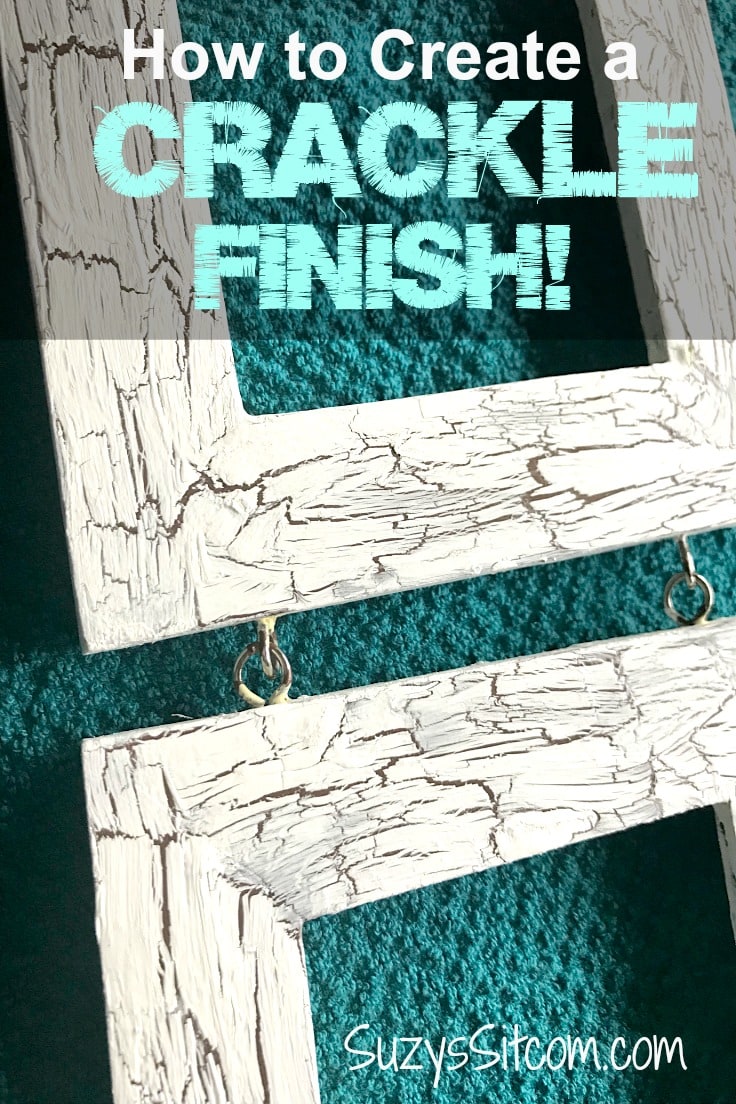
Create a unique decorative frame with this fun painting technique!
Love unique painting techniques? This Easy Faux Rust Paint Technique looks amazing for another rustic finish.
Love the ideas you see here on Ideas for the Home by Kenarry®? Subscribe today to get our FREE DIY & Craft Planning Calendar, plus our weekly Ideas in Your Inbox newsletter filled with creative tips and exclusive offers!
Do You love to paint?
I do a whole lot of painting on SuzysSitcom.com. Be sure to check out some of these fun projects! Many include free patterns!
How to Paint Paisley Stones for your Garden!

Fun Jar ‘O Monsters Painted Spoons!
DIY Hand Painted Flapper Hat Stands
You may also enjoy these 3 craft ideas on Ideas for the Home by Kenarry® –
Carrie, Can I use Modge Podge for this technique?
Hi Beverly! According to the Mod Podge website, it can be used for this technique in place of white glue. Hope that helps. Suzy
Great idea. Just happen to have all the supplies needed and some time on my hands. Thanks.
Perfect! I love when that happens, don’t you? Happy crafting, Marlene! Suzy and I would love to see a photo of your project when you’re done.
Best wishes,
Carrie
Ideas for the Home by Kenarry
Can I do a light color on the bottom and dark color on the top and will this technique still work?
Hi Stacey,
This technique works best when the dark color is on the bottom, but you can definitely try it with a light color on the bottom and the dark color on top. I would recommend testing it out on a sample piece of wood first before you so it on an entire project. We’d love to hear how it turns out for you.
Best wishes,
Carrie
Ideas for the Home by Kenarry
Hi
Can i do this on a large board and once dried paint a saying on top? As well I was wondering if chalk paint would work and when all done wax on top of it?
Thanks
Hi Debbie, you could easily paint a saying on top. As for chalk paint, I cannot give you an answer as I have never used it for this type of project. I would try a practice piece to see if you get the desired effect before working on the final piece. Hope that helps!