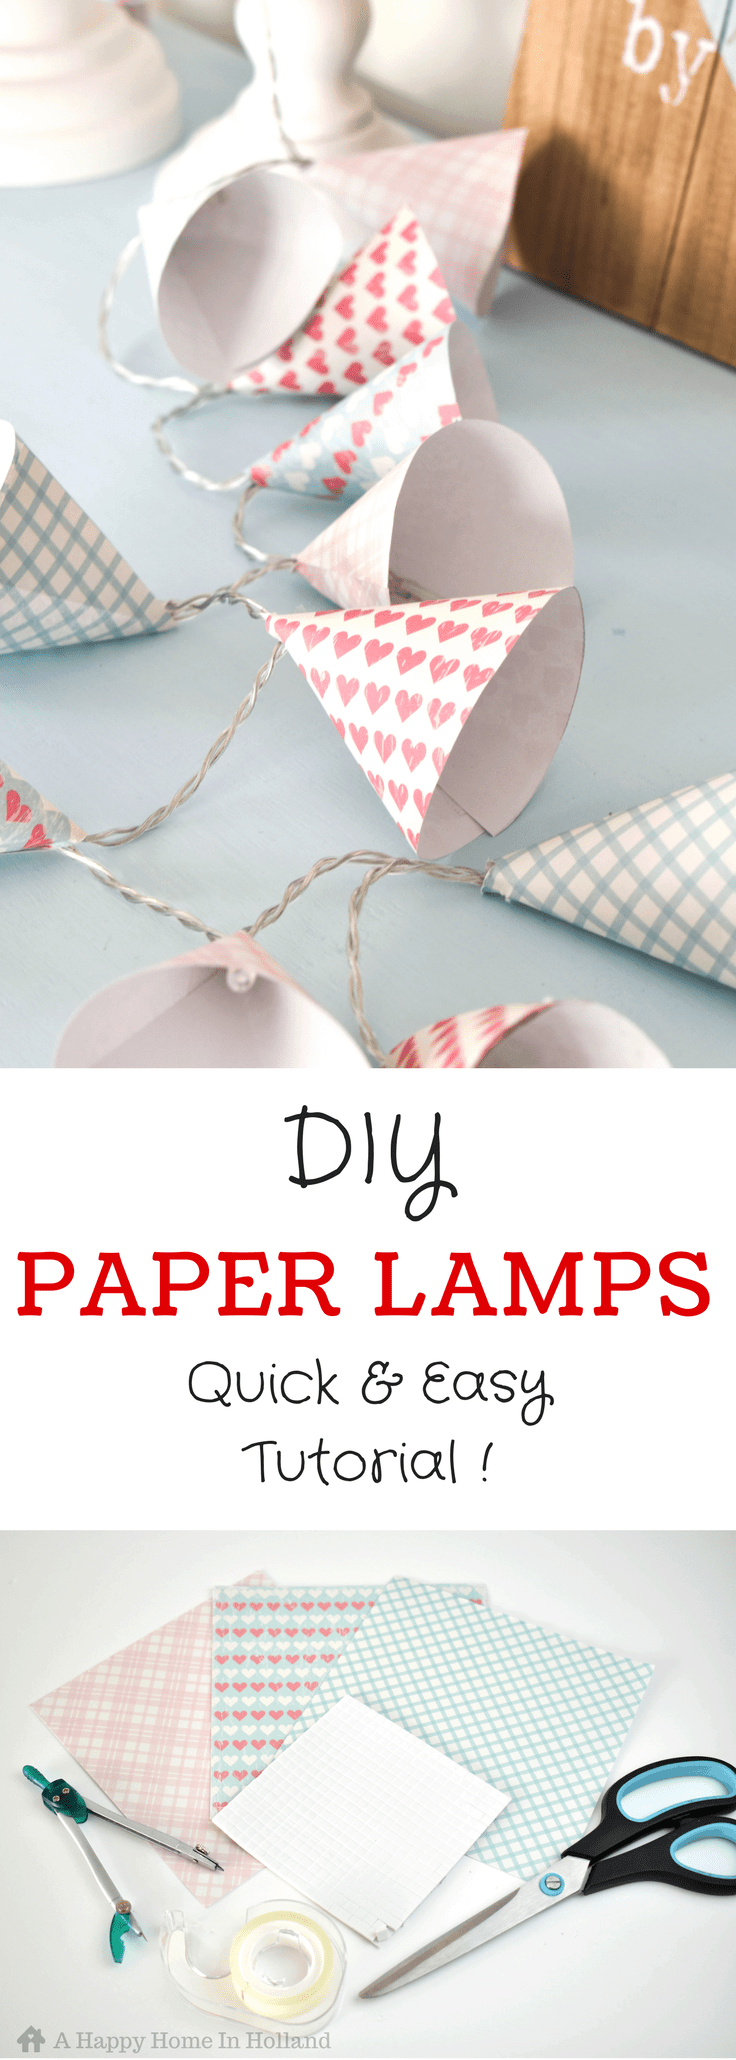
Mini DIY Paper Lampshade Idea: LED Lights Upcycle
THIS POST MAY CONTAIN AFFILIATE LINKS. PLEASE SEE OUR FULL DISCLOSURE POLICY FOR DETAILS.
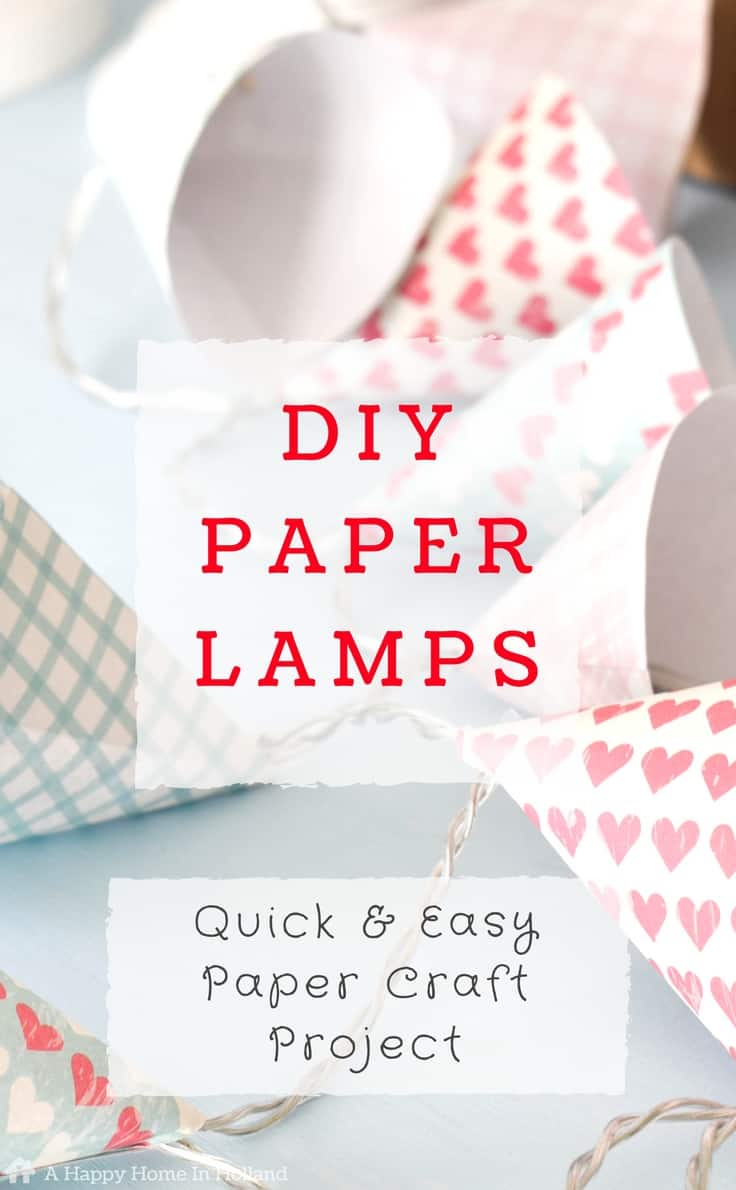
Recycle old battery LED lights and make DIY mini paper lampshade covers to create trendy home decor accents for your kid’s bedrooms!
These cute little DIY paper lampshade covers are a great way to recycle and jazz up any old battery operated LED lights that you may have lying around the home.
This quick and easy paper craft project is perfect to brighten up your home and they really look fab in kids bedrooms!
Step Up Your LED Lights With These Mini Paper Shades
Hello Kenarry readers, it’s Sam here from A Happy Home In Holland, back again with another simple DIY craft idea for your home.
I actually came up with this idea when my youngest, who has just started getting homework from school, wanted to create a desk area in her room to work (I love that she is so enthusiastic about it all).
We moved a few things around and I added some plain led lights to brighten it up a bit. I then thought, hang on a minute, I can make this much cuter!
And so I took them up to my craft room and this is what I came up with.
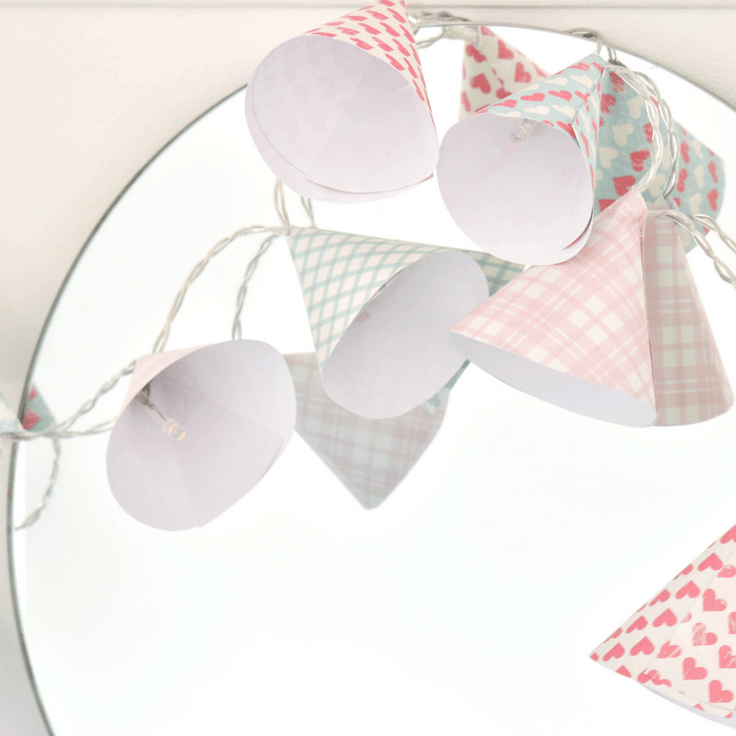
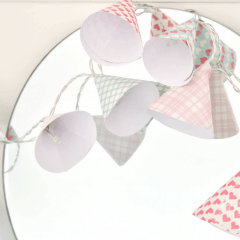
Mini paper lampshade covers!
I managed to score these little books of patterned paper at my local thrift store.
And if you are anything like me you will probably already have a lot of these sets of battery operated LED lights in your Christmas decor box.
If your scrapbook paper stash is full of fall colors, you’ll adore this pumpkin garland paper craft too!

Disclosure: This blog post contains affiliate links for products or services we think you’ll like. This means if you make a purchase from one of these links, Ideas for the Home by Kenarry® will make a small commission at no additional cost to you so we can keep the great ideas for the home coming your way. All opinions expressed are derived from personal experience.
DIY Mini Paper Lamp Shades Tutorial
They always say that the simplest of ideas are the best. And, well, you can’t get simpler than this quick little DIY papercraft project.
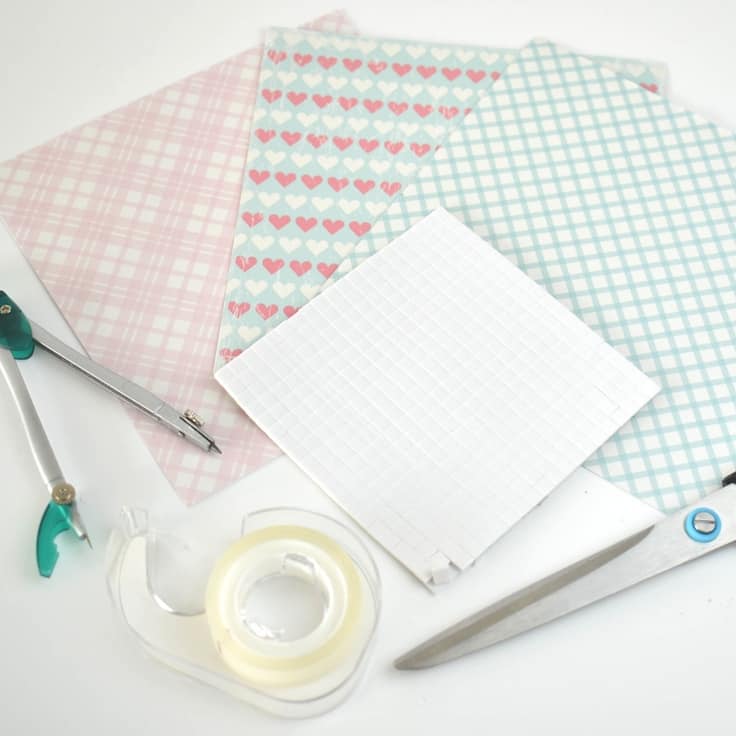
Supplies:
- Battery operated LED lights
- Patterned paper or printable scrapbook paper
- Sharp pair of scissors
- Compass and pencil
- Ruler
- Thin double sided sticky tape
- Small square double sided sticky pads
Craft Tips
The entire tutorial is in the printable card at the bottom of this post. Before we get to it, here are some tips that I hope will help you out.
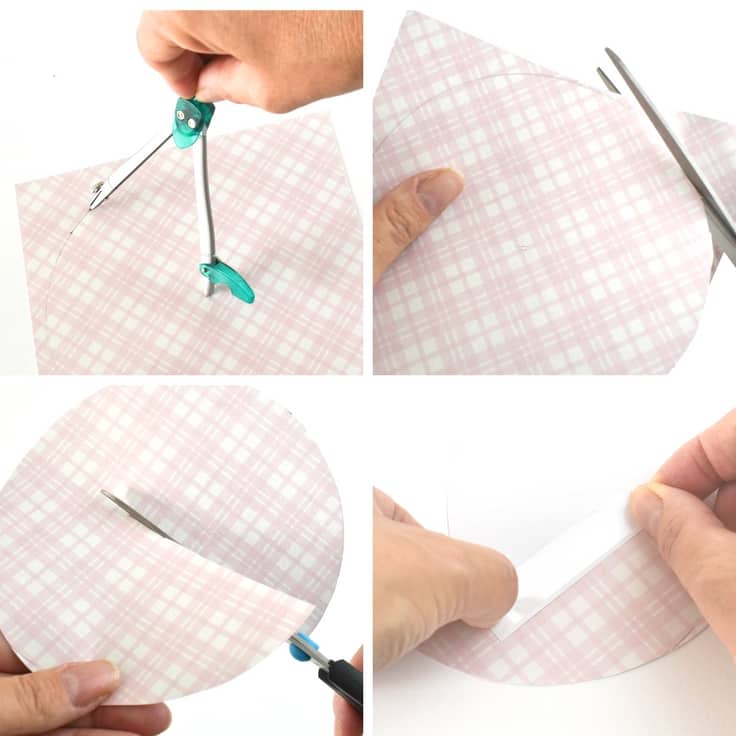
Cut out perfect circles with a compass
This lampshade will look so much better if you draw a symmetrical circle with a compass, believe me. You can try to just wing it, but the cones won’t be as even.
Use double-sided sticky tape
I didn’t even try to use regular tape folded in half. The double-sided tape holds it better and it’s so much easier to use.
I also put another piece of tape in the middle of the cone, where the light will go.
This just helps to secure the lights and stop them from sliding out of the cones if you accidentally make your holes a bit too big
Tighten the cone’s hole
As you roll the paper to make a cone, tighten the hole as much as possible, then firmly secure the paper in place by pressing it down onto the double-sided tape.
Don’t worry if you have slightly misaligned the paper cones because you can always trim any bits that lap over too much.
That’s it! Here are all of the steps in more detail. They make the perfect party decoration too.
DIY Mini Paper Lampshade
Equipment
- Sharp pair of scissors
- Compass
- Pencil
- Ruler
- Thin double-sided sticky tape
Supplies
- 1 string Battery operated LED lights
- 12 pieces Patterned paper
Instructions
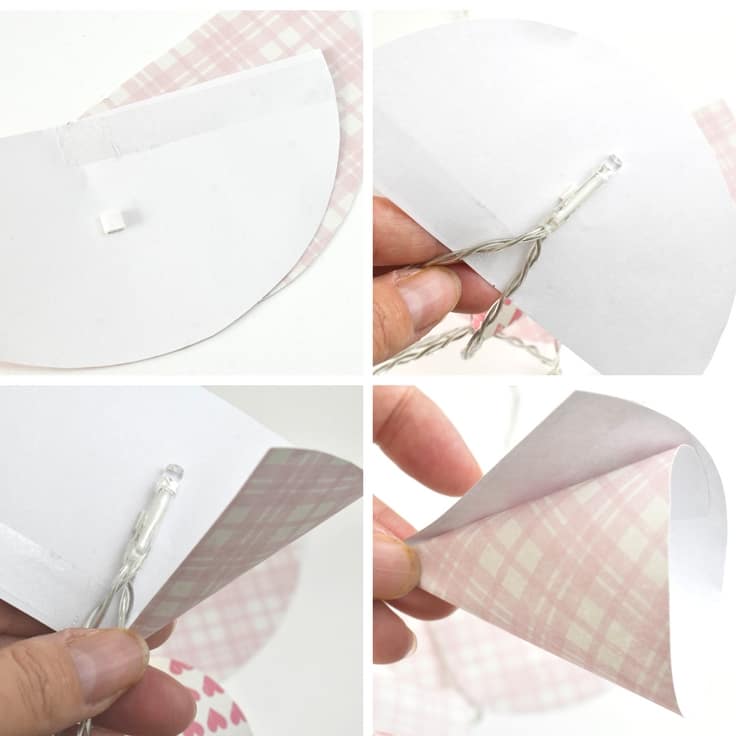
- First set your compass to a diameter of approximately 5.5″/14cm and draw a circle on paper or card.
- Carefully cut your circle shape out avoiding wonky lines or jagged edges.
- Cut the circle shape in half to make a semi-circle.
- Put a thin strip of double sided sticky tape along half of the straight edge of the semi-circle.
- Add one of the small double-sided foam squares to the middle of your semi-circle and stick one of the lights in place.
- Carefully roll your paper or card around the light to make a cone. Tighten the hole as much as possible, then firmly secure the paper in place by pressing it down onto the double-sided tape.
- Repeat previous steps until you have created a mini paper lampshade for each individual light.
See I told you this was an easy project!
How to Match the Lights to Your Decor
I love that this mini paper lampshade idea is so versatile. You can basically tailor this idea to suit your own taste and decor by just changing the pattern, color or texture of the paper.
You can use fall-themed paper in October, red and green paper in November-December. You can also use them to decorate for a baby shower or birthday party.
Which colors are you going to use?
More DIY Projects and Tutorials
If you are looking for more creative inspiration then you may like to take a look at some of my other DIY projects and tutorials.
Stencilled Burlap Pillow Tutorial

Simple Air Dry Clay Display Cones
Love the ideas you see here on Ideas for the Home by Kenarry®? Subscribe today to get our FREE DIY & Craft Planning Calendar, plus our weekly Ideas in Your Inbox newsletter filled with creative tips and exclusive offers!
What’s Next?
While you’re here, be sure to check out other paper crafts on Ideas for the Home by Kenarry® –
- Fun Easter Craft: Create a Bunny Brooch with Paper
- Paper Crafts with Printables: Free Download
- DIY Custom Notebook with Mod Podge
Originally published October 2017. Updated October 2018.