Pumpkin Garland Fall Paper Craft
THIS POST MAY CONTAIN AFFILIATE LINKS. PLEASE SEE OUR FULL DISCLOSURE POLICY FOR DETAILS.
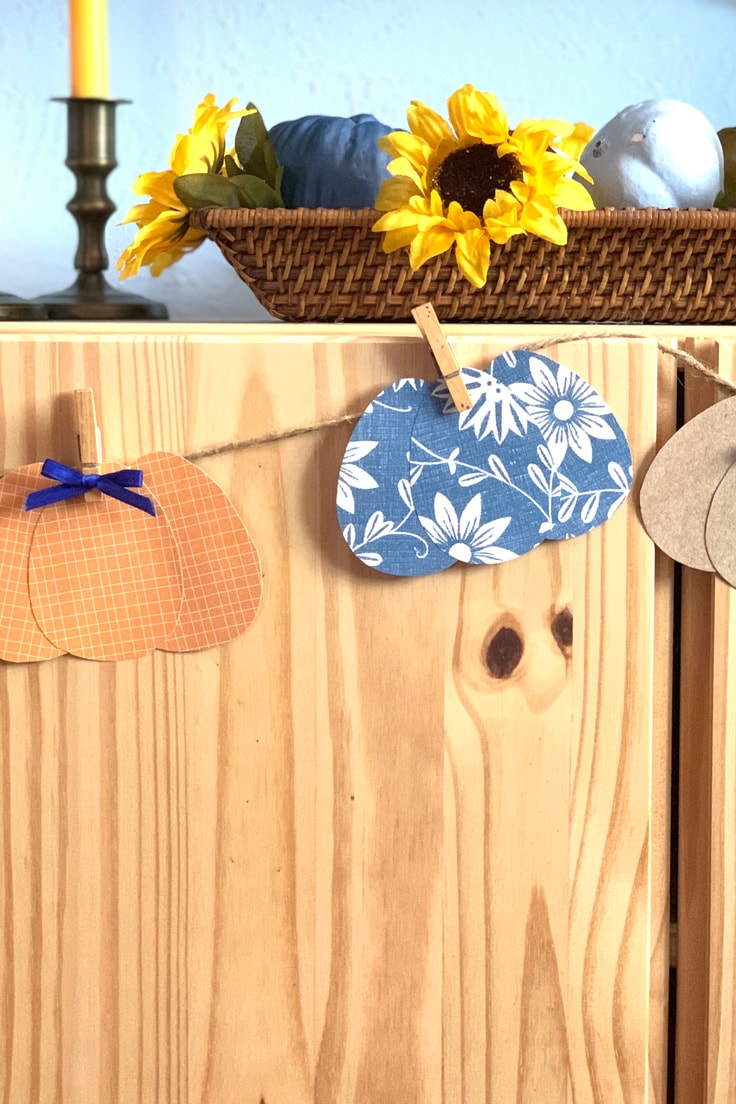
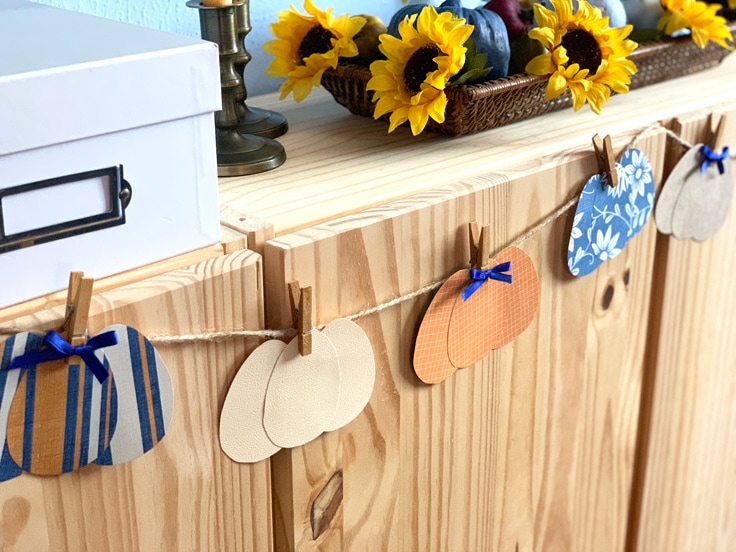
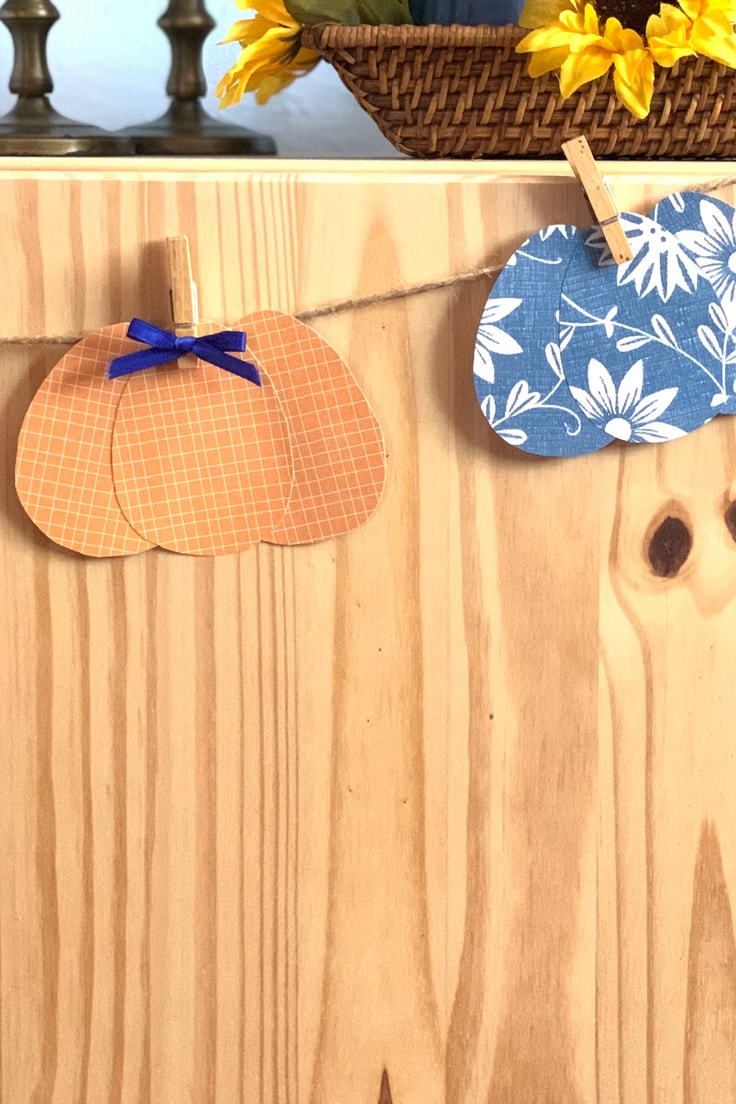
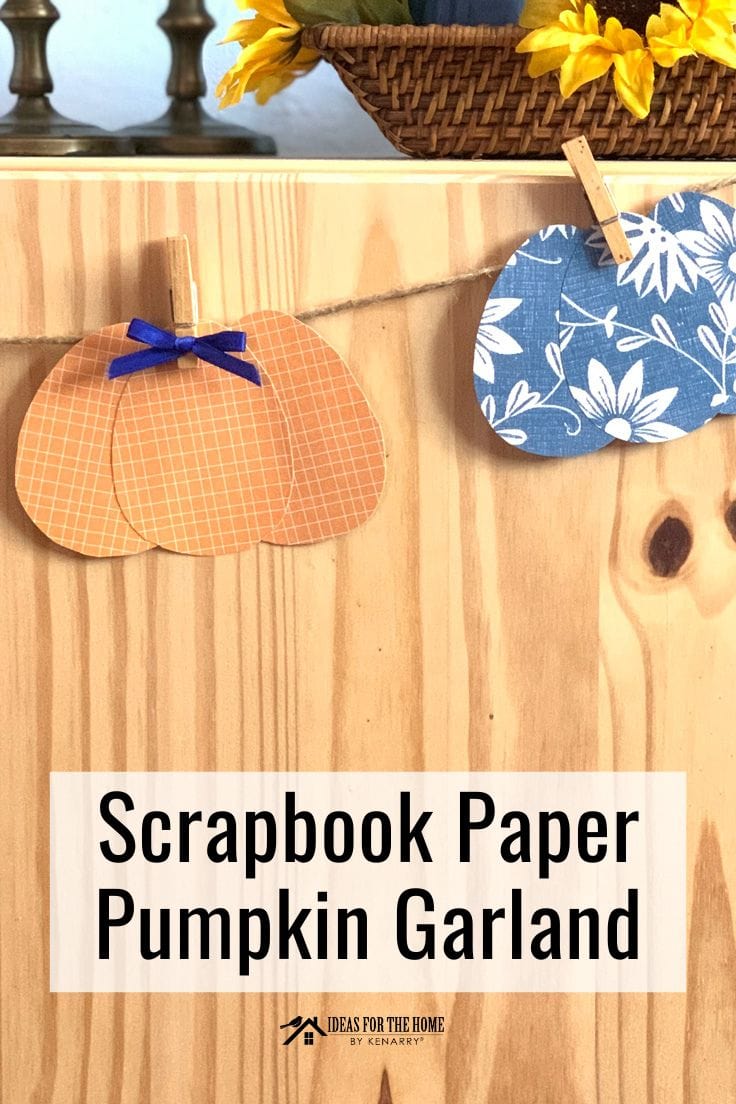
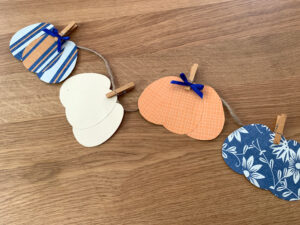
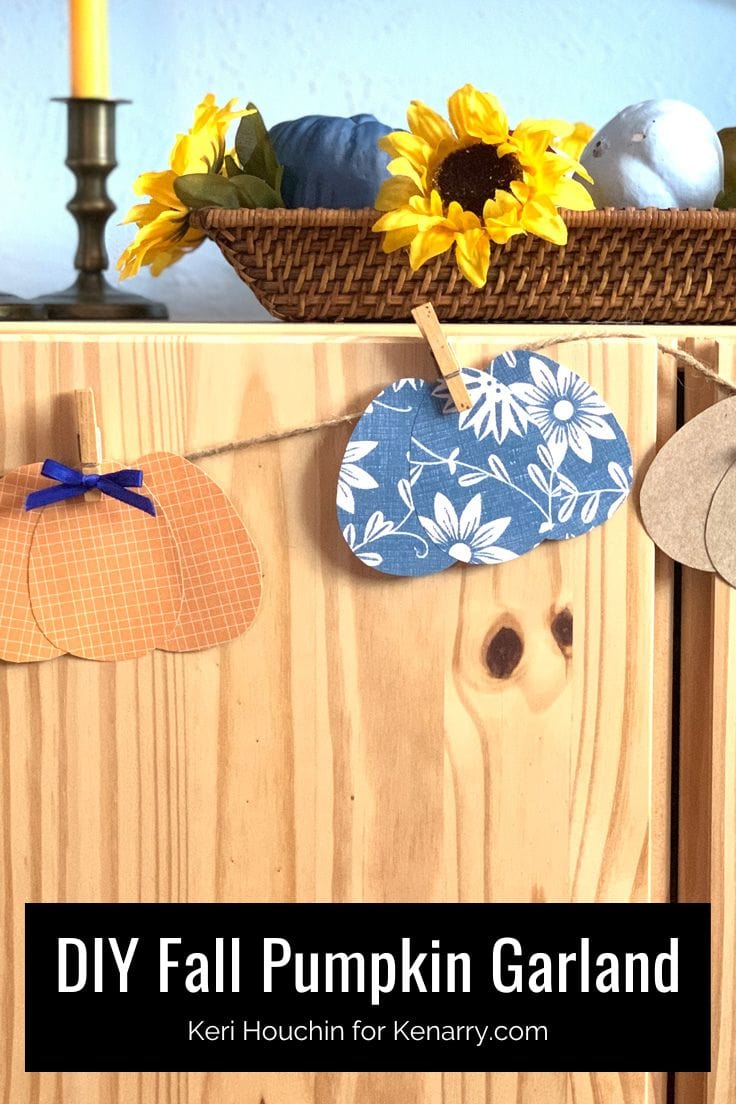
Use your favorite scrapbook paper to make this adorable pumpkin garland. It’s the perfect fall paper craft to add to your farmhouse decor!
This pumpkin garland is a simple craft that you can display all season long. Keri from One Mama’s Daily Drama here. This month I want to show you how to make a cute pumpkin garland using an unexpected shape – eggs!

Grab your scrapbook paper and some jute cord to make this pumpkin garland. It’s perfect for adding a bit of seasonal decor to your mantle, a wall, or even your front door.
This tutorial is super easy with the help of a printable template. If you don’t want to use a printable, you could also substitute an egg shaped stencil or cookie cutter that you already have.
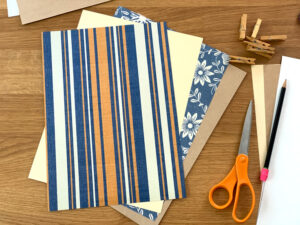
My favorite part of this craft is the scrapbook paper. I can’t resist pretty paper, so I’ve got a ton in my stash. For this fall craft, I wanted to match my other seasonal decor, so I went with blue, orange, and brown.
Use whatever scrapbook paper matches your fall decor. You could also go with traditional orange, but I recommend at least mixing up the paper patterns and textures to make it interesting.
If you had fun making this pumpkin garland, be sure to check out my Christmas gingerbread cookie garland too. It uses a similar technique.
How to Make a Pumpkin Garland
Turn this into a Halloween garland by using solid colored paper and drawing jack o’lantern faces with a black marker.
What you need:
Want more ideas like this? Subscribe today to get our weekly Ideas in Your Inbox newsletter plus other exclusive gifts and offers — all for FREE!
Craft Tools:
Supplies:
- Printable template or stencils (See instructions below to download)
- Scrapbook paper
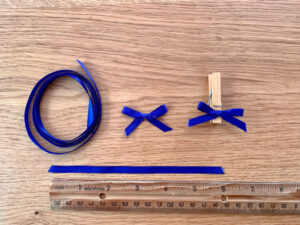
- 1/4-inch blue ribbon
- Mini clothespins
- Jute cord
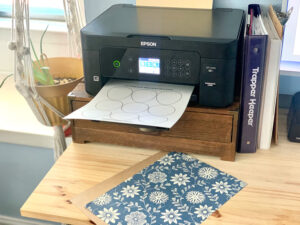
Get the Free Printable Pumpkin Garland Template
Sign up below to get the free printable template for the pumpkin garland sent directly to your inbox:
Your privacy is important to us. We promise not to spam you or share your information. You can opt-out at any time. See our privacy policy for more information.
All printables from Ideas for the Home by Kenarry® are for your own PERSONAL USE ONLY.
After you’ve signed up, watch for an e-mail to confirm your e-mail address and download the free digital printable. Plus you’ll have the opportunity to get the weekly Kenarry Ideas In Your Inbox newsletter, as well as product discounts, special offers and other content that is EXCLUSIVE for Kenarry subscribers only.
You can also join our Idea Insider VIP Club to get unlimited access to the full vault of unique and beautiful printables we offer to make gift giving, holidays and everyday life more special. A lifetime membership in our Idea Insider VIP Club is a great way to save time and money with easy access to hundreds of printable cards, tags, wall art and more right at your fingertips.
Pumpkin Garland Craft Tips:
Trim paper for your printer.
You can use a paper trimmer or scissors to cut the paper to fit through your printer. This is usually 8.5×11-inches. Since most scrapbook paper is 12×12-inches, I just cut mine to 8.5-inches wide. The extra inch on the length wasn’t an issue.
Choose a template.
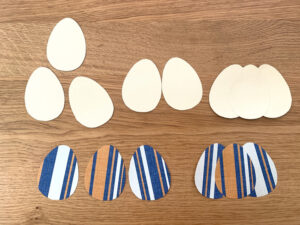
I included 2 different templates in the download. The first page has enough 3-inch tall eggs to make 3 pumpkins; the second page has a single 3-inch, 5-inch, and 7-inch egg in case you want to make different sizes.
Print on scrapbook paper.
Some printers don’t like to play nice with anything but traditional printer paper. Thin paper works best. Thicker paper (similar to card stock) should still work, but your printer may spit it out a few times before it prints.
Glue the shapes together.
To assemble the pumpkins, turn the eggs with the big end at the bottom – or change it up and make them different. It’s totally up to you!
Space the pumpkins on the Jute cord.
You can put the pumpkins as close together or far apart along the cord as you like. Mine are about 6 inches apart.

Pumpkin Garland
Equipment
- 1 Pair of scissors
- 1 Pencil
- 1 Craft Glue
Supplies
- 1 printable template
- 5 sheets scrapbook paper
- 48 inches blue ribbon 1/4 inch width
- 7 miniature clothespins
- 48 inches jute cord
Instructions
- Trim scrapbook paper to print size.Start by choosing your scrapbook paper pieces and cut them all to fit through your printer.

- Print the template onto the paper.Next, download and print the template on the back side of the paper. You may need to check your printer setting to make sure you add the paper facing the right direction.
- Cut out and assemble the paper pumpkins.Use scissors to cut out all of the egg shapes. You’ll need 3 for each pumpkin. To assemble them, lay 2 beside one another, then apply glue to the back of the third. Press that egg shape into the center on top of the first pair.
- Make tiny bows.To make decorative bows for the pumpkins, cut a length of ribbon about 6 inches long. Tie and shape it, then glue it to the bottom of a mini clothespin. Repeat to make a bow for each pumpkin – or leave some without bows.
- Assemble the garland.Finally, bring it all together. Cut a length of jute cord however long you want your garland to be. Mine is 4 feet long. Use the clothespins to clip each paper pumpkin onto the jute. Display your finished garland!
Love the ideas you see here on Ideas for the Home by Kenarry®? Subscribe today to get our FREE DIY & Craft Planning Calendar, plus our weekly Ideas in Your Inbox newsletter filled with creative tips and exclusive offers!
What’s Next?
If you enjoyed this pumpkin garland then you’ll enjoy these fall home decor crafts too.
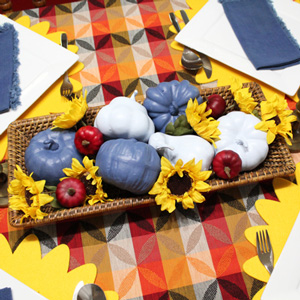
Pumpkin Centerpiece Table Decor
You may also enjoy these fall craft ideas on Ideas for the Home by Kenarry® –