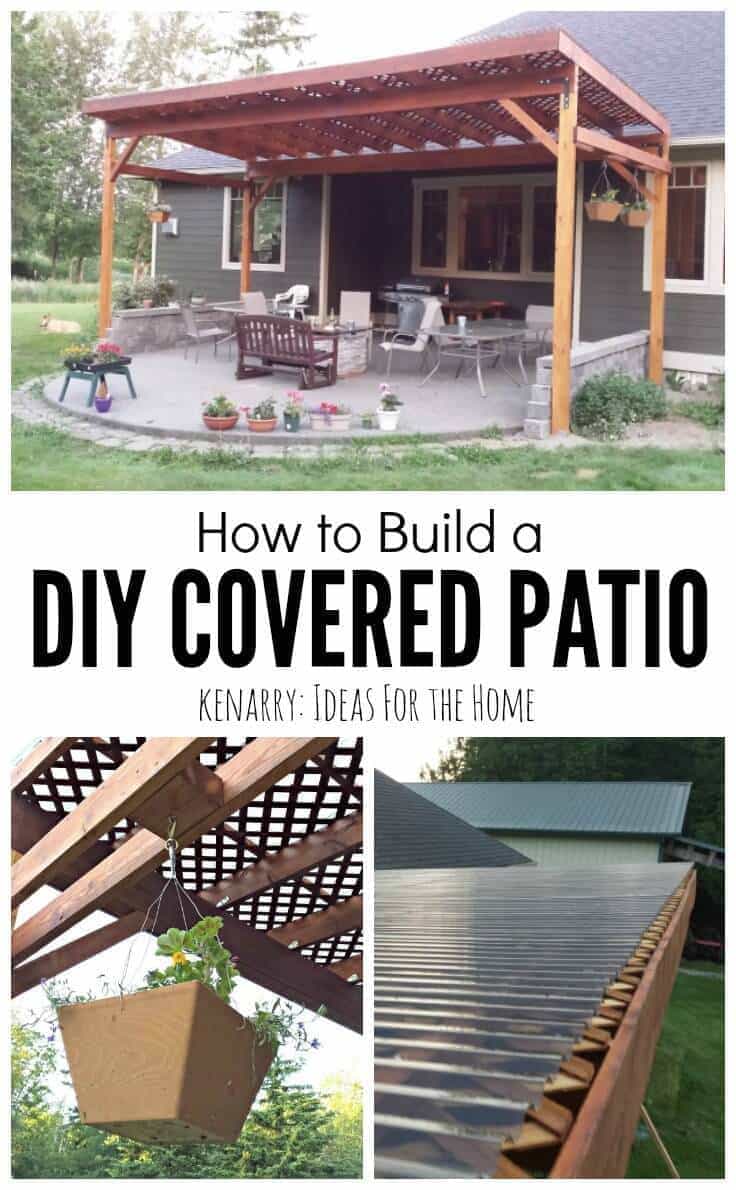
How to Build a DIY Covered Patio
THIS POST MAY CONTAIN AFFILIATE LINKS. PLEASE SEE OUR FULL DISCLOSURE POLICY FOR DETAILS.
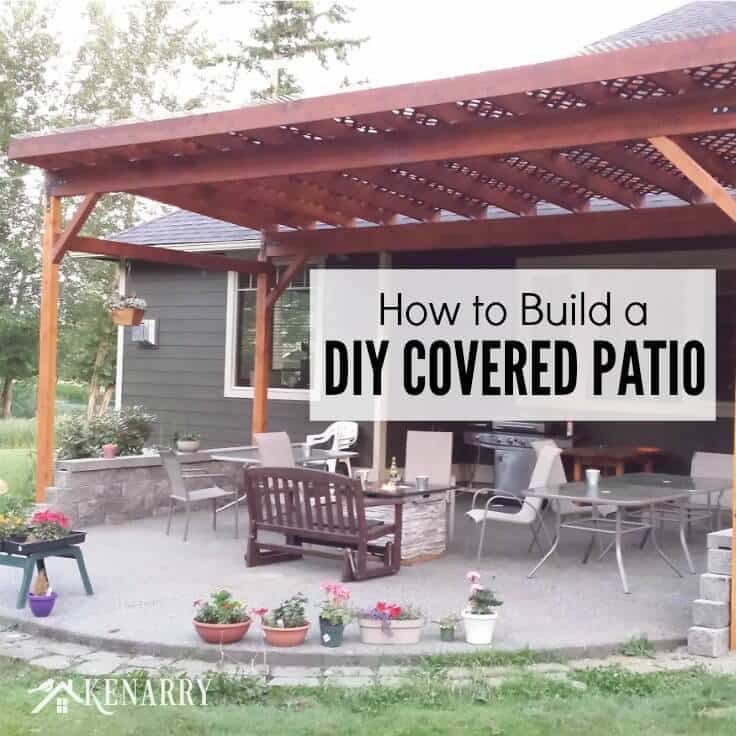
You’ll be able to enjoy your backyard while protecting yourself from the sun when you learn how to build a DIY covered patio in this detailed tutorial.
I have a special treat for you today! My brother-in-law, Curt is sharing his first guest post here at Ideas for the Home by Kenarry®. He and his wife built an amazing covered roof for their patio to provide a little shade and rain protection in their backyard. I think it looks incredible and was thrilled when Curt told me he wanted to share a tutorial for how to build a DIY covered patio on Ideas for the Home by Kenarry®. I’ll let Curt take it from here!
Disclosure: This blog post contains affiliate links for products or services we think you’ll like. This means if you make a purchase from one of these links, we’ll make a small commission at no additional cost to you so we can keep the great ideas for the home coming your way. All opinions expressed are our own, derived from our personal experience.
It is that time of the year when I start planning my summer projects. Most of the year I spend my time teaching English: grammar, styled writing, paragraph frameworks and a smattering of really good literature, but in the summer I am able to get my hands dirty and build stuff. This year I picked two major projects. The first is going to be a covering for our outdoor patio, and the second will be a natural swimming pond. This post will be covering the former and you can check out our DIY pond here.
Video Overview of DIY Patio Cover
Take a quick video tour to get a visual perspective on the scope and features of the DIY Covered Patio:
How To Cover A Patio
There are numerous ways to cover a patio.
My favorites include:
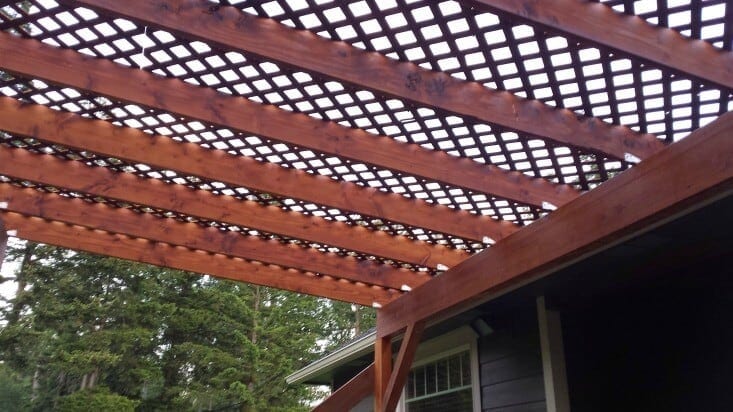
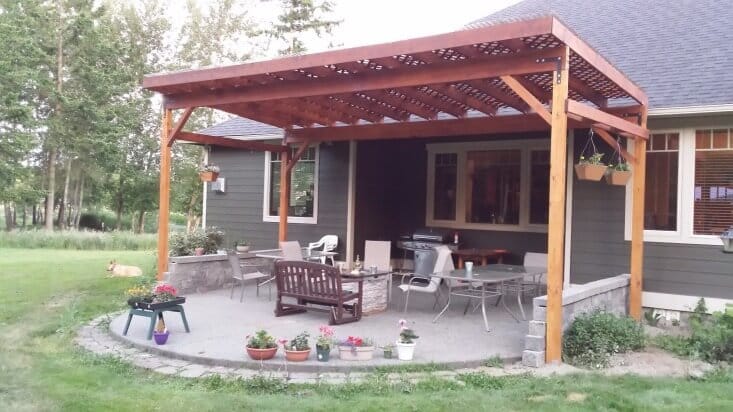
After carefully considering costs and benefits, the one that best fit the family’s needs was a modified trellis that not only created shade, but also a dry space.
DIY Patio Cover Size & Cost
The patio area to be covered is fairly large, 24’X12’, so spanning it became the major obstacle. The two choices were to run 12’ beams and then get 24’ engineered trusses to cover the span, or run 24’ beams and run 12’ 2X8’s to span the 10’ gap. If we had chosen the former, we would have gone with a gabled ceiling trimmed out with tongue and groove cedar, and covered with asphalt shingles.
In the end, the cost differential was substantial enough that the latter was a better choice. The final cost including all the finishing materials was just under $2000.
How to Make A DIY Patio Cover
Let’s start your project. This tutorial will walk you through every step. At the end, you’ll have a shaded patio that you built yourself.
1. Decide Patio Dimensions
Start the project by deciding your covered area’s dimensions: width, depth, and height.
Lumber has limitations, so it is important to get accurate information regarding expected loads and spans. The local lumber yard is a great place to start and can tell you what size lumber you will need for your project.
In this case, the span was over 24’ in one direction, which required an engineered beam, but the other span was only 10’ so the project only required 2X8’s 12’ long set 2’ on center.
The project also used 3’ 4×4’s diagonally mounted and secured with 6” lag screws.

2. Choose The Type of Wood to Use
Another consideration for this project was the type of wood to use. After comparing the cost and aesthetics of cedar vs fir, cost overruled looks for us and at a third less was the more viable choice.
The Sikkens teak cedar stain turned the #2 fir beautiful, but the one time that the can was shaken and not stirred, the wood was a lot lighter because the pigment was at the bottom of the gallon can.
3. Square Up The Posts By Measuring Horizontally & Diagonally
When you start putting this project together, make sure that you square up your posts by measuring horizontally and diagonally. If you do not take the time to do this you will face extensive headaches when you install the lattice and roofing.
4. Brace Everything
Next, you need to make sure you reinforce and brace it correctly.
The 4×6 posts were installed on peer pads with pre-installed brackets, but in hindsight, the posts should have been buried at least 3’. This would have helped eliminate some of the swaying that occurred when I was crawling across the 2x2s installing the Tuff-Tex. The project’s opening is nearly 13’ high and required extensive bracing.
The project was stabilized by attaching the 2×8 with brackets and strong-tie nails, extensive stapling of the lattice and screwing the Tuff-Tex down every other corrugated wave along the 2×2.
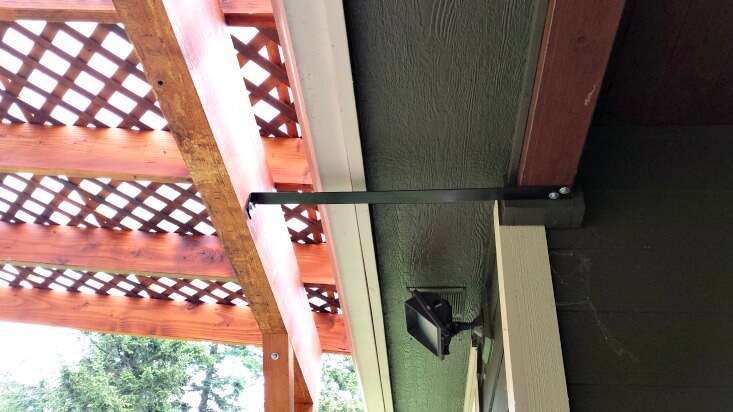
12” black steel strong-tie L brackets secured the beam to post, a flat iron strip was lagged into the beam and the house, and the hanging baskets structure finished stabilizing the structure.
5. Stabilize the Structure
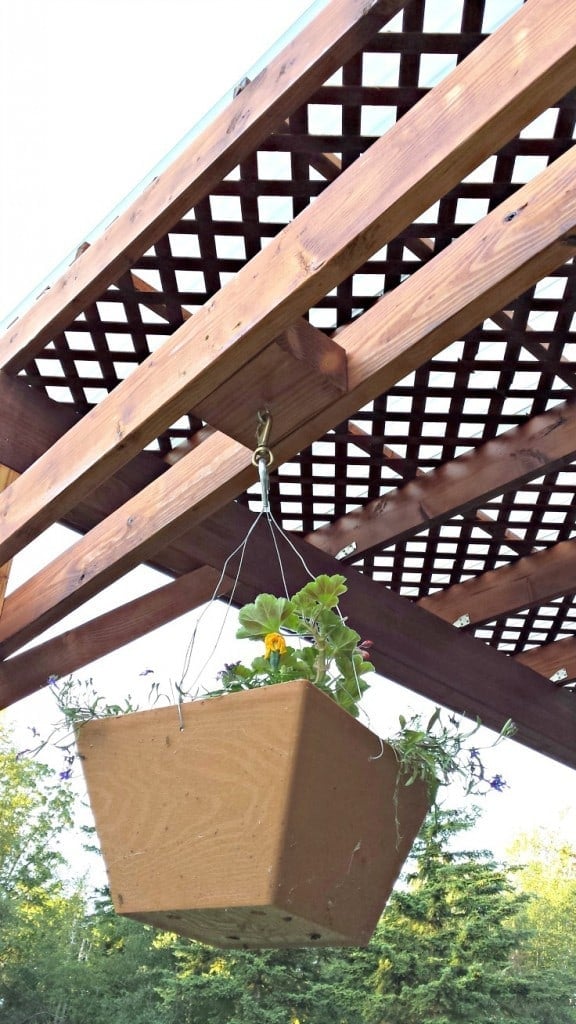
In the end, 2×6 were attached to the outside and inside of the beams front to back, and then the end pieces that were cut from the posts were used between the boards. Besides further stabilizing the structure it allowed for hooks to be mounted and hanging baskets hung down the sides of the structure. I also installed a drip irrigation system that was very easy to install and works wonderfully.
The Steps:
- Decide on your dimensions.
- Visit the lumber yard and get help picking lumber that will meet your local area codes for snow loads and wind shear.
- Square up the post holes and install the posts, use a level and braces to keep them straight.
- Make sure the bad side of your beam is facing the sky.
- Mark out the top of your beams either 2’ or 16” on center, depending on loads and lumber size.
- Install your brackets on the marks.
- Lift and install your beams, re-check that your posts are level.
- Install the diagonal cross braces and lag screws
- Install your cross members and nail them with strong-tie nails to the brackets
- Next, it is time to staple your pre-stained lattice to the cross members.
- When you install your lattice put up enough sheets to check that everything is square before you start stapling things in place.
- In order for you to properly install your roofing, you will need to install 2×2 members perpendicular to the cross member. I used 3 inch galvanized nails but these could be screwed in place.
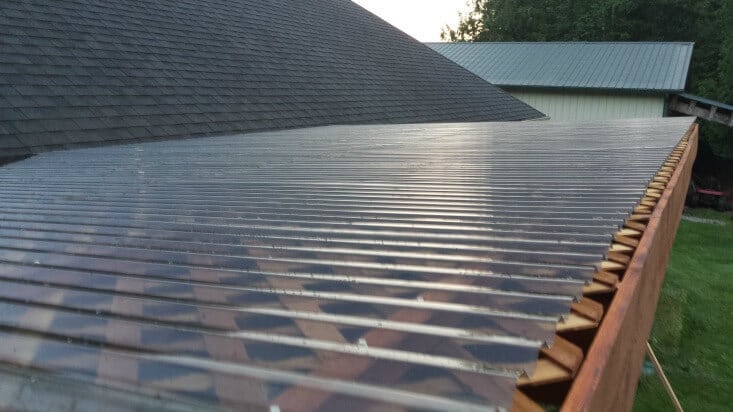
- Now install your roofing. Do not skimp on the screws. This structure will be a giant sail in the wind, and the roofing creates a lot of shear strength for the entire structure.
- Begin wrapping things up by installing metal bracing and if necessary secure the structure to the main building.
- Finally, add the final bracing and decorative touches.
When the final touches were finished and the drip irrigation was added for the hanging baskets, it was time for me and my wife to enjoy the evening fire.
Get the look…
Life is busy. We get it! If the idea of building your own gazebo from scratch is too much for you, here are some other options.
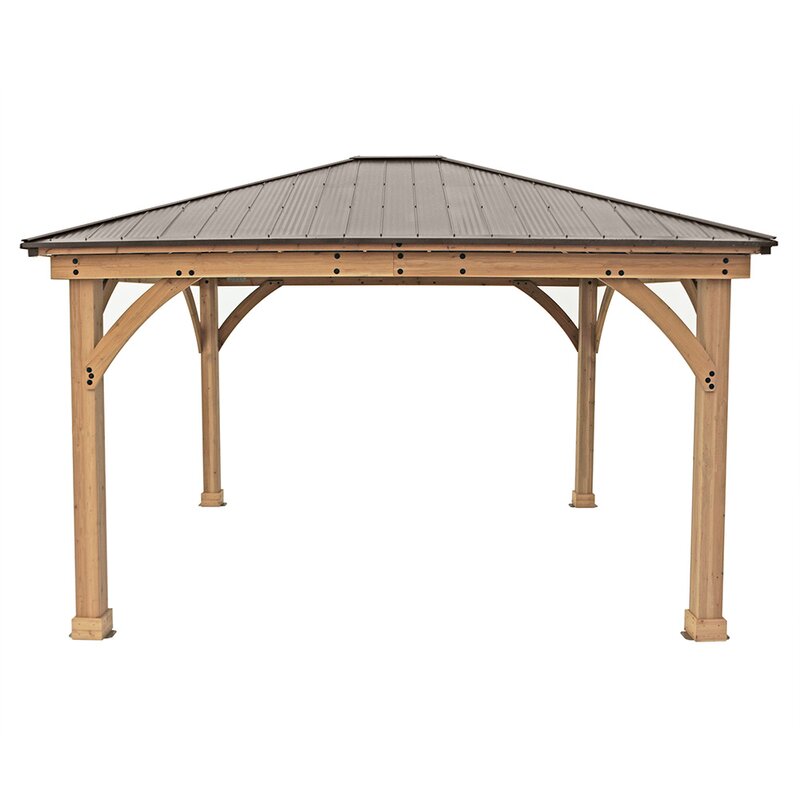
This ready to assemble gazebo kit comes with everything you need to put it together in just a few days.
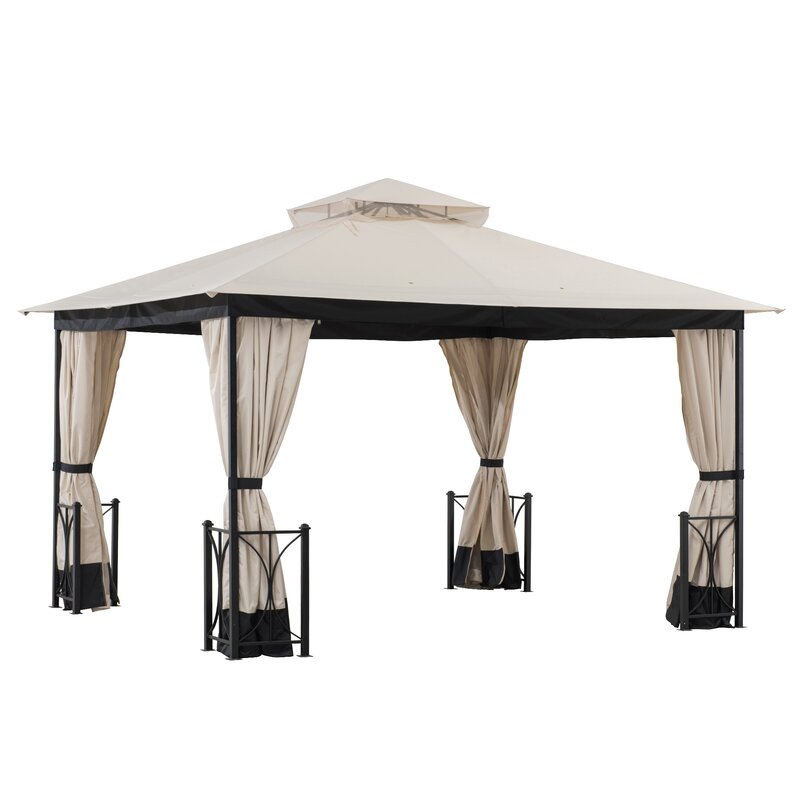
Looking for some protection from the sun in a jiffy? This steel gazebo can be set up in a matter of hours and even comes with curtains to give you privacy or keep you in the shade on a super hot day.
If you’re looking for something a little more temporary, this smaller steel gazebo may be perfect. It comes in a variety of colors and can easily be moved if needed.
Love the ideas you see here on Ideas for the Home by Kenarry®? Subscribe today to get our weekly Ideas in Your Inbox newsletter plus other exclusive gifts and offers — all for FREE!
More DIY Projects
While you’re here, be sure to check out other DIY projects on Ideas for the Home by Kenarry® –
If you enjoyed this tutorial for how to build a DIY covered patio, please share it with your friends or pin it for later:
Originally published 2015. Updated June 2018.


I am thrilled to have run across this on the link party today! We live in FL, our back patio is in the sun from sun rise until about 2:00. Nobody wants to sit out there because the direct sunlight is a scorcher! I love how simple you made this, and how stunning it turned out! I am pinning this so that I can show my husband! This is exactly what I want.
This is awesome!! We’re trying to figure out what to do with our patio…my husband wants a covered area. This might be an option for us. Thanks for sharing it with us at #FoodieFriDIY!
Thanks for linking up to You’re Gonna Love it! This will be one of my featured links this week! I love it!
AWESOME! Pinned to share!
This looks amazing. Thank you for sharing at Share It One More Time. Cathy
I love this project! We have a space in our back yard that needs something like this in the biggest way. Thanks for sharing the indepth info too. Visiting from the DIY Sunday Showcase ! Pinning and sharing on FB:)
Did you slope the roof so it would drain off. My problem is my crepe myrtle tree that supplies the shade, it also supplies the leaves and tiny flowers……. I’ve been told we can’t roof it with shingles so I really have thought about the Tuff-Tex, but figured with all the leaves and flowers falling on top, I would somehow have to get up there and wash it off………….. wish I could post a photo of mine here in this message, but………
Please reply back to my email, then maybe I can forward you a photo and see what you think. Thanks !!!
Dear Judy,
Thank you for reaching out to us with your questions! Someone else recently asked similar questions so I sent those along to my brother-in-law, Curt, who created this DIY Covered Patio. Here was his response:
QUESTION: Do you have a picture showing how the top is at the roofline? How has this worked for drainage from the roof where the shelter begins.
ANSWER FROM CURT: “Attached is a picture of the 2X8 hanging over the gutter. If I was to do it again though I would cut them so they ran up to the gutter and let the Tuff Tex roofing hang over the gutter.”
FOLLOW-UP QUESTION: So you are redirecting all or most of the water with the guttering without having to tie the shelter into the roof or into the wall under the soffit.
ANSWER FROM CURT: “Correct, the water drains off of the shelter on to the roof and into the gutter system already in place. While the shelter could stand on its own, because of the excessive height at the opening we chose to brace it to the soffit, and we had a local manufacturer bend two pieces of flat iron and predrill holes for lag screws.”
Does that help answer your question, Judy? If not, let me know and I can get more information from Curt to help you with your project!
Have a great day!
Best wishes,
Carrie
Can you post a list with dimension of your building supplies? I want to build the same size in much the same way perhaps with larger posts. Thanks!
Hi Dan,
Thanks for reaching out to us. Unfortunately we’re not able to provide you with a list of the dimension of the supplies beyond what you find described throughout this blog post. We apologize, but it’s been three years since this post was originally written and published, and my brother-in-law Curt actually no longer lives at the house where he built this DIY Covered Patio. The blog post is intended for inspiration and guidance only and is not a specific building plan with schematics.
We wish you all the best with your project and would love to see pictures of what you create for your covered patio!
Best wishes,
Carrie
Ideas for the Home by Kenarry®
https://kenarry.com
I love the covered patio. I like how you didn’t block the light from above.
Did you get the natural swimming pool done? Can’t wait to see it.
Is this to code? Is it considered free standing, because it doesn’t seem like those Iron strips would be to code, as far as how it is attached to the house? I am asking because I like the design, but my father in law was giving me a little push back 🙂
Also, how common is it to build something angled towards the house like that, is that normal, because most of the ones I have seen slope away from the home.
Thanks!
Hi Daniel, great questions! I e-mailed my brother-in-law, Curt who wrote this post. Here’s his response:
“Thank you for the interest in the project. The beams and cross members were chosen based on the engineered load specifications provided by my local lumber yard. I attached it to the house because of personal preference, not because of any code requirements. It was probably overkill, but I felt better as I am a bit of worrier. While the expert advice I sought from the local lumber yard when I was designing the structure was that it could function as a free standing structure, I wish I had buried and cemented the posts a couple feet into the ground to create greater rigidness. With regards to the slope, there were two reasons we tilted it back. Since the structure does not cover the entire patio, I did not want to have a drip line worn across the exposed part of the patio and thus created it to drain back onto the roof. Secondly, if I had tilted the structure forward it would have created a much more closed in feeling, and that was not what we were looking for. I am sure you could tilt it forward and add a gutter to the front if you feel that there would be too much water added to your roof drainage system. As with all structures it is best to seek advice from your local permitting agency to make sure you meet the building codes for your area.”
Thanks for the post. I am thinking of covering my back patio and I am starting research on how I want the project to look. I like the idea of the trellis covering above. It gives you shade without the closed in feeling.
Thanks, Peyton!
So did you make the roof of the patio overlap your house roofand angle it so the water runs onto it and uses your existing gutters? Been thinking about doing exactly that but have never seen it executed.
If thats what you did, how has it worked out for you?
Thank you for your interest. You are absolutely correct that the water is running back towards the house. I have not had any problems at all. The only thing I would do differently is that I would not run the 2×8 rafters over (above) the gutters as the roofing is ridgid enough to extend to the roof line without losing form. We also found that it was important that the plastic roofing meet up shingles to avoid splatter and wind driven rain getting through to the patio.
Looks amazing, Carrie! I bet you spend a ton if time out there!
I wish, Kendra! This is actually my brother-in-law and sister-in-law’s amazing covered patio. We’re thankful they chose to share it here on Kenarry.
Would you feel comfortable putting a ceiling fan under this roofing? Is it leak proof enough? What about a TV? I would like one in the corner that I would then simply plug into the outdoor outlets. Also, I would consider putting my posts to existing patio, but would you recommend cementing posts in just past the patio?
Finally, I would most likely attach to my house and slant away as I have a two story and would want to slant away from the house.
Thanks
Hi Drew,
Those are some good ideas. When we installed the roofing material we used screws similar to the ones used with metal. Those screws have a foam/rubber washer to seal the head down. We do have a slight drip in a spot, but I think that is a function of not sealing a screw that hit a knot in the wood and didn’t fasten properly. Given the fact that I live in NW Washington, during the Spring, Summer and Early Fall I would be comfortable having an outdoor outlet in the middle of roof and a fan plugged in.
With regards to the tv, the patio cover is an extension of 6′ eve of the house, so I would mount a tv outside next to the house no problem. If I was considering mounting to the posts I would make sure it was at the top, almost bumping into the roofing members and located on the inside. Because of the height and lack of eve, any wind and rain combo would get to the tv if it is lower. Your weather in your region will obviously affect this consideration.
While lag bolting the posts to your patio with L brackets or putting them on buried peer pads like I did is adequate, if I was doing it again, I would sink and cement my posts.
Finally slanting away from the house is fine, but I would run a gutter system under that front edge.
I hope that helps you make your design decisions.
Wow, so nice! How long did it take Curt to complete?
Veronique, It was roughly a two day project for my self and my buddy. One day we laid out all the wood and stained everything and after it was dry, it took a full day to put it all together.
How has the Tuftex held up? Some reviews I’ve seen says it gets brittle after a year or 2 and may have to be replaced.
Hi Bob, since we put it up, I have not had a need to walk out on it. And while we have had a couple wicked storms the past couple of years, we have not had any pieces break off, and we continue to be very happy with it. If that changes I will be sure to post.
Hi, thank you for this article. However, structurally, i think you went way over kill on the 4×12 and 4×6 beams, you could have done the same frame with 4×4 posts and 2×6 beams and it still would have been more than enough to support that roof style, unless you live in an area that gets 12 feet of snow.
Thanks for sharing your thoughts, Nathan! My brother-in-law, Curt who created this DIY Covered Patio lives in the Pacific Northwest so some snow and inclement weather is definitely a consideration for any outdoor project like this.
Hey Carrie,
Great post, good thing you mentioned numerous ways to cover a patio. Noted on that. I’m still undecided what to use but your post will be a big help.
Keep it up
Zac
Zac, glad this could spark a few ideas for you. Good luck with your patio!
How would you go about building a cover for an out door wood fire pizza oven.
Hi Irene,
Thanks for reaching out to us! That’s an excellent question. Unfortunately we don’t have any experience creating outdoor wood fire pizza ovens, so we’re not qualified to advise you — especially when there’s fire involved!
Good luck with your project!
Best wishes,
Carrie
Do you know what the level of wind shear and snow weight capacity that this cover can handle? Will it change if it’s on a deck that is a foot off ground?
Tracy, unfortunately I do not have that exact information. It wasn’t engineered. I did go to the local lumber store and followed their recommendations so that the structure met county code. According to http://apps.leg.wa.gov/wac/default.aspx?cite=246-359-250 the 2X8 spanning 10′ provides 40 lbs per square foot of snow load coverage. Where I live in Western Washington near the coast I am required to have at least 24 lbs. But if I were living in Grand Rapids Michigan I would be required to have at least 35 lbs of snow load capacity. It is important for you to check with your local regulations.
And here is the link to the tuftex product. https://tuftexpanel.com/faq-tuftex-questions.shtml. Any support posts should be go all the way to a hard surface on the ground. they should not rest directly on the cross members of the deck.
Sorry I can’t give you a more definitive answer but I think the links I have provided will help you make some determinations. Curt