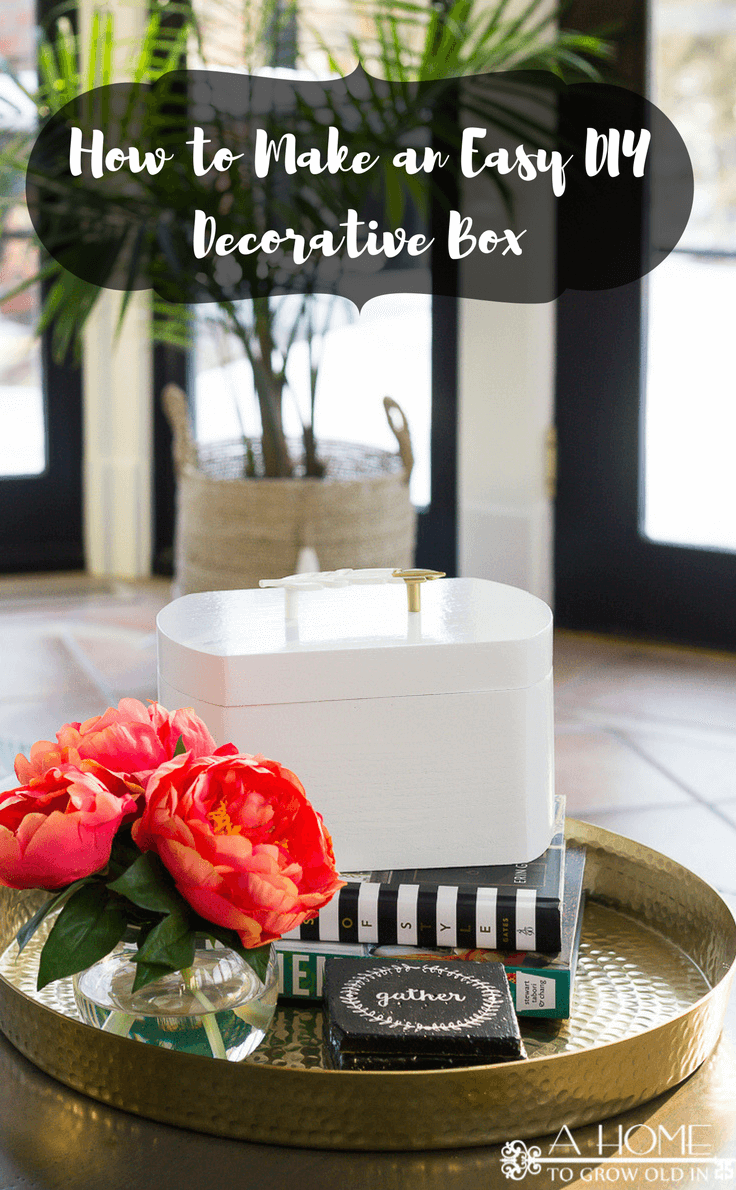
How To Make An Easy DIY Decorative Box
THIS POST MAY CONTAIN AFFILIATE LINKS. PLEASE SEE OUR FULL DISCLOSURE POLICY FOR DETAILS.
You won’t believe just how easy it is to make a pretty decorative box to organize all the small items around your home that you don’t know what to do with!
Hi there, my Kenarry friends! It’s Robin from A Home To Grow Old In. I’m back today to share with you one of the easiest ways to make a decorative box to organize and store small items around your home.
I have these boxes all over my home, and I just realized I’ve never written about them. I think it’s because they are so simple to make and easy to customize to your own style and decor that it just never occurred to me to tell people about it.
Disclosure: This blog post contains affiliate links for products or services we think you’ll like. This means if you make a purchase from one of these links, Ideas for the Home by Kenarry® will make a small commission at no additional cost to you so we can keep the great ideas for the home coming your way. All opinions expressed are derived from personal experience.
How to Make a DIY Decorative box
You might want to use this box as pure decoration sitting on a serving tray. Or, you can give it as a DIY gift. It’s such a fun craft.
Supplies
Here’s what you’ll need:
- wooden craft box (you can also find a great selection in the craft stores)
- small screwdriver
- wood filler
- paint
- wood craft sticks (optional)
- tack cloth
- cabinet pull or knob or some other small decorative item for the top
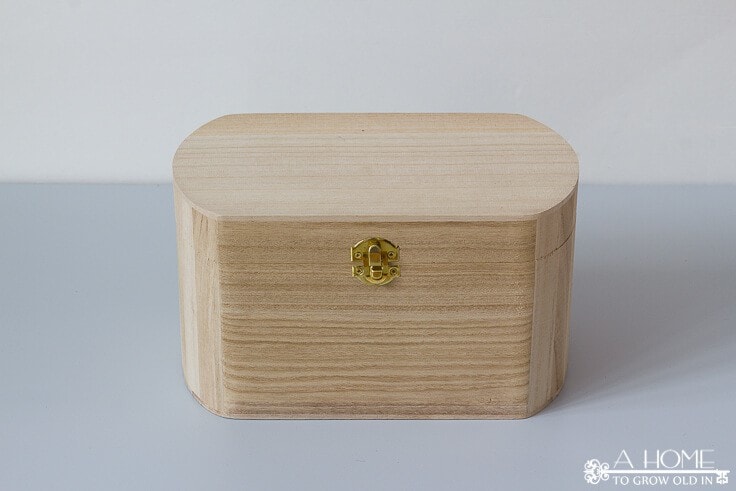
Here is what the wooden craft box looked like before I even started.
Instructions
Now I’ll share each step of the tutorial, along with plenty of pictures. Follow along and make your own with me.
These inexpensive wooden boxes come in several different sizes and shapes. Most craft stores have a good selection, and you can usually use a coupon on them!
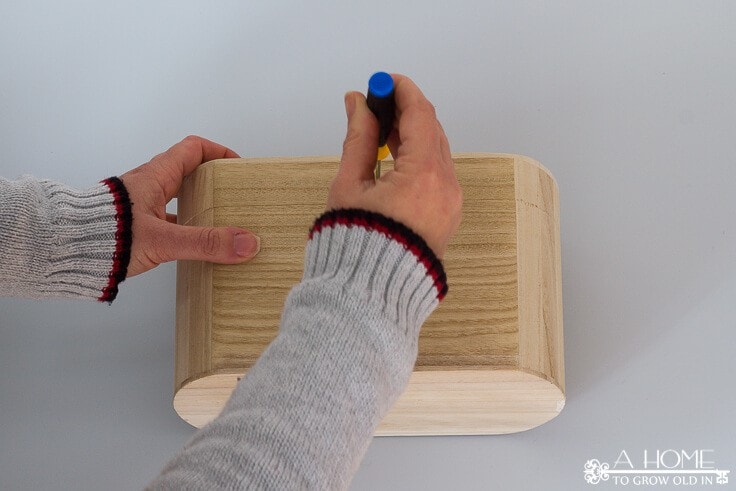
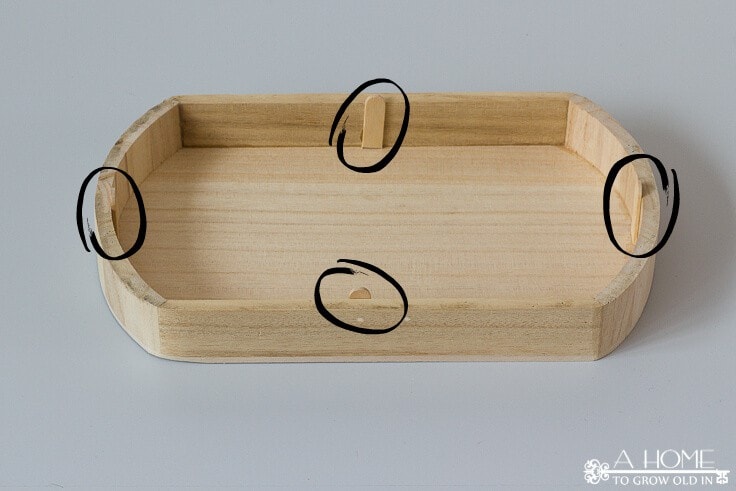
1. Remove the latch and hinges
Remove both the latch from the front and hinges from the back of the box with a small screwdriver.
I did not reuse the hinges on my box. I wanted to be able to take the top off completely off when finished. I used a heavy drawer pull on top of my box. I was concerned that the weight would make the box fall over with the hinges.
If you want to reuse the hinges, put them aside. Make sure to put them, along with their screws, somewhere you won’t lose them.
2. Fill in the screw holes
Fill the holes left from the screws with wood filler. You do not need to fill the holes from the hinges if you are reusing them.
3. Sand the box well
Let the wood filler dry, and then sand the box really well with 100 grit sandpaper. I don’t worry about sanding the insides of the boxes.
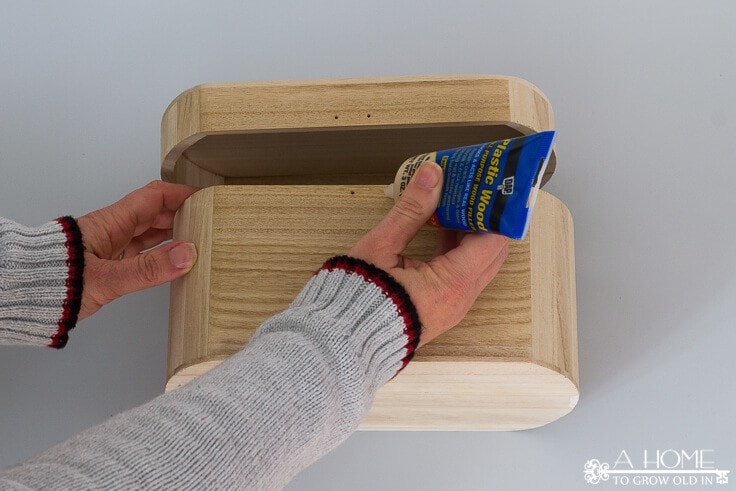
4. Add craft sticks in the place of the hinges
Since I did not reuse the hinges on my box, I cut pieces of craft sticks just slightly taller than the lid and glued them onto the middle of each side. This keeps the lid in place when the box is closed.
To cut the craft sticks you can use tin snips or cutting pliers.
5. Clean off the box
You’re almost ready to paint. Before you do, get all the dust off by vacuuming it and wiping it off with a tack cloth. A tack cloth is a sticky cloth that catches any dust left behind after the vacuum).
6. Paint the box
Once your box is cleaned up, you can paint it. I used a gloss spray paint this time, but I’ve used chalk paint and slightly distressed the box with sandpaper. They both look beautiful. It just depends on the look you’re going for.
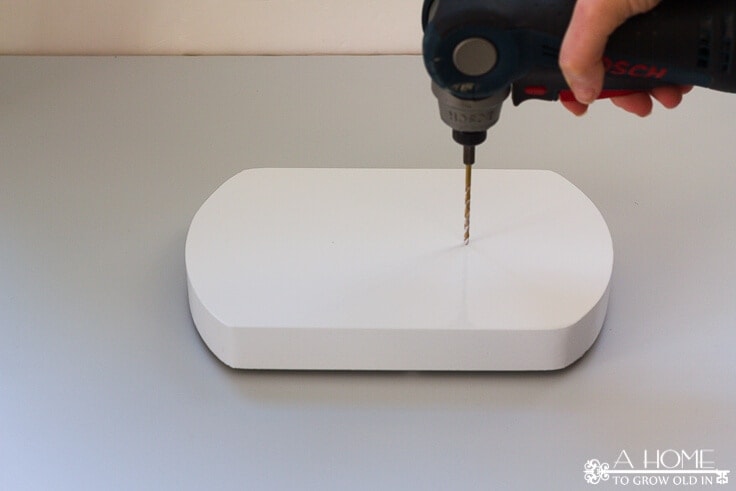
7. Finish with Decor
Finally, once the box dried, I drilled some holes in the top of my box. Then I screwed in this beautiful feather drawer pull that I found. If you are reusing the hinges, you can put those back on once your box is dry.
I’m using this decorative box to organize all of the remotes we have laying around our family room!
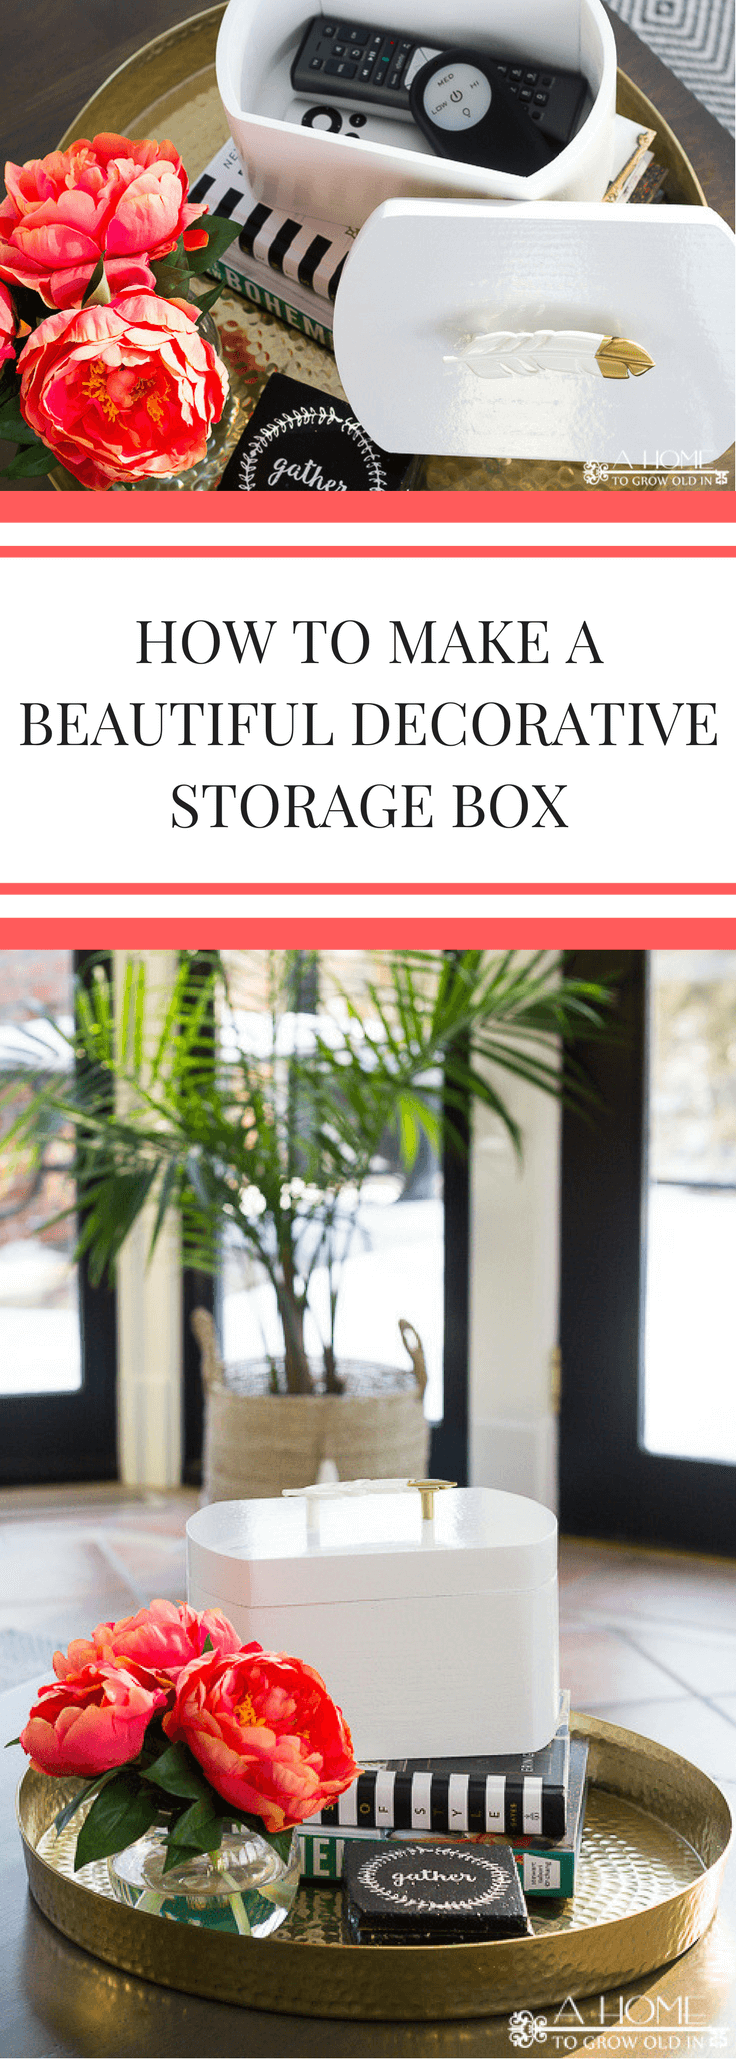
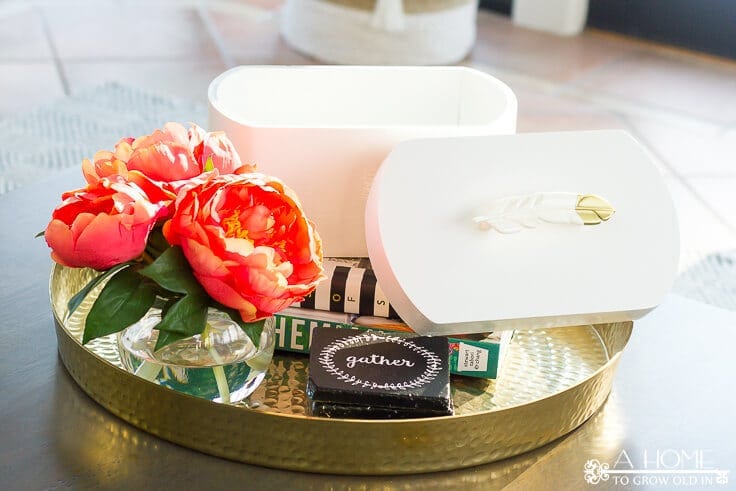
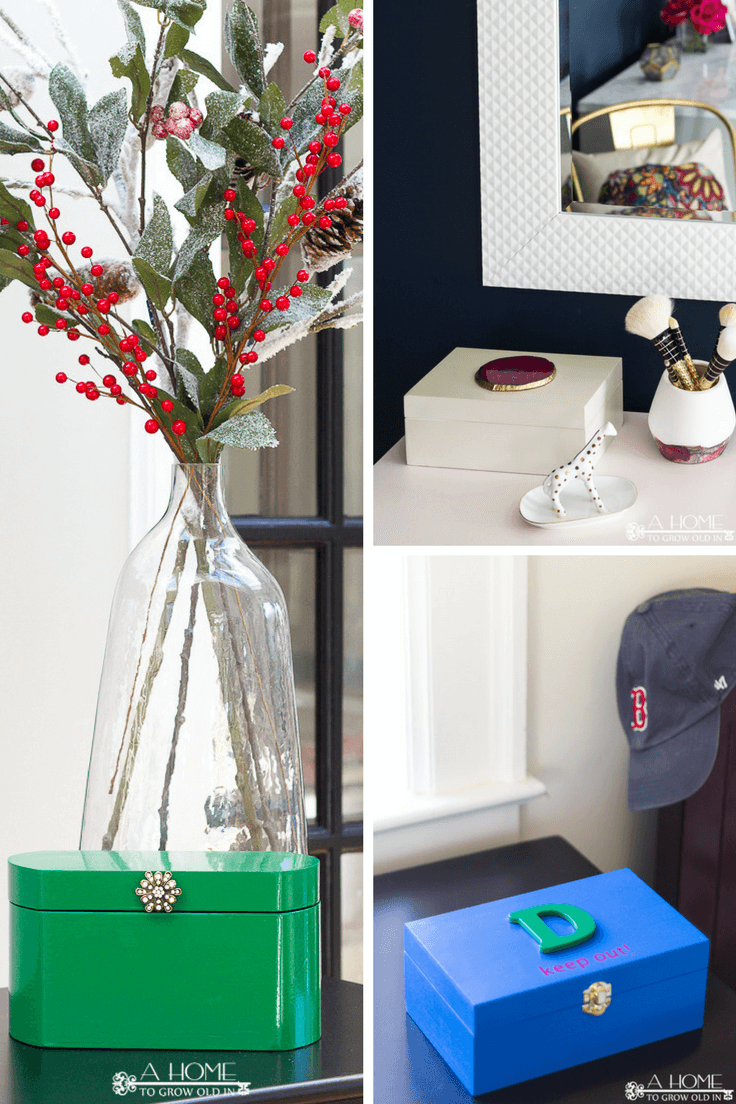
This decorative box is the perfect size to stash all those small things you don’t know what to do with. I’ve got one on an entry table to hide my husband’s wallet and keys. I have another that holds DVDs and video games that we’ve removed from their cases and put in sleeves. And one that contains all my nail polish. I truly use them all over my house and have them each decorated differently!
You can see below that I’ve used agate slices and jewelry to top them. I also have a couple that is covered in marble contact paper and wrapping paper. The great thing is that you start off with a plain box and you can let your imagination go wild with the decor possibilities!
Do you have any areas of your home that could use a decorative box like this? How would you decorate yours?
If you love to DIY and craft, here are a few other posts from A Home To Grow Old In that you may be interested in.
Create Pretty Shelf or Drawer Liner
My Top 10 Favorite Paint Supplies

Love the ideas you see here on Ideas for the Home by Kenarry®? Subscribe today to get our weekly Ideas in Your Inbox newsletter plus other exclusive gifts and offers — all for FREE!
What’s Next?
While you’re here, be sure to check out other home decor ideas on Ideas for the Home by Kenarry® –
What a great looking and functional piece of storage. I am all about functional aesthetics and your boxes fit that perfectly. I think I need to add one of these to my to do list…like I need more on my to do list!!
Thanks for sharing you creativity.
Lynn
Lynn, it’s always good to have a project on the horizon, isn’t it? Thanks for taking the time to visit and check out this great idea from Robin at A Home to Grow Old In.