Scented Clay Fresheners
THIS POST MAY CONTAIN AFFILIATE LINKS. PLEASE SEE OUR FULL DISCLOSURE POLICY FOR DETAILS.
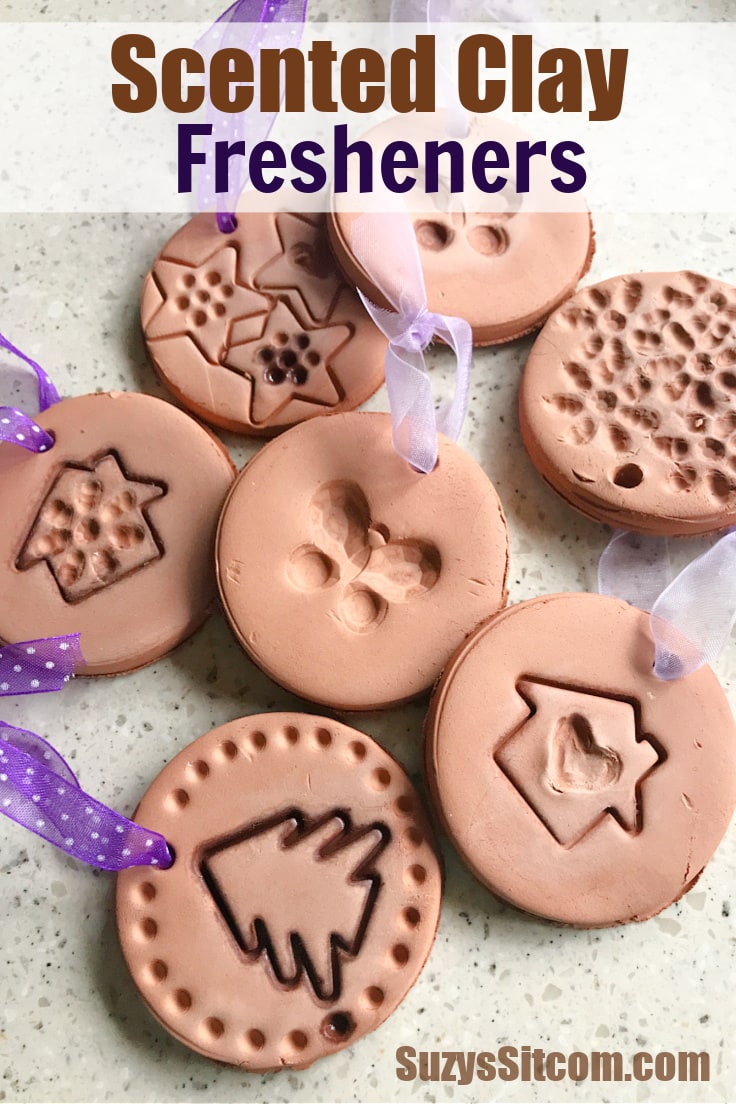
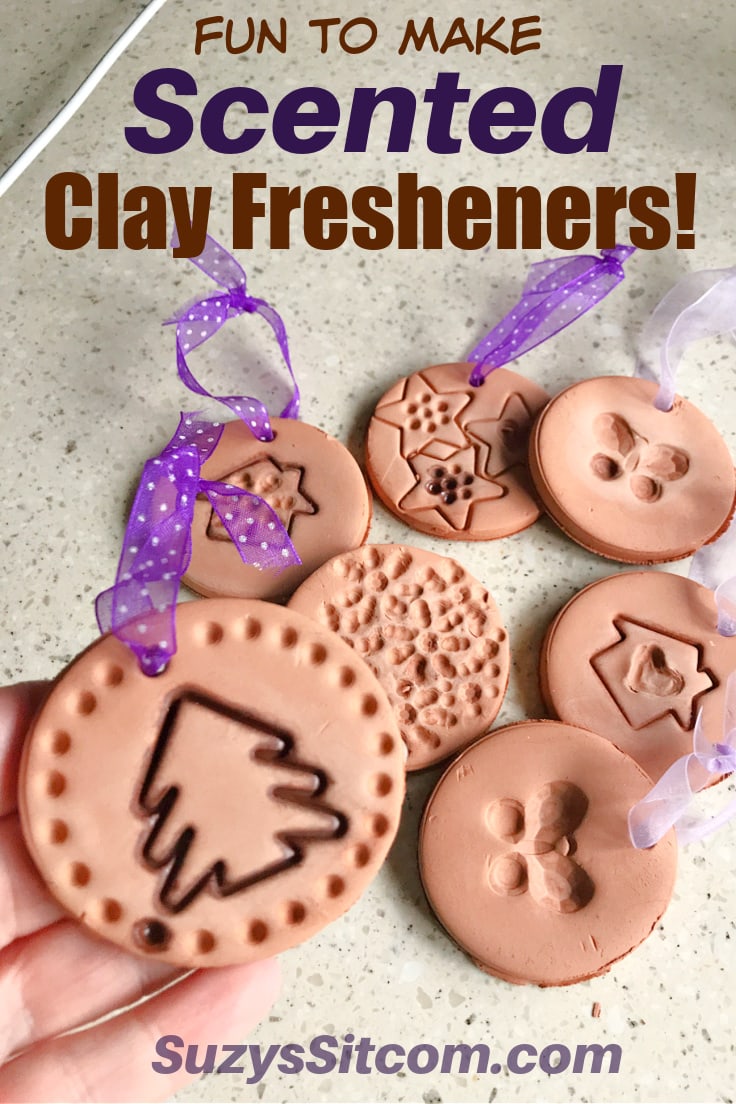
Create these fun-to-make scented clay fresheners with air dry clay and essential oils! These pretty clay fresheners not only look beautiful in your drawers and closets but will also make them smell wonderful!
This is a fun project for a cold winter day. Create pretty clay fresheners for your drawers and closets and chase the winter doldrums away with beautiful summer scents of lilac, orange, or cinnamon. These are simple to make and even the kids can help out!
This is Suzy from SuzysSitcom. My husband and I are full-time travelers living in our RV. During the past two years, we stayed at a beautiful farm in New York and took care of the animals there while the pandemic was at full force. During that time, the RV was in storage waiting for us.
The job on the farm has now ended, and we are back on the road. And I have to tell you that this RV is a bit musty from sitting by its lonesome so long. So a little bit of air freshener magic seems the way to go!
How to Make Scented Clay Fresheners
I’m a huge fan of working with clay. Usually, polymer clay is my go-to, but recently I discovered the versatility of air-dry clay. Did you know that air dry clay will absorb essential oils and smell amazing? Well, now you do!
The entire tutorial is in a printable card at the bottom of this post. But first, here is a little bit of info about the tools and supplies you’ll need.
Want more ideas like this? Subscribe today to get our weekly Ideas in Your Inbox newsletter plus other exclusive gifts and offers — all for FREE!
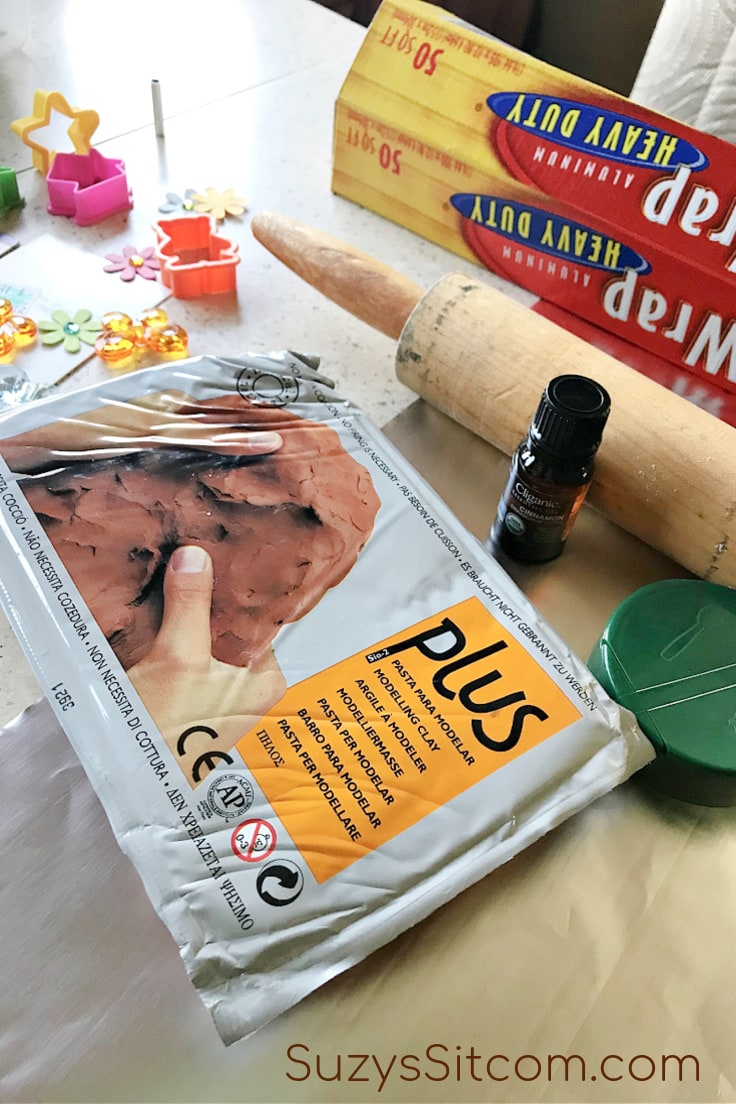
What you need:
- Air Dry Clay (any color)
- Essential Oil (your favorite scent)
- Narrow Ribbon
- Cookie cutter
- Straw
- Assorted items to press into the clay
- Foil
Scented Clay Fresheners Tips:
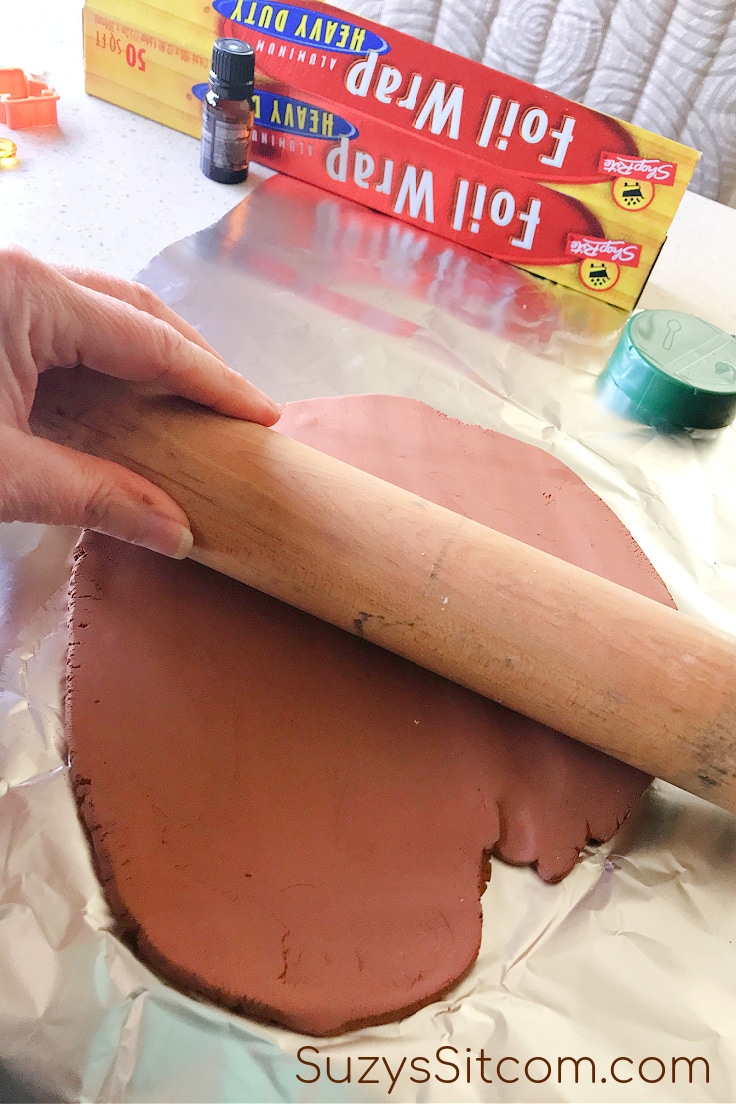
Roll out clay
Knead about 1/2 pound of the air dry clay between your hands to warm it up and make it more pliable. (Place any unused clay in a zip lock bag for future projects). Lay a piece of foil on your workspace. Use a rolling pin or clay roller to roll out to about 1/4″ thick.
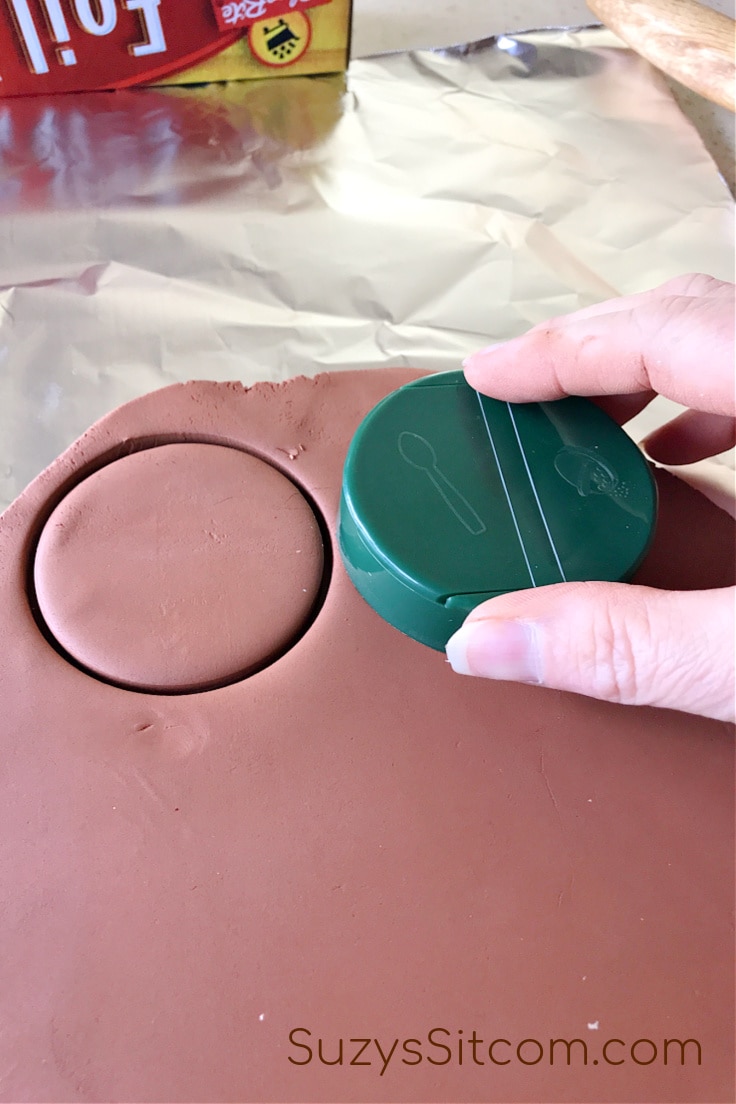
Cut out the fresheners
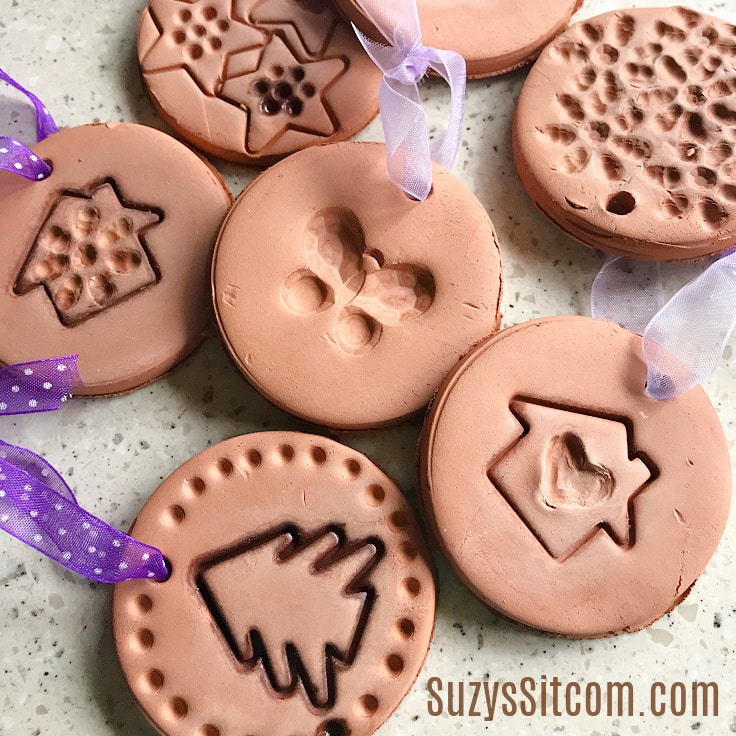
Use a cookie cutter (or in my case, a lid from my sugar jar), to cut out the individual fresheners from the clay. Note: these fresheners do not have to all be circular! You can always use shaped cookie cutters for more variety.
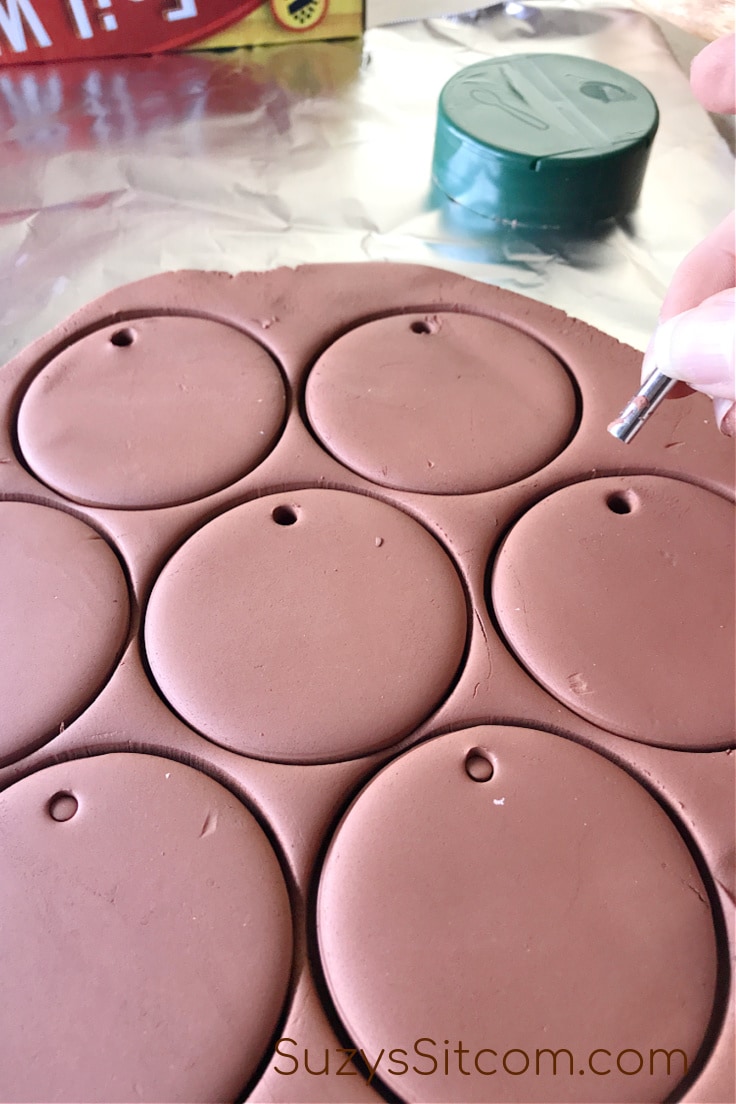
Create holes for hanging
Use a straw to cut a hole into each freshener for hanging. (This is optional- but helps for hanging in your closet).
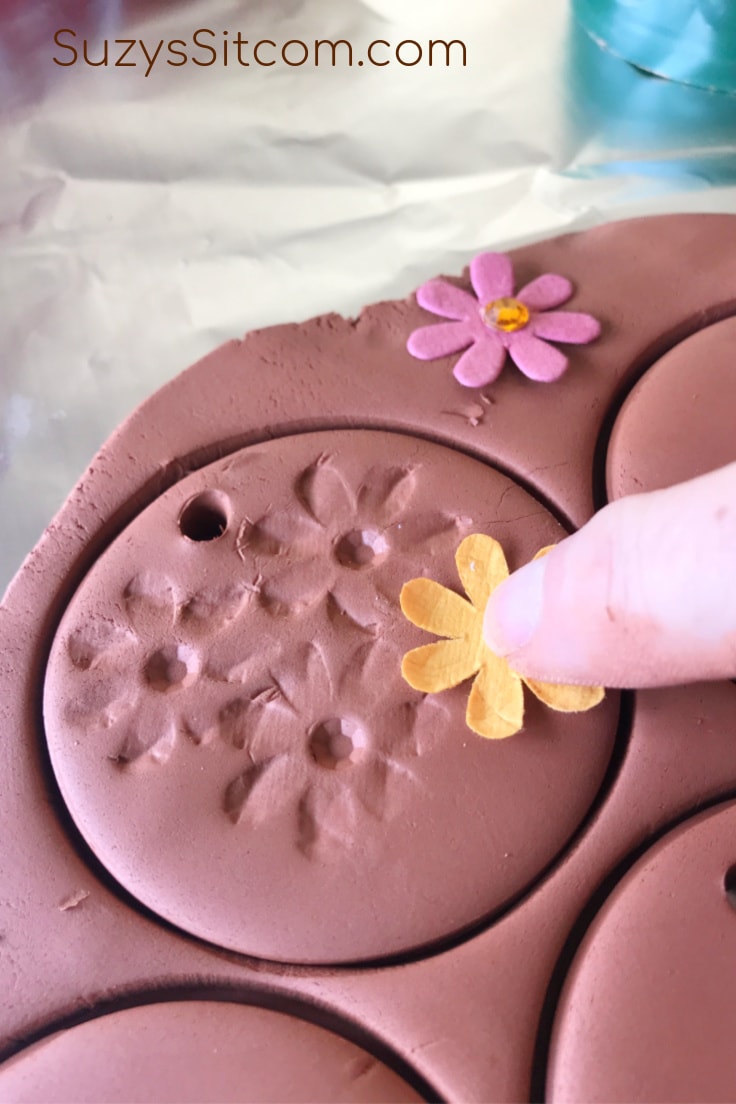
press shapes into the clay
Give your fresheners a bit of design with texture. Use what you have around the house. Check your crafts supplies! Use stamps, beads, lace…
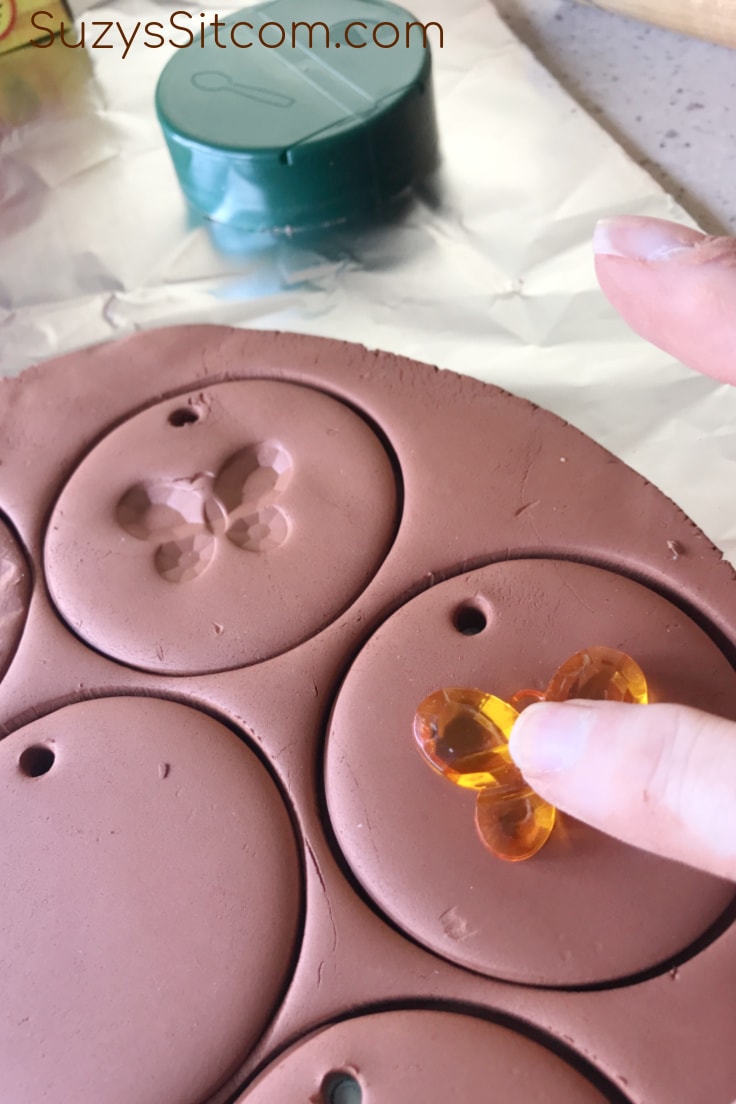
These pretty crystal butterflies have been in my drawer for years waiting on a project. They made beautiful little designs in the clay.
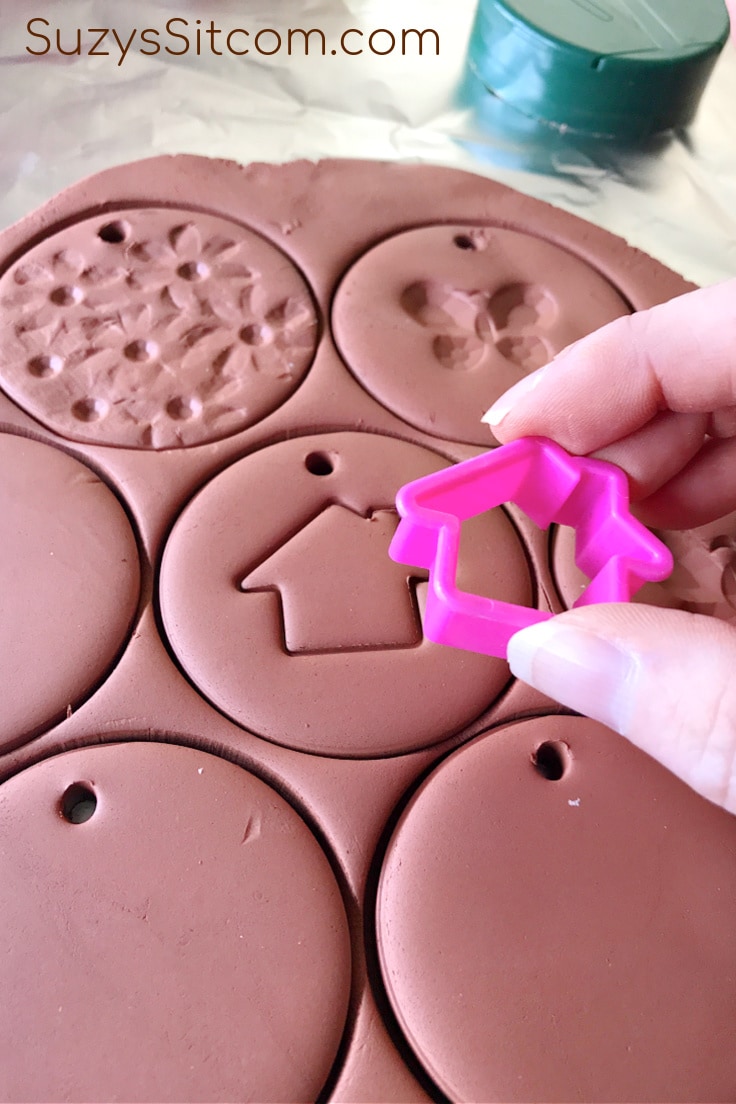
I also found some miniature cookie cutters that I just pressed into the clay enough to make a nice indention.
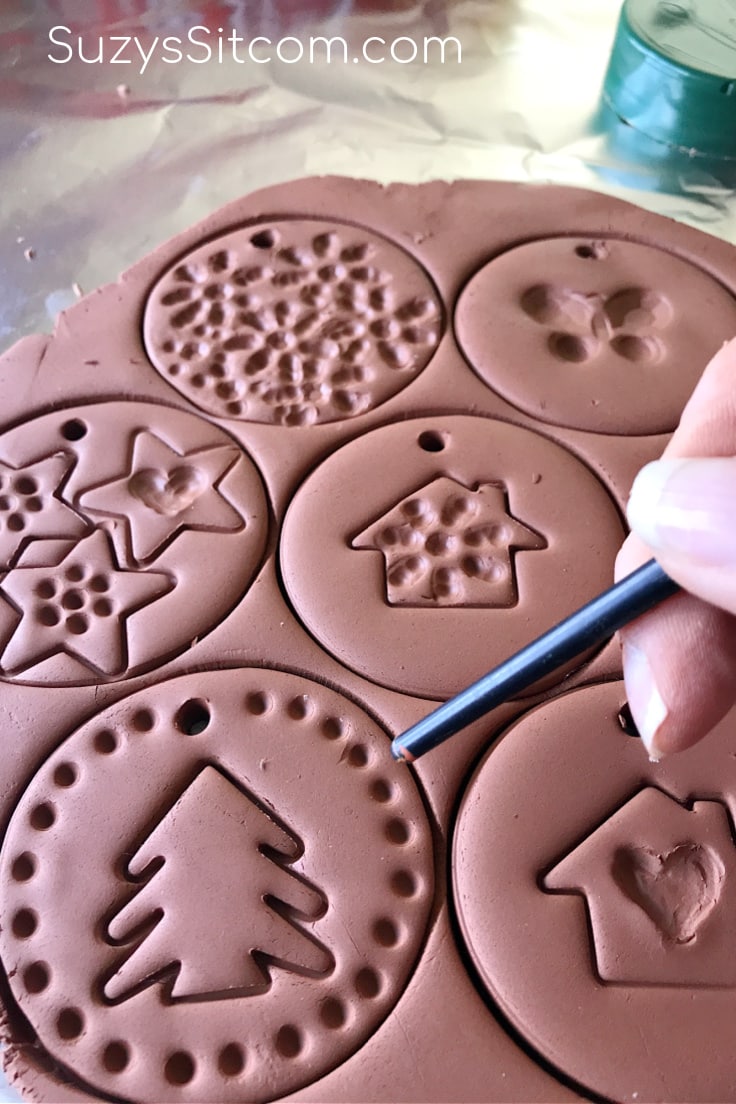
Add as much design as you like. Here I used the end of a paintbrush handle to add more texture. The more texture you add, the more crevices that the essential oils will have to go into.
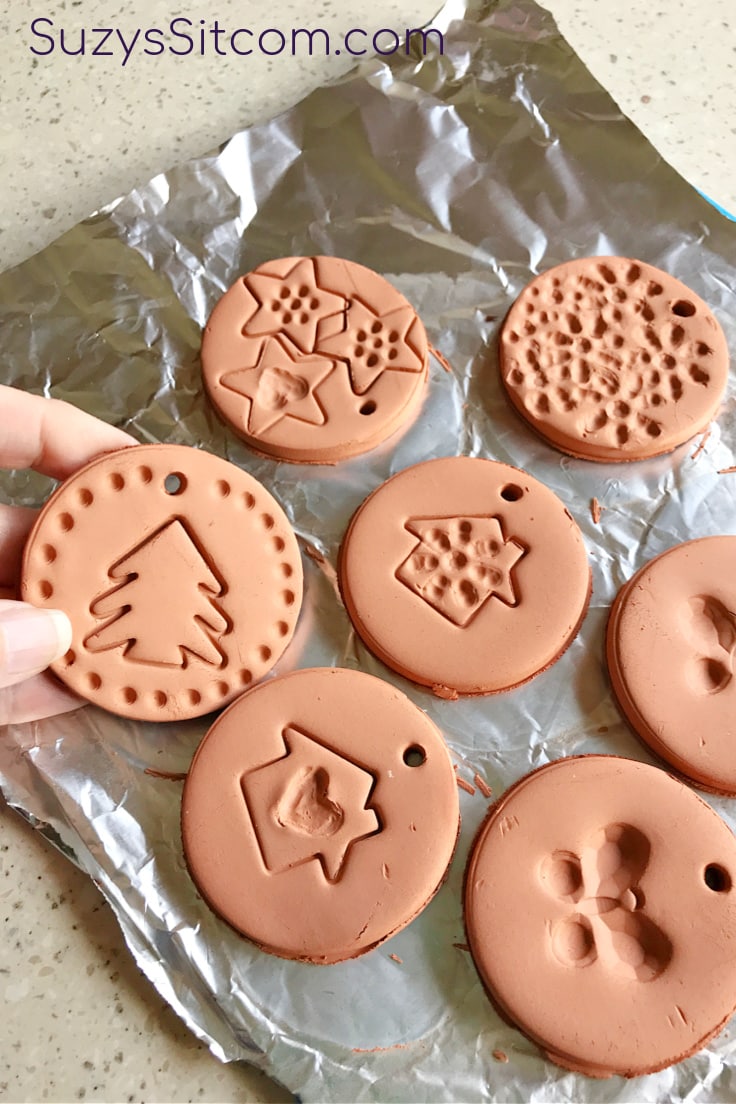
Allow the Air Dry Clay to dry
Air-dry clay usually takes about 24 hours to completely dry. Place your fresheners in a sunny window and turn them about halfway through to ensure that both sides dry. They are completely dry when the color turns lighter.
Add Essential Oils
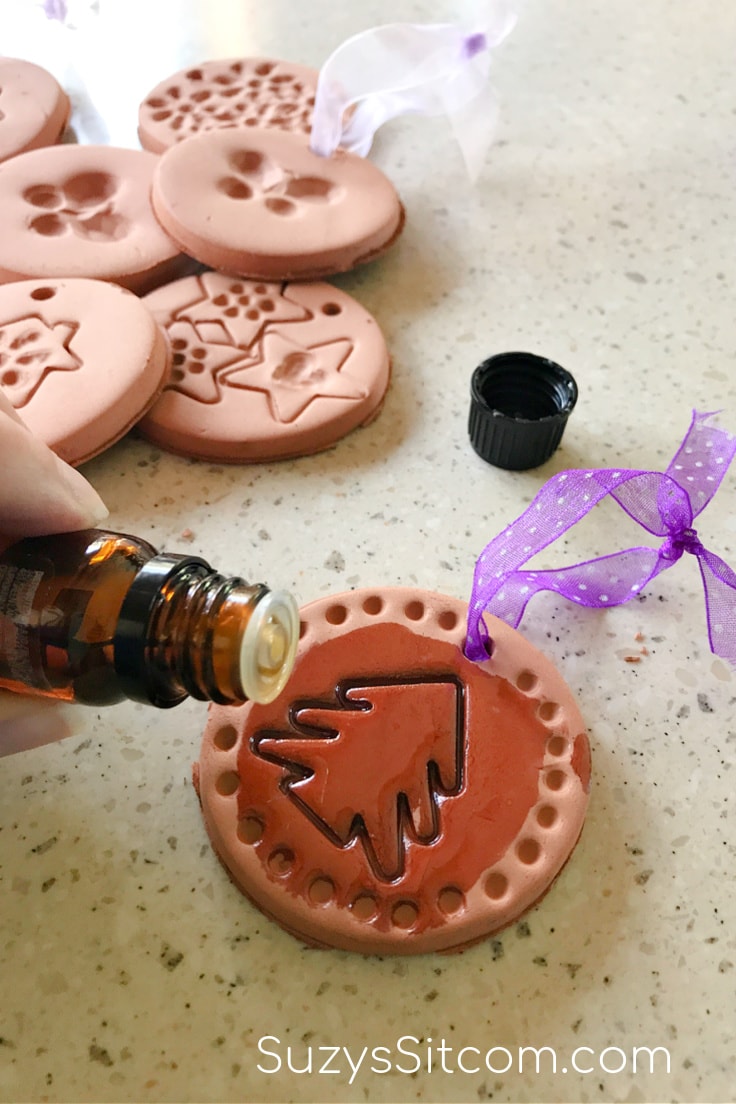
Thread a ribbon through each hole and knot.
Add drops of essential oil to your air-dried pieces. Spread with your finger or a cotton swab. Use a few drops of oil on each piece. (A little goes a long way). Allow the air-dry clay to soak up the oil. Mine took about 2 hours to completely soak up the oil.
Now place your clay fresheners in your drawers, or hang them in the closets. Soon, your storage areas will smell so much nicer!
And… if the scent starts to wane after a few weeks, simply add a few more drops of oil to each freshener!
I added these fun to make clay fresheners to all my drawers and closets in the RV and now we smell fresh like spring!
Here’s the printable card with everything you need to know about how to make Scented Clay Fresheners!

Scented Clay Fresheners
Equipment
- 1 Cookie Cutter any shape
- 1 straw
- 1 rolling pin or clay roller
- 1 Foil
Supplies
- 1 lb. Air Dry Clay Any color will work
- .33 oz Essential Oils Any scent
- 1 ea Narrow Ribbon
Instructions
- Knead air dry clay and roll out on foil about 1/4" thick
- Cut clay with cookie cutter
- Add hanging holes to each piece with a straw
- Press beads, crystals, stamps, or lace into each to add texture and design
- Allow to dry for 24 hours. Turn pieces over about halfway through.
- Thread a narrow ribbon through each one and knot.
- Add several drops of essential oil to each piece, using your finger or a cotton swab to spread.
- Allow the oil to soak into the clay (about 2 hours).
Love the ideas you see here on Ideas for the Home by Kenarry®? Subscribe today to get our weekly Ideas in Your Inbox newsletter plus other exclusive gifts and offers — all for FREE!
Love working with Clay?
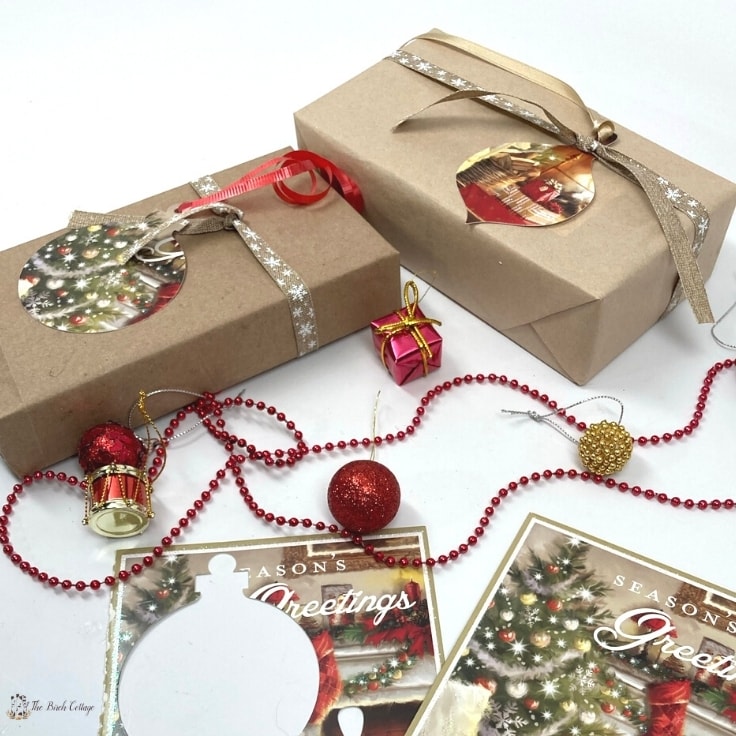
If you loved working with clay to make these scented air fresheners, then how about a few more clay-themed projects? Here are some of my favorites!
Make a Marbled Mothers Day Gift Set!
Pretty Peacock Journal Cover (with free pattern)

Sparkling Flamingo Plant Pokes
You may also enjoy these 3 clay ideas on Ideas for the Home by Kenarry®