DIY Cookie Tin Sewing Kit: How To Upcycle Cookie Tins
THIS POST MAY CONTAIN AFFILIATE LINKS. PLEASE SEE OUR FULL DISCLOSURE POLICY FOR DETAILS.
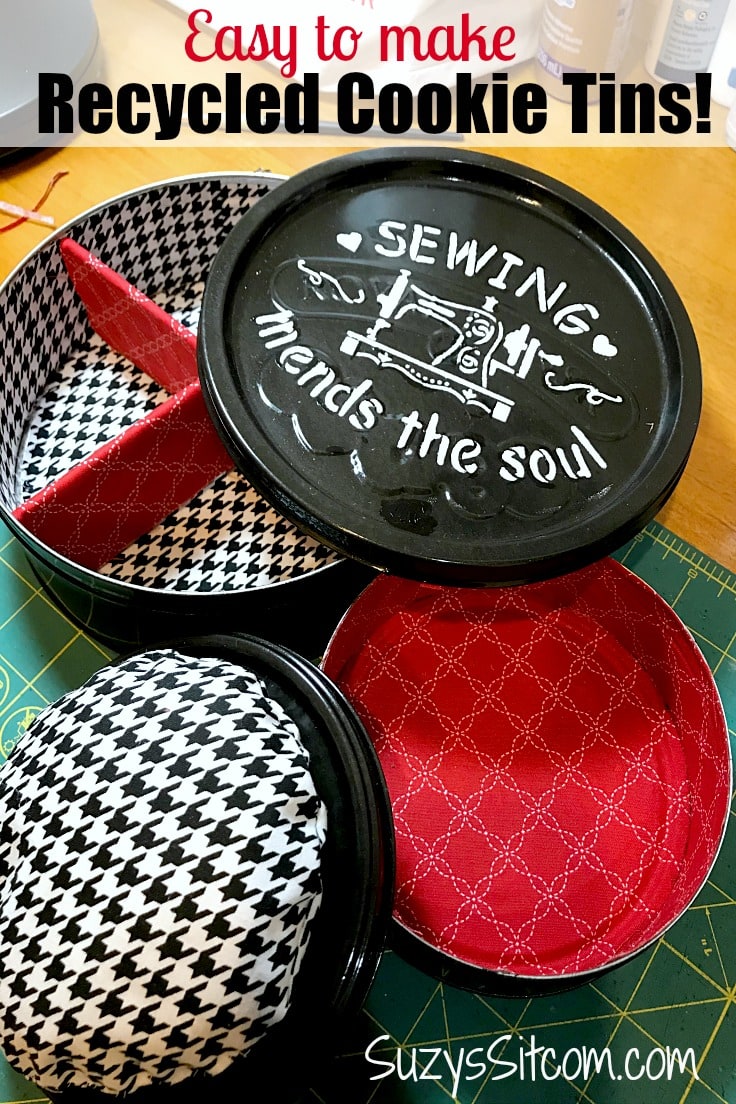
Do you have a bunch of tins laying around after the holidays? Make a DIY cookie tin sewing kit – it’s an easy way to upcycle your cookie tins!
I just cannot throw them away. I love all those wonderful tins that show up during the holidays. Here is a great way to recycle your cookie tins and create storage for your sewing or craft supplies.
Seems that nothing gets thrown out in my house without a little thought process. What can I make out of that? Since cookie tins are well known for handling sewing supplies, I decided to make them a bit more fun to look at and create something very useful in the process. This is Suzy from Suzy’s Sitcom, and I’d love to share the process with you!
The entire tutorial is in a printable card at the bottom of this post. But first, here is a little bit of info about the tools and supplies you’ll need.
How to Make A DIY Cookie Tin Sewing Kit
Of course, you could always just throw your sewing supplies into the tins and be done with it. But where is the fun in that? Let’s create something cute and useful too!
Want more ideas like this? Subscribe today to get our weekly Ideas in Your Inbox newsletter plus other exclusive gifts and offers — all for FREE!
What you need:
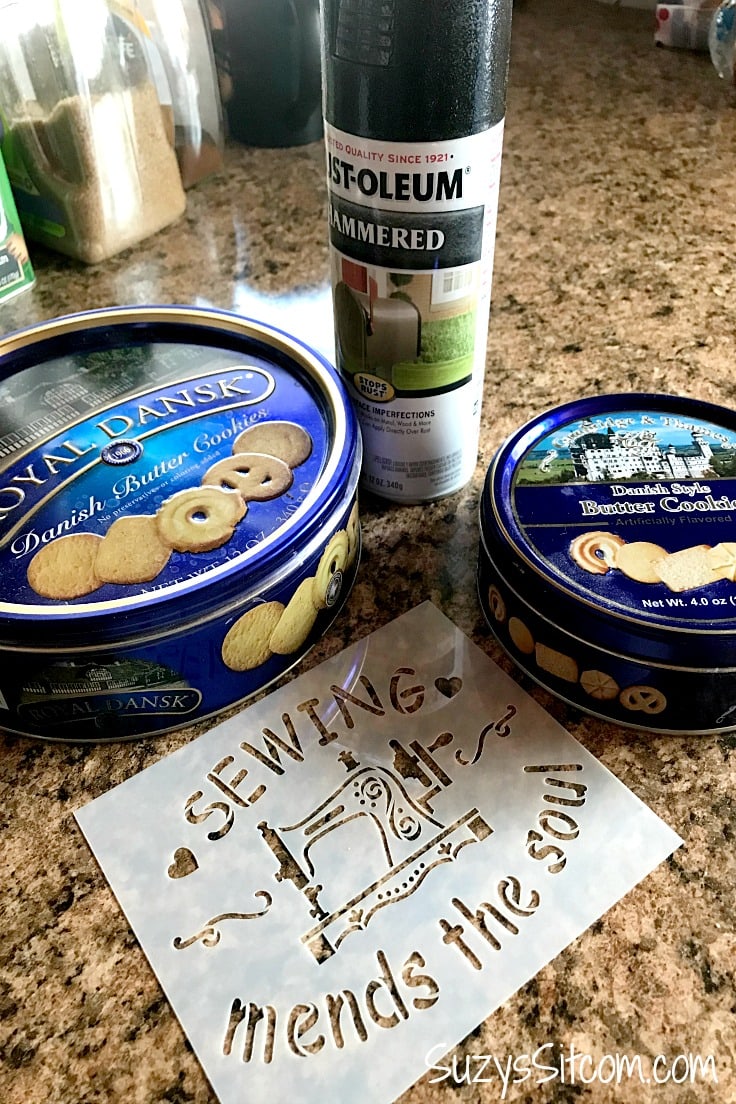
- A large and a small cookie tin (eat the cookies first)
- Black spray paint (for metal surfaces)
- White acrylic paint
- Sewing Mends the Soul Stencil (optional)
- Pouncing brush
- Painters tape
- Fabric scraps
- Cardboard scraps
- Small amount of fiber fill stuffing
- Mod Podge
spray paint the cookie tins
Be sure to use spray paint that is meant for metal. It will help it to adhere. I used black for this project, but any color preference will certainly work! Be sure to allow your tins to dry completely before going to the next step.
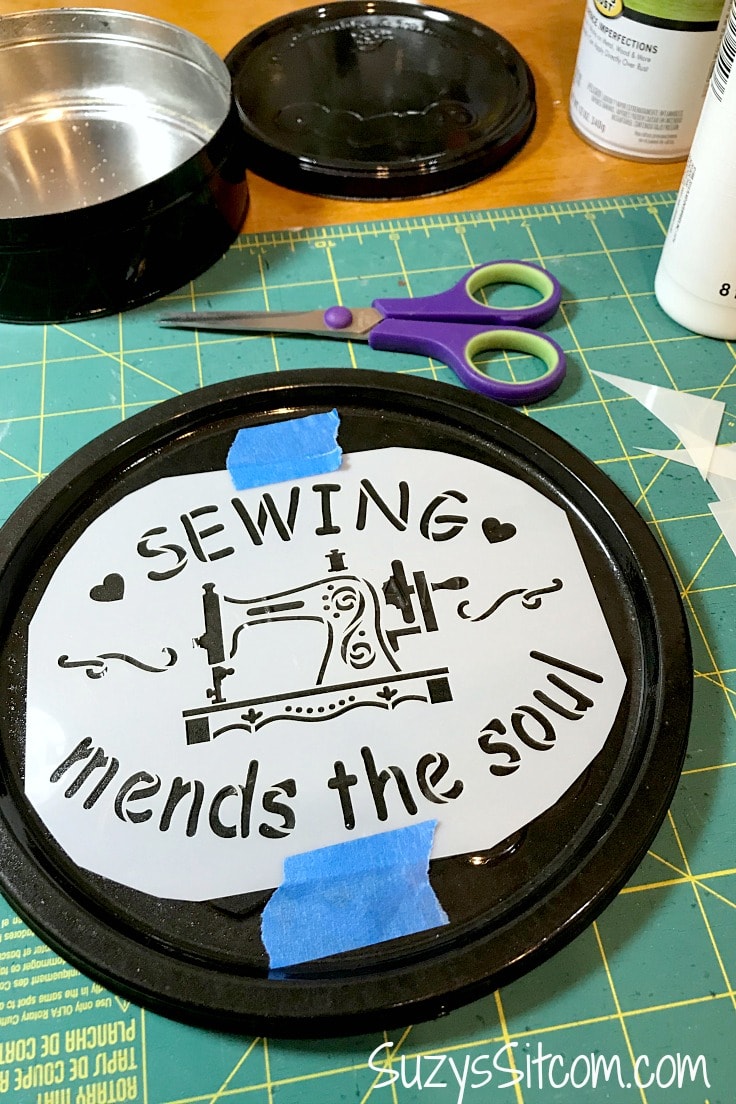
stencil the large cookie tin
The large cookie tin lid is a perfect size for this stencil! Clip the corners of the stencil to allow it to lay flat on the lid. Use painter’s tape to hold in place for stenciling. (It will not stick to your new paint and damage it).
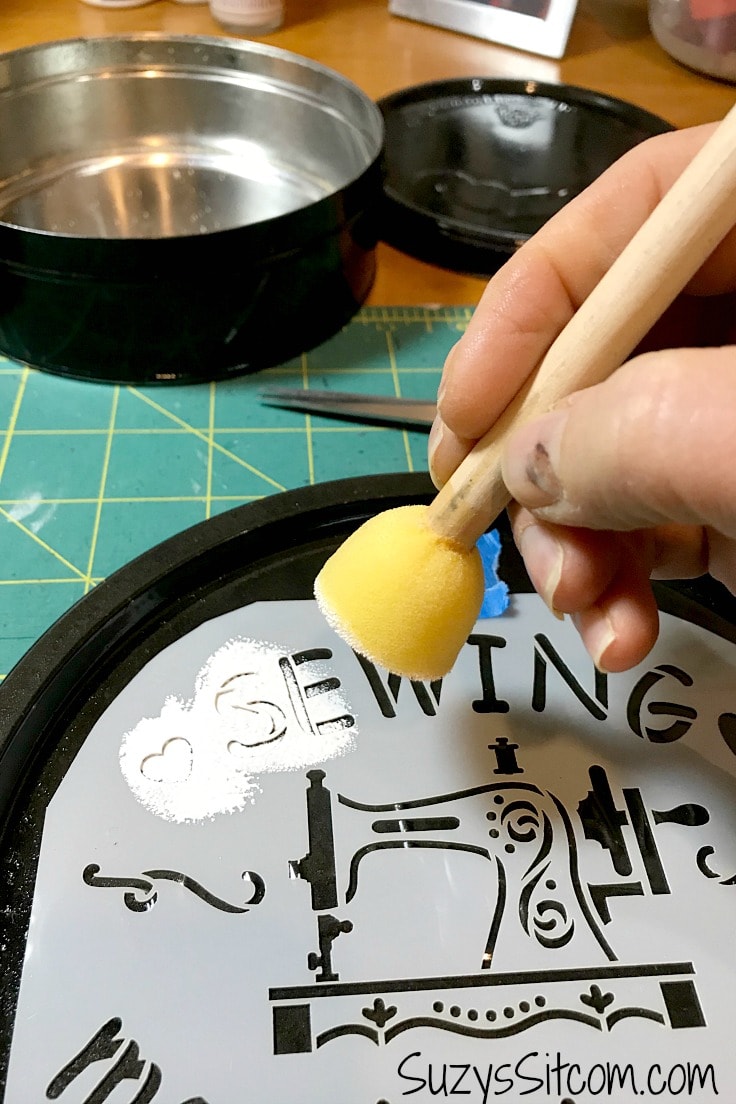
Use the pouncing brush or a sponge to apply the acrylic paint to the stencil. Lightly dab the brush into the paint, and then dab a paper towel to remove excess paint before applying it to the stencil. (You want a relatively dry brush). Be sure to push the stencil down as you are working if your can lid is not entirely flat.
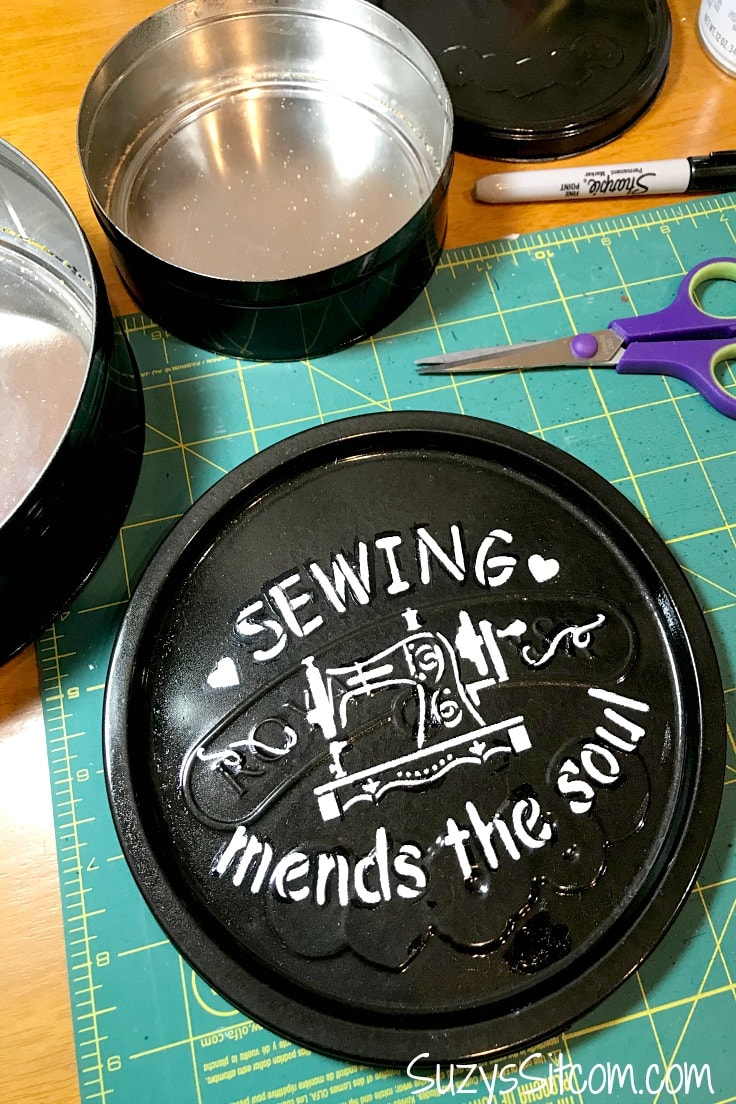
Use a small brush and white paint to do any touching up of the stencil work if needed.
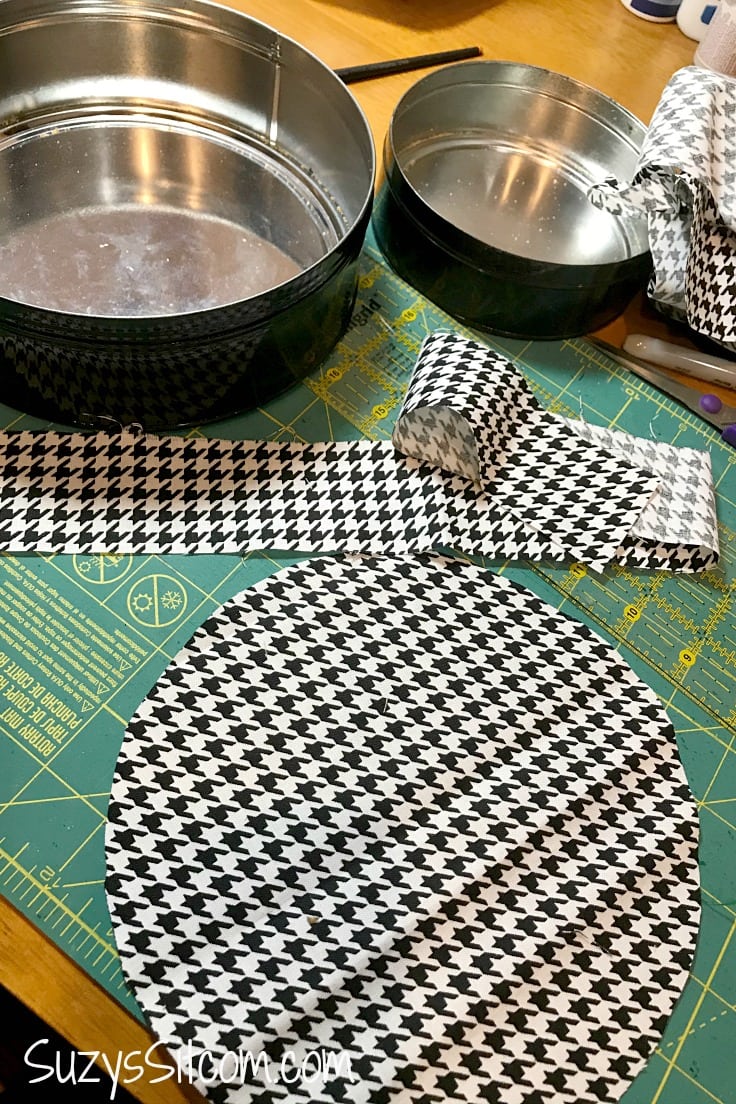
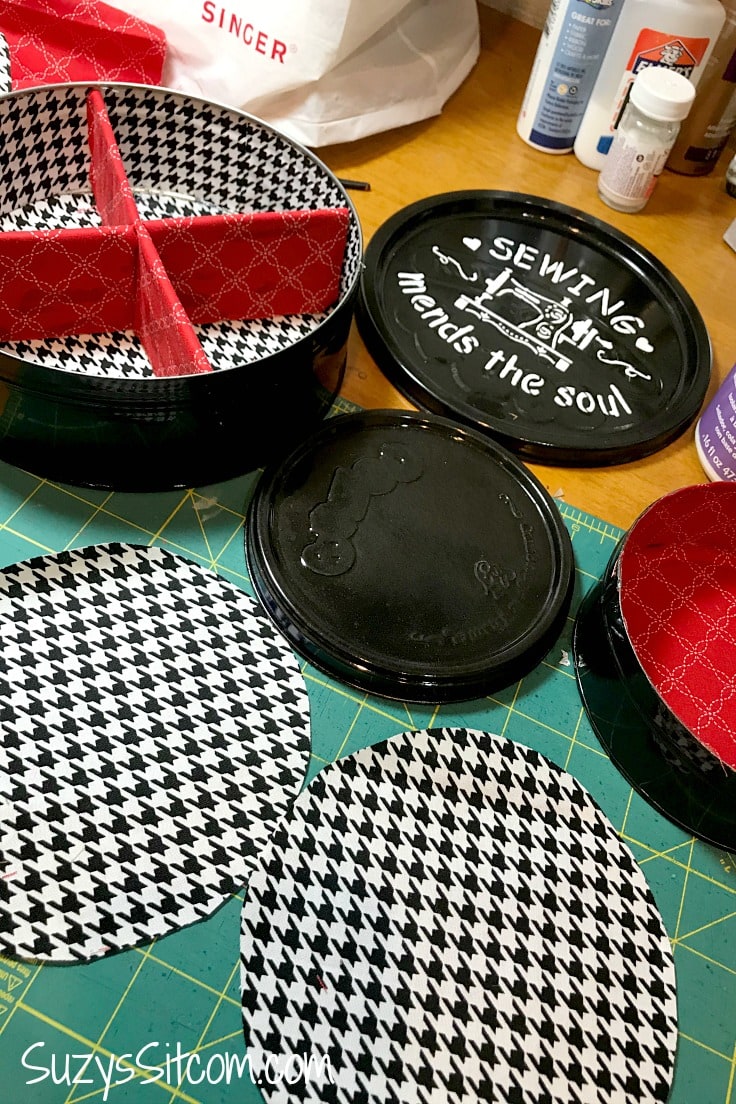
Cutting fabric for lining the cookie tins
In order to line the large tin, I chose a fun black and white print. Use the base of the tin to cut out a circle of fabric. Measure the depth of your tin (in my case, it was 2″ deep), and cut a long strip of fabric the width of your measurement.
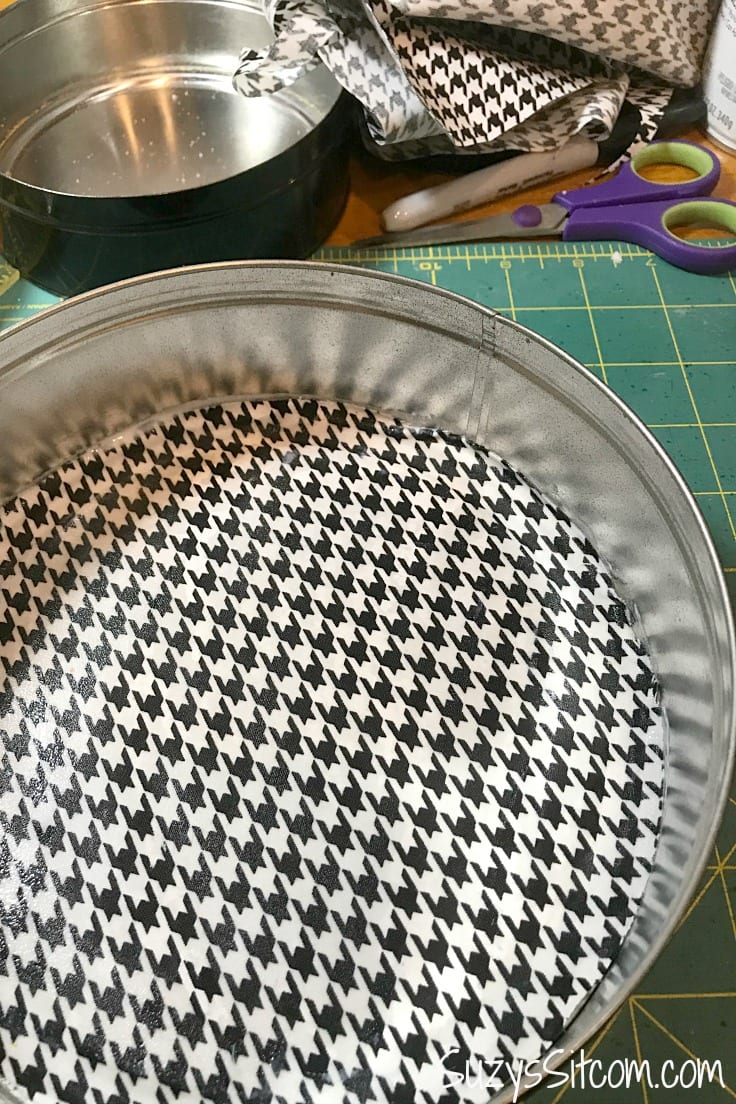
Use Mod Podge To Seal The Tin
Paint the bottom of the tin with Mod Podge and place the large circle of fabric into the bottom of the tin. Paint Mod Podge on top of the fabric. Allow it to dry.
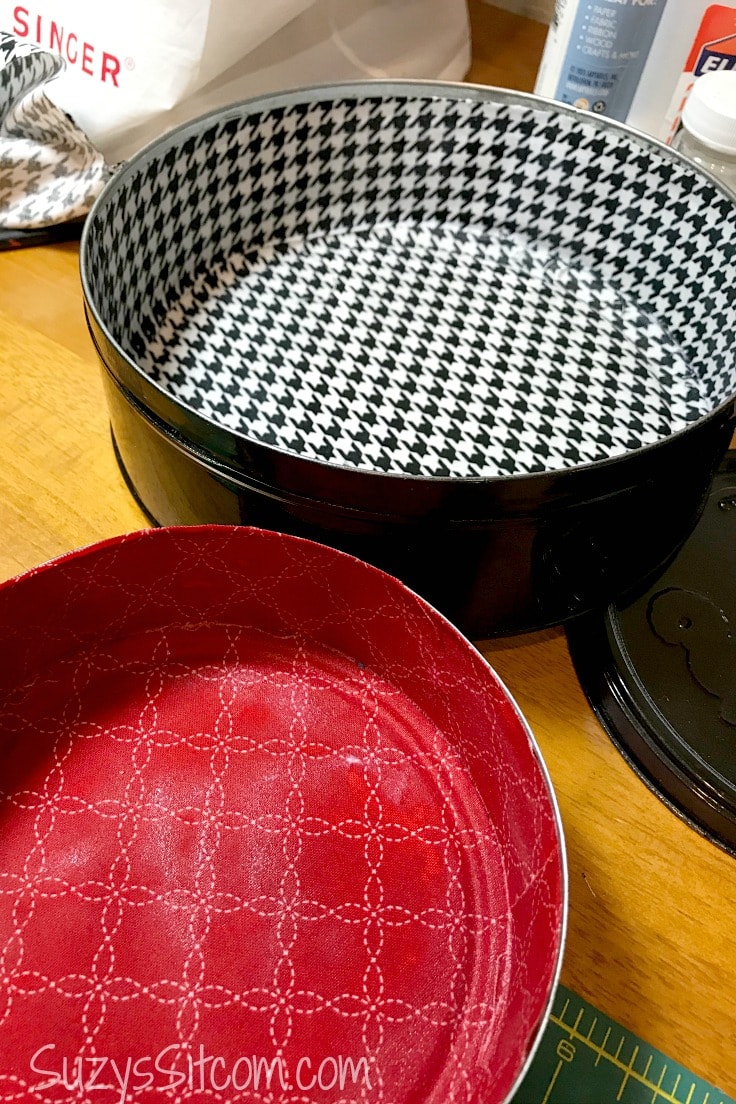
Paint the sides of the tin with Mod Podge and place the fabric strip in place. Mod Podge over top of the fabric. Allow it to dry. Repeat this entire process for the small tin. I chose a red fabric for that tin.

creating sections in the cookie tin
In order to create sections in the large cookie tin, cut two cardboard strips that measure the width of the tin in length and are the depth of the tin in height. In my example, my tin is 12″ wide and 2″ deep, so my strips are 12″ long x 2″ wide.
Cut a notch into the center of each cardboard strip.
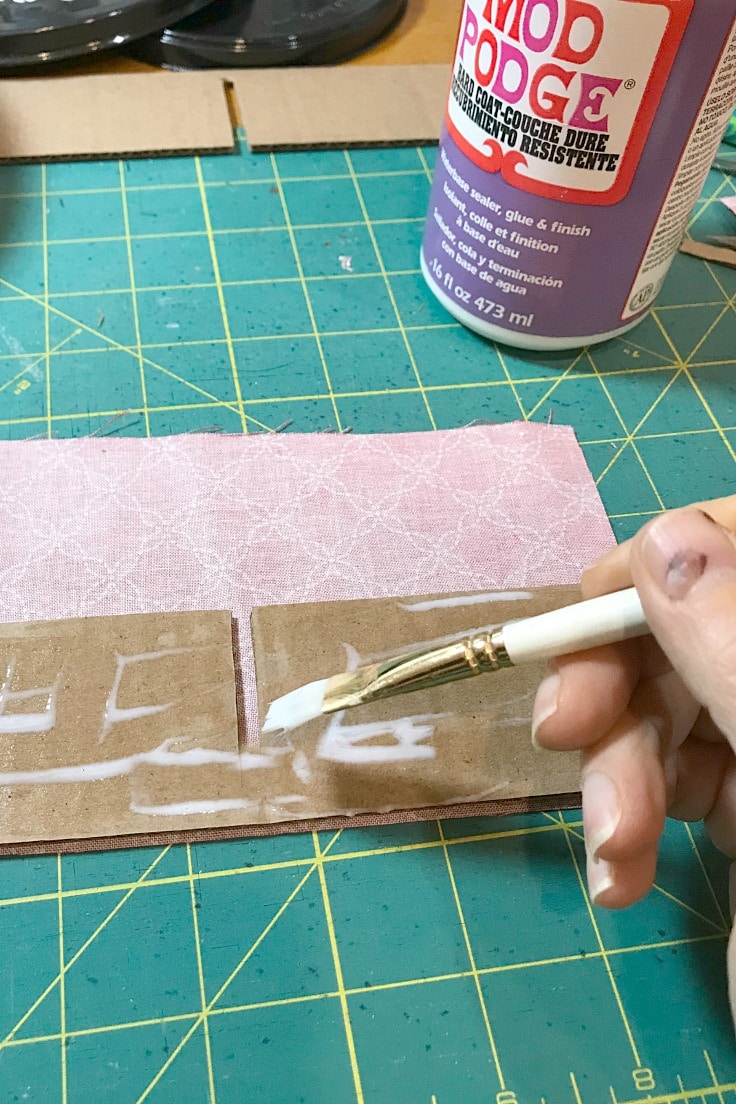
covering the cardboard strips
Cut fabric strips to cover the cardboard strips. Cut the strips the length of your cardboard strip and twice as wide so that it can be folded over the top of the cardboard strip and give the top a finished edge. In the example above, the fabric strip was 12″ long x 4″ wide.
Paint the backside of the cardboard with Mod Podge, place the fabric in place, paint the front side of the cardboard with Mod Podge, and fold the fabric over. Be sure to have the open notch on top of one piece and on the bottom of the other.
Once the fabric is dry, clip the notches with scissors.
To assemble, push the cardboard strip with the bottom notch into the cardboard strip with the top-notch. Place the cardboard insert into the large tin.
creating the pin cushion
For the small tin, create a pin cushion lid. Cut two circles of fabric using the small tin lid as a template. With right sides together and using a 1/4″ seam, sew the two circles of fabric together around the outside edge, leaving about 1″ unsewn.
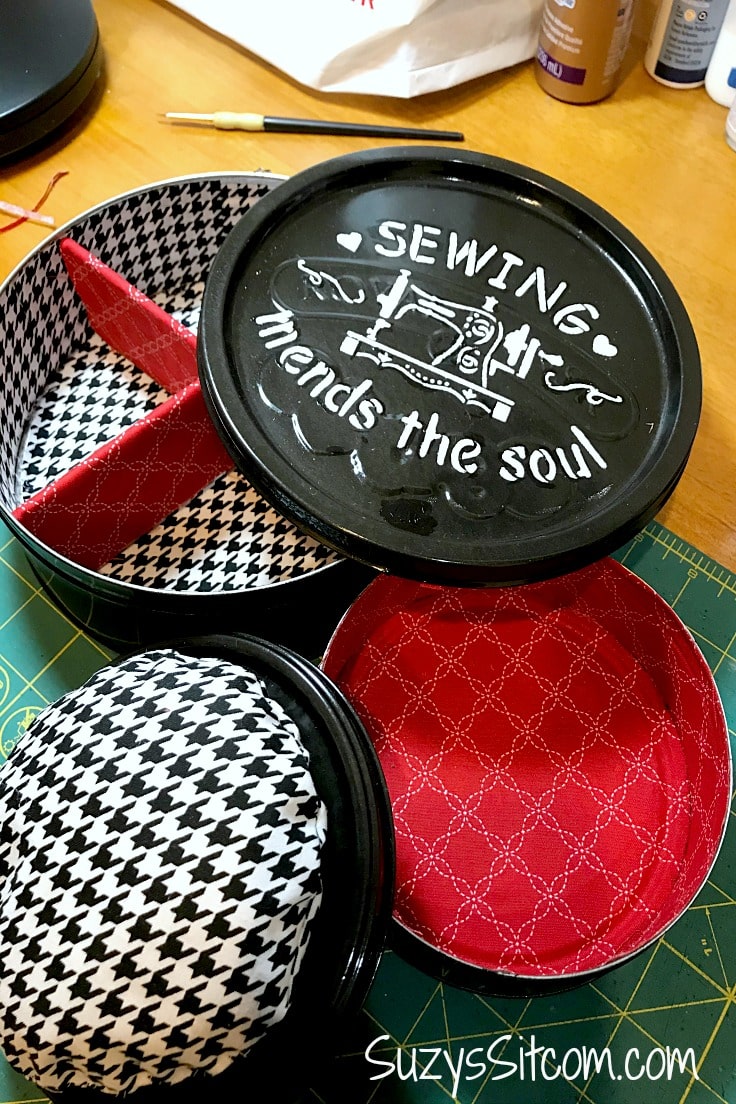
Using the unsewn area, turn the fabric right side out. Stuff with Polyfil stuffing and hand sew the 1″ open seam closed. Use white tacky glue to attach the pincushion to the top of the small tin.
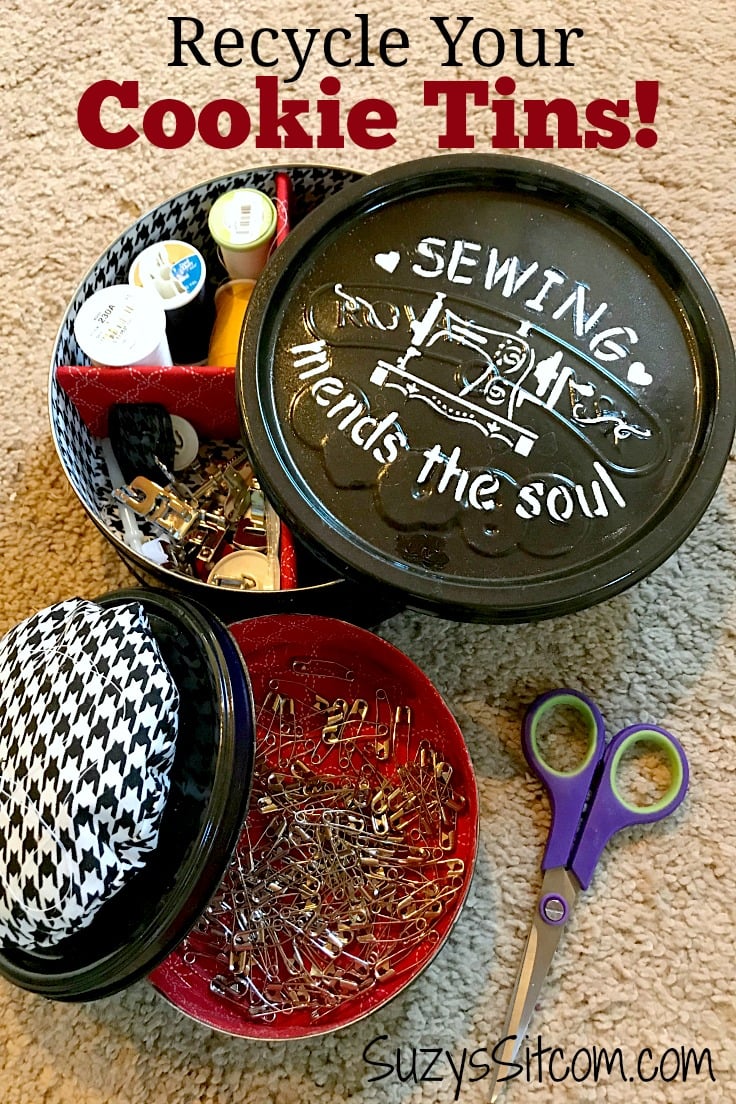
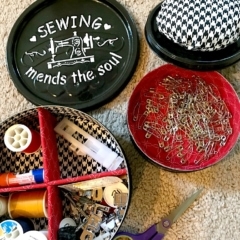
Now fill your tins with supplies! What a great way to recycle your tins into pretty things with a purpose!
Here’s the printable card with everything you need to know about how to create pretty storage with recycled cookie tins!

DIY Cookie Tin Sewing Kit
Supplies
- 2 ea. Cookie Tins Any size will work
- 1 ea. Black Spray Paint For metals
- 1 ea. White Acrylic Paint
- 1 ea. Stencil
- 1 ea. Pouncing Brush (for stenciling)
- 1 ea. Painters Tape (for holding stencil in place)
- 1 ea. Fabric Scraps
- 1 ea. Cardboard scraps
- 1 ea. Fiber fill stuffing (just a small amount)
- 1 ea. Mod Podge
Instructions
- Spray paint the cookie tins. Allow them to dry.
- Stencil the large cookie tin lid. Touch up if needed. Allow it to dry.
- Cut fabric for lining the tins using the bases of the tins and the depths of the sides for measurements. Cut circles of fabric for the bases and strips for the sides.
- Glue fabric in place using Mod Podge.
- In order to create sections in the large cookie tin, cut two cardboard strips that measure the width of the tin in length and are the depth of the tin in height. In my example, my tin is 12" wide and 2" deep, so my strips are 12" long x 2" wide. Cut a notch into the center of each cardboard strip.
- Cut fabric strips to cover the cardboard strips. Cut the strips the length of your cardboard strip and twice as wide so that it can be folded over the top of the cardboard strip and give the top a finished edge. Paint the back side of the cardboard with Mod Podge, place the fabric in place, paint the front side of the cardboard with Mod Podge and fold the fabric over. Be sure to have the open notch on top of one piece and on the bottom of the other. Once the fabric is dry, clip the notches with scissors.
- To assemble, push the cardboard strip with the bottom notch into the cardboard strip with the top notch. Place the cardboard insert into the large tin.
- For the small tin, create a pin cushion lid. Cut two circles of fabric using the small tin lid as a template. With right sides together and using a 1/4" seam, sew the two circles of fabric together around the outside edge, leaving about 1" unsewn.
- Using the unsewn area, turn the fabric right side out. Stuff with Polyfil stuffing and hand sew the 1" open seam closed. Use white tacky glue to attach the pin cushion to the top of the small tin.
Do you love to create with recycled items?
Here are a few more craft ideas from my website. Create something amazing with recycled items!
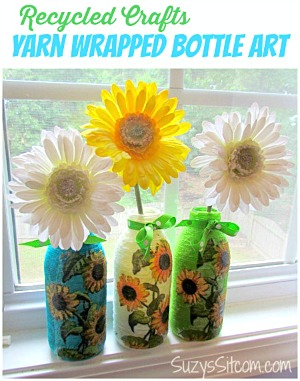
Recycle Crafts: Yarn Wrapped Bottles!
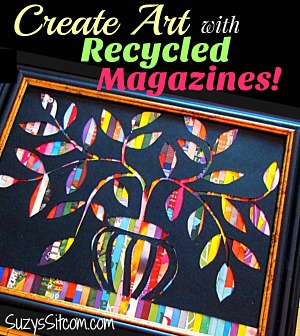
Create Beautiful Art from Recycled Magazines!
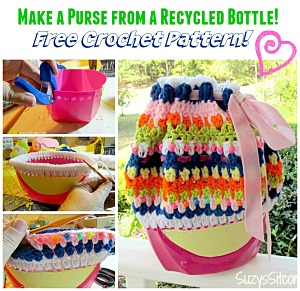
Make a Purse from a Recycled Bottle (Free Crochet Pattern)
Love the ideas you see here on Ideas for the Home by Kenarry®? Subscribe today to get our FREE DIY & Craft Planning Calendar, plus our weekly Ideas in Your Inbox newsletter filled with creative tips and exclusive offers!
You may also enjoy these craft ideas on Ideas for the Home by Kenarry® –
Bravo, you get the award for creative use of material and the upcycle of cookie tins!!!!
Thanks Ava! Glad you liked the idea!
Best wishes,
Carrie
Ideas for the Home by Kenarry
I have 3 of these already – my grandma did this in the 1950s and 1960s, and I inherited them about 20 years ago 🙂 They weren’t painted or redecorated, she was just using what she had on hand. Now I think it adds to the charm to be able to see the original tin designs. I was ecstatic to find that one of them was filled with cross-stitch supplies and two sets of “days of the week” kitchen towel patterns 🙂
What is old is new again, so many of these forgotten tips and tricks are getting new life. Thanks for posting!
Amanda,
I love that you’ve got vintage tins you’re using from your Grandma for your cross-stitch and other projects. What fun!
Thanks for stopping by to say hello!
Best wishes,
Carrie
Ideas for the Home by Kenarry
I love the things you do. Recycling and using the items in such a useful way. I can’t get rid of my tins. I’m such collector of boxes and tins and use them always. I really do like the idea of repainting, etc. some of the tins. I do keep some in their original state. They are ideal for storing sewing, embroidery (I have at least 2 dozen of old dishtowel patterns and make them for wedding gifts.) and odds and ends. Fun!! Thank for you sharing such fun stuff. I’m an 84 year old crafter and hope to never stop.