Create a Wooden Perpetual Calendar
THIS POST MAY CONTAIN AFFILIATE LINKS. PLEASE SEE OUR FULL DISCLOSURE POLICY FOR DETAILS.
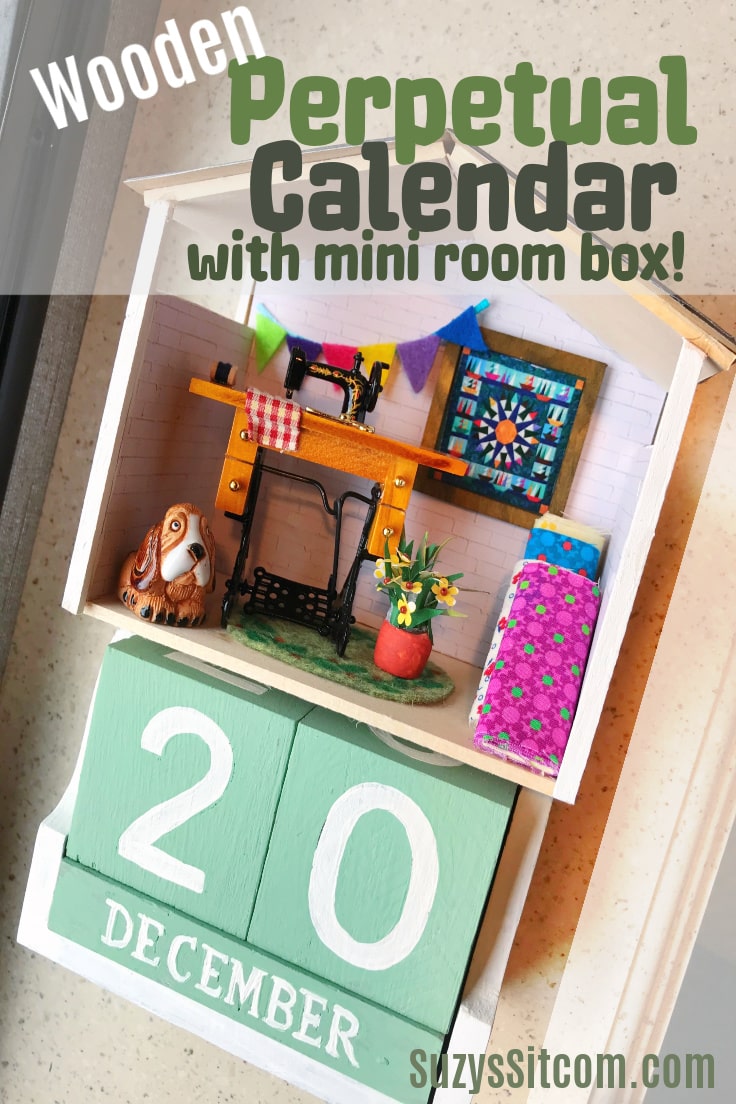
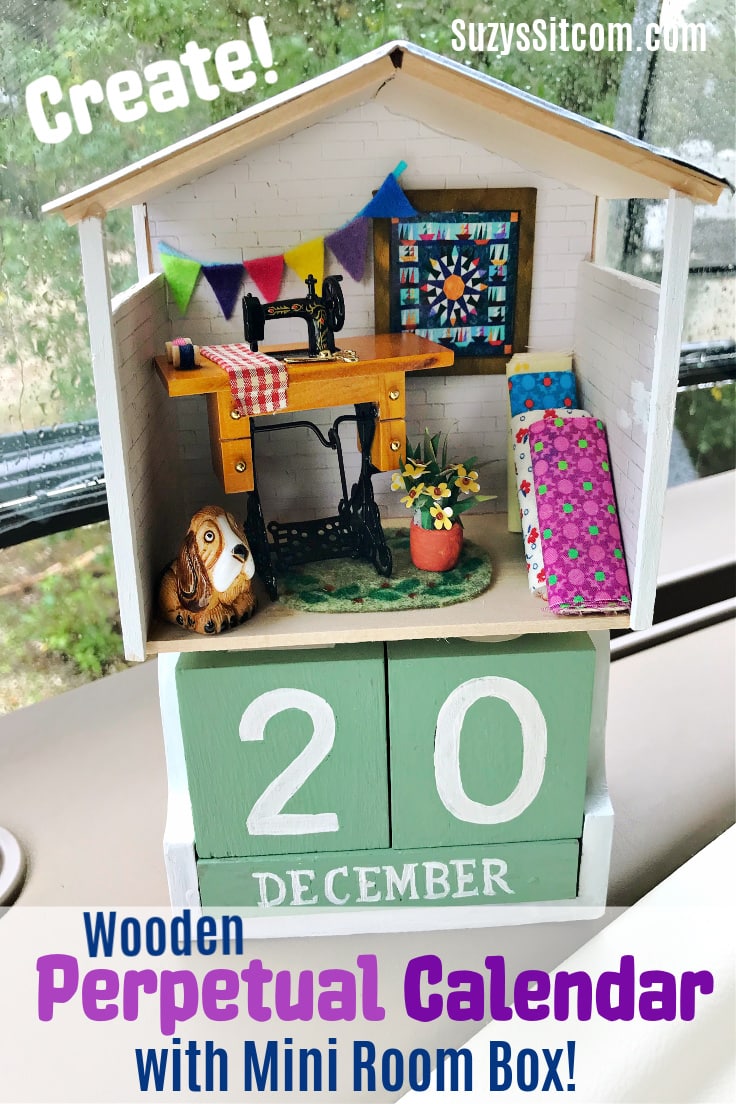
Stay organized with the new year and create a cute wooden perpetual calendar with a mini room box! Personalize your mini room box with cute miniatures. A fun way to keep track of the date and work with miniatures simultaneously!
This project combined my love of miniatures with a unique way to keep track of the days and was inspired by the many wooden advent calendars I have seen over the holidays. This unique and fun-to-make calendar can be displayed all year long and can be personalized in any way that you like!
This is Suzy from Suzys Sitcom. I live full-time in an RV as my husband and I travel the country. Room in our RV is not something we have an abundance of, so many of my projects need to take up very little space. It is a good thing that I love working with miniatures!
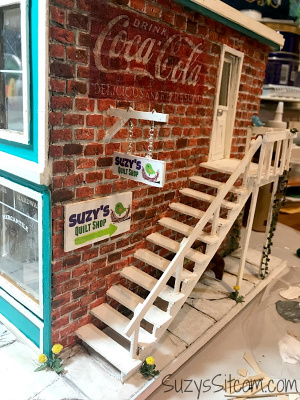
I love to sew also, so my miniature room is a sewing room. Feel free to personalize this project to suit you! Check out the miniature section of your local hobby store and see what works for you. There is so much to choose from!
How to make a wooden perpetual calendar
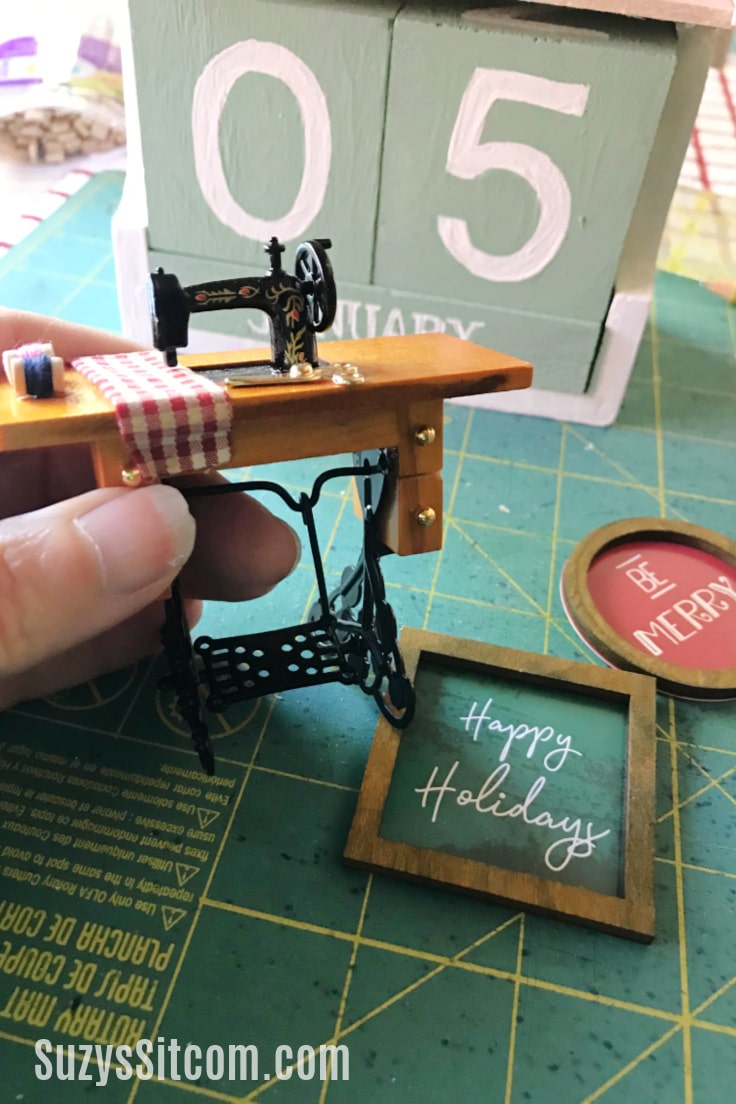
The actual wooden calendar in this tutorial is a cheap wooden desk perpetual calendar that I converted to a miniature room box. It is the basic structure that the project is built from. The miniature room was inspired by a tiny sewing machine table that I happened upon.
The entire tutorial is in a printable card at the bottom of this post. But first, here is a little bit of info about the tools and supplies you’ll need.
What you need:
Want more ideas like this? Subscribe today to get our weekly Ideas in Your Inbox newsletter plus other exclusive gifts and offers — all for FREE!
Tools:
Supplies:
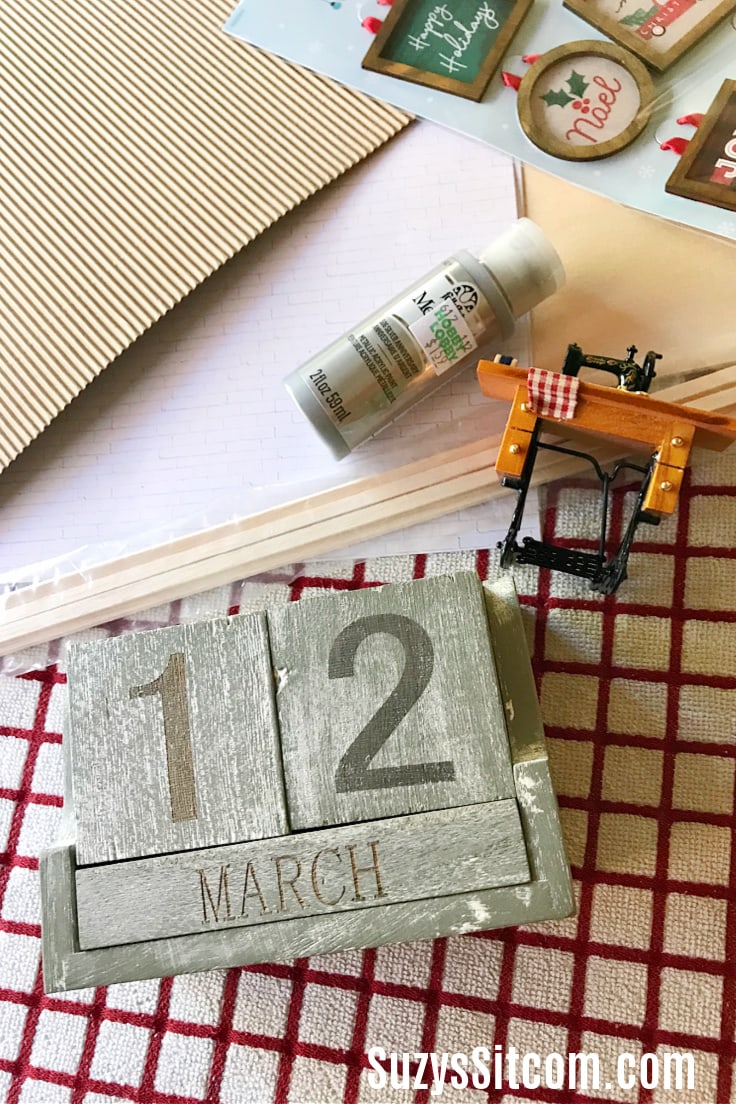
- Desktop Wooden Perpetual Calendar
- Hobby Bass Wood- 1/8″ thick x 36″
- Balsa Wood 1/8″ x 3/16 x 36″
- Scrapbooking Papers- white brick, corrugated
- Acrylic Paints
- Assorted Miniatures – Sewing Machine
How to make a wooden perpetual calendar
Paint the calendar pieces
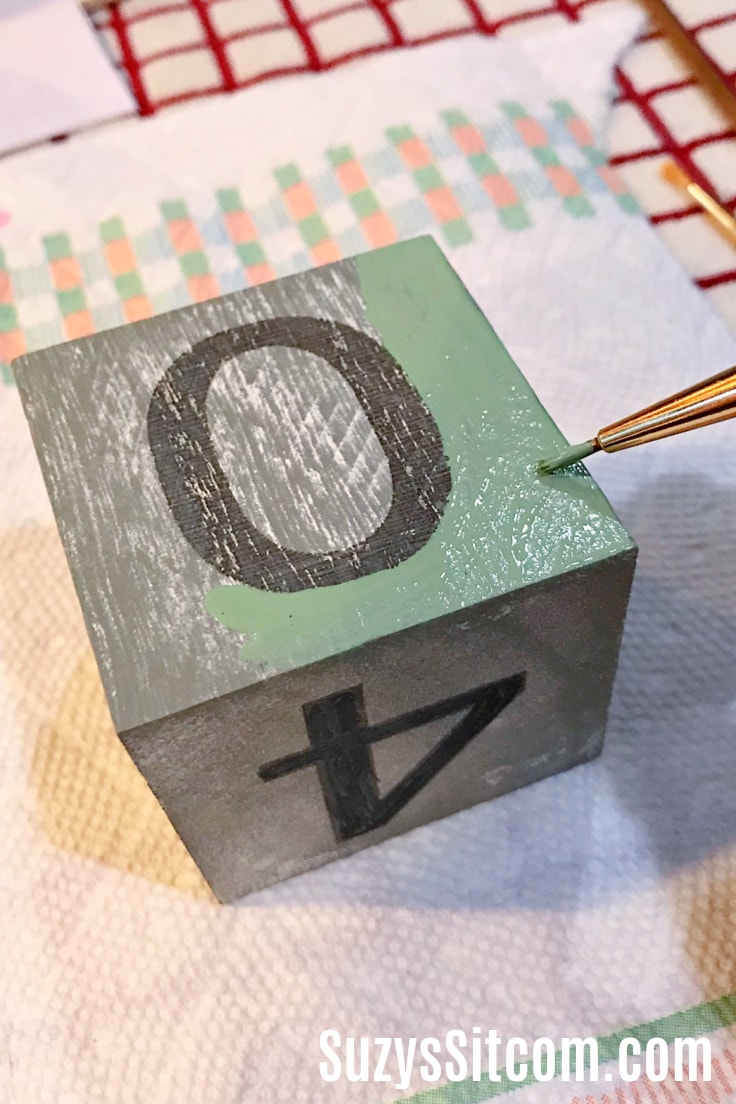
I purchased this wooden calendar new, but as you see, it really isn’t that nice to look at. I decided to repaint it using acrylic paints. This step is optional. If you love your calendar as is, then you do not need to repaint it.
I used the numbers already painted onto the blocks as a basis for my repaint job, painting in sage green and then adding the numbers in white.
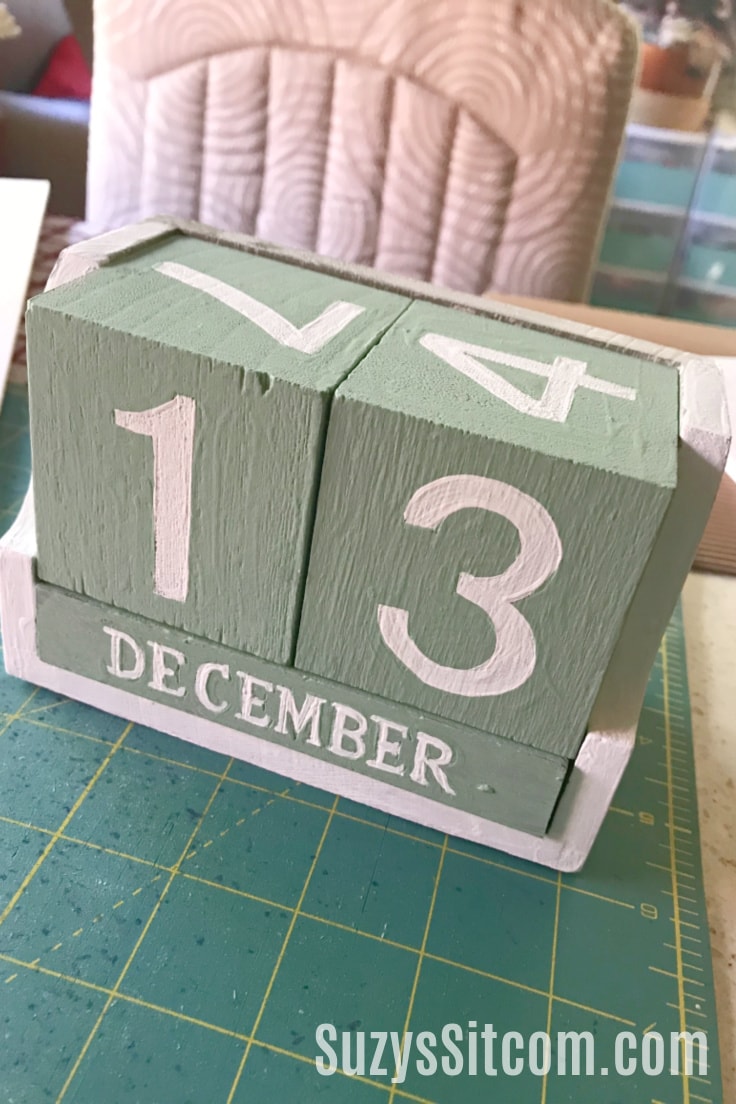
Once all pieces have thoroughly dried, assemble the calendar and lets start making the mini room box!
Creating the Mini Room Box
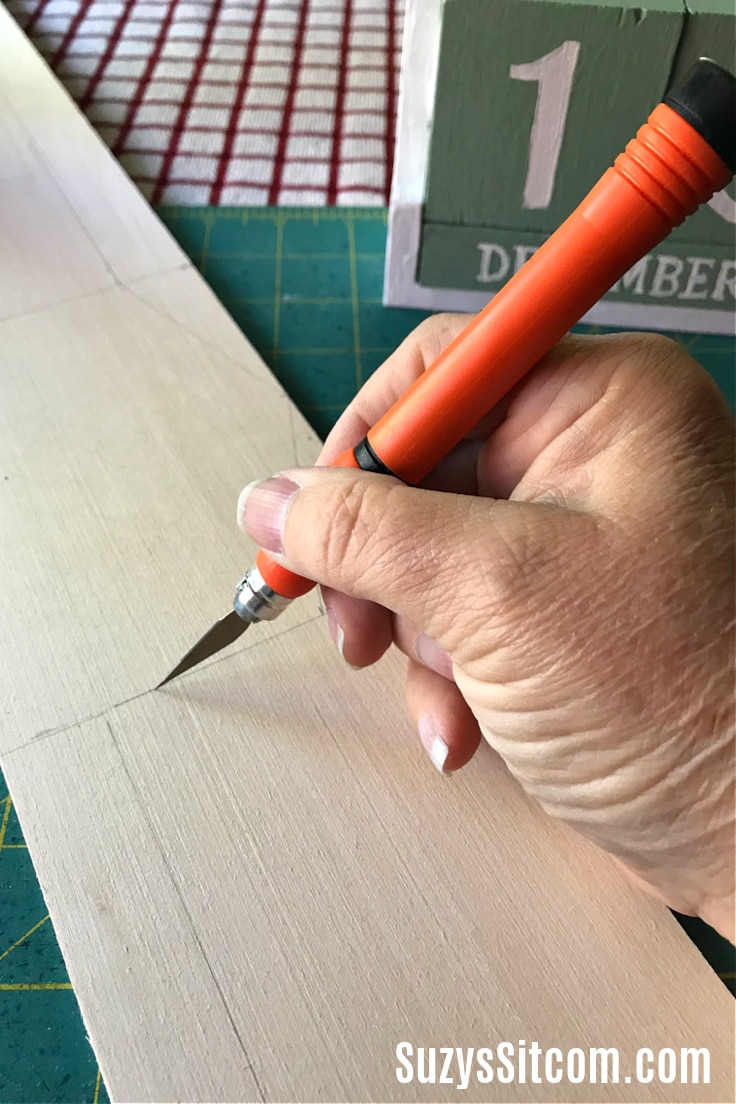
Cut the wood structure
Carefully use a craft knife to cut the bass wood into the following:
- Floor- 5.5″ x 3″
- Side Walls- 3″ x 3″ (cut 2)
- Back Wall- cut a pentagon shape- 5.5″ wide at the base, 4″ tall sides, and the peak is at 5″ tall.
- Roof- 3″ x 3″ (cut 2)
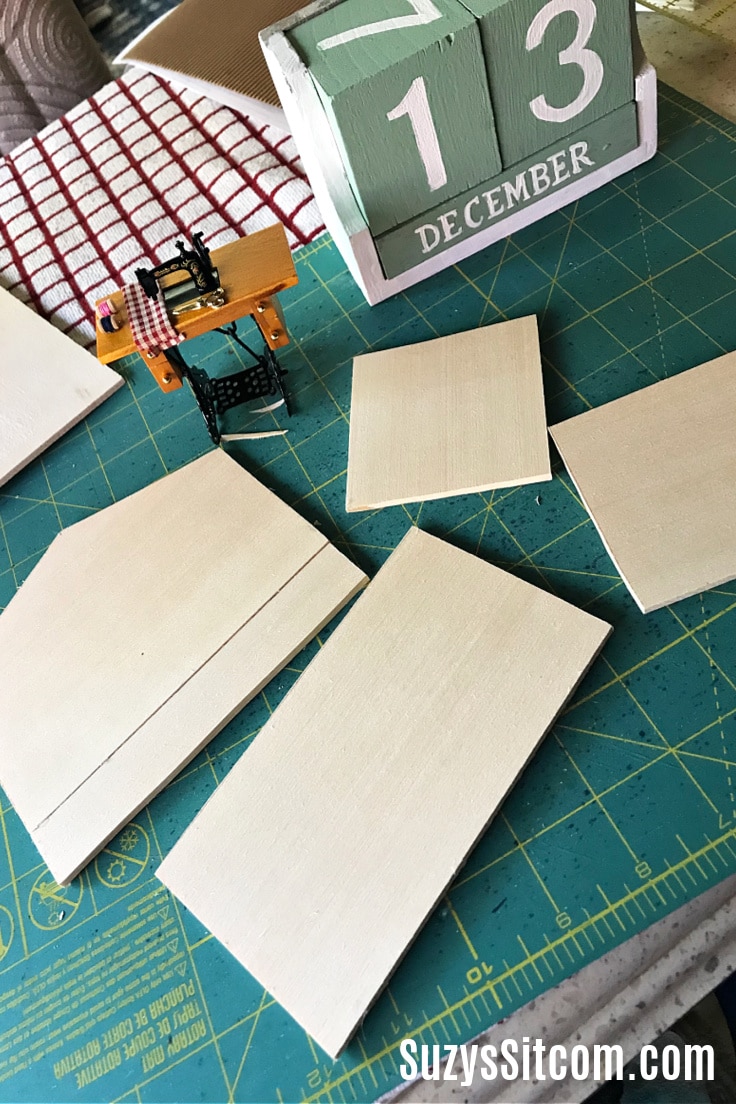
When cutting, be sure to cut away from your fingers! As you can see in the photo above, my wood was not wide enough for the 5″ tall peak in the back wall, so I added an inch to the bottom of the piece using hot glue. This seam will be covered later with scrapbooking paper.
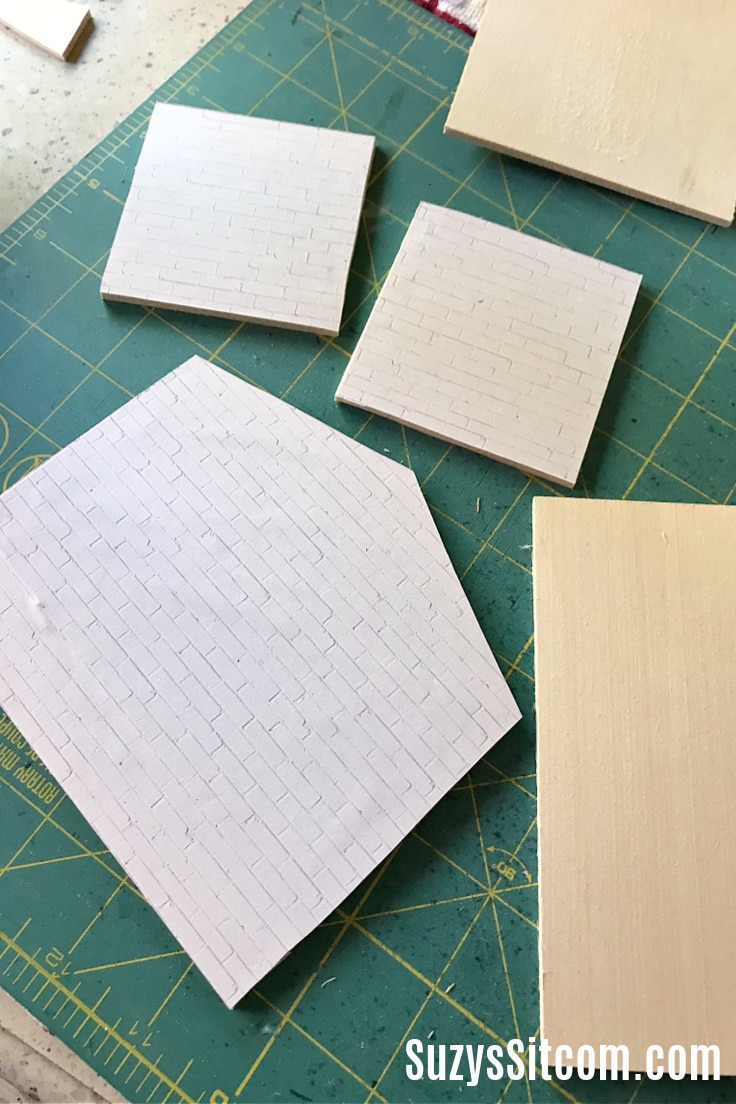
Add decorative scrapbook paper
Cut decorative scrapbooking paper to fit one side of the side walls and the inside peaked back wall. Add a thin coating of white tacky glue to each piece and press on the paper. (For a even coat of glue, an old paint brush works well). Allow to dry.
Assemble the Mini Room Box
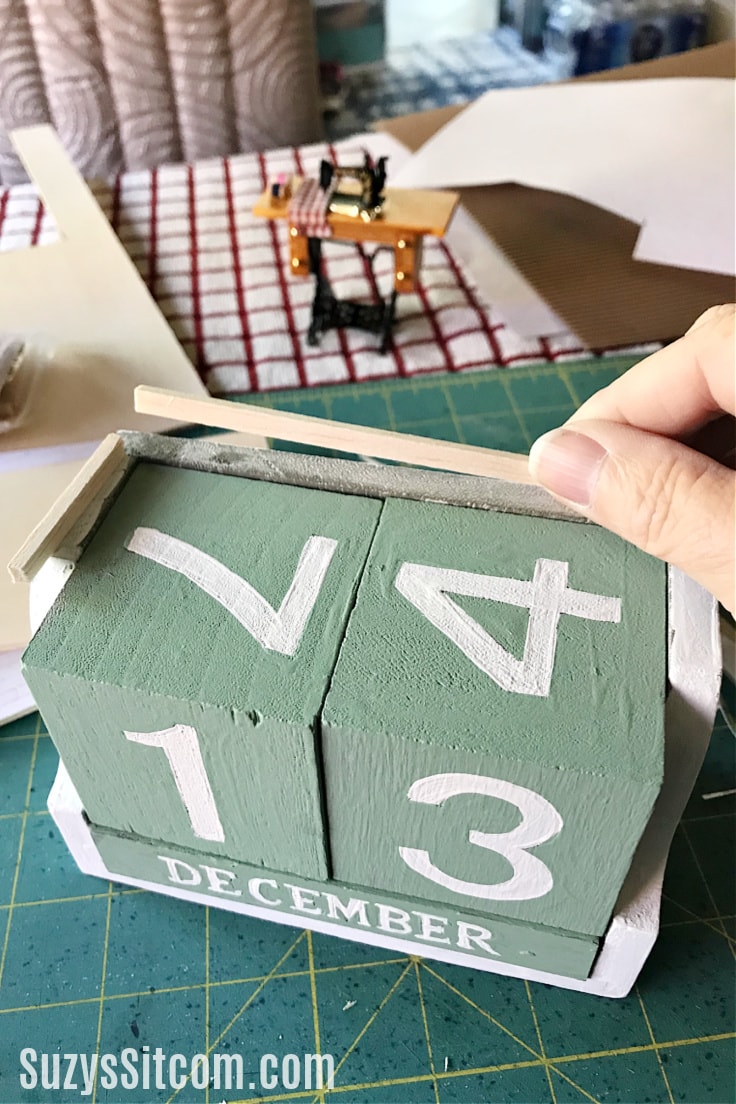
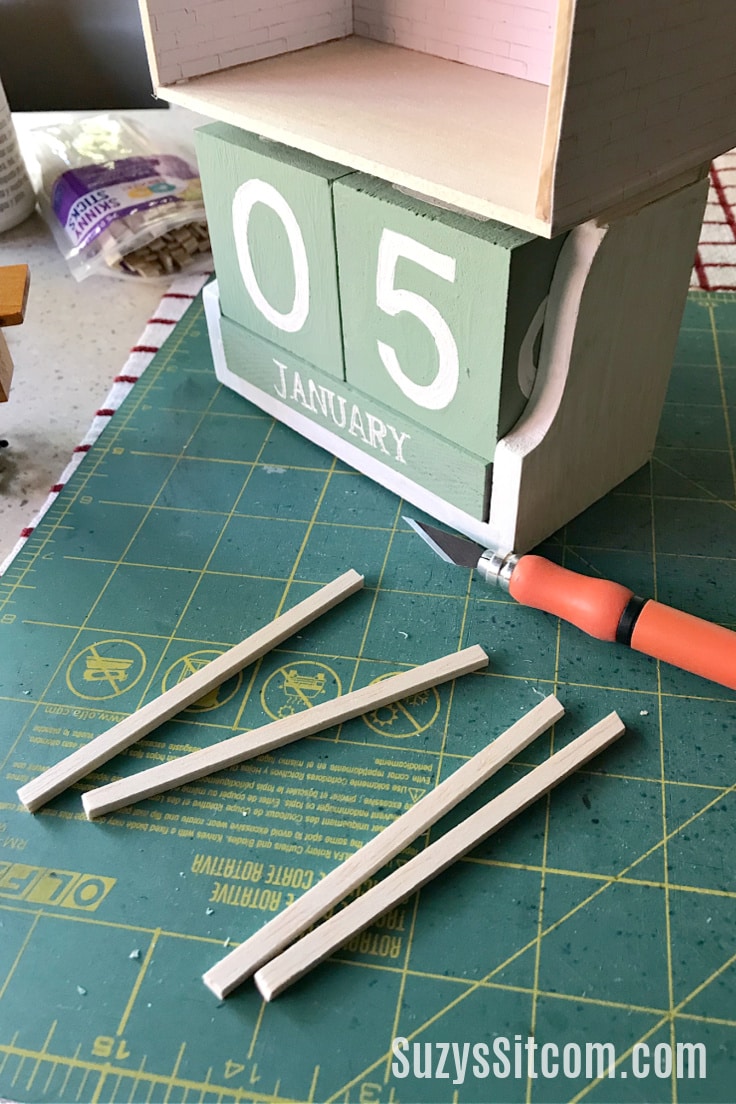
In order to give a bit of room to easily switch out the dates on the perpetual calendar, it is necessary to lift the room box up about a 1/4″. Cut three pieces of balsa wood to fit the top of the calendar and glue on with hot glue as shown above.
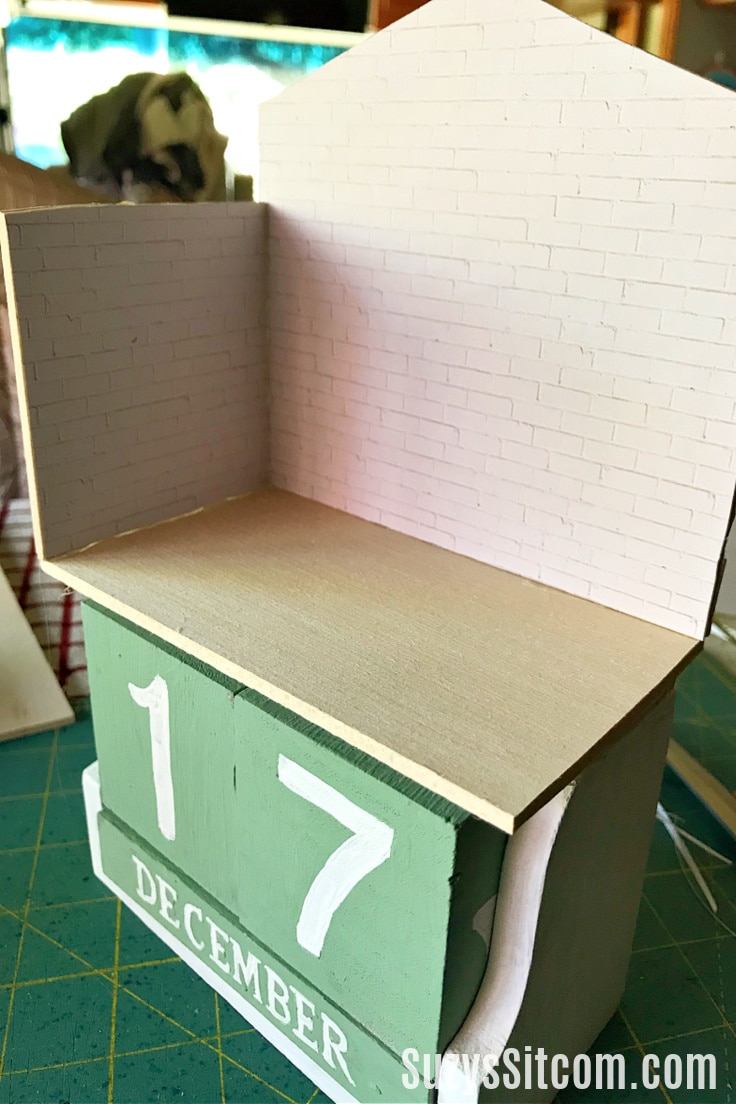
Glue the floor into place with hot glue and then add the sides one by one with the scrapbook papered side inside.
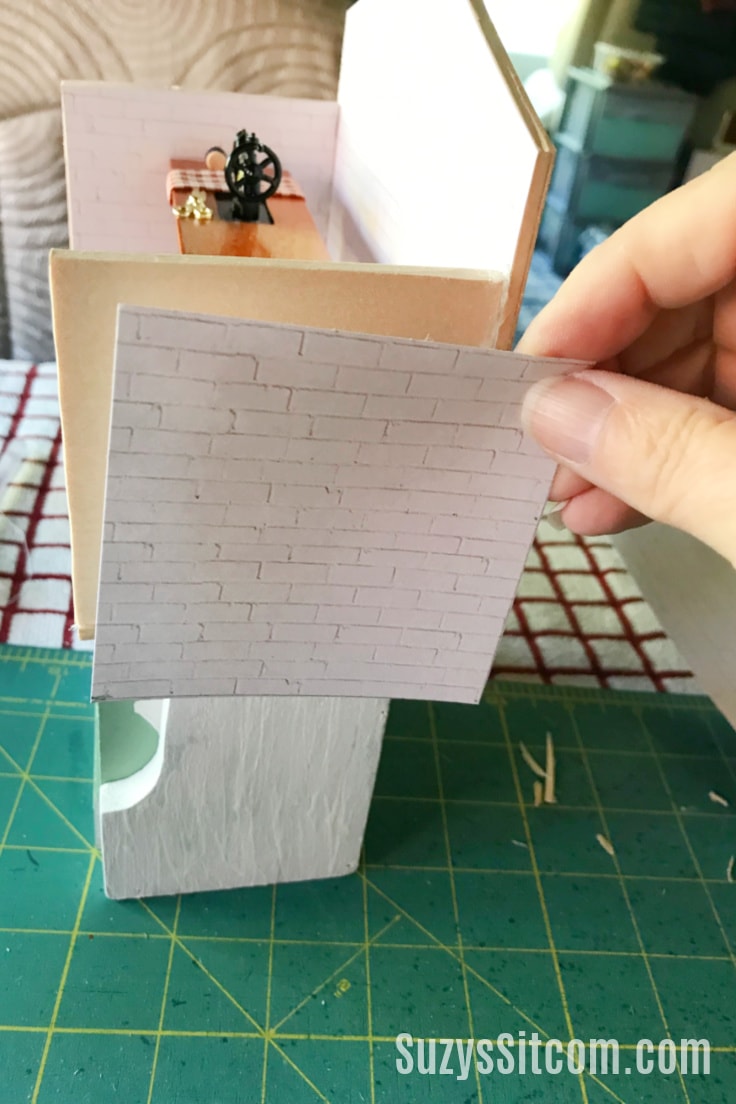
Add decorative paper to the outside
Add more of the scrapbooking paper, cut to size to the outside of the mini room box. Another option would be to paint the outside. Use tacky glue and a brush for this step as it makes for a much smoother finish. Make it your own!
Assembling the Roof
Cut four balsa wood sticks to 4″. These will be used for edging and to help hold up the roof.
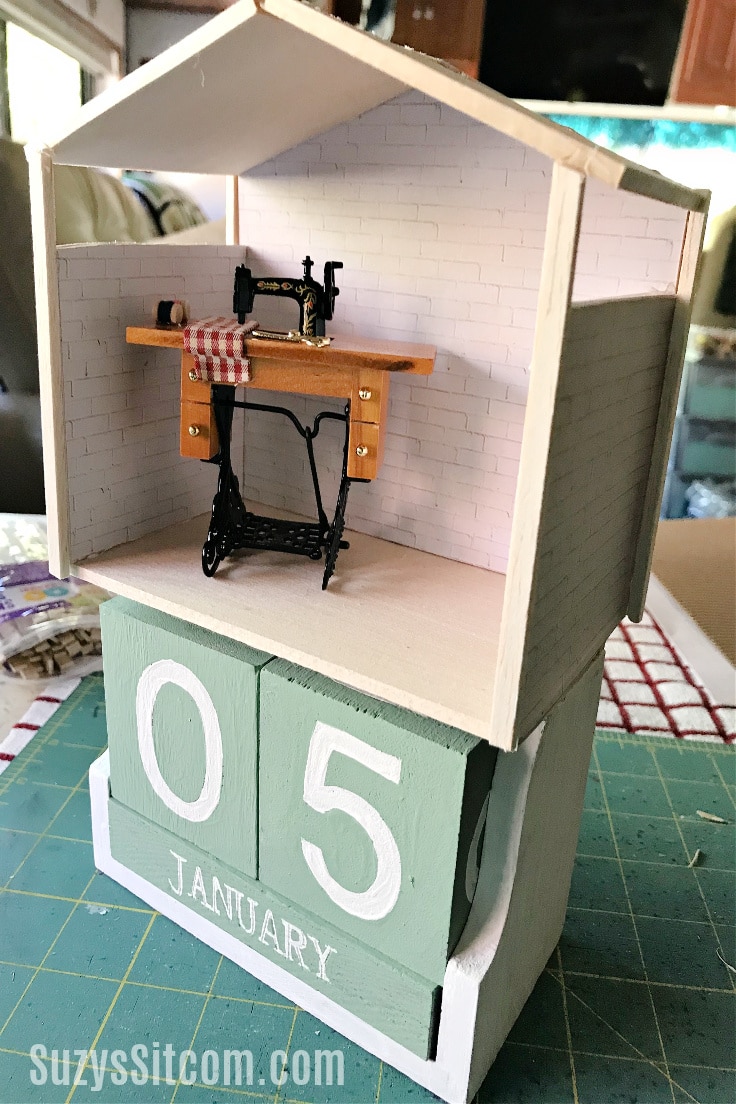
Use hot glue to attach the four balsa wood sticks to the outside four corners of the room box as shown above. Use hot glue to attach the two roof pieces into place.
Cut a piece of corrugated scrapbooking paper to fit the roof and glue into place with tacky glue. Use acrylic paints to do any touch ups on any of the wood.
adding the miniatures
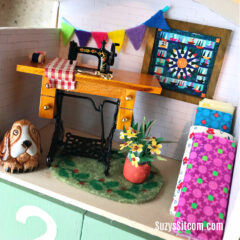
Now for the fun part! Create your tiny miniature room to suit you! In my example, I centered the room around my little miniature sewing machine find. I also found some great miniature frames in the holiday discount section of the craft store. Of course, you can always make your miniatures! Here are just a few ideas from my room:
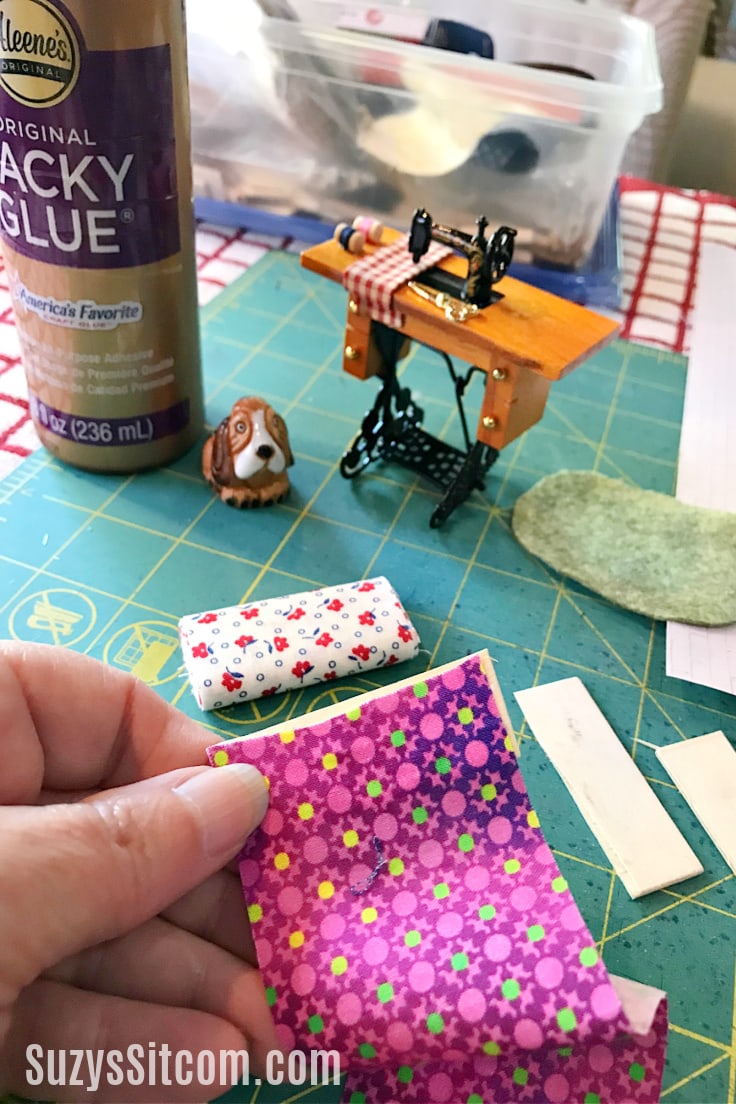
Making miniature fabric bolts
Cut from balsa wood several 3/4″ x 2″ wood pieces. Cut some fabric scraps 2″ x 8″. (Tiny print fabrics are best). Use tacky glue to attach one 2″ end to a wood piece as shown above (right side out). Wrap the fabric around the wood piece. Glue the end edge into place.
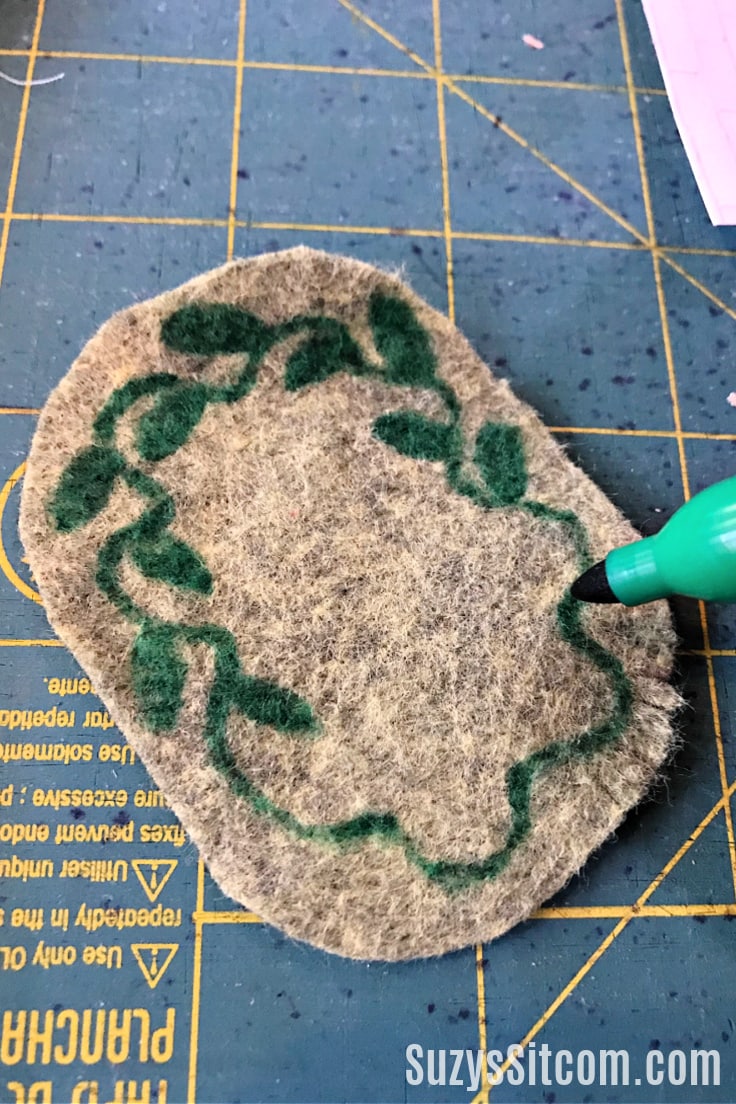
Making a miniature carpet
Cut from felt a 2-1/2″ x 1-1/2″ oval. Use a sharpie marker to draw a vine or any design onto the felt.
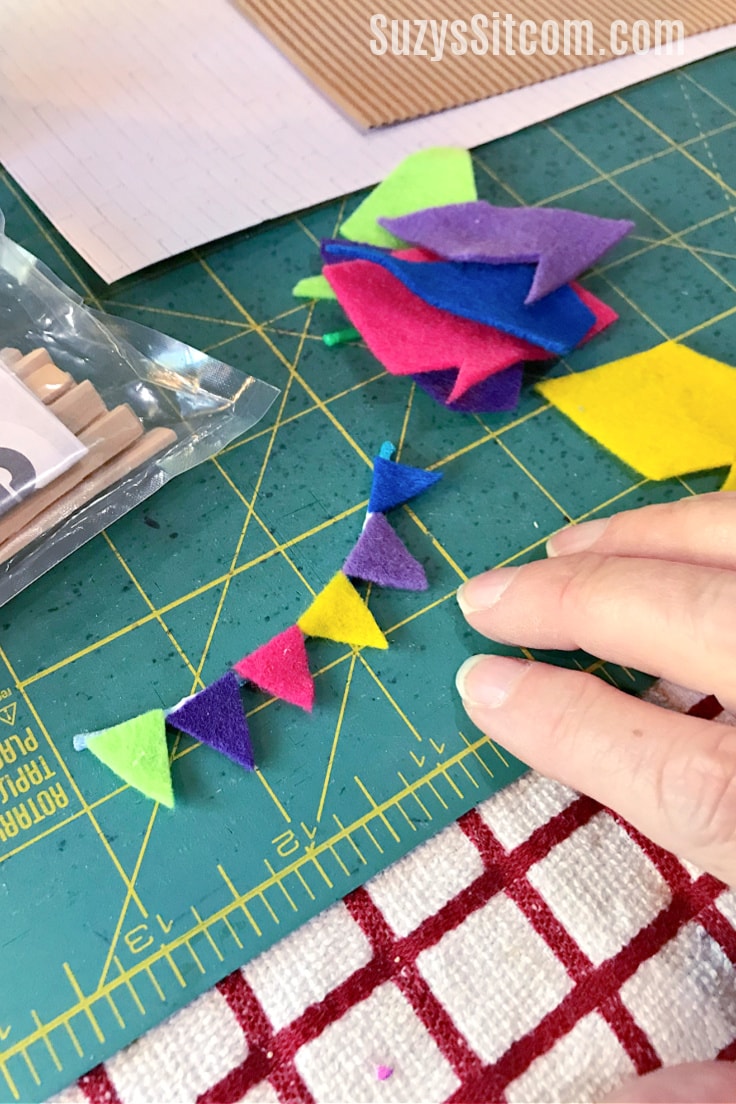
Making a Mini Banner
Cut from colored felt six tiny triangles. Use tacky glue to attach to a small length of string.

There is no wrong way to assemble the miniatures in your room box. Create a tiny little place that will make you smile! My room box includes several miniature items that I found along with several that I made myself. Each item is glued into place with either hot glue or tacky glue so that they will not shift while changing out the calendar.
This Wooden Perpetual Calendar with Mini Room Box is sure to brighten your day! Make something fun and unique for the new year! Here’s the printable card with everything you need to know about how to make a Wooden Perpetual Calendar with Mini Room Box!
How to Make a Wooden Perpetual Calendar
Equipment
- 1 Hot Glue gun and glue
- 1 Tacky Glue
- 1 Craft Knife
- 1 Ruler
Supplies
- 1 ea Desktop Wooden Perpetual Calendar
- 1 ea Hobby Bass wood 1/8" thick 4" wide by 36" long
- 2 pieces Scrapbooking Paper Your choice! I used a white brick and a corrugated silver.
- 1 set Acrylic Paints
- 1 set Assorted Miniatures Choose what you love
Instructions
- Paint the wooden calendar pieces (This step is optional)
- Carefully use a craft knife to cut the bass wood into the following:Floor- 5.5" x 3"Side Walls- 3" x 3" (cut 2)Back Wall- cut a pentagon shape- 5.5" wide at the base, 4" tall sides, and the peak is at 5" tall.Roof- 3" x 3" (cut 2)
- Cut decorative scrapbooking paper to fit one side of the side walls and the inside peaked back wall. Add a thin coating of white tacky glue to each piece and press on the paper.
- Cut three pieces of balsa wood to fit the top of the calendar and glue on with hot glue.
- Glue the floor into place with hot glue and then add the sides one by one with the scrapbook papered side inside.
- Add more of the scrapbooking paper, cut to size to the outside of the mini room box.
- Cut four balsa wood sticks to 4". These will be used for edging and to help hold up the roof.
- Use hot glue to attach the four balsa wood sticks to the outside four corners of the room box. Use hot glue to attach the two roof pieces into place.
- Cut a piece of corrugated scrapbooking paper to fit the roof and glue into place with tacky glue. Use acrylic paints to do any touch ups on any of the wood.
- Create a tiny little place that will make you smile! My room box includes several miniature items that I found along with several that I made myself. Each item is glued into place with either hot glue or tacky glue so that they will not shift while changing out the calendar.
Love the ideas you see here on Ideas for the Home by Kenarry®? Subscribe today to get our FREE DIY & Craft Planning Calendar, plus our weekly Ideas in Your Inbox newsletter filled with creative tips and exclusive offers!
Love Creating in Miniature?
Here are 3 fun posts from SuzysSitcom that show you unique ways to create realistic miniatures!
Make Realistic Miniature Bricks
A Realistic Miniature Sidewalk
How to Create Unique Miniature Signage
You may also enjoy these 3 ideas on Ideas for the Home by Kenarry® –