Create Easy Paper Art
THIS POST MAY CONTAIN AFFILIATE LINKS. PLEASE SEE OUR FULL DISCLOSURE POLICY FOR DETAILS.
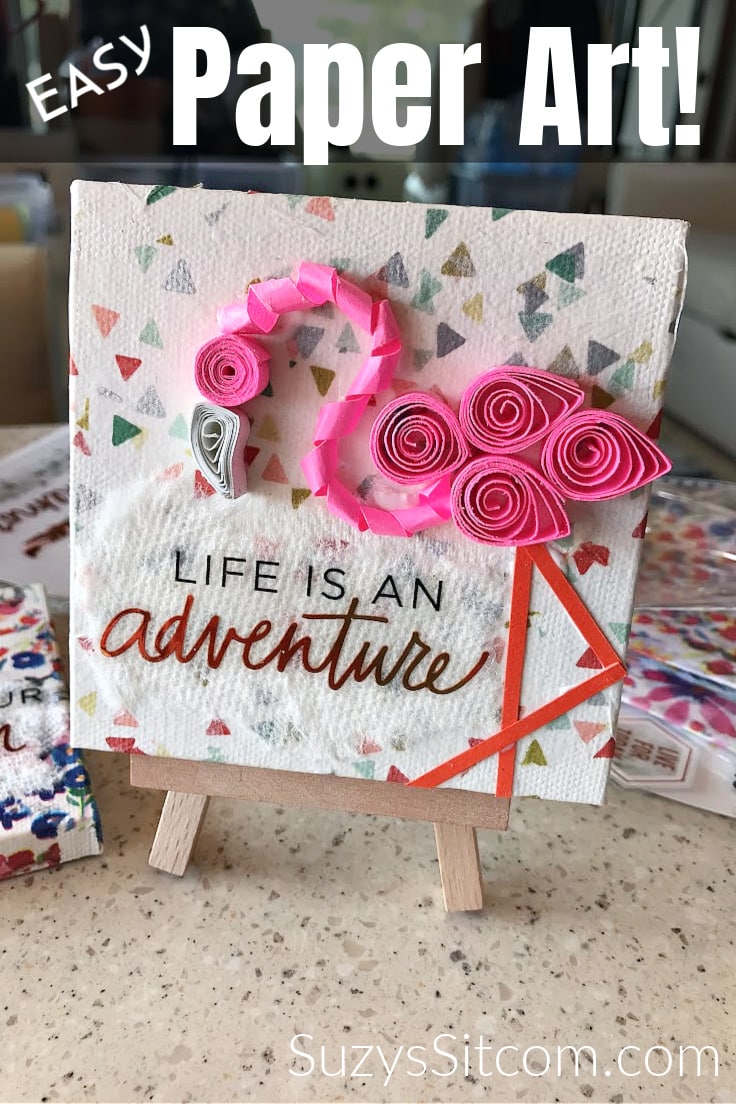
Create beautiful paper art with a mix of decoupage and paper quilling! These fun techniques are combined to create sweet inspirational art. A perfect addition to your home decor!
Paper is such a versatile medium! There are so many ways to create with paper. With this project, the use of decoupage and quilling come together to make beautiful inspirational art. These little pieces of art are created with mini canvases and of course- paper!
If you love art, then make easy Lippan art at home next!
This is Suzy from Suzys Sitcom. One of my favorite things to work with is paper. Over the years, it has been my go-to medium when I want to create. Paper is easy to work with, easy to come by and has so many great possibilities.
My husband and I are currently what is called “full timers”. That means that we sold our home and now live in our RV as we travel the country. I don’t have a ton of room for wall art, but I do enjoy having inspirational art around me. When I ran across a set of mini canvases, it seemed to be the perfect time to create a few pieces of miniature art featuring some of my favorite quotes.
How to Make Beautiful Paper Art
These mini canvases and inspirational stickers can be found at any arts and crafts store. There are so many possibilities for this project. Pick your favorite quote and go from there!
The entire tutorial is in a printable card at the bottom of this post. But first, here is a little bit of info about the tools and supplies you’ll need.
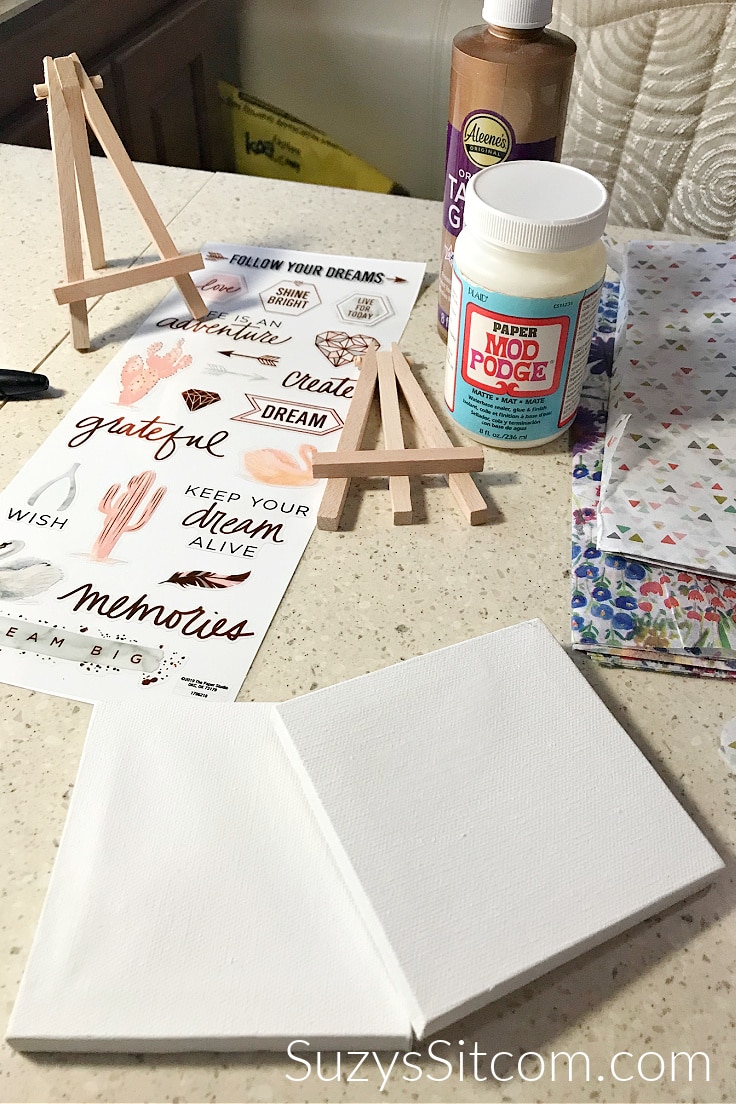
What you need:
Want more ideas like this? Subscribe today to get our weekly Ideas in Your Inbox newsletter plus other exclusive gifts and offers — all for FREE!
- 4″ x 4″ mini canvases
- Patterned Tissue Paper
- Stickers (quotes)
- Colored Cardstock
- Mod Podge
- Tacky Glue
- Quilling Tool
- Paper Cutter (optional)
- Mini Easels
Creating Beautiful Paper Art
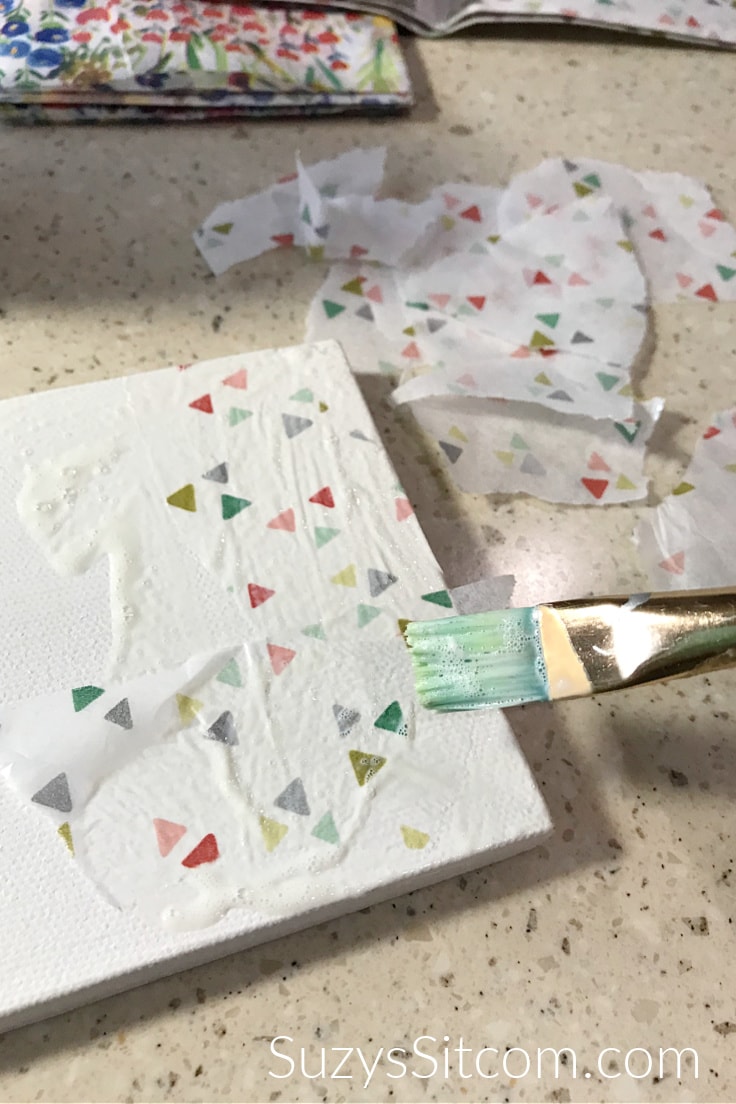
Decoupaging the Canvas
Begin by choosing a decorative tissue paper that will be the background of the canvas. Tear the tissue paper into roughly 1″ squares. Paint Mod Podge onto the canvas in small sections and apply the tissue paper. Add more Mod Podge over the paper.
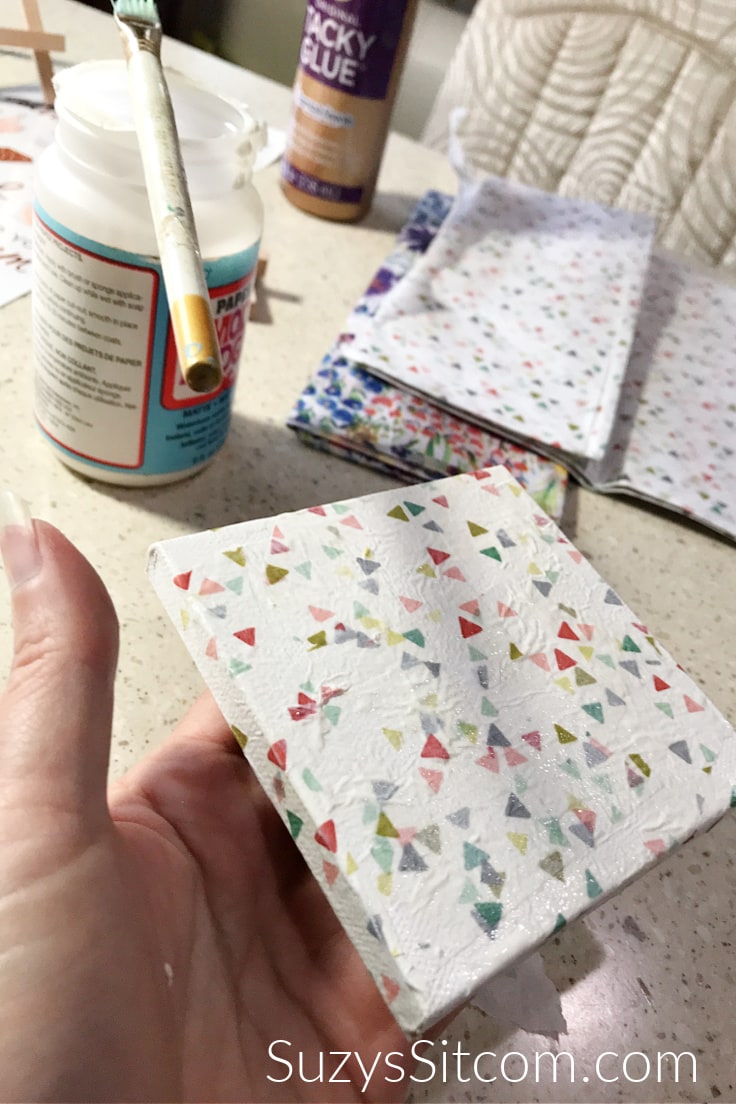
Repeat and cover the entire canvas with tissue paper, overlapping the paper onto the sides of the canvas. Allow the Mod Podge and paper to dry completely before going to the next step.
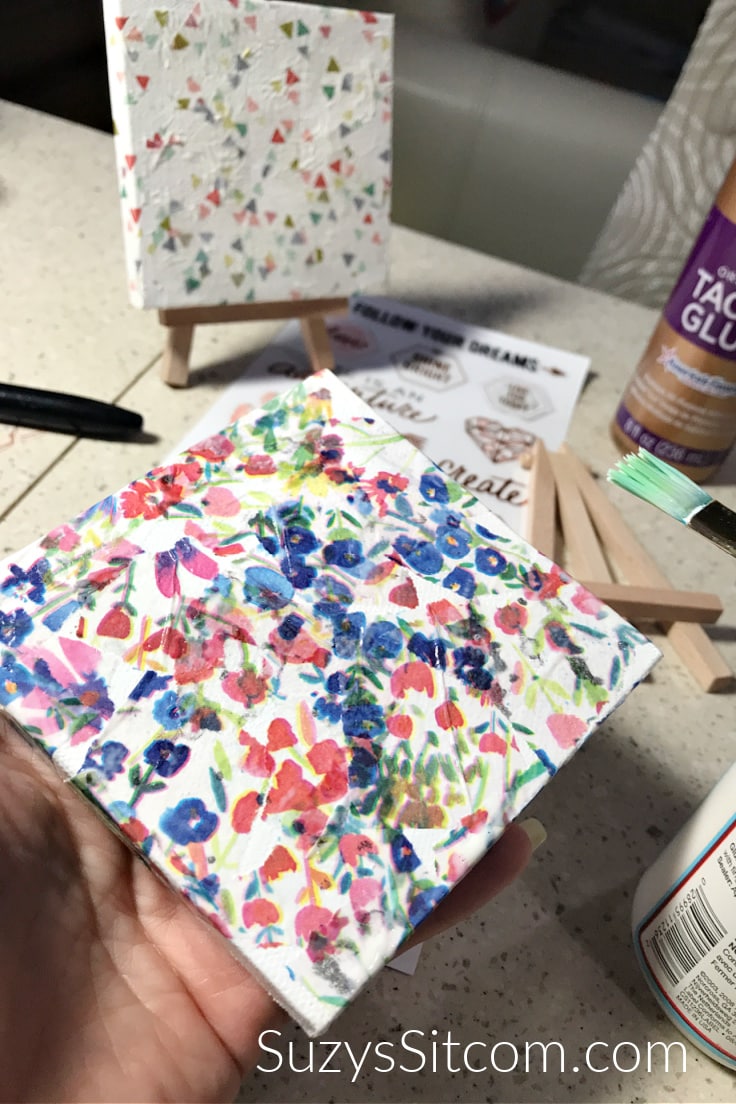
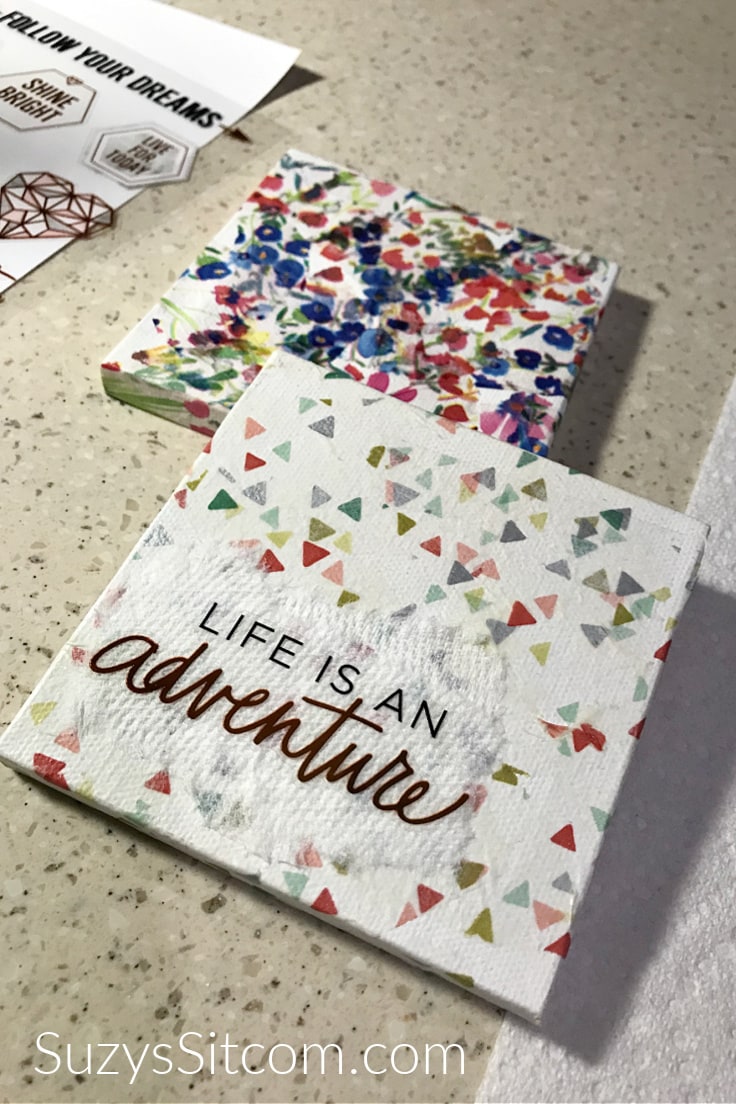
For my project, I used two canvases and two different patterned tissue papers.
Add the Inspirational Quote
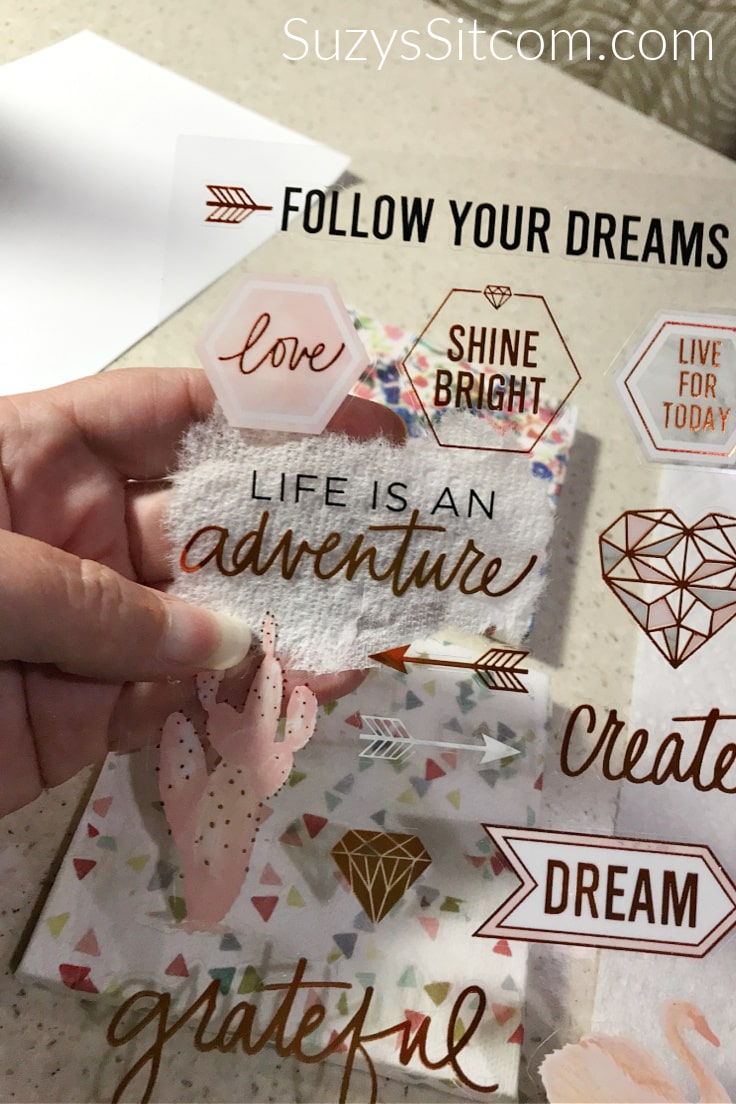
Choose a quotation sticker that you love that also fits well on the canvas. I found these inspirational stickers in the local craft store and chose two that resonated with me. In order to make the quotation stand out when placed over the tissue paper background, I tore a small piece of paper towel the correct size of the quote.
Use tacky glue to attach the piece of paper towel to the canvas and then place the sticker on top.
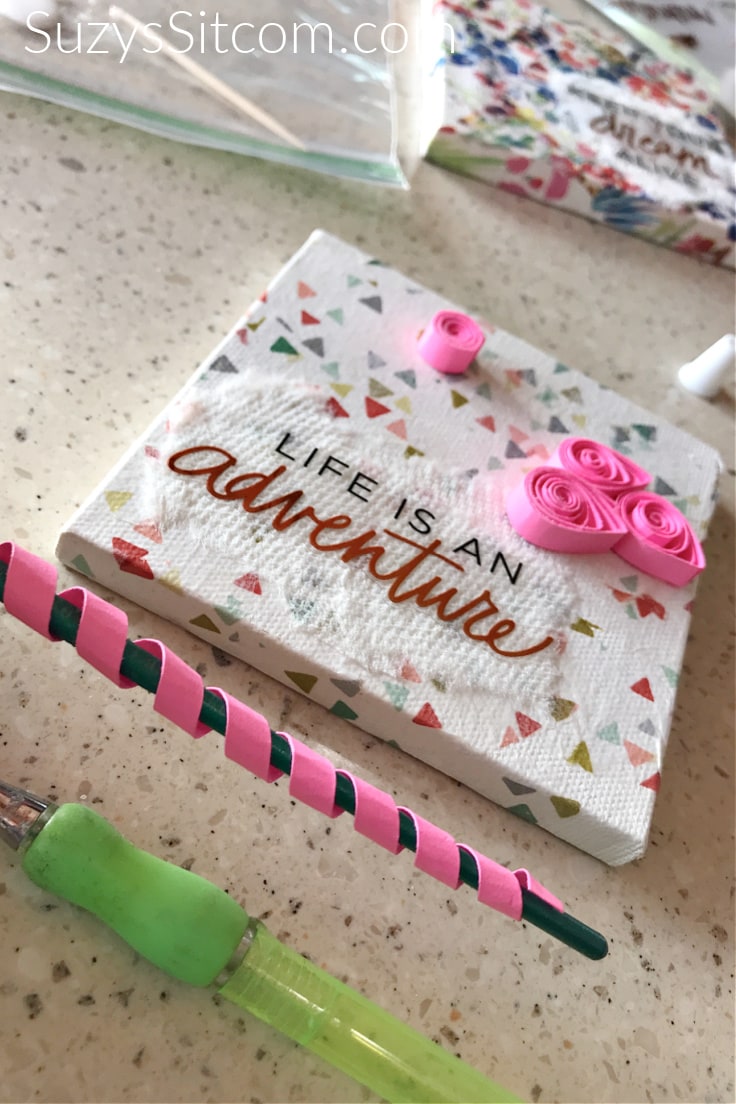
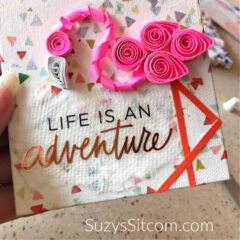
Easy Paper Quilling– Life is an Adventure

Now to add paper quilled designs to the canvases! For Life is an Adventure, I chose to create a paper quilled flamingo. Cut 1/4″ strips of 8-1/2″ x 11″ colored cardstock along the long side of the cardstock. Your strips will be 11″ long. A paper cutter works well for this, or you can always measure and cut with scissors.
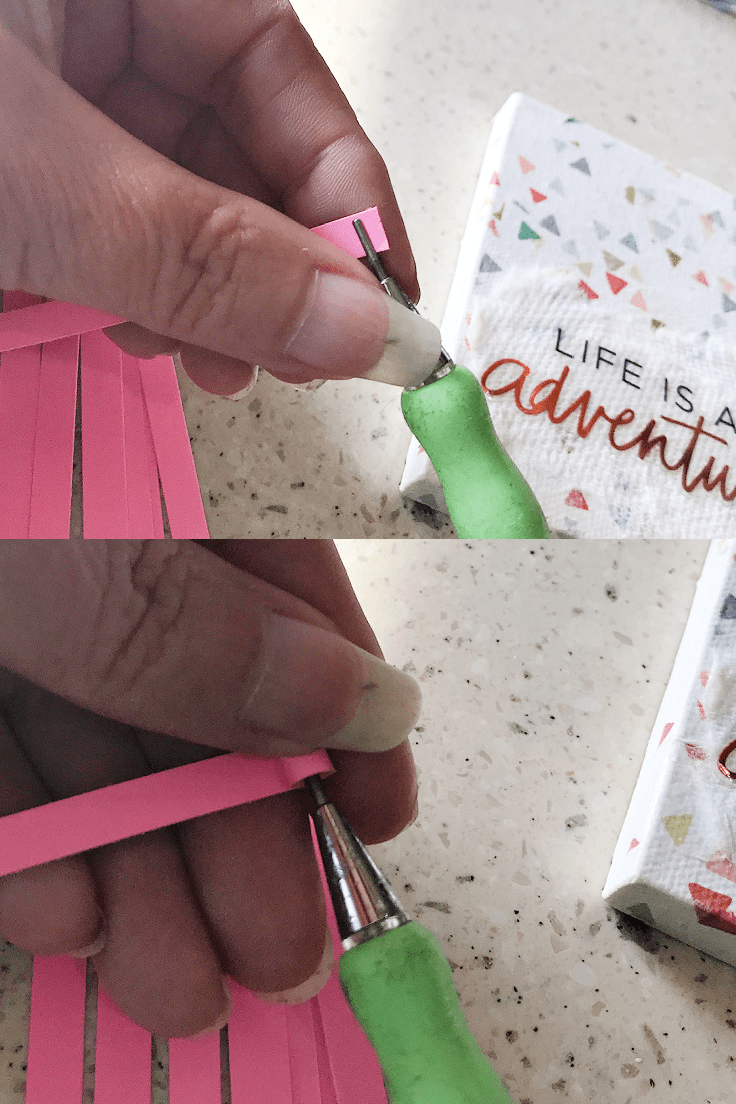
Place one end of a paper strip into the notch of your paper quilling tool. Roll up the strip with the tool until the entire strip is rolled tight.
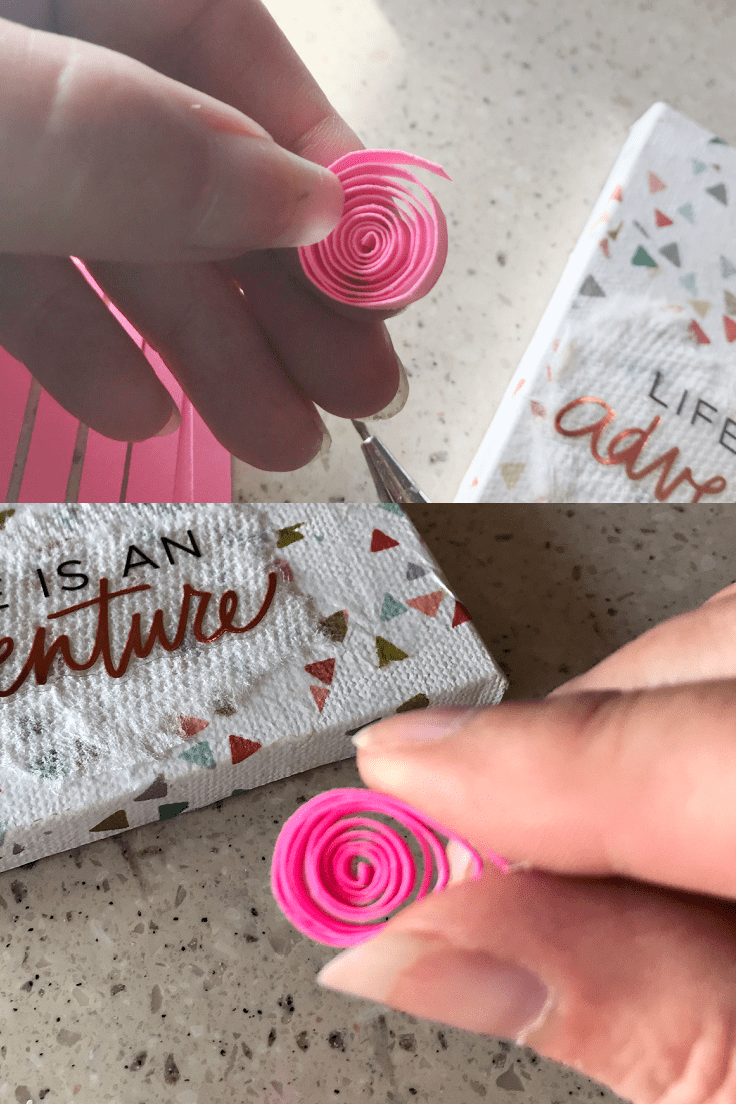
Let loose of the coiled strip and then add a touch of tacky glue to the end. Pinch with your fingers as shown above to create a teardrop shape. For the flamingo, you would need to create four of these teardrops.
For the head, create another coil of an 11″ strip, but keep it held tightly. Add a touch of tacky glue to the end and hold until it stays put.
For the neck of the flamingo, wrap an 11″ strip tightly around a thin paintbrush or wooden dowel to create a long coil as shown above.
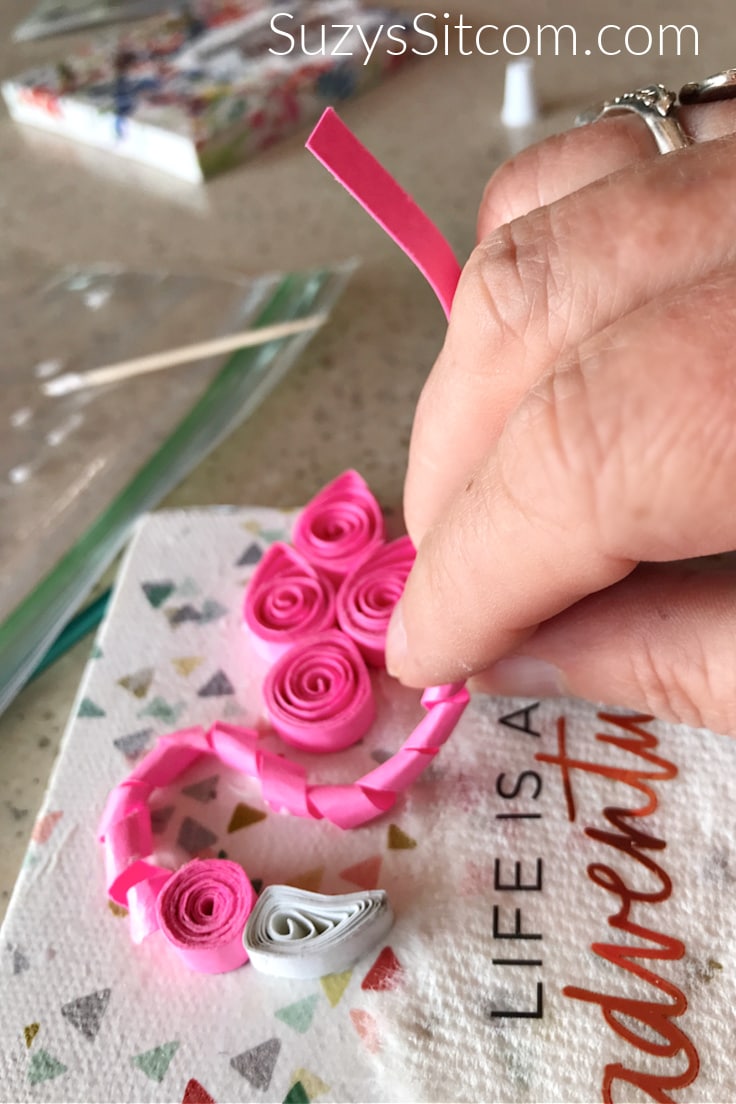
The beak is created using a white 11″ strip and a loose coil like the teardrops. Once the glue is holding the coil in place, shape the coil with your fingers into a beak shape.
Use tacky glue to adhere all pieces of the flamingo onto the canvas.

The final touch is to add legs! Cut several very thin strips of orange cardstock and glue them in place with tacky glue as shown above.
Easy Paper Quilling– Keep Your Dream Alive
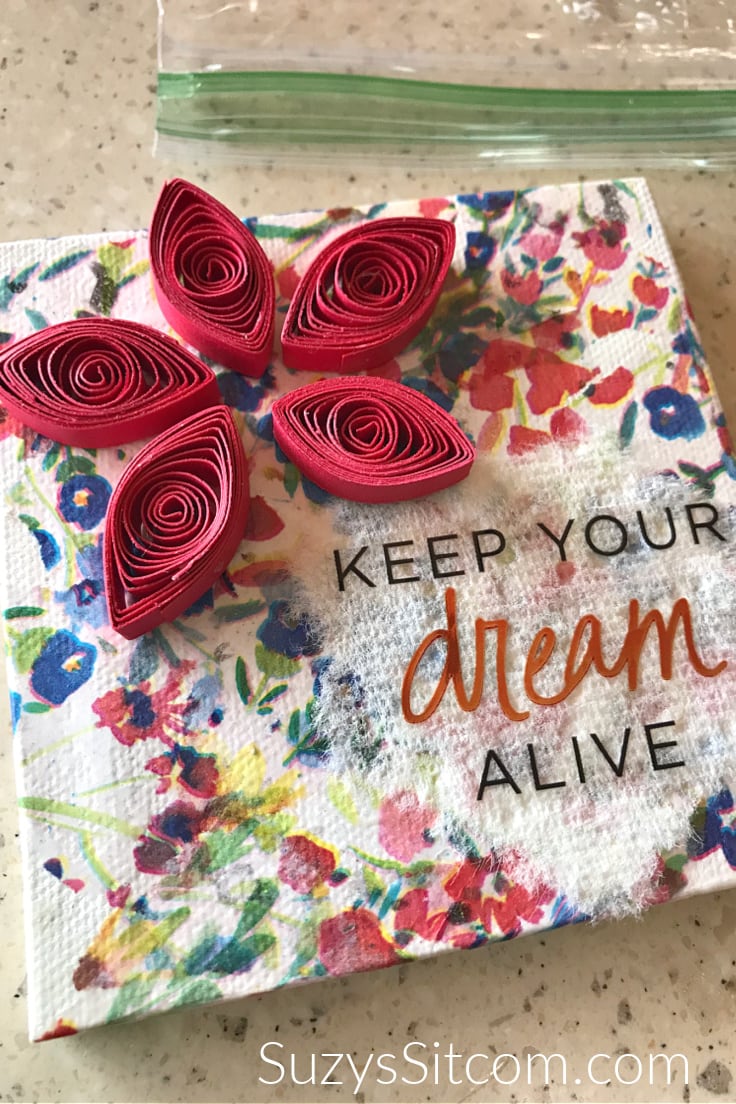
To create the flower petals for this canvas, use tacky glue to attach two 11″ strips of red cardstock together, creating a 22″ strip. Repeat the process for the teardrop shapes as above, but pinch the paper coil on both ends to create a petal shape. Create 5 petals.
Create a center for the flower and leaves, using 11″ strips and your quilling tool. The step is simply a curved thin piece of cardstock, cut with scissors. Glue all in place with tacky glue.

The beautiful paper art canvases can be displayed on the wall, or in these sweet mini easels! Perfect for any decor. Even in an RV!
Create something that will put a smile on your day.
Here’s the printable card with everything you need to know about how to make Beautiful Paper Art!
Easy to make Paper Art
Equipment
- 1 Paper Quilling Tool
- 1 Paper Cutter Optional (you can use scissors instead)
Supplies
- 2 ea 4" x 4" mini Canvases any size is fine
- 2 ea Patterned Tissue Paper
- 1 set 8-1/2" x 11" colored Cardstock
- 1 ea Mod Podge
- 1 ea. Tacky Glue
- 2 ea. Mini Easels Optional
- 1 set Inspirational Stickers
Instructions
- Decoupage the canvases using Mod Podge and torn pieces of the patterned tissue paper. Cover the front and sides of the canvas. Allow to dry.
- Choose an inspirational quote sticker. Tear a piece of paper towel to go behind it.
- Use tacky glue to attach the paper towel to the canvas. Place sticker on top.
- Use the quilling tool and 1/4" x 11" strips of pink cardstock to create 4 tear drop shapes for the flamingo.
- Use quilling tool and 1/4" x 11" strips of pink and white cardstock to create the head and beak.
- Coil a 1/4" strip of pink around a paintbrush or wooden dowel to create the neck.
- Glue the flamingo paper pieces in place with tacky glue.
- Cut two narrow strips of orange for legs. Glue in place with tacky glue.
- Display finished piece on a mini easel.
Love the ideas you see here on Ideas for the Home by Kenarry®? Subscribe today to get our FREE DIY & Craft Planning Calendar, plus our weekly Ideas in Your Inbox newsletter filled with creative tips and exclusive offers!
Love working with Paper?
Here are three more fun projects made from paper exclusively from Suzys Sitcom!
How to Make a Paper Butterfly in a Jar
How to Make Unique Paper Book Covers
Make Paper Beads with Cereal Boxes
You may also enjoy these 3 Paper Craft ideas on Ideas for the Home by Kenarry® –